Forums newest member of the 351 club
#31
 06-20-2014, 09:14 PM

On AFR , the Dynojet software and the tuner/operator agree - 12.8:1 at WOT optimum for power production. Please do a little research before forming an opinion on AFR. I simply typed "best AFR for power" in google and got a wealth of info that meshed with the Dyno's software and the tuners' suggestions of 12.8:1 . Check out my latest dyno test thread for the charts, including my AFR.
Air-Fuel Ratio Meter Tuning- Car Craft Magazine
Bristol Dyno technical article - air / fuel ratio
The chart on Mix It Up: Air/Fuel Tuning Explained
Blurb about Hartmans book and AFR values - AFR theory: Maximizing Torque (and thereby Power) - NASIOC
SAFR - Standalone Air Fuel Ratio Diagnostic Tool
etc, etc,
Last edited by Klxster; 06-20-2014 at 09:19 PM.
#32
06-20-2014, 10:08 PM
132 was far to fat for my big bore bike. i dont need a dyno with a butt sniffer to tell me that. bike runs MUCH better since i dropped it to 128 and i may even try the 124 for kicks.
#33
06-20-2014, 11:46 PM
I didn't need a dyno with a butt sniffer to tell me that my bike ran stronger with the 132. You and I are special like that.
But I dyno'd anyway - +1 hp.
Problem is that I was quite happy and the bike was quite happy with the #128 . The "butt sniffer" indicated lean AFR and that more power was only a jet change away.
Point is, without the "butt sniffer", you can't possibly know your AFR no matter how "special" you are.
But I dyno'd anyway - +1 hp.
Problem is that I was quite happy and the bike was quite happy with the #128 . The "butt sniffer" indicated lean AFR and that more power was only a jet change away.
Point is, without the "butt sniffer", you can't possibly know your AFR no matter how "special" you are.
Last edited by Klxster; 06-21-2014 at 06:37 AM.
#34
06-21-2014, 03:35 PM
Join Date: Jan 2013
Location: Las Vegas, NV
Posts: 1,422
Well jetting isn't just a main, a 132 main could be best with the needle NOT on the 3rd clip but on the 2nd clip. Or a 128 with the needle on the 4th clip. Jetting components overlap.
#35
06-21-2014, 09:58 PM
Yep, The combinations are darn near endless. I figured Dynojet worked out all the variables with their kit components well enough to offer a recipe. That is what I think you pay for.
Digest my AFR chart. It shows that a modded stock bore needs lots of fuel added to make optimum power.
Wouldn't it be nice if everyone could find an extra HP or more like I did. Just trying to help.
Digest my AFR chart. It shows that a modded stock bore needs lots of fuel added to make optimum power.
Wouldn't it be nice if everyone could find an extra HP or more like I did. Just trying to help.
#36
07-06-2014, 04:53 AM

Well, finally, I kicked off my project today thanks to my mate Chris being kind enough to help me out. I tell you what, I'm only too glad he did help me because after today I realise that I would not have been able to do it myself. Not only did 2 sets of hands help, but Chris' knowledge and tricks were invaluable!
I had done as much preparation work as I was comfortable with doing before he came. Coolant was drained, tank, seat, header pipe and cam chain tensioner were all removed first. Then I whipped off the cylinder head cover and cams and wired the cam chain up so it didn't fall down into the case. I also laid out all the tools I thought we would need, and had cleared surfaces so we had space to work on. And I think all of that prep-work was WELL worth it!
Cylinder Head
I strongly suspected that my valves were done and needed re-doing, so I had phoned up a couple of places to see how much it was going to cost me to have them re-done.
Fortunately Adrian here on the Kawasaki Forums was selling his head so I bought it. Admittedly it was a gamble buying it as it could have been totally stuffed but Adrian sent good quality photo's beforehand and it seemed OK, so I took a leap of faith. As it turns out the assembly was in good condition with the valves still in spec with what looks like stock shims.
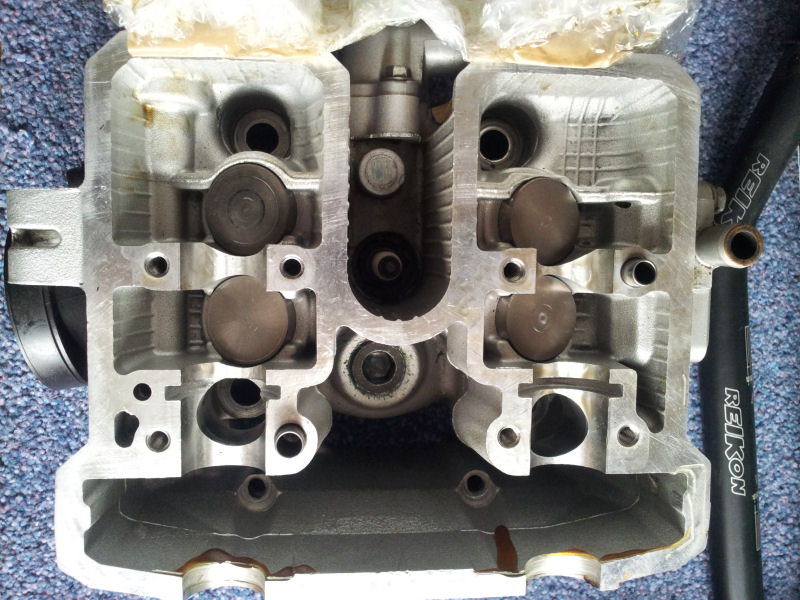

The head is off a US bike though I think, so unlike the Australian head which has the emissions system all closed off (actually, it looks like the Aus one just hasn't had the holes drilled out of the cast and a reed valve put in it).
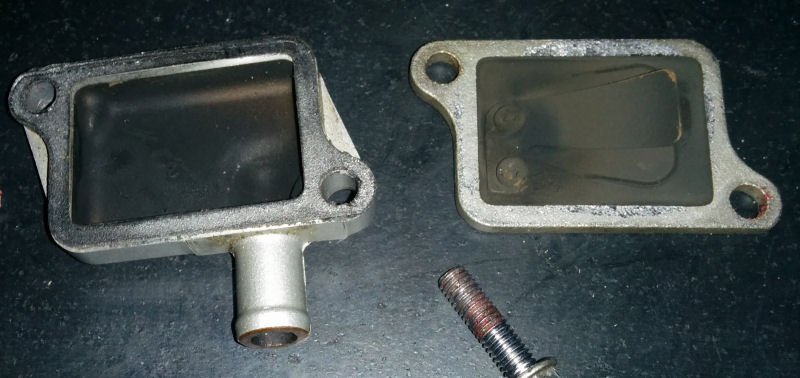
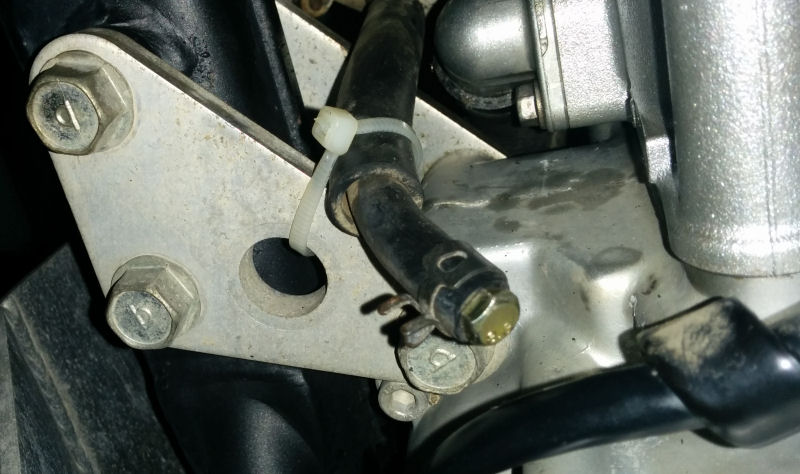
Fortunately I had some Exhaust Cement at home so I have filled the hole in and will look into getting a blacking plate to cover it nicely. There is also a difference in that the Aussie head seems to have a coolant circuit coming off the radiator whereas the replacement head had a temp sensor in that hole instead.
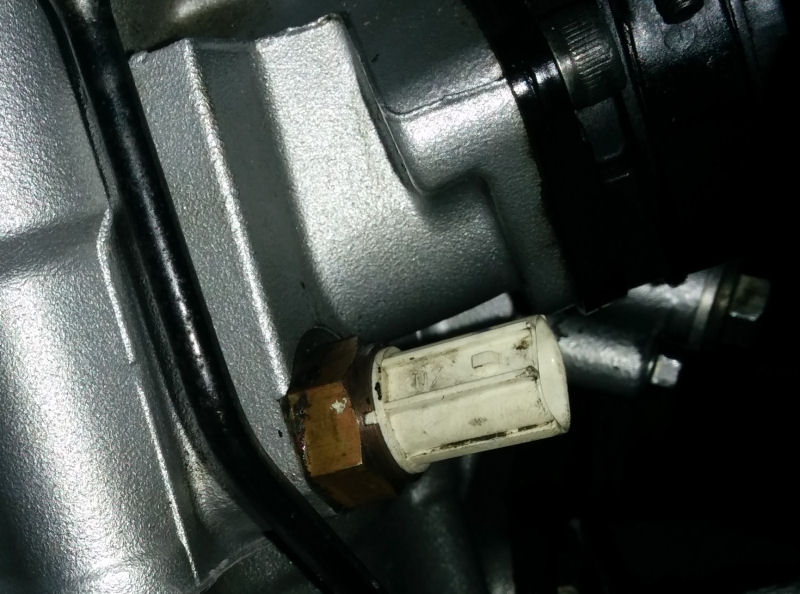
Strangely, the sizes of the holes is different so I couldn't just remove the temp sensor and plug the pipe connector from my old head in. So instead I have just left the temp sensor in and I have blocked off the coolant circuit with a bolt in the end of the pipe and a clip to keep it in place.
Original 250 Barrel and Piston
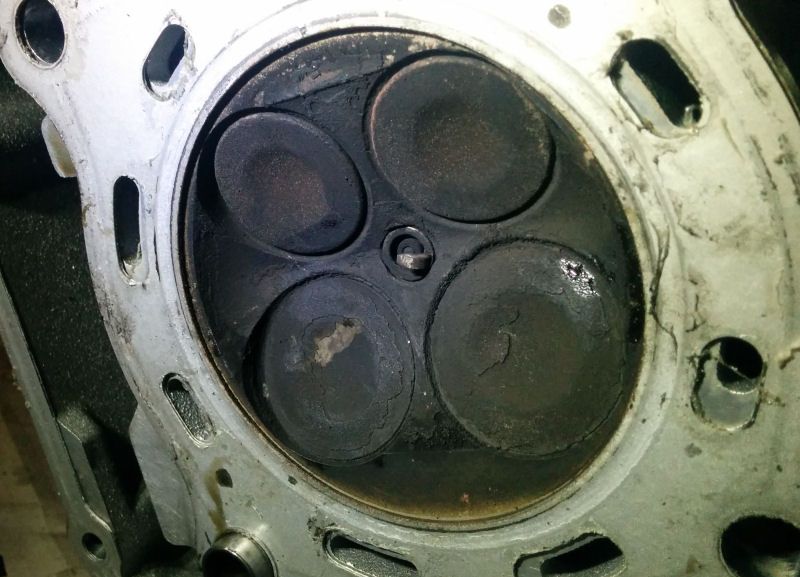
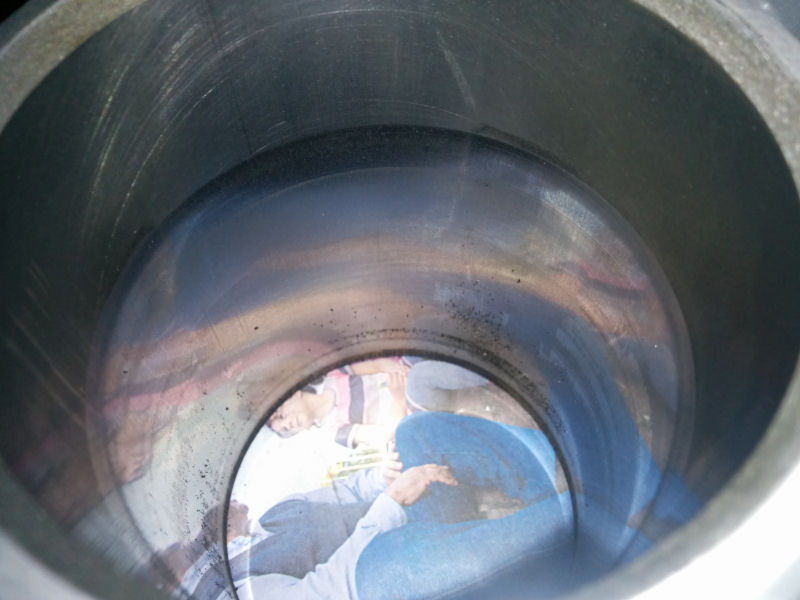
After removing the old cylinder head we removed the old 250 barrel and piston. Now, I must confess to not knowing a hellava lot about being able to identify a "good" or a "bad" piston and barrel, but I do know you want your bore to have nice cross-hatching and my old barrel was like a mirror!
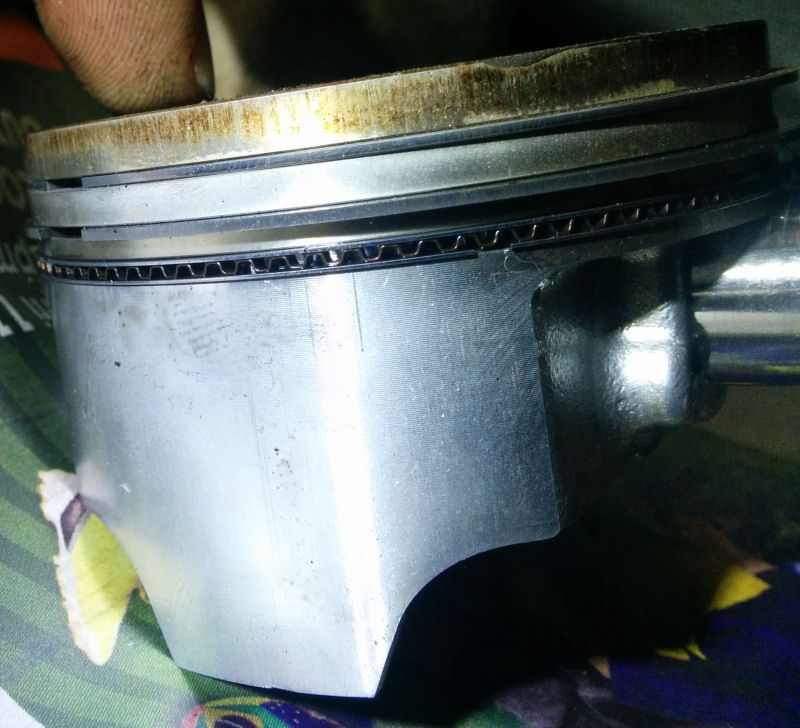
On inspecting the piston we discovered that the first compression ring (the top most ring) was actually stuck with its gap closed, so it was nearly flush with the piston. It took a bit of fiddling to loosen it so it opened properly. Surely that could not have been helping matters with the compression? Chris then told me that the "technical term" for the pistons condition was F#CKED!! So the top end rebuild was clearly justified!
Big Bore kit
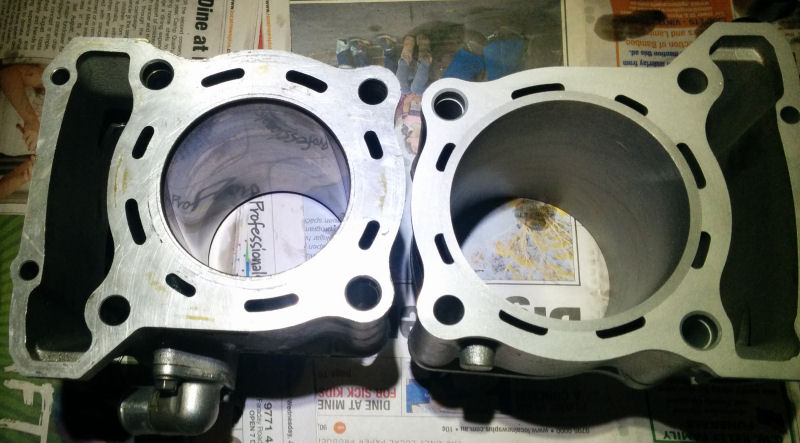
After I had finished scraping away the old base gasket with a craft knife blade we were ready to start the installation of the new top-end. Putting the 250 barrel side by side with the 351 big bore barrel it is VERY clear that there is a BIG difference in the bore size!
Chris did the installation of the new piston so as to save himself the pain and frustration of watching me fumble around with it. Whilst he was doing that I oiled up the big bore, wiped it clean to get ride of any manufacturing rubbish left behind. Then it came time to try slip the barrel on over the new piston. Although I have a piston ring compressor it was too big to use on this job I had to rely on Chris' skill. The old zip-tie trick didn't really seem to work that well due to the spacing of the rings and the fact that the biggest zip-ties I have weren't wide enough. Anyway, between Chris and I (mainly Chris) pushing on the rings to get them into the barrel we managed to line everything up and get the barrel on. How people do this job on their own is beyond me! It HAS to be a 2 person job as far as I saw.
With the barrel installed we slapped on the new cylinder head and install the cams. Fortunately for me Chris insisted on re-checking the cam timing and we discovered that I had put the cams onto the chain 1 tooth off where they should have been. We went through the process of adjusting it and then bolting everything back together for the second time, and this time we were happy that the timing was right. If it had been me doing the job on my own I would have thought the first setup was OK and no doubt would have trashed the top-end.
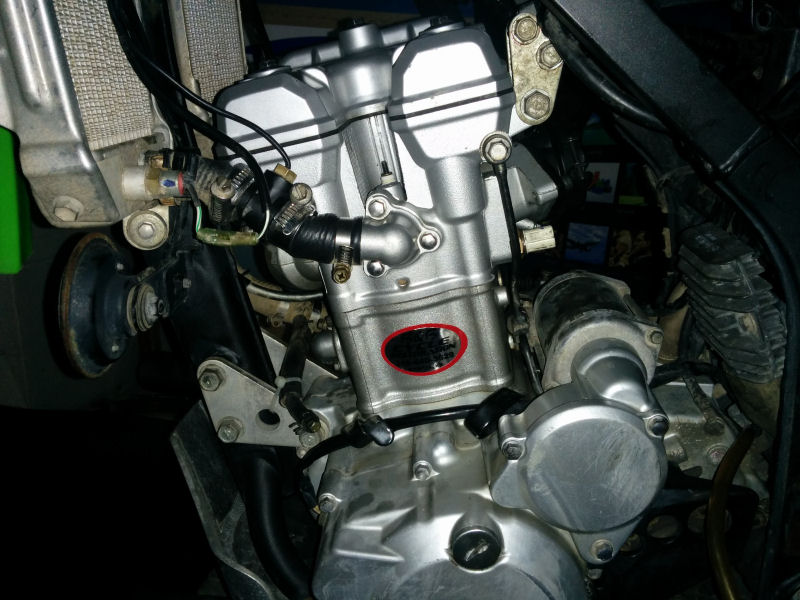
Chris helped me get things back together to a point where I can go through the process of getting it into a running state now. I need to put coolant in, new spark plug, re-jet the carb and fit it up again, and then temporarily fit the tank again to see if I can get the bike running. I just need to motivate myself to do it now as I am feeling pretty stiff after yesterdays ride. Here's the final 351 Big Bore Kit and new cylinder head installed:
I had done as much preparation work as I was comfortable with doing before he came. Coolant was drained, tank, seat, header pipe and cam chain tensioner were all removed first. Then I whipped off the cylinder head cover and cams and wired the cam chain up so it didn't fall down into the case. I also laid out all the tools I thought we would need, and had cleared surfaces so we had space to work on. And I think all of that prep-work was WELL worth it!
Cylinder Head
I strongly suspected that my valves were done and needed re-doing, so I had phoned up a couple of places to see how much it was going to cost me to have them re-done.
Fortunately Adrian here on the Kawasaki Forums was selling his head so I bought it. Admittedly it was a gamble buying it as it could have been totally stuffed but Adrian sent good quality photo's beforehand and it seemed OK, so I took a leap of faith. As it turns out the assembly was in good condition with the valves still in spec with what looks like stock shims.
The head is off a US bike though I think, so unlike the Australian head which has the emissions system all closed off (actually, it looks like the Aus one just hasn't had the holes drilled out of the cast and a reed valve put in it).
Fortunately I had some Exhaust Cement at home so I have filled the hole in and will look into getting a blacking plate to cover it nicely. There is also a difference in that the Aussie head seems to have a coolant circuit coming off the radiator whereas the replacement head had a temp sensor in that hole instead.
Strangely, the sizes of the holes is different so I couldn't just remove the temp sensor and plug the pipe connector from my old head in. So instead I have just left the temp sensor in and I have blocked off the coolant circuit with a bolt in the end of the pipe and a clip to keep it in place.
Original 250 Barrel and Piston
After removing the old cylinder head we removed the old 250 barrel and piston. Now, I must confess to not knowing a hellava lot about being able to identify a "good" or a "bad" piston and barrel, but I do know you want your bore to have nice cross-hatching and my old barrel was like a mirror!
On inspecting the piston we discovered that the first compression ring (the top most ring) was actually stuck with its gap closed, so it was nearly flush with the piston. It took a bit of fiddling to loosen it so it opened properly. Surely that could not have been helping matters with the compression? Chris then told me that the "technical term" for the pistons condition was F#CKED!! So the top end rebuild was clearly justified!
Big Bore kit
After I had finished scraping away the old base gasket with a craft knife blade we were ready to start the installation of the new top-end. Putting the 250 barrel side by side with the 351 big bore barrel it is VERY clear that there is a BIG difference in the bore size!
Chris did the installation of the new piston so as to save himself the pain and frustration of watching me fumble around with it. Whilst he was doing that I oiled up the big bore, wiped it clean to get ride of any manufacturing rubbish left behind. Then it came time to try slip the barrel on over the new piston. Although I have a piston ring compressor it was too big to use on this job I had to rely on Chris' skill. The old zip-tie trick didn't really seem to work that well due to the spacing of the rings and the fact that the biggest zip-ties I have weren't wide enough. Anyway, between Chris and I (mainly Chris) pushing on the rings to get them into the barrel we managed to line everything up and get the barrel on. How people do this job on their own is beyond me! It HAS to be a 2 person job as far as I saw.
With the barrel installed we slapped on the new cylinder head and install the cams. Fortunately for me Chris insisted on re-checking the cam timing and we discovered that I had put the cams onto the chain 1 tooth off where they should have been. We went through the process of adjusting it and then bolting everything back together for the second time, and this time we were happy that the timing was right. If it had been me doing the job on my own I would have thought the first setup was OK and no doubt would have trashed the top-end.
Chris helped me get things back together to a point where I can go through the process of getting it into a running state now. I need to put coolant in, new spark plug, re-jet the carb and fit it up again, and then temporarily fit the tank again to see if I can get the bike running. I just need to motivate myself to do it now as I am feeling pretty stiff after yesterdays ride. Here's the final 351 Big Bore Kit and new cylinder head installed:
#37
07-06-2014, 06:14 AM
Arctra,
Nice work, and welcome to the 351 club.
Thread added to the other 351 build links here. https://www.kawasakiforums.com/forum...351-0-a-36944/
Keep us apprised!
Nice work, and welcome to the 351 club.
Thread added to the other 351 build links here. https://www.kawasakiforums.com/forum...351-0-a-36944/
Keep us apprised!
#38
07-13-2014, 06:42 AM
OK guys, I can formally inducted into the 351 club now! I managed to fire the beast up this afternoon after putting a new spark plug in and blocking off the smog rubbish properly.
I dropped the oil straight way and have put a new filter in. Once I put the bike back together I intend do some running around town to run it in a bit. She's gonna be out on the trails before long!
I dropped the oil straight way and have put a new filter in. Once I put the bike back together I intend do some running around town to run it in a bit. She's gonna be out on the trails before long!
#39
07-27-2014, 01:08 AM
So, with my newly re-valved suspension bolted back onto the bike I finally had a chance to take my first test ride with the big bore kit on. I am running:
- CV carb
- OEM #38 pilot jet (same pilot I had on the 250 bore and it worked a treat)
- A/F screw 2 turns out from firm seating (I think this is about the same setting I had with the 250 bore)
- Dynojet #132 main jet (As advised by other members on the Kawasaki Forums. I had the Dynojet #128 on the 250 bore and it worked nicely)
- Dynojet needle middle clip (I think this is the same clip position I had on the 250 bore)
- Airbox lid delete, backfire filter mesh delete, and twinair filter (same as when I had the 250 bore)
- FMF Powercore 4 slip-on (same as when I had the 250 bore)
- Being in Sydney I am pretty much at sea level (same as when I had the 250 bore)
I charged the battery overnight so it was full of juice. It was pretty cold this morning when I tried to fire her up (around 10C, or 51F) and it took several attempts to get the bike fired. It did start a few times but died within seconds, whether I left the choke pulled out or not. After leaving the bike 30 seconds or so between attempts I had better luck and finally got the bike fired. The need to leave a decent break between attempts, and the smell of fuel in the air leads me to think the pilot circuit is too rich. When I got home, with the bike up to running temp and idling steady I tried winding the A/F screw in and out to see if it had any effect on the idling but it didn't really have an effect. What surprised me is that even with the A/F screw dialled all the way in to the seated position the bike carried on running fine. Could this mean that fuel is being drawn through the main circuit at idle to be able to carry on running? If so then I definitely need to play with the jet and needle height.
Once the bike had run a couple of minutes to warm up I took it out for a 5km ride. I turned the throttle very slowly and after a bit of hesitation the bike would then pull nicely for a 1500rpm-odd range and then she started "missing". Holding the throttle steady did not help, the bike just kept missing. Turning the throttle a bit more made the revs climb and the missing died down a bit, but it was still there every couple of seconds. This makes me think I need to drop the needle a clip position (i.e. move the clip UP one groove on the needle).
On deceleration I had a mean backfire so when I got back home I checked the header pipe and noted that there was a bit of a leak where the header bolts onto the cylinder. So I will need to put some sealant/gasket maker there to make sure it seals off properly. I'm not sure if this is contributing to the rough running?
Because the piston rings and bore are so fresh I did not dare trying full throttle to get an idea about whether the main jet is too big, but I suspect it is.
I'm going to let the engine cool now and then have a go at sorting the header pipe seal out and have another go.
Any advice would be welcomed.
#40
07-27-2014, 03:45 AM
I think the stock carb has 3 pilot holes in the floor of the carb.. there's a chance that's letting it idle with the idle mix screw all the way in, but typically that's not supposed to happen
I'd suggest checking your float level in case it's too high and allowing gas to seep into the carb throat somewhere, because that's about the only way the carb'd be getting gas with the idle mix all the way in.
I'd suggest checking your float level in case it's too high and allowing gas to seep into the carb throat somewhere, because that's about the only way the carb'd be getting gas with the idle mix all the way in.
Last edited by Richard Avatar; 07-27-2014 at 03:50 AM.