Changing wheel bearings

Thread Starter
|
Senior Member
Joined: Mar 2008
Posts: 3,406
From: N. Illinois
1st Gear Member
The front seal package has 30-3502 on it.
The rear seal package has 30-4205 on it.
I'm guessing those are the numbers you need

Dan

Da dirty moderator
1st Gear Member
Joined: May 2006
Posts: 12,584
From: Pittsburgh, PA
Eric, it was March 10th 2009 and I was freezing my a$$ off trying to get those same hubs off my truck. I nearly had to call a flatbed wrecker to come get the truck, and have a po-fessinal mechanic show me how to do it. They were so rusted in, no amount of heat or force would budge them at first. Perseverance and some Kano-kroil penetrant oil (Penetrating-Lubricating Oils best stuff ever) eventually got the hubs out. I have a picture of me flipping the hubs the bird.
Dan
Dan
Having this stuff helps...


Thread Starter
|
Senior Member
Joined: Mar 2008
Posts: 3,406
From: N. Illinois
1st Gear Member
Thanks you guys for the tips on bearing install. I will chill the bearings, and warm the hub a little.
Where I work, the assembly area actually installs sleeves into housings by chilling them with liquid nitrogen.
Dan

Thread Starter
|
Senior Member
Joined: Mar 2008
Posts: 3,406
From: N. Illinois
1st Gear Member
IDRIDR pointed me to Klxrelic's thread the other day. Here's a link. Good stuff.
https://www.kawasakiforums.com/forum...tenance-37177/
I cleaned the wheels up all around, and did use some scotchbrite ( per klxrelic's recomendation), on the ID of the hubs where the bearings go.

I had the bearings in the freezer and I used a torch to carefully warm up the hub. I had hopes that the bearings might drop in easily, but it didn't work that way. I think the heat/freeze helped, but also believe that you could get by with out it.
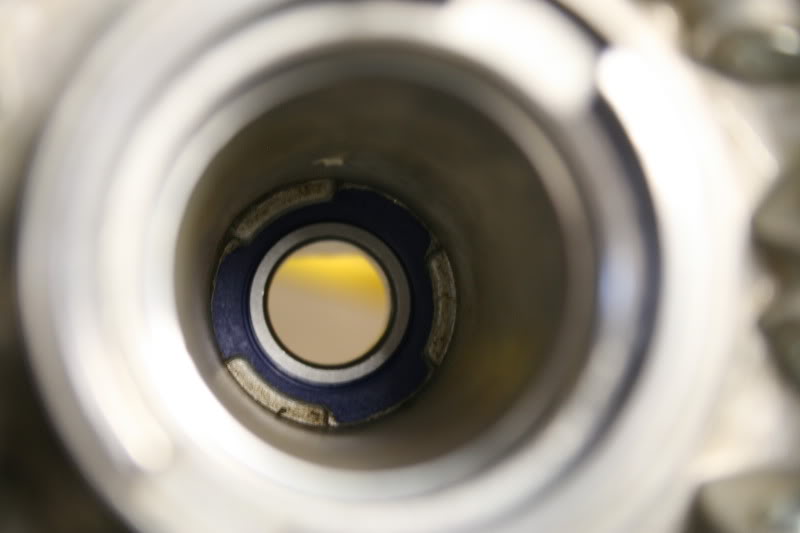
I would recommend using a bearing driver to press your bearings in. When installing these bearings, you only want to push on the outside diameter. I used another of relics idea,s and ground down the OD of one each of my old bearings .010 undersize. I then took the bearings apart so only the outside race would contact the new bearings.
Drilling the rivets, between the *****, in the keeper.

Without the keeper, the ***** will all move to one side.

Pop the inside race out.

I tapped the bearing in flush with a piece of aluminum barstock, and then set up my new pusher. I am using my tire change stand which ended up working great. A bearing drive kit from Harbor Freight would work as well.


Crank it in.

Ta-da!

Snap ring back in.

https://www.kawasakiforums.com/forum...tenance-37177/
I cleaned the wheels up all around, and did use some scotchbrite ( per klxrelic's recomendation), on the ID of the hubs where the bearings go.
I had the bearings in the freezer and I used a torch to carefully warm up the hub. I had hopes that the bearings might drop in easily, but it didn't work that way. I think the heat/freeze helped, but also believe that you could get by with out it.
I would recommend using a bearing driver to press your bearings in. When installing these bearings, you only want to push on the outside diameter. I used another of relics idea,s and ground down the OD of one each of my old bearings .010 undersize. I then took the bearings apart so only the outside race would contact the new bearings.
Drilling the rivets, between the *****, in the keeper.
Without the keeper, the ***** will all move to one side.
Pop the inside race out.
I tapped the bearing in flush with a piece of aluminum barstock, and then set up my new pusher. I am using my tire change stand which ended up working great. A bearing drive kit from Harbor Freight would work as well.
Crank it in.
Ta-da!
Snap ring back in.
Last edited by dan888; Jan 30, 2012 at 02:50 AM.