
Cam Girdle help

Thread Starter
|
Senior Member
Joined: Aug 2015
Posts: 113
From: Wichita, Ks
1st Gear Member
Well I'm almost done with my big bore kit (FINALLY). I got everything put back together once, and snapped the forward most cam chain side bolt. I tried my best to get it out, but had to take it to a professional and let them extract the remainder of the bolt.
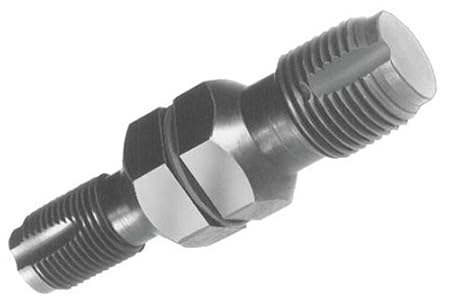
Got it back from them with a slightly damaged case, no big deal. Got everything put back together up to the cam girdle. Now the longer bolt on the intake cam side only turns a half rotation and starts locking up. I tried the bolt in other holes, and it threads in fine. I went to get a tap and die set to clean the threads in the head that the cam girdle bolts too, but realized I didn't know the measurements. I was able to find out that it's a 6mm bolt, 46mm long, but I wasn't able to find any information on the pitch. I don't have any of the bolts with me as the bike is in my friend's garage. Any help would be great.
Also, I've been having difficulties getting the intake hose to fit between the airbox and the pumper carb from Bill Blue. Any tips or tricks for getting that back on would be greatly appreciated as well.
Senior Member
Joined: Sep 2009
Posts: 5,050
From: Abilene, TX
1st Gear Member
Pretty sure that's a 6mm X 1.00...one of the most common diameter and thread pitch units on the bike.
On the airbox boot, are you trying to install the boot after you have the carb installed? It's usually easier to have the boot in the airbox and install the carb into the intake manifold and then spread the airbox boot over the intake mouth of the carb. The airbox boot is pretty flexible. I usually use a hook tool to bring the lip of the boot around the circumference of the carb intake mouth. Just don't poke a hole in the boot with the tool. The airbox boot is pretty flexible but also quite tough. It also helps if you're in a warm place.
I think I'm understanding what you're asking here.
Thread Starter
|
Senior Member
Joined: Aug 2015
Posts: 113
From: Wichita, Ks
1st Gear Member
Sweet. I'll head back to the store after work tomorrow and see if they have a metric tap and die with multiple pitches, just in case.
Yep, that's what I was looking for. I already have the carb on the bike, but it's not tightened down yet. The stock carb is such a pain in the *** to fit in there, this custom built one is even worse. I guess I'll just have to take it off and put the tube on the airbox first......or I might put it on the carb after I have it somewhat situated. My buddy's garage isn't that well insulated, or heated at all so it gets cold in there really quickly. At first I had thought about getting rid of the tube and just getting some custom duct work or something. Then I thought about a pod filter, but that just wouldn't be right.
Yep, that's what I was looking for. I already have the carb on the bike, but it's not tightened down yet. The stock carb is such a pain in the *** to fit in there, this custom built one is even worse. I guess I'll just have to take it off and put the tube on the airbox first......or I might put it on the carb after I have it somewhat situated. My buddy's garage isn't that well insulated, or heated at all so it gets cold in there really quickly. At first I had thought about getting rid of the tube and just getting some custom duct work or something. Then I thought about a pod filter, but that just wouldn't be right.

Senior Member
Joined: Aug 2009
Posts: 4,656
From: Delaware, Ohio
1st Gear Member
Odds are as TNC says. The companies almost all use the same thread pitch on the engine fasteners, same bolt size on the tensioners I sell - M6-1.00. Same pitch holds on side covers, seat, fenders, etc. The other M6 pitch I think is 0.80, fine thread. It's easy to check if you have a metric ruler, there will be 6 threads in 1 millimeter, hold it up to the light and count the crests.
You can use a tap to start, but will need to tap again with a bottoming tap(sixth question down in the link). You can do this by grinding the end of the standard tap down almost all the way to create a bottoming tap for the blind hole or find and buy an M6-1.00 bottoming tap. It cuts the threads deeper, close to the bottom of the hole. I've done the grinding when I needed a bottoming tap, works fine. Standard tap first to get the threads started, don't force it when it hits the bottom, then tap with a bottoming tap. Stick a wire or something in the hole to measure how deep it is, then mark the taps so you don't go too deep, twist too hard and break the tap or ruin the hole. Put tape on the tap so you know max depth and don't go that far.
I'm betting that company that did your work may have tapped with an SAE.
Other fix is to install a Helicoil if you pull the repaired threads when torquing the cap.
Last edited by klx678; Jan 14, 2017 at 02:39 PM.
Senior Member
Joined: Mar 2013
Posts: 760
From: Young Harris, GA
1st Gear Member

And it's best to use tools designed for chasing threads rather than cutting new threads(like a tap does). It can be pretty easy to go from hmm in aluminum to oh $hit! when doing hand machine work so take care.
Last edited by GBAUTO; Jan 15, 2017 at 07:14 AM.
Senior Member
Joined: Aug 2009
Posts: 4,656
From: Delaware, Ohio
1st Gear Member
C'mon Mark. I'm pretty sure that it means 6mm in diameter and thread pitch=1.0mm or 1 mm between threads.
And it's best to use tools designed for chasing threads rather than cutting new threads(like a tap does). It can be pretty easy to go from hmm in aluminum to oh $hit! when doing hand machine work so take care.
And it's best to use tools designed for chasing threads rather than cutting new threads(like a tap does). It can be pretty easy to go from hmm in aluminum to oh $hit! when doing hand machine work so take care.
Doesn't look like a huge difference, I cut a groove in a bolt to make a thread chaser, tapered the tip a bit. Works fine for dirt and crud. Now I use a tap with care. Works better for me. Thread chaser:
Bottoming tap:

I'd check with the shop that did the work, find out what they did to extricate the old broken bolt and what they did to the threads. Clearly they either damaged or altered them in their work. Chance is it should be helicoiled.
Last edited by klx678; Jan 15, 2017 at 12:08 PM.
Thread Starter
|
Senior Member
Joined: Aug 2015
Posts: 113
From: Wichita, Ks
1st Gear Member
I'm going to do my best to clear this up. I needed help with the cam girdle bolt, not the cam chain side head bolt. I was just providing an update on what I've been doing. Yes, the cam girdle bolt was 6x100. I was able to clean up the threads enough to put the bolt back in. I did use a tap and went slowly.
ANOTHER UPDATE: I've got the bike back together completely, and almost fully functional. It only took half a quart/liter of coolant, and when I turn on the petcock, fuel dumps out of the float bowl drain. I know it should take more coolant, but none of my lines are pinched, so I'm stumped there. As far as the fuel leak goes, I know there's a bolt you can screw in/out, but mine won't budge. I have the TM33/34 pumper from Bill Blue in case you were wondering.
ANOTHER UPDATE: I've got the bike back together completely, and almost fully functional. It only took half a quart/liter of coolant, and when I turn on the petcock, fuel dumps out of the float bowl drain. I know it should take more coolant, but none of my lines are pinched, so I'm stumped there. As far as the fuel leak goes, I know there's a bolt you can screw in/out, but mine won't budge. I have the TM33/34 pumper from Bill Blue in case you were wondering.
Senior Member
Joined: Mar 2013
Posts: 760
From: Young Harris, GA
1st Gear Member
Chances are the float is stuck in the carb. Try tapping on the side of the bowl to see if that will dislodge the valve. I don't think that there is a drain valve on the TM so it's probably coming from the bowl vent lines. The cooling system has air trapped in it-don't worry too much and just keep topping it off util it burps all of the air out.
Thread Starter
|
Senior Member
Joined: Aug 2015
Posts: 113
From: Wichita, Ks
1st Gear Member
I tried burping the coolant, tipping the bike at a hard lean angle to each side several times, but barely got any results. I didn't even think about tapping on the side of the bowl....I'm not very good with carbs, only messed with the stock cvk, this one, and the ones on my old '93 Seca II many years (and bikes) ago.
The carb definitely has a bowl drain (see link below) but I don't understand why it would have been open. As I stated before, the screw won't budge. I plugged the hose and it seemed alright but then it started draining from the vent hoses. Shut off the fuel supply, and started the bike just to hear it run.
http://www.mikunioz.com/wp-content/u.../photo-341.jpg
Senior Member
Joined: Mar 2013
Posts: 760
From: Young Harris, GA
1st Gear Member
That's different than my generic TM. That style of drain valve is just a tapered seat on the screw so remove it and try to dislodge any debris. If it is still draining from the actual vent lines thenthe float valve IS stuck and you'll need to disassemble the bowl to resolve the problem.

Thread
Thread Starter
Forum
Replies
Last Post
markmeinteil
General Motorcycle Discussion
14
Nov 10, 2006 12:14 AM
SDRRider
Ninja ZX-6R & ZX-6RR
27
Jul 6, 2006 09:00 PM