
My Winter Project

Thread Starter
|
Senior Member
1st Gear Member
Joined: Oct 2006
Posts: 463
From: Kersey, PA
1st Gear Member
Well, in a way they are alike, in that they both produce a durable finish.
Aluminum oxidizes as soon as it comes in contact with oxygen. Unlike steel or iron that will rust to nothing, the oxidation on aluminum forms a barrier that keeps it from corroding further. Anodizing uses chemicals and electrical current to make the aluminum oxidize more (thicker) than usual. Dyes can be added to the chemicals to give it color, as normally this layer would be clear.
Powder coating uses plastic pellets that have been ground to a fine powder. This powder is given a positive electrical charge, while the part to be coated is given a negative charge. A gun is used to spray the powder onto the part. Opposites attract, so the powder sticks in all the nooks and crannies. The part is then placed in an oven or under a heat lamp to melt the powder into an even coating.
You can anodize any aluminum piece, but the results will vary. Hard aluminum alloys and cast aluminum sometimes don't come out with an even color. Some spots will be lighter or darker than others. My hubs were cast aluminum, so I powder coated them instead anodizing them to make sure the finish looked good.
 Nice job man!
This is a great and detailed build you are doing. Nicely Done!
Not to rain on your great klx build, but you should have your furnace 18 inches off of the concrete in the garage due to flammables (depending on your county codes of course). See picture #4
Not to rain on your great klx build, but you should have your furnace 18 inches off of the concrete in the garage due to flammables (depending on your county codes of course). See picture #4
Thread Starter
|
Senior Member
1st Gear Member
Joined: Oct 2006
Posts: 463
From: Kersey, PA
1st Gear Member
Thanks for all the comments on my garage too. It's 28' X 32', but if I had the money, I'd build one twice as big. You can never have enough shop space.


Thread Starter
|
Senior Member
1st Gear Member
Joined: Oct 2006
Posts: 463
From: Kersey, PA
1st Gear Member
Well, it's been a while since I've posted an update. I've been working on the bike when I can, but a few things conspired to slow me down.
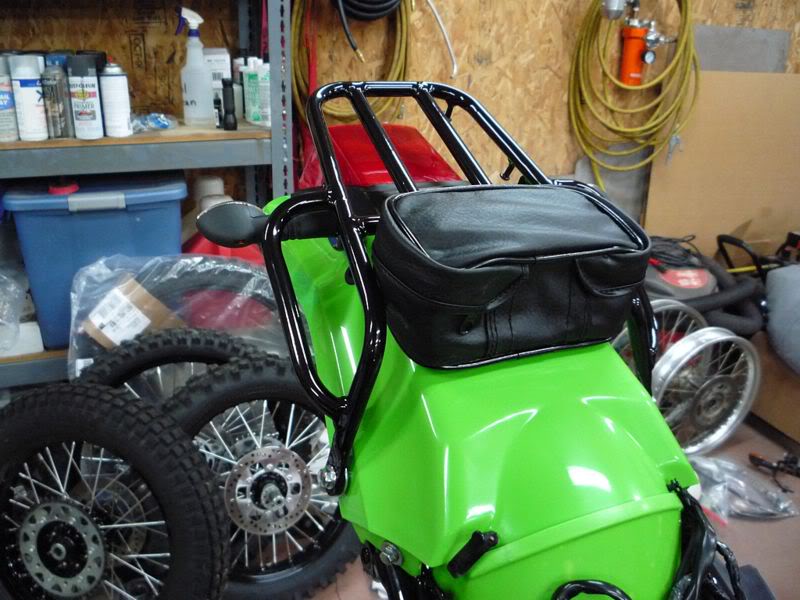
First, I started putting pieces back on that took forever at the powder coaters (it's stock car building season here, and the powder coater was swamped). I installed a new rear fender, along with the rack and tool bag. I also replaced my cheap Chinese turnsignals with cheap Taiwanese turnsignals. A lot of people told me they couldn't see the old ones in bright sunlight. These ones are much brighter.
I also bought a KX450f front fender. It bolted right up. It was a little early in the build to bolt it on, but I had to see what it looked like.
Here's where I wasted a lot of time. I really wanted to swap the stock headlight for the KLX450R headlight. I got one, but in no way was it even close to working with the stock headlight bracket and gauges. I literally spent 2 weeks trying to bend and weld up a new bracket, but 2 problems kept cropping up. Either there was a huge gap between the headlight bezel and the triple clamps, or if I tucked it in, there wasn't enought room to fit the stock gauges. I've seen pictures of other KLX's with 450 headlights, and frankly I'm not sure how they mounted them.
I probably could have made it work, but my patience ran out and I decided to try Plan B. I clicked on Buy It Now, and got a headlight and bracket from a 2010 KLX250SF. The 2009 and newer KLX's have different botton triple clamps than the '06/'07s, with the headlight bracket mounts closer to the center (the top bolt holes matched my triple clamps).
The 2009+ KLXs also have a drilled and tapped post cast in the middle of the bottom triple clamp to mount the headlight bezel. Some creative surgery fixed that problem. The '09+ KLXs obviously have digital gauges, but the mounting plate on the headlight bracket is smaller than my analog gauges. All I needed to mount my gauges was to weld on tabs for the rubber grommets.
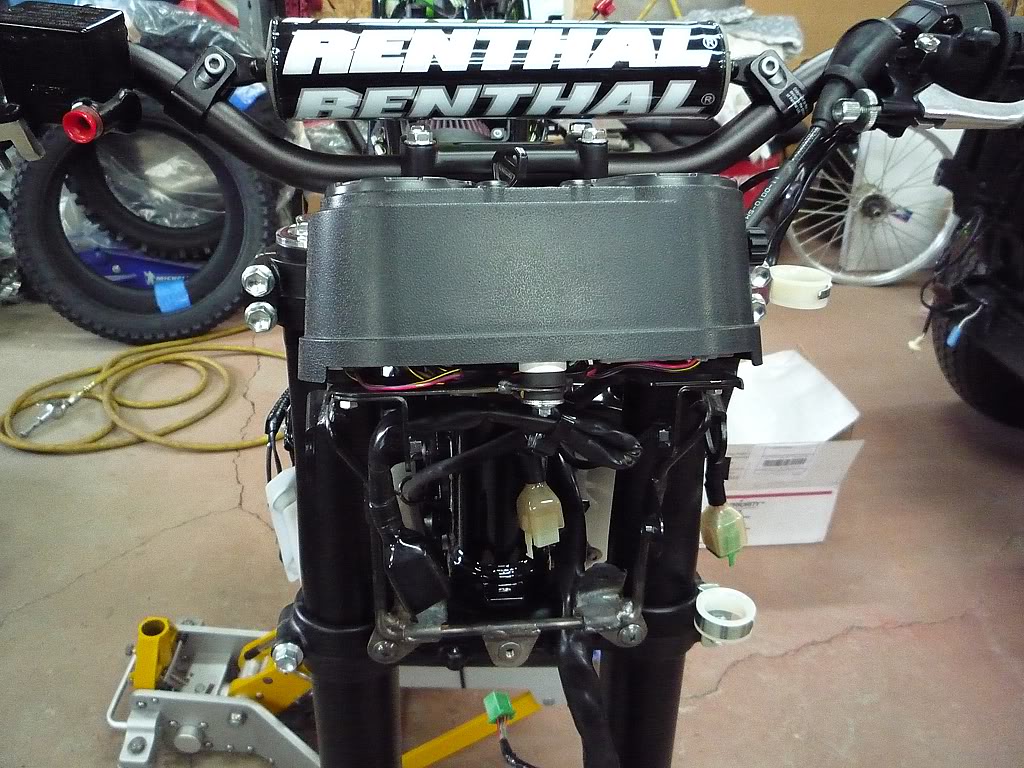
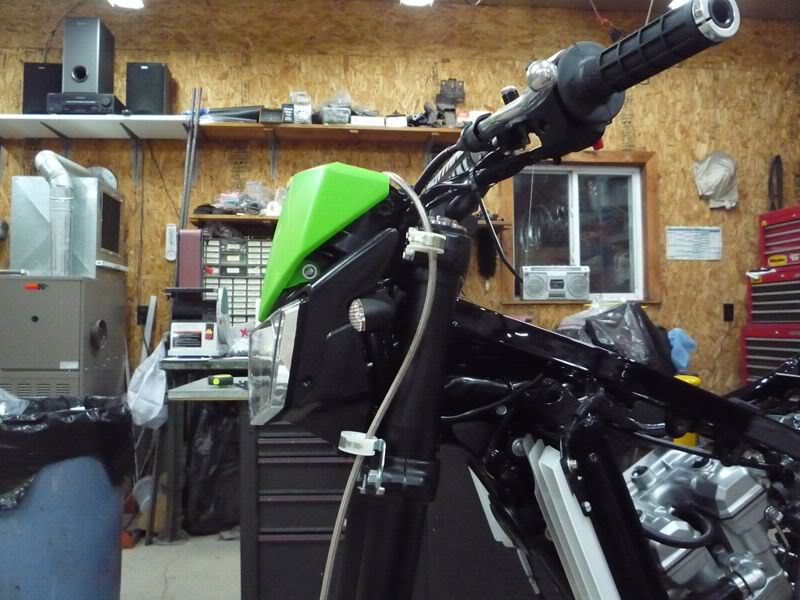
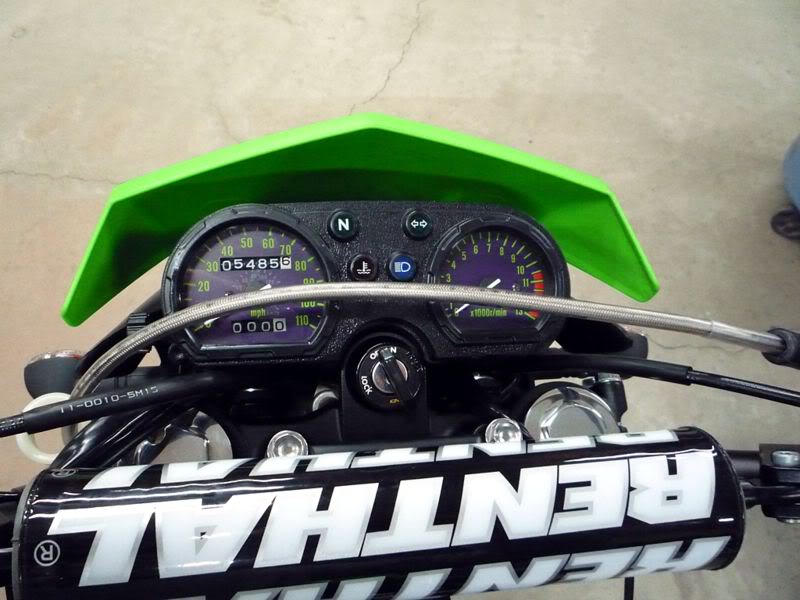
Oh yeah, I mounted up some new Renthal 7/8" bars too (CR High bend).
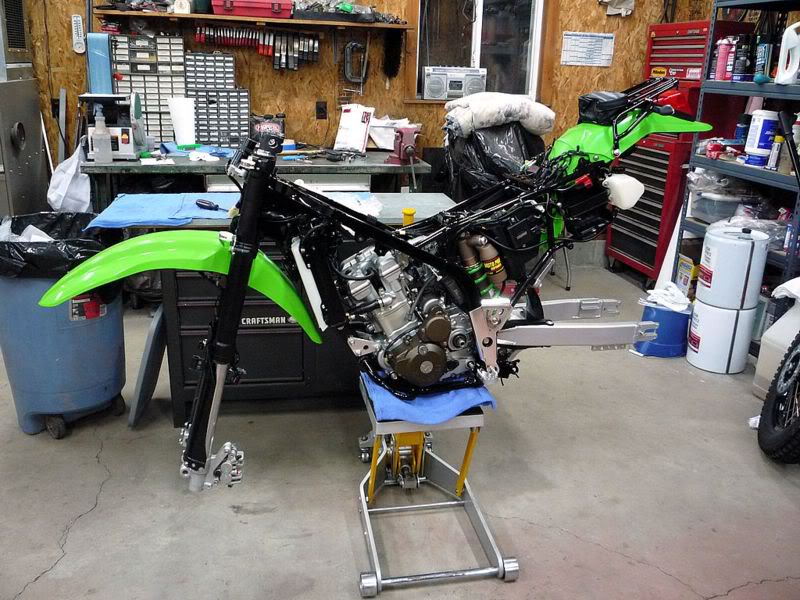
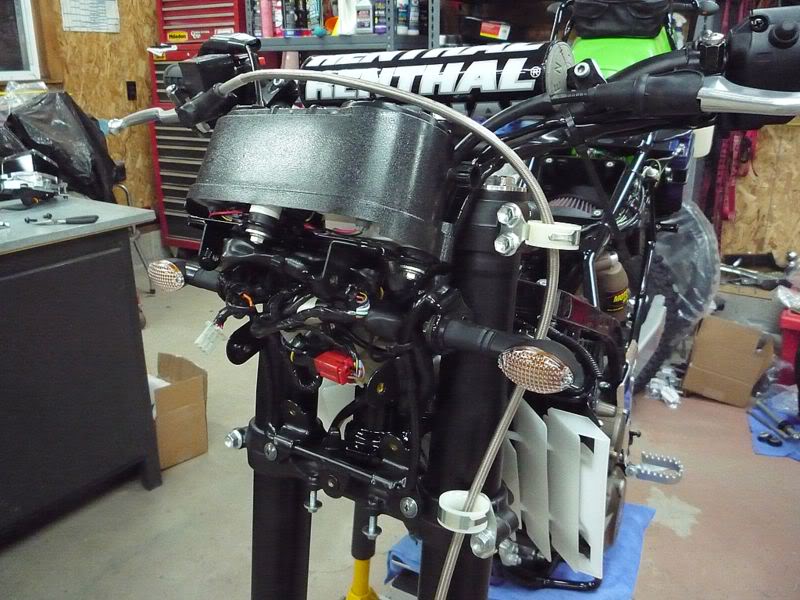
Back from the powder coaters, and ready for the final installation.

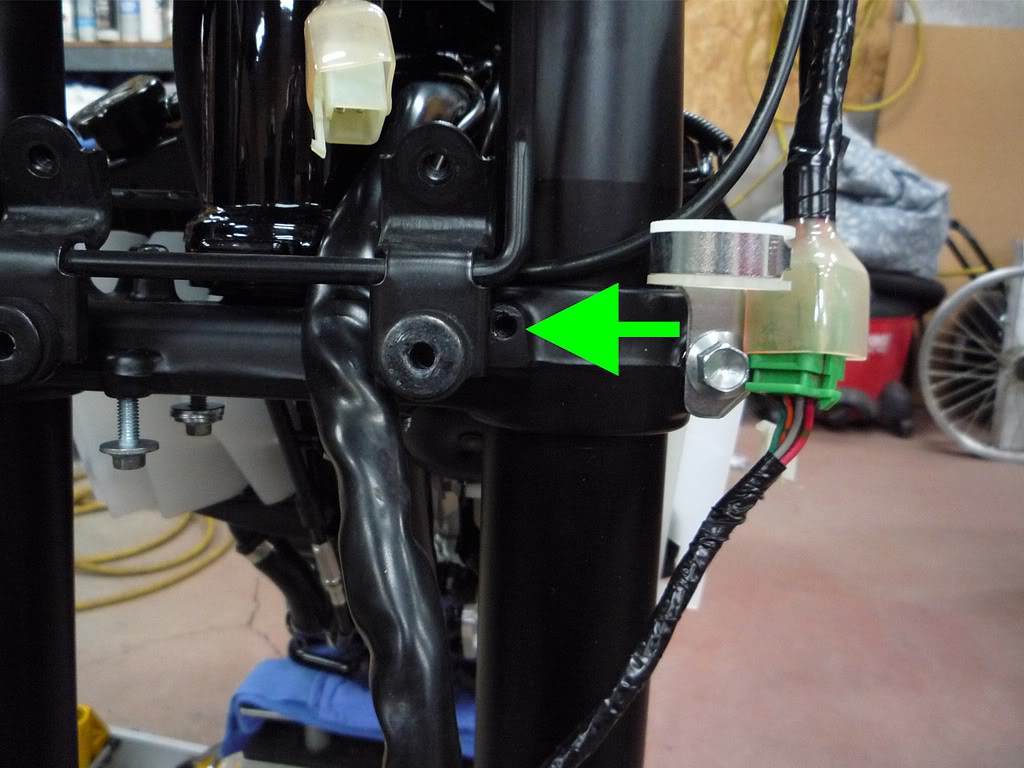
Gauges installed, wiring harness connected and tucked in, and new matching front turnsignals.
The headlight installed. The stock headlight used a regular H4 connector right from the harness to connect. The new headlight is designed differently. The stock H4 connector wouldn't work on it, so I had to remove it and wire on a new connector to match the new headlight.
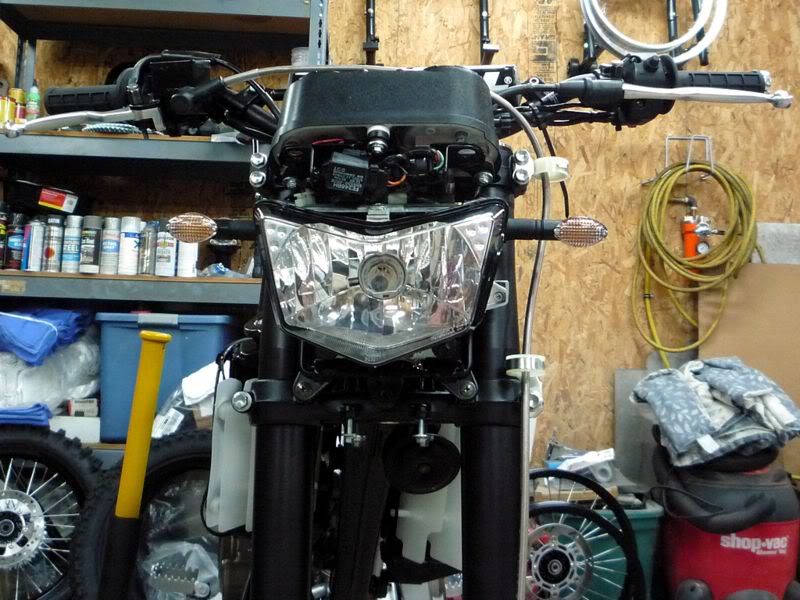
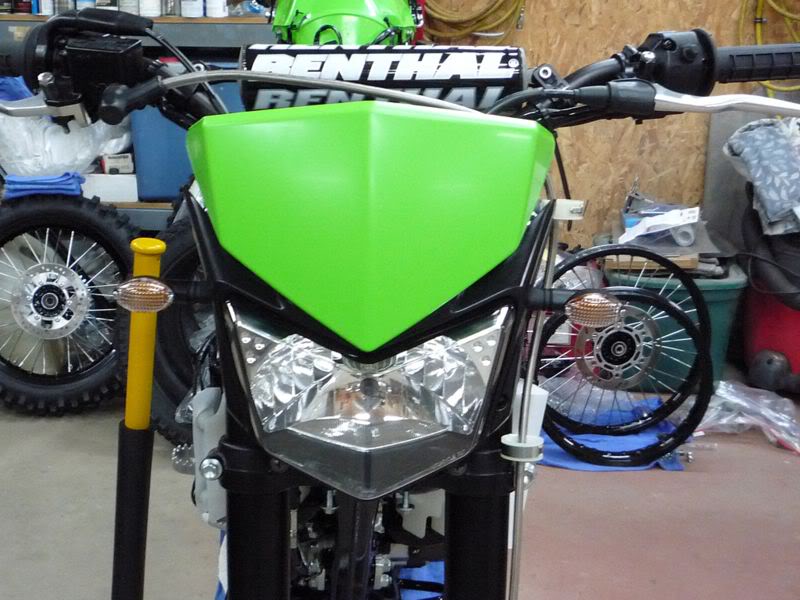
The headlight I bought didn't come with the upper and lower plastic bezels, so I order 2012 plastics for it.
I know that's not much to show for all the time it took. I've got all my parts and pieces now, so she'll be finished up pretty soon.
More to come...
First, I started putting pieces back on that took forever at the powder coaters (it's stock car building season here, and the powder coater was swamped). I installed a new rear fender, along with the rack and tool bag. I also replaced my cheap Chinese turnsignals with cheap Taiwanese turnsignals. A lot of people told me they couldn't see the old ones in bright sunlight. These ones are much brighter.
I also bought a KX450f front fender. It bolted right up. It was a little early in the build to bolt it on, but I had to see what it looked like.
Here's where I wasted a lot of time. I really wanted to swap the stock headlight for the KLX450R headlight. I got one, but in no way was it even close to working with the stock headlight bracket and gauges. I literally spent 2 weeks trying to bend and weld up a new bracket, but 2 problems kept cropping up. Either there was a huge gap between the headlight bezel and the triple clamps, or if I tucked it in, there wasn't enought room to fit the stock gauges. I've seen pictures of other KLX's with 450 headlights, and frankly I'm not sure how they mounted them.
I probably could have made it work, but my patience ran out and I decided to try Plan B. I clicked on Buy It Now, and got a headlight and bracket from a 2010 KLX250SF. The 2009 and newer KLX's have different botton triple clamps than the '06/'07s, with the headlight bracket mounts closer to the center (the top bolt holes matched my triple clamps).
The 2009+ KLXs also have a drilled and tapped post cast in the middle of the bottom triple clamp to mount the headlight bezel. Some creative surgery fixed that problem. The '09+ KLXs obviously have digital gauges, but the mounting plate on the headlight bracket is smaller than my analog gauges. All I needed to mount my gauges was to weld on tabs for the rubber grommets.
Oh yeah, I mounted up some new Renthal 7/8" bars too (CR High bend).
Back from the powder coaters, and ready for the final installation.
Gauges installed, wiring harness connected and tucked in, and new matching front turnsignals.
The headlight installed. The stock headlight used a regular H4 connector right from the harness to connect. The new headlight is designed differently. The stock H4 connector wouldn't work on it, so I had to remove it and wire on a new connector to match the new headlight.
The headlight I bought didn't come with the upper and lower plastic bezels, so I order 2012 plastics for it.
I know that's not much to show for all the time it took. I've got all my parts and pieces now, so she'll be finished up pretty soon.
More to come...