Kawasaki Forums
  • LOG IN
  • REGISTER
  • Forums
    • KawasakiForums.com News & Articles
      • KawasakiForums Site Articles & News Section
    • General Kawasaki Forums
      • New Member Area
      • Off Topic
      • Sights 'N Sounds
      • KF Help & Suggestion Center
      • General Motorcycle Discussion
      • Bike of the Month
    • Technical Information
      • Detailing
      • General Tech
      • DIY - Do It Yourself
      • Gear Section
    • RACING / RECREATIONAL
      • Street/Strip
      • Off Road
      • The Stunters Corner
    • Kawasaki Motorbikes
      • Kawasaki Ninja Models
      • Kawasaki Vulcan Models
      • Kawasaki Classic Section
      • Kawasaki Touring Models
      • Kawasaki Streetbike Models
      • Kawasaki Dual Purpose Models
      • Kawasaki Off Road Models
      • Kawasaki Motocross
    • Other Vehicles
      • Kawasaki Jet Ski's
      • Kawasaki Quad's & ATV's
      • Kawasaki Mule
    • Kawasaki Classifieds
      • Sponsor Group And Special Buys
      • PRIVATE For Sale / Trade Classifieds
      • Private 'Wanted' Classifieds
      • Biker Performance
      • Lightning Fast
  • Marketplace
    • Vendor Directory
    • Become a Vendor
  • New Posts
  • Tools
    • Car Payment Calculator
    • Tire Rim Calculator
    • Recalls
    • Technical Service Bulletins (TSBs)
    • Members List
    • Live Feed
  • Gallery
  • View Dark Mode
    • Please register or login to enable Dark Mode.
  • Log In
  • Register
Kawasaki Forums
    • Threads
      • Advanced
Dark Mode

Please register or login to enable Dark Mode.

Log In

Forgot your Password?

By logging into your account, you agree to our Terms of Use and Privacy Policy, and to the use of cookies as described therein.
  • Recent
  • Commented
  • Albums
  • My Pictures

TyCobb2000's Photos

View Profile
Sort:
Most Recent
  • Most Recent
  • Most Comments
  • Albums
  • Photos
Almost home after about an hours ride. I would take more pics, but I can't stop riding.
0 2011/06/09 22:09:24 TyCobb2000
I work up in those mountains at Mammoth Mountain Ski Area, and we will be skiing and snowboarding on the 4th of July.
0 2011/06/09 22:09:24 TyCobb2000
Gotta love snow in the mountains and clear roads.
0 2011/06/09 22:09:24 TyCobb2000
Looking back up 395, the way to Reno. Maybe another nice ride.
0 2011/06/09 22:05:22 TyCobb2000
LA might be a nice ride, if I hadn't been stuck there for 4 days waiting for the weather to clear for my flight.
0 2011/06/09 22:05:22 TyCobb2000
Parked on a 2 lane pull off.
0 2011/06/09 22:05:22 TyCobb2000
The view from the "cockpit"
0 2010/10/25 01:02:41 TyCobb2000
In this pic you can see the Trail Tech TTO Tach/Hour Meter. Mounted using the Trail Tech optional bar mount (7/8in and 1 1/4in mounts included). Well worth the money. I need to touch up the shield mount, clean up the rust and repaint it. Maybe but a new quick release mount from National Cycle.
0 2010/10/25 00:35:19 TyCobb2000
Every time I clean the bike, I'm amazed at how well some of the bright stuff shines, like the little nuts that hold the chrome trim on the sides in the rear.
0 2010/10/25 00:35:19 TyCobb2000
These blinkers replaced the stockers that had dry rotted stems. They're brighter than stock, have a clean LED look, without having to add or change resistors. Again good chrome
0 2010/10/25 00:35:19 TyCobb2000
All the chrome still looks good.
0 2010/10/25 00:25:24 TyCobb2000
2 into 1 pipe crosses under and over to the right side. Looks "Right" if you know what I mean.
0 2010/10/25 00:25:24 TyCobb2000
This is the pipe that had to come off to get to the sproket cover, to do the  1 change. Took the shop 2 hours......would have taken me all day.
This is the pipe that had to come off to get to the sproket cover, to do the 1 change. Took the shop 2 hours......would have taken me all day.
0 2010/10/25 00:25:24 TyCobb2000
Just below the refelection of the powerline is the scratch on the tank.
0 2010/10/25 00:21:25 TyCobb2000
The paint is a bit faded from mounting my backpack via bungie cord.
0 2010/10/25 00:21:25 TyCobb2000
0 2010/10/25 00:18:59 TyCobb2000
This is the front at night, notice the headlght to the left.
0 2010/06/20 01:25:54 TyCobb2000
This is the rear at night, you can see the tail light just to the right in the photo. The lower bit of red is the turn signal illuminating the rear side marker reflector.
0 2010/06/20 01:25:54 TyCobb2000
This is the rear during the day.
0 2010/06/20 01:25:54 TyCobb2000
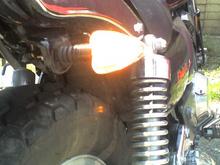
This is the light illuminated, They blink a little bit slower(24w vs. 14w bulbs), but still above 60/min. so it's legal. And they're quite visible, although the front's a little tight in on the headlight.
0 2010/06/20 01:12:43 TyCobb2000
In this picture you can see how close the stalk mounts to the headlight, and a smart man would have taken the headlight off, and not gotten frustrated working in a tight space, and not forgotten to take the lock washer and nut off the stem before running and crimping the wires.
0 2010/06/20 01:12:43 TyCobb2000
The procedure for the front is the same as the rear. Remember the procedure. Duh !!!
0 2010/06/20 01:12:43 TyCobb2000
Left side. If you look close behind the bracket you can see some extra wire I twist tied up till I take the fender off tomorrow.
0 2010/06/20 01:00:10 TyCobb2000
Crimp 'em, tape 'em, and tuck 'em back up. Cinch down the nut on the stem, and move to the other side.
0 2010/06/20 01:00:10 TyCobb2000
Before crimping the wires, check   to   amd - to -. In this case the black yellow on the bike went to the new yellow and the bikes grey went to black.
Before crimping the wires, check to amd - to -. In this case the black yellow on the bike went to the new yellow and the bikes grey went to black.
0 2010/06/20 01:00:10 TyCobb2000
At this point pull the old wires back through the bracket, remove the washer and nut from the new lights and run the new blinker wires through to the back side of the bracket and loosely mount the light.
0 2010/06/20 00:46:19 TyCobb2000
Withe the 2 wires exposed, and the bleeding stopped, strip the ends to expose the bare wire underneth.
0 2010/06/20 00:46:19 TyCobb2000
After you have an extra few inches of wire exposed, clip off the old signal, andcut back the sheath covering the 2 wires, being carefull not to stab your self in the thunb. Look close....
0 2010/06/20 00:46:19 TyCobb2000
I started by removing the bolt that held the stem to the bracket, and gently pulled some slack cable down from up under the fender behind the bracket, while pulling the signal out a little from the bracket. The EL250 had a 2pc. rear fender, and I had to be at work in less than 2 hours, otherwise I would have pulled the lower rear fender off.

0 2010/06/20 00:35:59 TyCobb2000
The tools. $12 electrical connector kit.
0 2010/06/20 00:35:59 TyCobb2000
These are the lights. They were a bit smaller than I thought they would be, and was worried about the output, I didn't need to be.
0 2010/06/20 00:35:59 TyCobb2000
This is the front right. The blinker mounts to the headlight bracket, just behind the headlight bucket. See how the two cables arc gracefully and meet at the bottom.....the bolt's right in there.  : - (
This is the front right. The blinker mounts to the headlight bracket, just behind the headlight bucket. See how the two cables arc gracefully and meet at the bottom.....the bolt's right in there. : - (
0 2010/06/20 00:23:04 TyCobb2000
This is the right rear with the bolt still in place.
0 2010/06/20 00:23:04 TyCobb2000
Start by identifying where your signals mount to the bike. On naked bikes like mine, it's easy, sport bikes, well you'll have to pull some plastic up front. This is the left rear, it's just a simple hanger with a hole. The bolt has been removed in this picture.
0 2010/06/20 00:23:04 TyCobb2000
And this is what I was dealing with under all that Gorilla Tape.
0 2010/06/20 00:16:59 TyCobb2000
And yes, they passed PA inspection this way.
0 2010/06/20 00:16:59 TyCobb2000
Not pretty, but it worked.
0 2010/06/20 00:16:59 TyCobb2000
First
Page
1 of 2
Last
Go To
Page
  • 1
  • 2
1 of 2
Go To GO
Go to page of 2 pages
  • 1
  • 2

Top
Kawasaki Forums
  • Contact Us
  • FAQ
  • Archive
  • Advertising
  • Cookie Policy
  • Privacy Statement
  • Terms of Service
  • Your Privacy Choices
  • Manage Preferences

© 2026 MH Sub I, LLC dba Internet Brands


When you click on links to various merchants on this site and make a purchase, this can result in this site earning a commission. Affiliate programs and affiliations include, but are not limited to, the eBay Partner Network.