
New Goods Installed w/Pics


Senior Member
1st Gear Member
Joined: Aug 2007
Posts: 411
From:
hey Bryan, did you have an issue with your "clutch sensor" thing a magig.... as in.... what did you do with the wires going to the clutch that tells the bike to not start unless its pulled in... I have an after market perch on the way and i don't care for the safety switch much anyway (i always start with the clutch in, even in neutral) would like to lose the wires all together right out of the harness (if it goes to one) do i have to make them connect? or leave them open?
Thanks for the heads up
Thanks for the heads up

Senior Member
1st Gear Member
Joined: Apr 2006
Posts: 1,349
From:
I don't remember wheather the switch is normaly open or closed but the easy way to do it is to follow the wires to where they plug in (behind the headlight). Then unplug both wires and try to start the bike. If it starts then nothing more is required. If it doesn't start then you need to connect the two wires together.
If my memory serves me correct I think that you have to connect the two. It's been two years since I installed my ASV levers and my memory sucks.
If my memory serves me correct I think that you have to connect the two. It's been two years since I installed my ASV levers and my memory sucks.

Senior Member
1st Gear Member
Joined: Jan 2007
Posts: 1,036
From:
Cut the plug end off the clutch switch. Leave a bit of wire off the plug then wire them together & cover with shrink wrap. plug that back into the stock main harness. Done.

Senior Member
1st Gear Member
Joined: May 2007
Posts: 878
From: New Glasgow, Nova Scotia, Canada
Received my new pro-tapers yesterday and completed the install today...Last week, I painted the radguards and kickstand and the back of my lexanheadlight cover....I cannot wait for some warm riding weather...this winter sucks bad.
Here are acouple pics.....
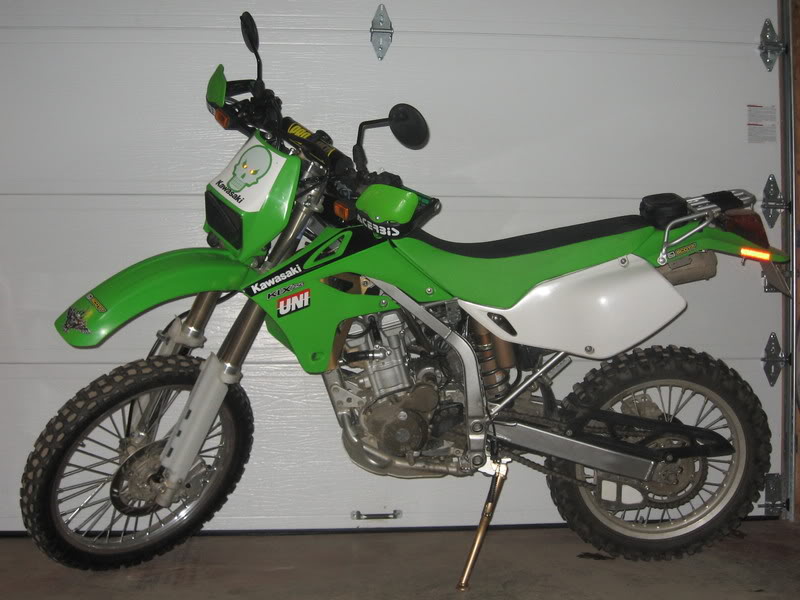
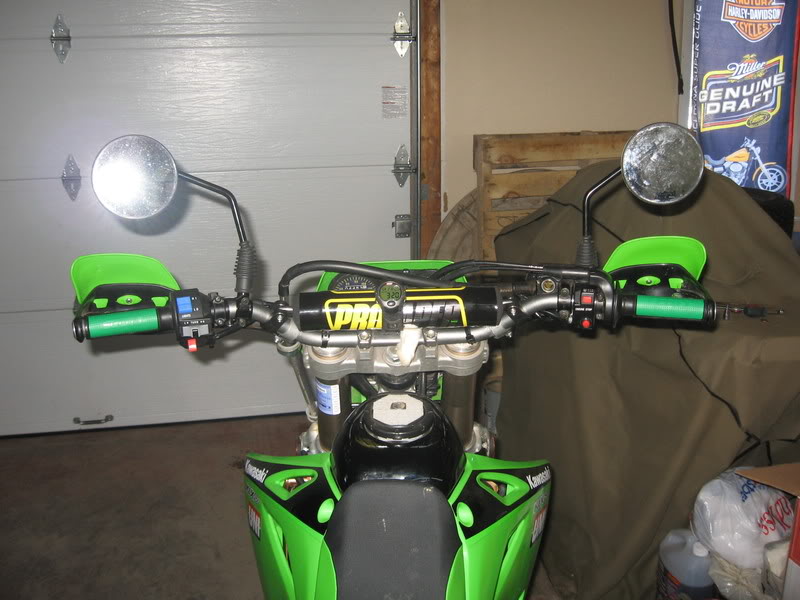
and the new bars (and grips as I thought I'd destroy the old ones in the process, but surprisingly I did not)...
Here are acouple pics.....
and the new bars (and grips as I thought I'd destroy the old ones in the process, but surprisingly I did not)...

Senior Member
Joined: Jan 2008
Posts: 255
1st Gear Member
I already posted these pics on the LED thread, but wanted to show you all some of my first mods, UFO front fender (had to modify the headlight shroud on the bottom and around the blinkers with my dremel tool), new LED's front and back with Tony's diode plan, middle fork decals, removal of the tail and chain gaurd ( I'll have to put the plate back on somehow), and that's about it so far. Still waiting for the Big Gun and 13t front sprocket, hoepfully just a couple more weeks then I will post some new and improved pics. Not too shabby for a newbie.
[IMG]local://upfiles/8159/9310B6C5252A41E7B039835ED8C819A3.jpg[/IMG]
[IMG]local://upfiles/8159/9310B6C5252A41E7B039835ED8C819A3.jpg[/IMG]
Senior Member
1st Gear Member
Joined: May 2007
Posts: 878
From: New Glasgow, Nova Scotia, Canada
Those are the Cr high bends, but they are not much higher than the OEM bars (maybe just a half-inch and just a tad straighter), but that was fine with me as I liked the positioning of the stock bars, but would have liked them up maybe a tad more. For anyone wanting higher bars, I recommend these, but it may also be a good idea to get the risers for them as well...I myself am content with them, but will have a better idea when i get out for a ride in the Spring (if it ever comes).
I basically decided to get new bars for 2 reasons, first being I heard of the stock bars being easily bent in a crash and second, I wanted one of those cool pads which came with the new bars. It was a little tricky getting the clutch and brake levers positioned so they wouldn't catch on the inside of the handguards, so I would recommend installing shorty levers at the same time (if one was considering them). I am actually going to price them now as I really would prefer more room for the levers.
In the meantime:bryantjt, did you put both levers on? or just the shorty clutch lever? and what brand and model did you use? Any info would be greatly appreciated. THX.
I basically decided to get new bars for 2 reasons, first being I heard of the stock bars being easily bent in a crash and second, I wanted one of those cool pads which came with the new bars.
It was a little tricky getting the clutch and brake levers positioned so they wouldn't catch on the inside of the handguards, so I would recommend installing shorty levers at the same time (if one was considering them). I am actually going to price them now as I really would prefer more room for the levers.In the meantime:bryantjt, did you put both levers on? or just the shorty clutch lever? and what brand and model did you use? Any info would be greatly appreciated. THX.
