


Fork Oil Seal Replacement


Thread Starter
|
Senior Member
1st Gear Member
Joined: May 2007
Posts: 1,102
From: Oklahoma City, OK
 Fork Oil Seal Replacement
This is quick guide on replacing fork oil seals on the KLX forks.
Some of the tools that will be needed:
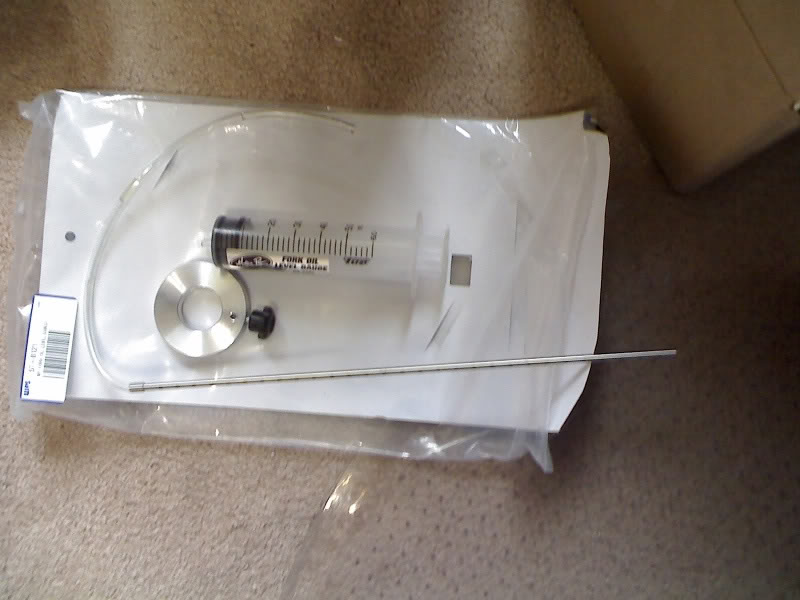
Fork Oil Level Gauge. Made by Motion Pro. Cost is $22.17 from BikeBandit.com.
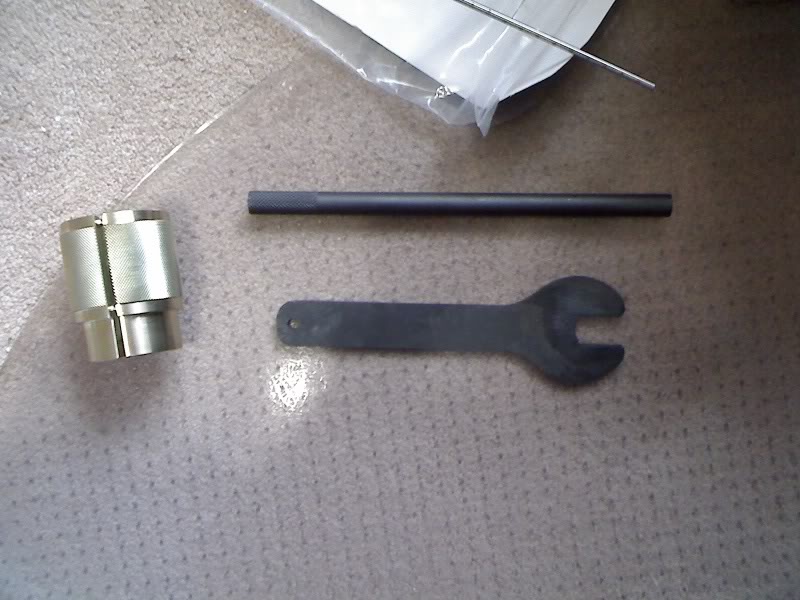
Fork Seal Driver (brass color collar) 43mm. Made by Motion Pro. Cost is $38.90.
Fork Spring Holder (black color wrench). Made by Kawasaki
Fork Rod Puller (black color rod, I call it a damper shaft extender). Made by Kawasaki.
Step 1:
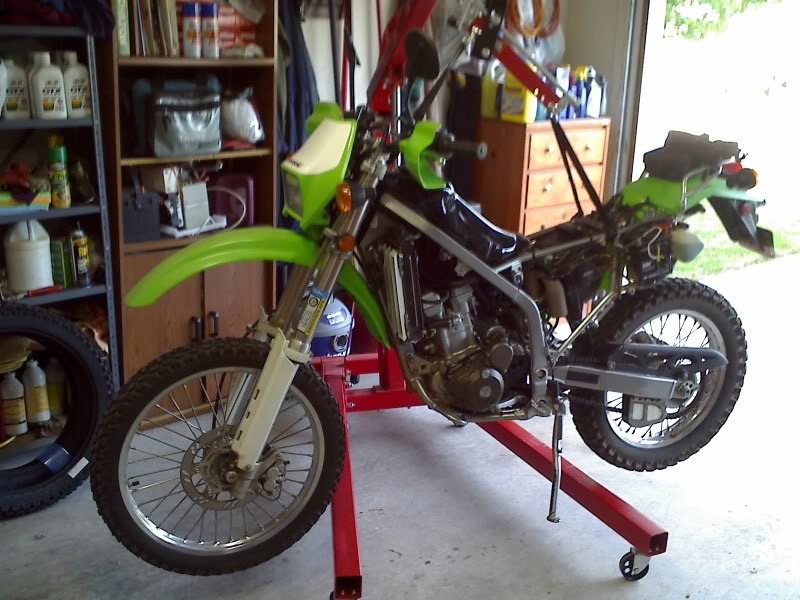
Prepare the KLX and lift it off the ground. Before removing the fork tubes. It is a good idea to make refenence marks on the handle bar and fork tubes. This way you can easily re-align the markings later when re-installing parts.
Step 2:
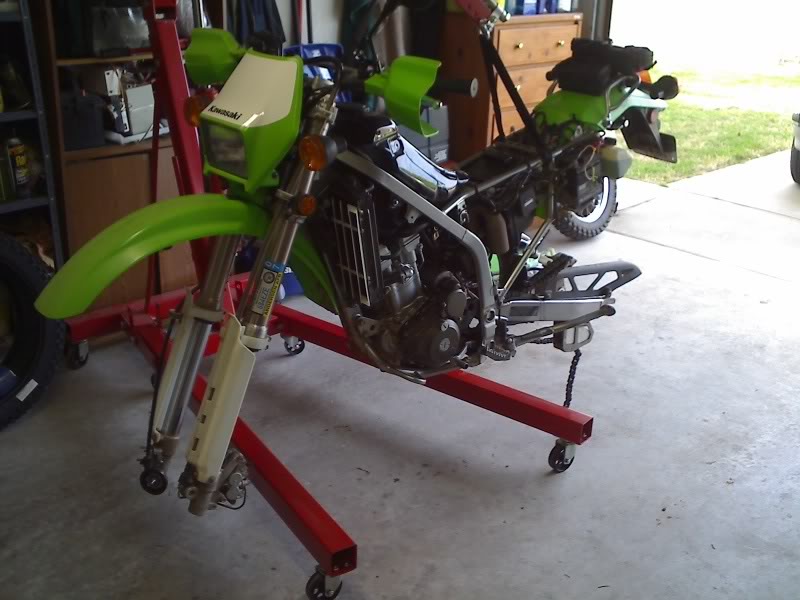
Remove the wheels. (Removing the rear wheel is not required for fork oil seal replacement. I was doing tire replacement at the time.)
Step3:
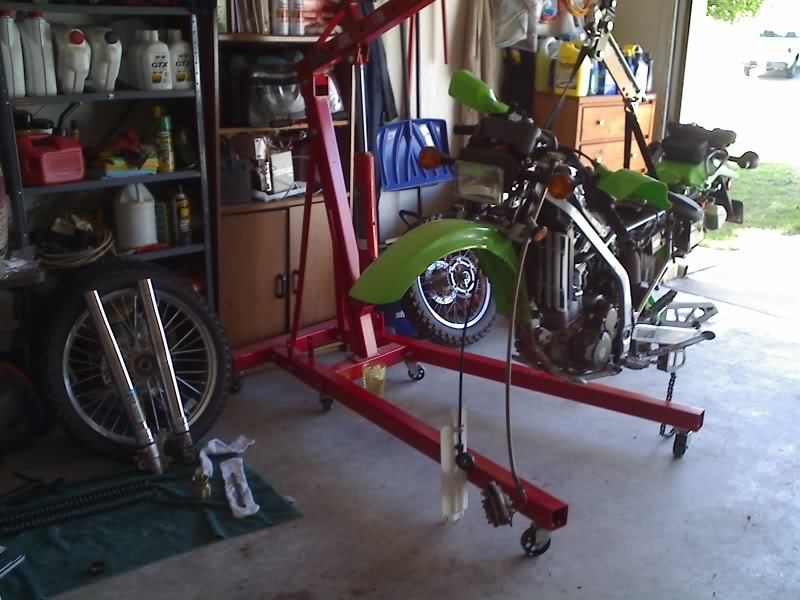
Remove the fork tubes. But before removing them competely, remove the handlebar and loosen the fork tube cap.
Step 4:
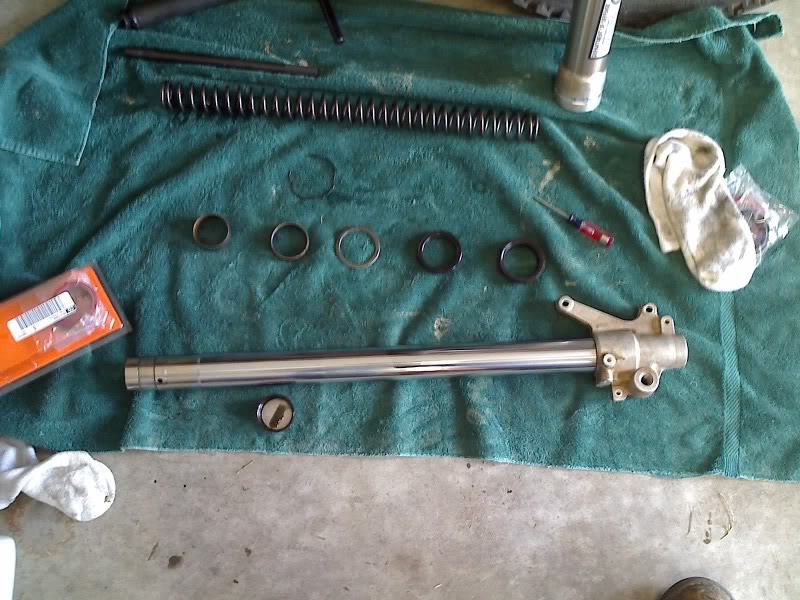
Disassemble the fork tube. The picture shows it already disassembled. So in this order, un-screw the fork tube cap. Slide outer tube down. Take a 17mm open wrench to the nut on damper shaft and un-screw the tube cap from the damper shaft. Then remove the spring. Tilt the fork tube down to pour out the fork oil. Push in and out on the damper shaft 10 times to help remove all the oil. Take a small straight slot screw driver and pry the dust seal away from the outer tube. Take a small straight slot screw driver and pry out the retaining clip on the inside of the outer tube. Lastly, take the outer tube and slide it upwards till the oil seal pops out. Be careful, it will be a sudden seperation of the inner and outer tubes.
Step 5:
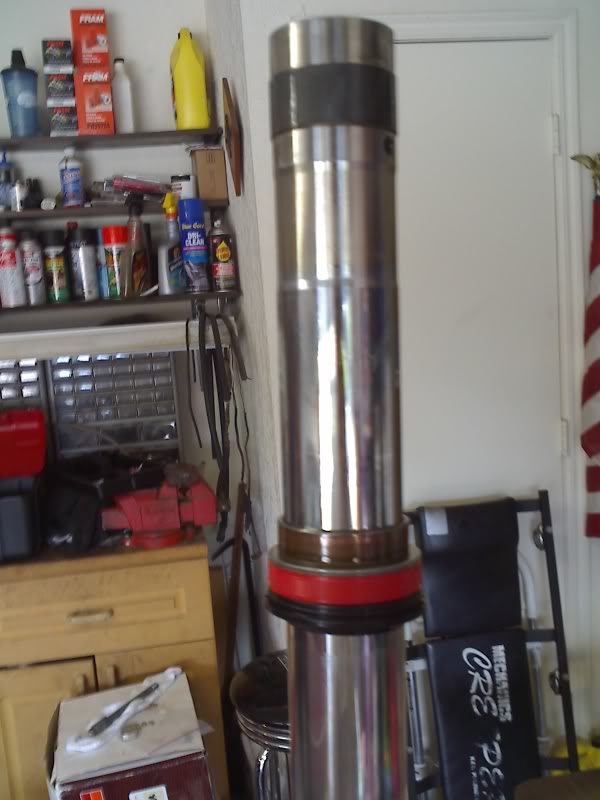
Place new parts on the inner tube in this order. Dust Seal, Oil Seal, Washer, Spacer, and the bushing.
Step 6:
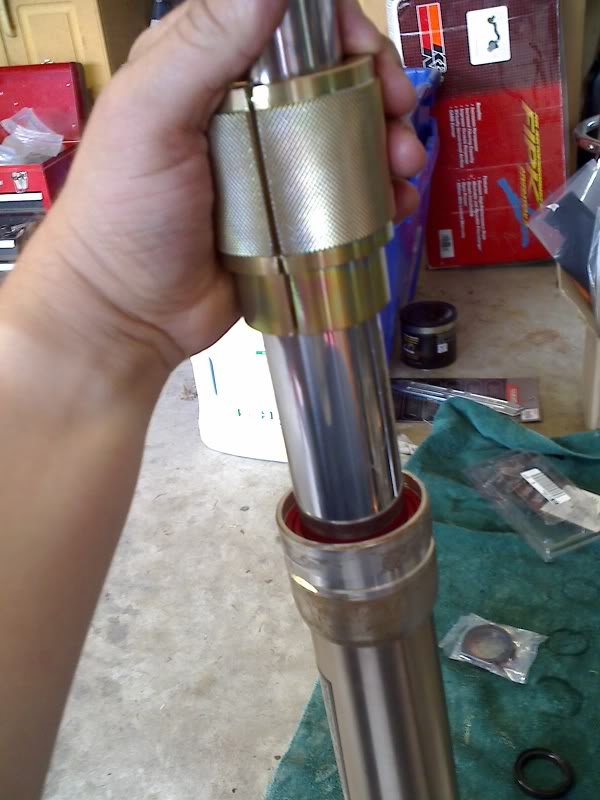
Use the seal driver to gently impact the oil seal into its seat. Re-intall the retaining clip. Lastly, hand press the dust seal into the outer tube till seal is flushed against surface.
Step 7:
Fully compress the tube and fill the tube with fork oil up to the two holes on the inner tube inside. Using a damper shaft extender, push the damper shaft up and down 5 time. Then let it sit for 5 minutes for the air bubbles to be released. Using the fork oil level gauge, set the tube depth to 95mm and slowly remove execisive oil from the tube.
Step 8:
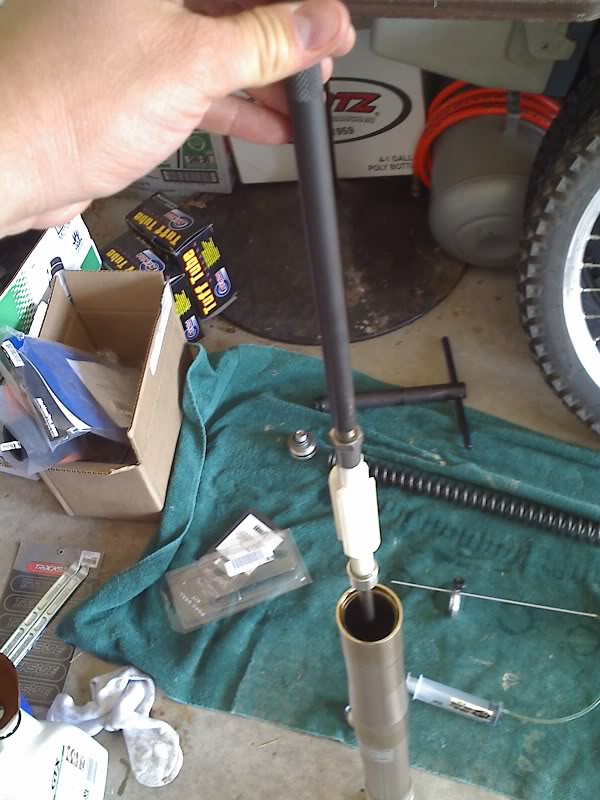
Time to re-install the spring. Using the damper shaft extending tool to help make this a little more easy.
Step 9:
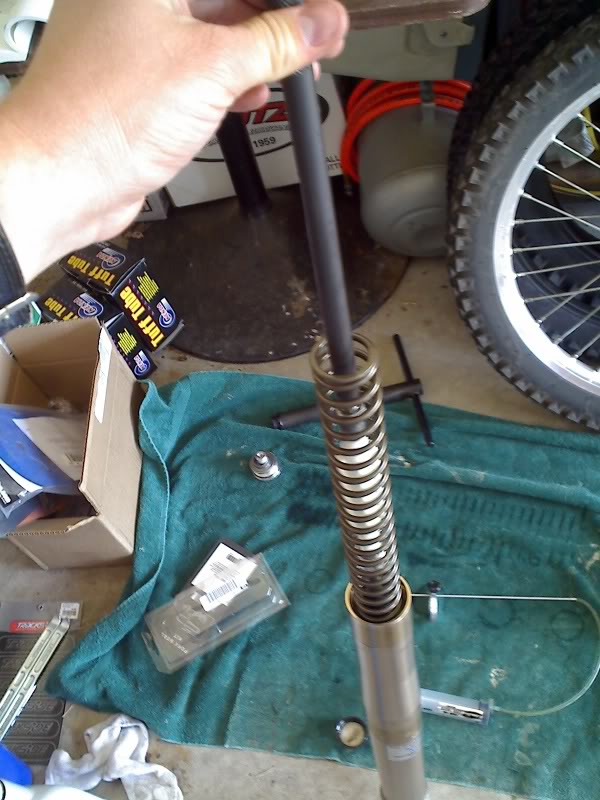
Slide the spring back in the tube.
Step 10:
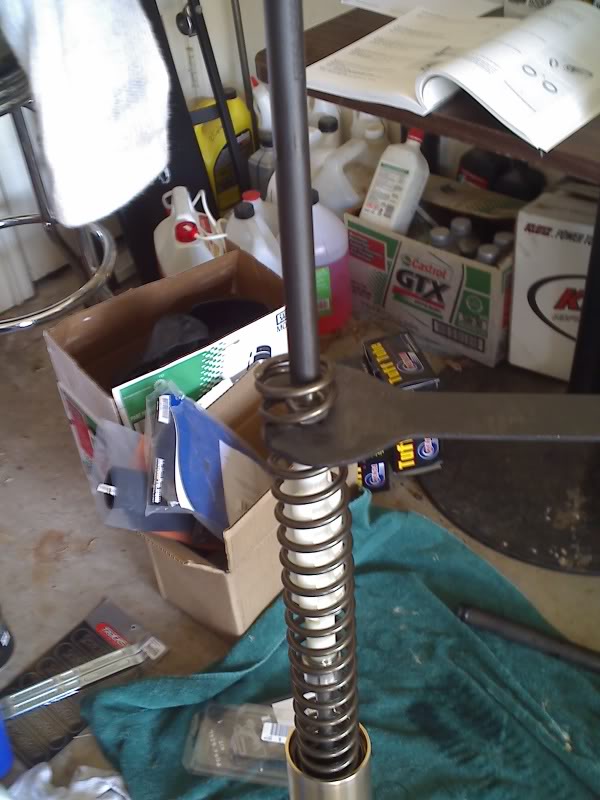
Slide the spring holder tool into place and start the screw treads on to the tube cap.
Step 11:
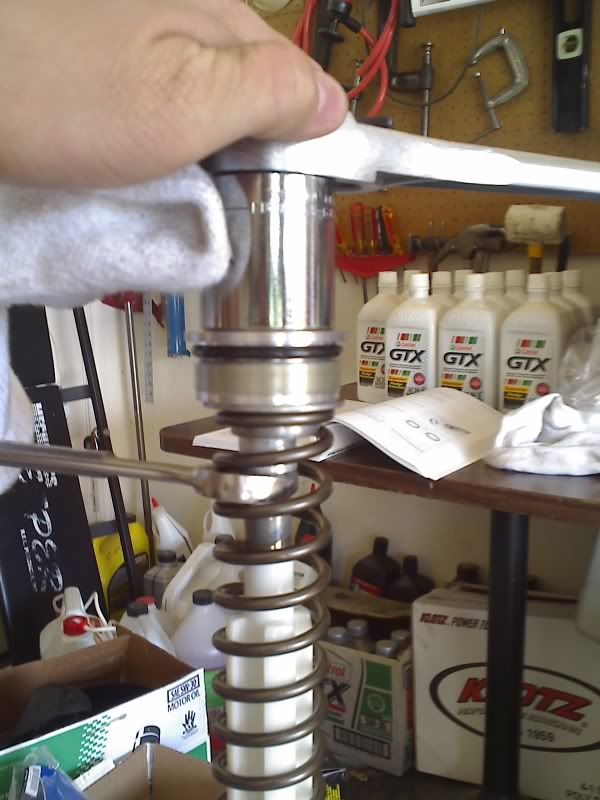
Gently tighten the cap back on to the damper shaft.
Step 12:
Reinstall the fork tube back into the triple clamp. Make sure you align the marks left on the tubes. Tighten the clamps, and then tighten the tube cap, and then re-install the handle bars.
After everything is completed. It should look like a motorcycle again. Like this:
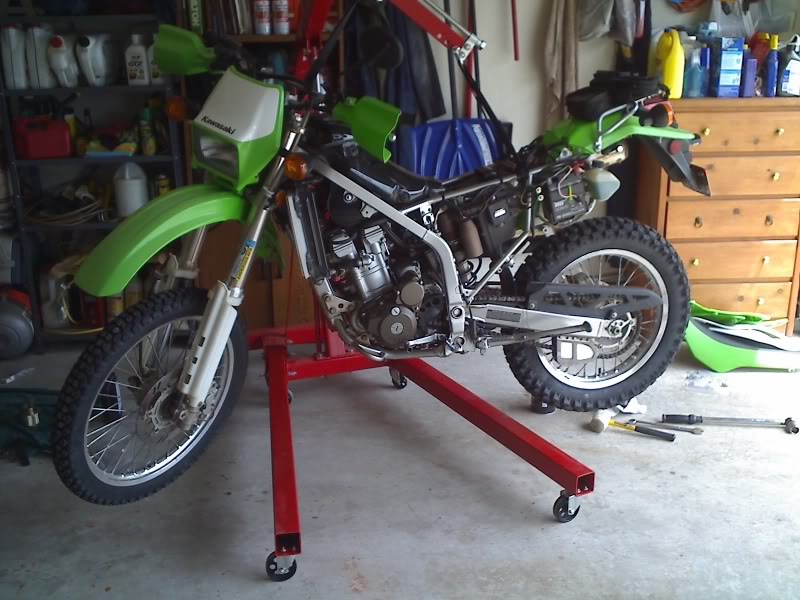
After the test drive, the KLX definitely feels like a different machine. I changed the fork oil from the OEM 5wt to 10wt. Which should help dampen the forks better and slow down the nose diving on braking. With new tires, the balance is not the same. I think the front tire has a heavy spot and feel to lumpy on the road. Then again that could be from the change of fork oil that maybe now that I'm feeling more of the road. I will give 200 miles to see any changes. If no changes, I will take the front tire off to be balanced to see if that does help.
Some of the tools that will be needed:
Fork Oil Level Gauge. Made by Motion Pro. Cost is $22.17 from BikeBandit.com.
Fork Seal Driver (brass color collar) 43mm. Made by Motion Pro. Cost is $38.90.
Fork Spring Holder (black color wrench). Made by Kawasaki
Fork Rod Puller (black color rod, I call it a damper shaft extender). Made by Kawasaki.
Step 1:
Prepare the KLX and lift it off the ground. Before removing the fork tubes. It is a good idea to make refenence marks on the handle bar and fork tubes. This way you can easily re-align the markings later when re-installing parts.
Step 2:
Remove the wheels. (Removing the rear wheel is not required for fork oil seal replacement. I was doing tire replacement at the time.)
Step3:
Remove the fork tubes. But before removing them competely, remove the handlebar and loosen the fork tube cap.
Step 4:
Disassemble the fork tube. The picture shows it already disassembled. So in this order, un-screw the fork tube cap. Slide outer tube down. Take a 17mm open wrench to the nut on damper shaft and un-screw the tube cap from the damper shaft. Then remove the spring. Tilt the fork tube down to pour out the fork oil. Push in and out on the damper shaft 10 times to help remove all the oil. Take a small straight slot screw driver and pry the dust seal away from the outer tube. Take a small straight slot screw driver and pry out the retaining clip on the inside of the outer tube. Lastly, take the outer tube and slide it upwards till the oil seal pops out. Be careful, it will be a sudden seperation of the inner and outer tubes.
Step 5:
Place new parts on the inner tube in this order. Dust Seal, Oil Seal, Washer, Spacer, and the bushing.
Step 6:
Use the seal driver to gently impact the oil seal into its seat. Re-intall the retaining clip. Lastly, hand press the dust seal into the outer tube till seal is flushed against surface.
Step 7:
Fully compress the tube and fill the tube with fork oil up to the two holes on the inner tube inside. Using a damper shaft extender, push the damper shaft up and down 5 time. Then let it sit for 5 minutes for the air bubbles to be released. Using the fork oil level gauge, set the tube depth to 95mm and slowly remove execisive oil from the tube.
Step 8:
Time to re-install the spring. Using the damper shaft extending tool to help make this a little more easy.
Step 9:
Slide the spring back in the tube.
Step 10:
Slide the spring holder tool into place and start the screw treads on to the tube cap.
Step 11:
Gently tighten the cap back on to the damper shaft.
Step 12:
Reinstall the fork tube back into the triple clamp. Make sure you align the marks left on the tubes. Tighten the clamps, and then tighten the tube cap, and then re-install the handle bars.
After everything is completed. It should look like a motorcycle again. Like this:
After the test drive, the KLX definitely feels like a different machine. I changed the fork oil from the OEM 5wt to 10wt. Which should help dampen the forks better and slow down the nose diving on braking. With new tires, the balance is not the same. I think the front tire has a heavy spot and feel to lumpy on the road. Then again that could be from the change of fork oil that maybe now that I'm feeling more of the road. I will give 200 miles to see any changes. If no changes, I will take the front tire off to be balanced to see if that does help.


Senior Member
1st Gear Member
Joined: Mar 2010
Posts: 407
From: Rio de Janeiro, Brazil
To set the new oil seal, I cut 1/8 of the old one to be able to put it around the inner tube and then remove it with everything in place.
To gauge the oil inside the tube, I used a large siringe with a straw cut to spec (104mm in my case).
Thread Starter
|
Senior Member
1st Gear Member
Joined: May 2007
Posts: 1,102
From: Oklahoma City, OK
Wow, its been a long time since I've logged in.
The tools make the job easier to do. Plus they are not that expensive. I've actually done another fork seal replacement again since this post. The Moose racing seals don't last very long. So I've gone back to the Kawi OEM seals and added fork seal savers to keep them dirt/dust free.
The tools make the job easier to do. Plus they are not that expensive. I've actually done another fork seal replacement again since this post. The Moose racing seals don't last very long. So I've gone back to the Kawi OEM seals and added fork seal savers to keep them dirt/dust free.

Junior Member
Joined: Dec 2012
Posts: 8
From: BC Canada
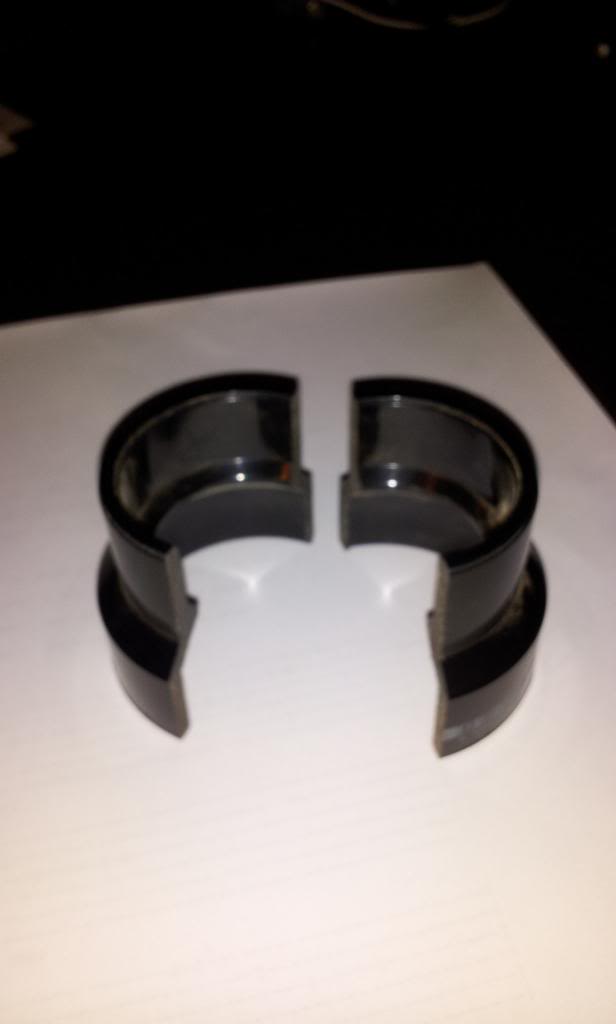
You can save a few bucks on the seal driver. Measure the fork tube and see if you can find a PVC pipe adapter at your local hardware store that is close to the right size. Cut it in half and you have your seal driver.
[IMG] [/IMG]
[IMG]
[/IMG]

Thread Starter
|
Senior Member
1st Gear Member
Joined: May 2007
Posts: 1,102
From: Oklahoma City, OK
For both tubes, it will take 1qt of oil total. But the air bleeding process requires them to be slightly overfilled, so you may need that 1 cup more oil. If you are really careful on the amount drawn after bleeding the 1st tube, you might have exactly enough for the 2nd tube.

