
Bi-Xenon HID kits?


Senior Member
Joined: Oct 2006
Posts: 3,106
From: Misawa Japan
1st Gear Member
Nice write-up, Minako.
As an alternative, here's the one I've had my eye for while, as the price slowly drops. It's a lot more expensive and has only one bulb(motorcycle kit), but in the case of HID, I have been told that the saying 'you get what you pay for' takes on a whole new meaning.
http://www.xtralights.com/index.asp?...PROD&ProdID=22
This is a stateside source for the more durable, reliable, compact and weatherproof systems that also meet Japanese industry spec.
I hope yours is a long-term success story, but the very same 'Hyper HID Parner' system you are using is on shelves over here in JA and has a high customer return rate...mainly relating to random shutdowns. Maybe the company has had some time to work out the bugs though.
Thread Starter
|
Senior Member
1st Gear Member
Joined: May 2007
Posts: 1,102
From: Oklahoma City, OK
I ordered the HID kit based on actually fellow member reviews on the TRS board. Xtralights.com was one of the kits that I was thinking of since they offered a digital ballast. Problem thou, their kits did not offer bi-xenon bulbs, just the low beam. I wanted both.
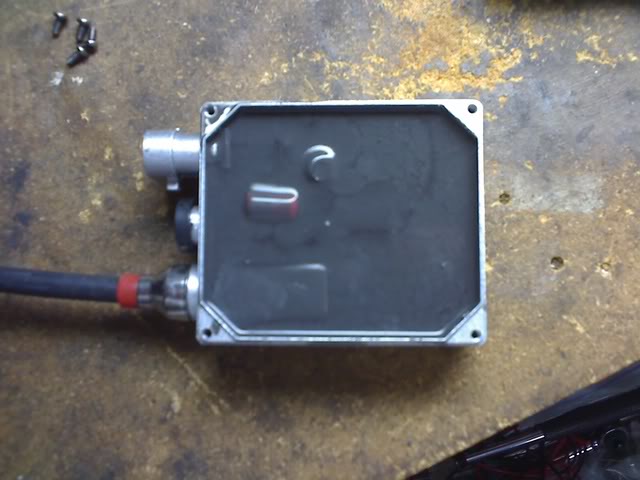
Photo the ballast with the back cover removed. Some sites offer this as Injection Molding as part of their gig. Well, heres proof that its the same for this ballast. So it should be weather, water, shock - proof for the most part.
Photo the ballast with the back cover removed. Some sites offer this as Injection Molding as part of their gig. Well, heres proof that its the same for this ballast. So it should be weather, water, shock - proof for the most part.
Senior Member
Joined: Oct 2006
Posts: 3,106
From: Misawa Japan
1st Gear Member
I ordered the HID kit based on actually fellow member reviews on the TRS board. Xtralights.com was one of the kits that I was thinking of since they offered a digital ballast. Problem thou, their kits did not offer bi-xenon bulbs, just the low beam. I wanted both.

Photo the ballast with the back cover removed. Some sites offer this as Injection Molding as part of their gig. Well, heres proof that its the same for this ballast. So it should be weather, water, shock - proof for the most part.
Photo the ballast with the back cover removed. Some sites offer this as Injection Molding as part of their gig. Well, heres proof that its the same for this ballast. So it should be weather, water, shock - proof for the most part.
OBTW, Xtralights offers the bi-xenon bulbs for an additional $40.00. It's in the flip down menu. With any luck, you will have no need for it, but just in case.

Senior Member
1st Gear Member
Joined: Nov 2005
Posts: 610
From:
I'm a huge fan of the telescoping bi-xenon kits. I have a pair in the FJR and one in my old BMW airhead. I've used them in several other bikes now gone including my Bonne and my old KLR650. Thousands of miles without issue.
Don't be deterred by the nay-sayers. HID conversion work well in all sorts of standard headlight enclosures. The key is getting the HID capsule properly aligned and aimed. Take care with those two tasks and you'll be very pleased with the results.
Don't be deterred by the nay-sayers. HID conversion work well in all sorts of standard headlight enclosures. The key is getting the HID capsule properly aligned and aimed. Take care with those two tasks and you'll be very pleased with the results.
Thread Starter
|
Senior Member
1st Gear Member
Joined: May 2007
Posts: 1,102
From: Oklahoma City, OK
I'm a huge fan of the telescoping bi-xenon kits. I have a pair in the FJR and one in my old BMW airhead. I've used them in several other bikes now gone including my Bonne and my old KLR650. Thousands of miles without issue.
Don't be deterred by the nay-sayers. HID conversion work well in all sorts of standard headlight enclosures. The key is getting the HID capsule properly aligned and aimed. Take care with those two tasks and you'll be very pleased with the results.
Don't be deterred by the nay-sayers. HID conversion work well in all sorts of standard headlight enclosures. The key is getting the HID capsule properly aligned and aimed. Take care with those two tasks and you'll be very pleased with the results.
Bi-Xenon conversion is complete. All thats left is for night to fall so I can re-align the beam and take it for its first test drive. The SPDT relay works just like I wanted it to. Plus a benefit from the relay is that it will allow more power to start the engine by shutting off the headlight.
More photos to come with a better write-through step.
Thread Starter
|
Senior Member
1st Gear Member
Joined: May 2007
Posts: 1,102
From: Oklahoma City, OK
Photo time:
Assuming that you know how to remove the plastics, I'll skip to the more important details. Also, when wiring the forks, make sure the wire clear the fork stoppers. Have the wires bundled up and zip tired for safety.
Theres not much room, but the ballast can fit on the far left. You'll need to relocate the fuse and relay to the other side. Which is simple.
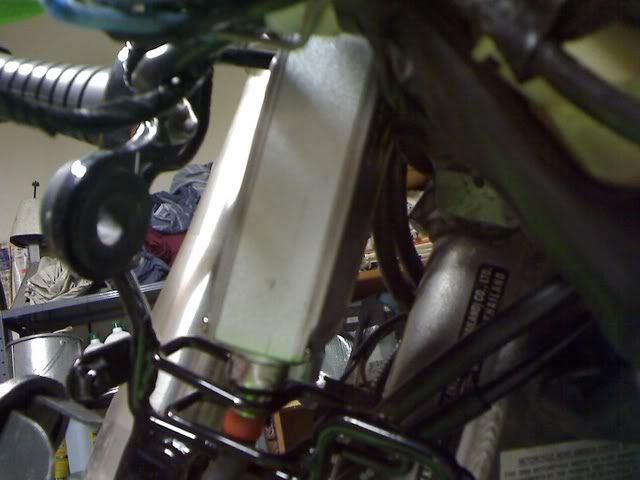
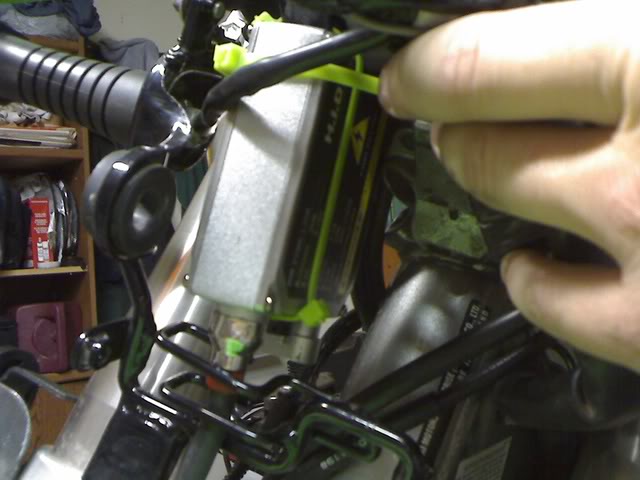
Ballast install. One trick is to route the ballast wire through the bracket which held the fuse before. Then zip tie to hold it securely.
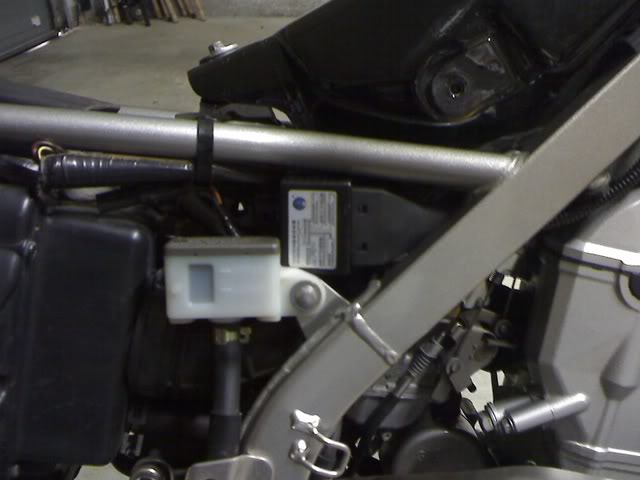
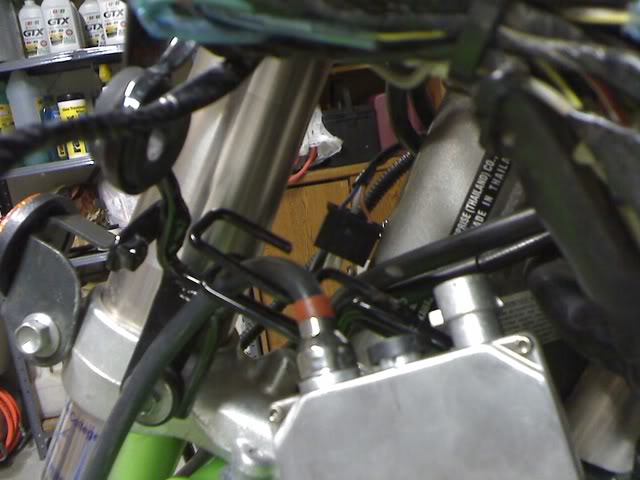
Location of the hi/low on/off relay.
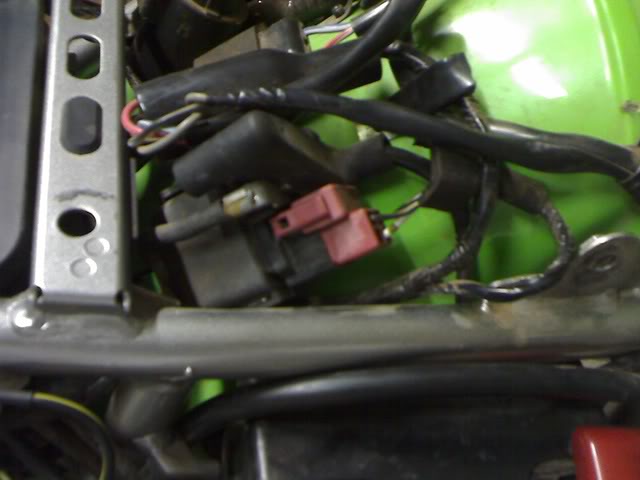
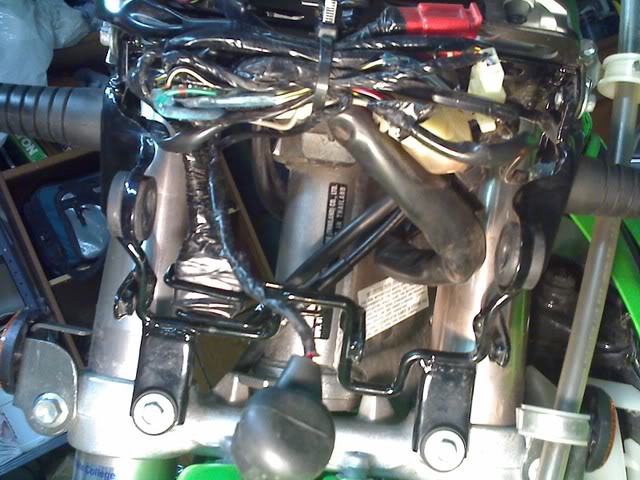
Starter relay, it will be the one with the red connector.
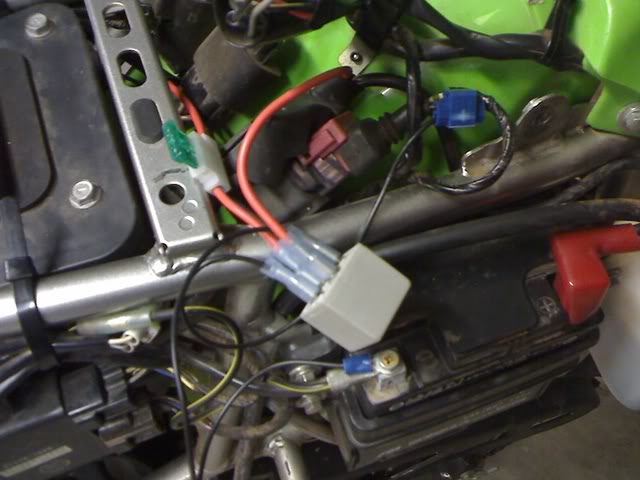
The SPDT relay. I actually used the starter relay as the source of power also, since it connects directly to the POS + side of the battery. Also to note, for it to shut-off the headlight during startup. You'll need to splice into the soild black wire that goes to the starter relay. It will be the top right wire, looking at the relay with the bigger power wires on top.

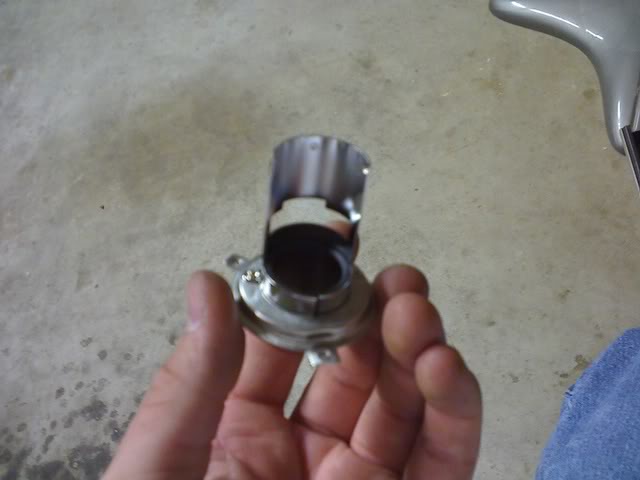
The HID bulb light shield. I removed the tip of it by removing the tiny screw that was there. Also the light shield can be seperated for easier install. Install the light shield first, then fit the rubber gourment over, then install the HID bulb.
Old Halogen light spray. Top is low beam, bottom is high beam.
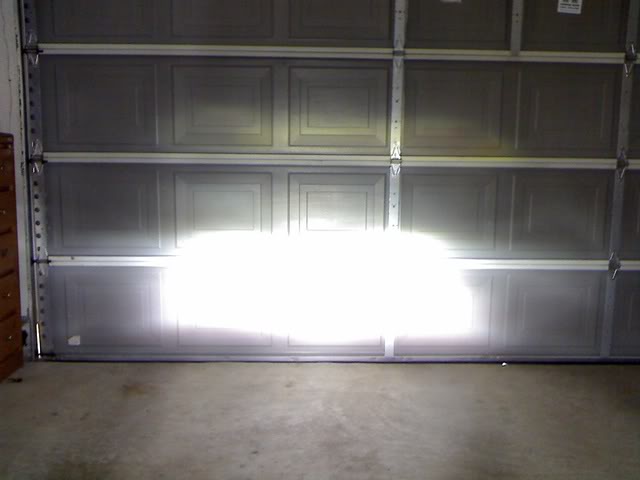
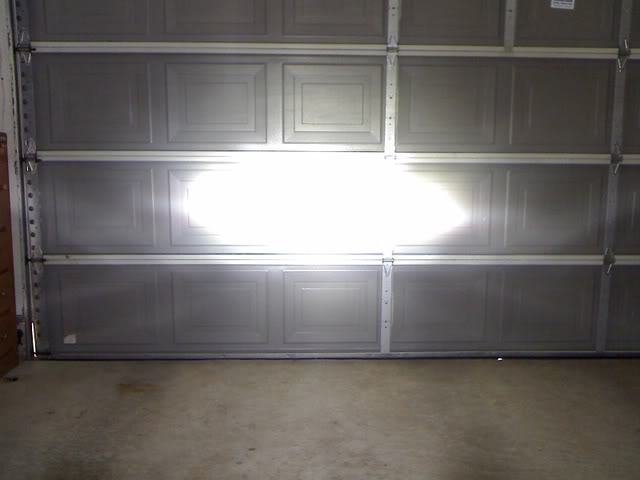
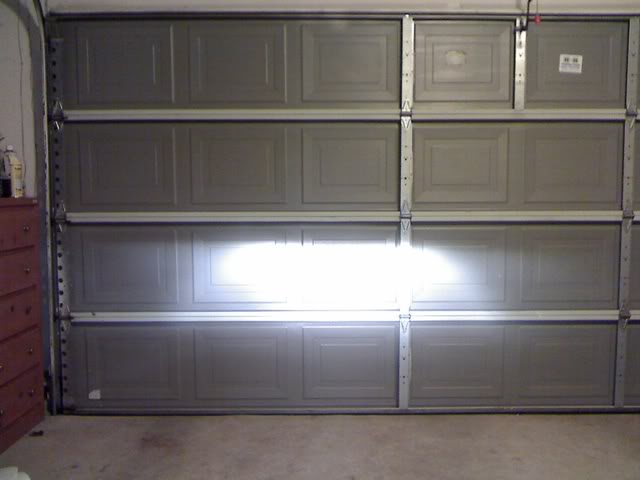
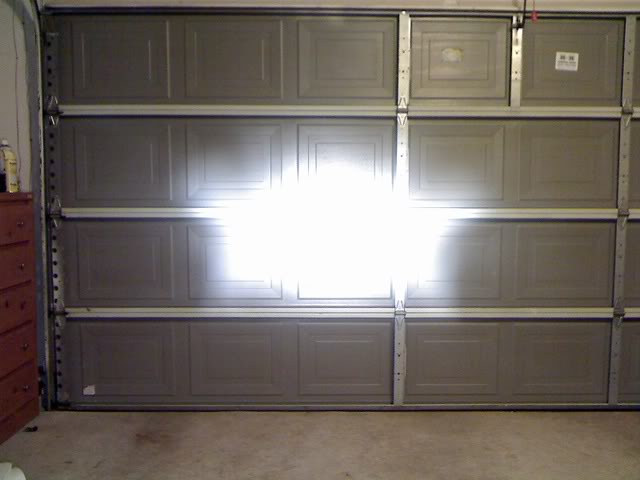
New HID light spray. Top is low beam, bottom is high beam.
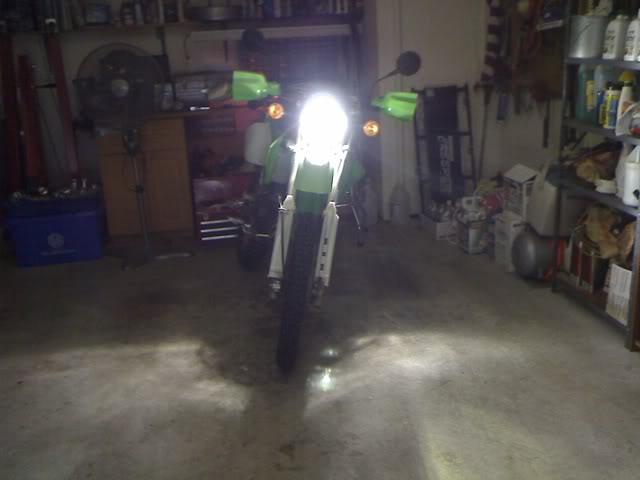

Image of the headlight
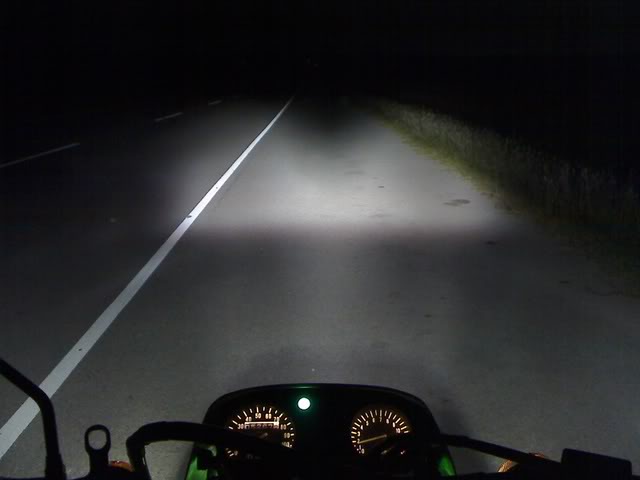

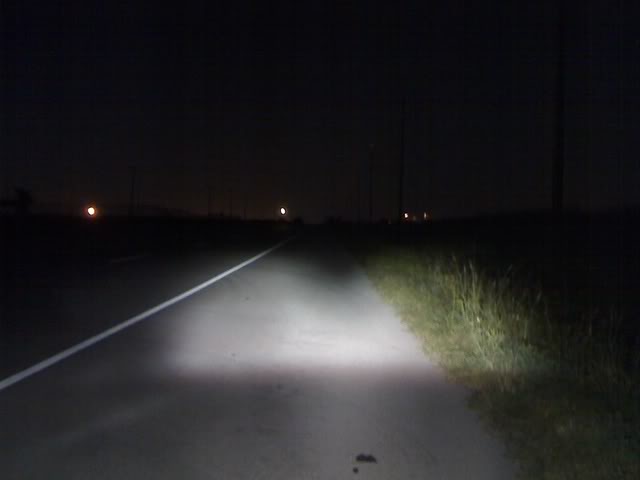
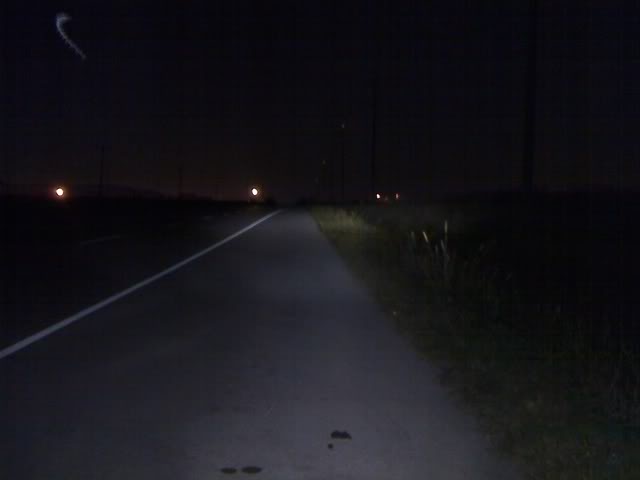
Images of the light beam. First two is low (1st pic) and hi (2nd pic) beam facing down hill. The last two are the low (3rd pic) and hi (4th pic) beam facing up hill. Note how the signs light up from about a 1/8 of a mile away.
Assuming that you know how to remove the plastics, I'll skip to the more important details. Also, when wiring the forks, make sure the wire clear the fork stoppers. Have the wires bundled up and zip tired for safety.
Theres not much room, but the ballast can fit on the far left. You'll need to relocate the fuse and relay to the other side. Which is simple.
Ballast install. One trick is to route the ballast wire through the bracket which held the fuse before. Then zip tie to hold it securely.
Location of the hi/low on/off relay.
Starter relay, it will be the one with the red connector.
The SPDT relay. I actually used the starter relay as the source of power also, since it connects directly to the POS + side of the battery. Also to note, for it to shut-off the headlight during startup. You'll need to splice into the soild black wire that goes to the starter relay. It will be the top right wire, looking at the relay with the bigger power wires on top.
The HID bulb light shield. I removed the tip of it by removing the tiny screw that was there. Also the light shield can be seperated for easier install. Install the light shield first, then fit the rubber gourment over, then install the HID bulb.
Old Halogen light spray. Top is low beam, bottom is high beam.
New HID light spray. Top is low beam, bottom is high beam.
Image of the headlight
Images of the light beam. First two is low (1st pic) and hi (2nd pic) beam facing down hill. The last two are the low (3rd pic) and hi (4th pic) beam facing up hill. Note how the signs light up from about a 1/8 of a mile away.
Last edited by LearjetMinako; Sep 26, 2008 at 01:58 AM.
Senior Member
Joined: Oct 2006
Posts: 3,106
From: Misawa Japan
1st Gear Member
Thanks for the write-up and pics, Minako. Great stuff!
Did you to end-up having to use any spacers between the capsule and refector for proper focus? Also, in aiming the capsule within the reflector, did you use any special technique, or did it fully seat and align with no issues?
Thanks!
Did you to end-up having to use any spacers between the capsule and refector for proper focus? Also, in aiming the capsule within the reflector, did you use any special technique, or did it fully seat and align with no issues?
Thanks!
Last edited by tremor38; Sep 26, 2008 at 08:33 AM.
Senior Member
Joined: Oct 2006
Posts: 3,106
From: Misawa Japan
1st Gear Member
Here's another brand with good reviews for reliability. This motorcylce kit comes with an extra long ballast lead to allow more flexibilty in locating/mounting your ballast.
http://www.kbcarstuff.com/4300k_Moto...h-fslash-l.htm
http://www.kbcarstuff.com/4300k_Moto...h-fslash-l.htm
Last edited by tremor38; Sep 26, 2008 at 10:52 AM.
Thread Starter
|
Senior Member
1st Gear Member
Joined: May 2007
Posts: 1,102
From: Oklahoma City, OK
Thanks for the write-up and pics, Minako. Great stuff!
Did you to end-up having to use any spacers between the capsule and refector for proper focus? Also, in aiming the capsule within the reflector, did you use any special technique, or did it fully seat and align with no issues?
Thanks!
Did you to end-up having to use any spacers between the capsule and refector for proper focus? Also, in aiming the capsule within the reflector, did you use any special technique, or did it fully seat and align with no issues?
Thanks!
The light is defenitly brighter. I am finding little problems with it but I'm working on those. One problem is the dead spot in the center of the beam. You can see it in the low beam photos. Also, the high beam seems to aim too high. Almost parallel to the road. And the low beam is slightly too low (lights the road greatly, but want it to be slightly more ahead without the high beam aiming for the sky). Next step I'll take to see if it works is to remove the light all together. So it will be just the HID bulb changing the focal point. And in the more extreme case, I'll mod the light shield to similar light blockage of the Halogen H4 bulb.
Last edited by LearjetMinako; Sep 26, 2008 at 12:04 PM.