DIY Cylinder Head and Valve refresh
#1
 08-02-2014, 03:59 AM


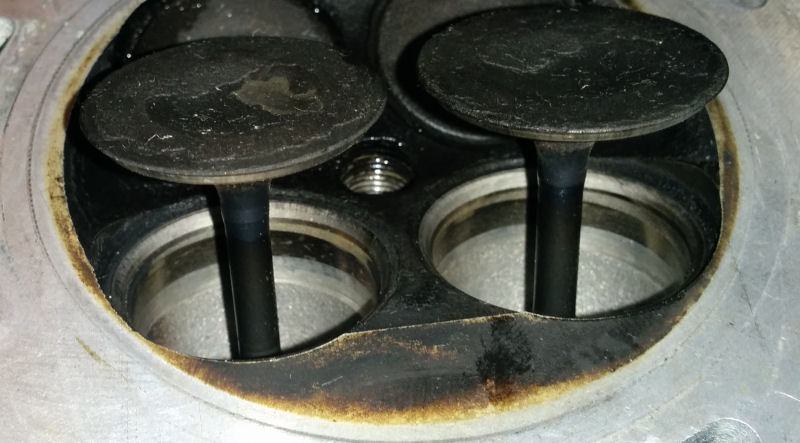
After a few exchanges with a mate during the week about my KLX valves I decided to have a go at taking my original valves out to inspect them and their seats. I found a couple of guides on how to take the valves out without a valve spring compressor so I gave it a go. I only did the intake valves as they were the ones out of spec. It was actually easier than I thought it would be, but putting them back in I reckon I will need a spring compressor (and probably a bit of assistance too).
Valves in the process of being removed once I had removed the retainers on the other end
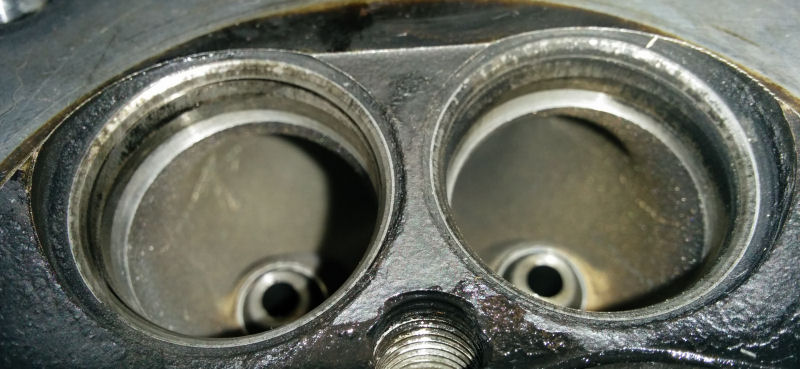
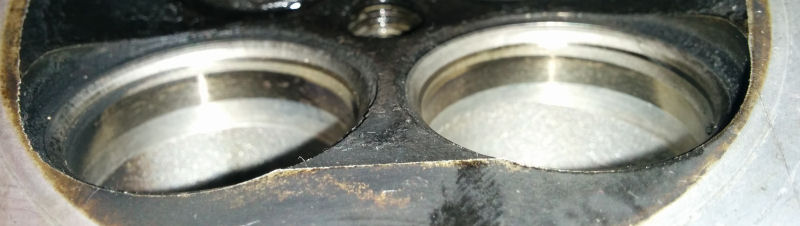
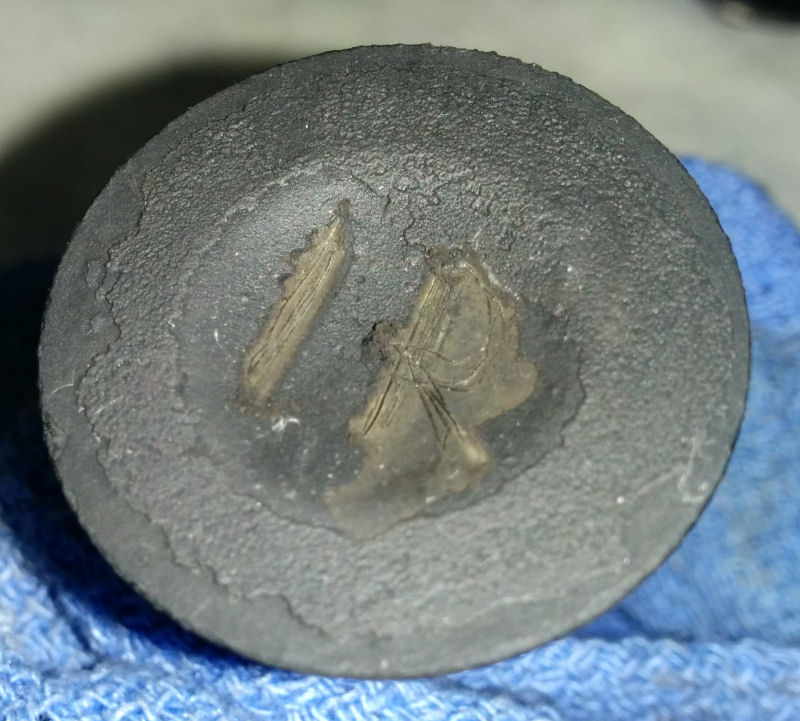
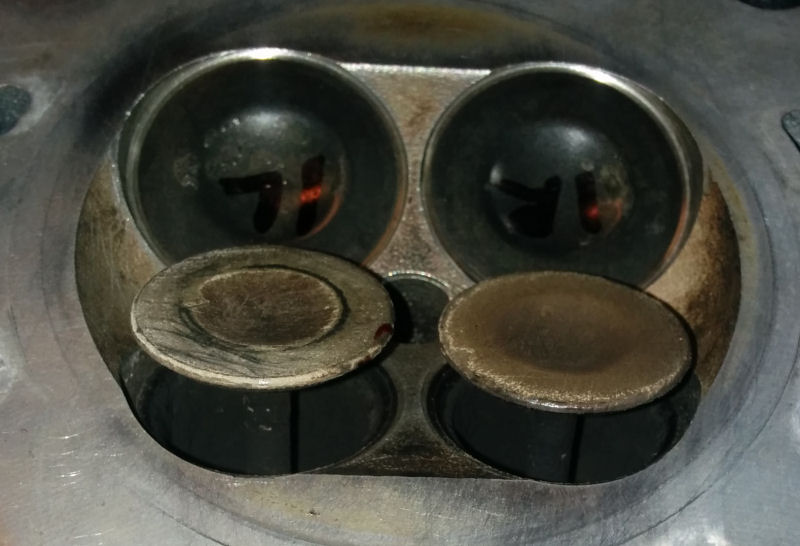
This is what the intake valve seats look like from a couple of different angles. I'm certainly no expert but they don't look to be in great condition to me. I would have thought that they should be nice and smooth and clean.
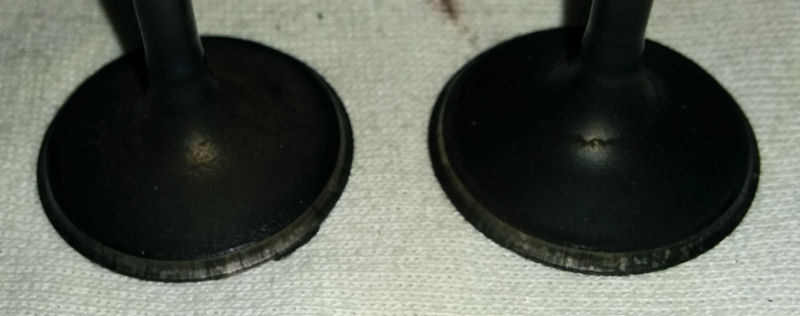
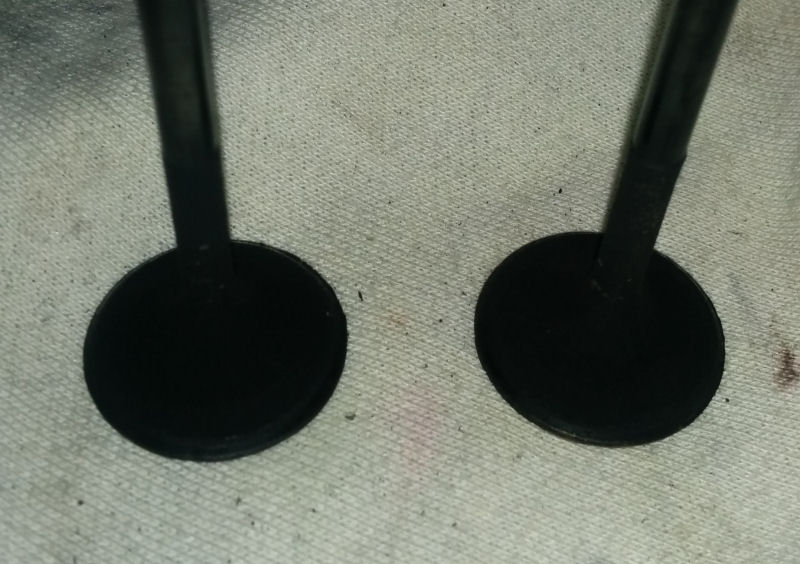
Bottom of the valves. There is a pretty bad carbon build-up on the bottom of the valves. I can't see this being a good thing?
Top of the valves. Again, there looks to be a carbon build-up on those edges that mate with the valve seats... could have been the source of my loss of compression issues? But then I would have expected to need to put in thicker shims rather than thinner ones to get them back in spec.
I am probably going to whip the replacement head off my bike and see if I can use the valves out of that in the original head with a little bit of lapping to get the seal nice and tight. Once again, John B has offered to help me out which I am very grateful for.
Valves in the process of being removed once I had removed the retainers on the other end
This is what the intake valve seats look like from a couple of different angles. I'm certainly no expert but they don't look to be in great condition to me. I would have thought that they should be nice and smooth and clean.
Bottom of the valves. There is a pretty bad carbon build-up on the bottom of the valves. I can't see this being a good thing?
Top of the valves. Again, there looks to be a carbon build-up on those edges that mate with the valve seats... could have been the source of my loss of compression issues? But then I would have expected to need to put in thicker shims rather than thinner ones to get them back in spec.
I am probably going to whip the replacement head off my bike and see if I can use the valves out of that in the original head with a little bit of lapping to get the seal nice and tight. Once again, John B has offered to help me out which I am very grateful for.
#2
08-02-2014, 04:01 AM
Having had a go at the intake valves earlier I had to satisfy my curiosity as to what condition the exhaust valve seats are in. I had started scrubbing the head clean with a wire brush when I noticed that there was a fair build-up of a lighter coloured substance on the exhaust valves, which made me think the other side of the valves might not be in as good condition as I had assumed. So I popped the valve exhaust holders off and pulled the exhaust valves out. You can see where I scraped some of the deposits off the valve on the left of the pic.
Taking the valves out I was a little surprised at how much soot build-up there was on the valve. This included deposits on the part of the valve that sits in the valve seat. So where I had originally thought that the loss of compression was on the intake valves, I now think it is far more likely the exhaust valves.
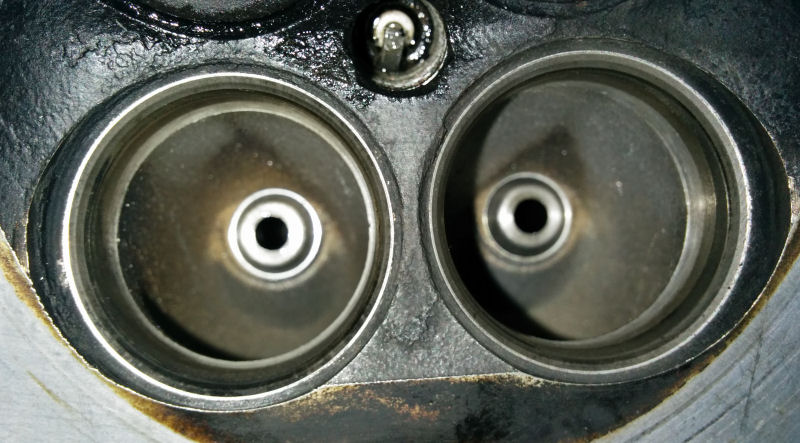
The valve seats, again, don't look great I don't think. Hopefully just a bit of lapping will make them serviceable though.
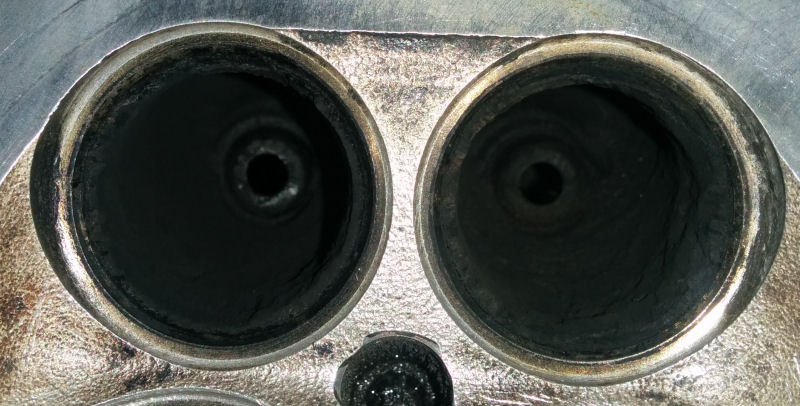
Looking inside the exhaust valve ports, once again, there is a significant build-up of soot in them. This cannot be good. I have pulled out the dremel and wire-brush bit and taken to the ports to clean them out as much as I can. A LOT of soot dust came out, and although they are looking better I can still see deposits in there. I'm just not sure how far I go trying to clean them out before I start doing damage.
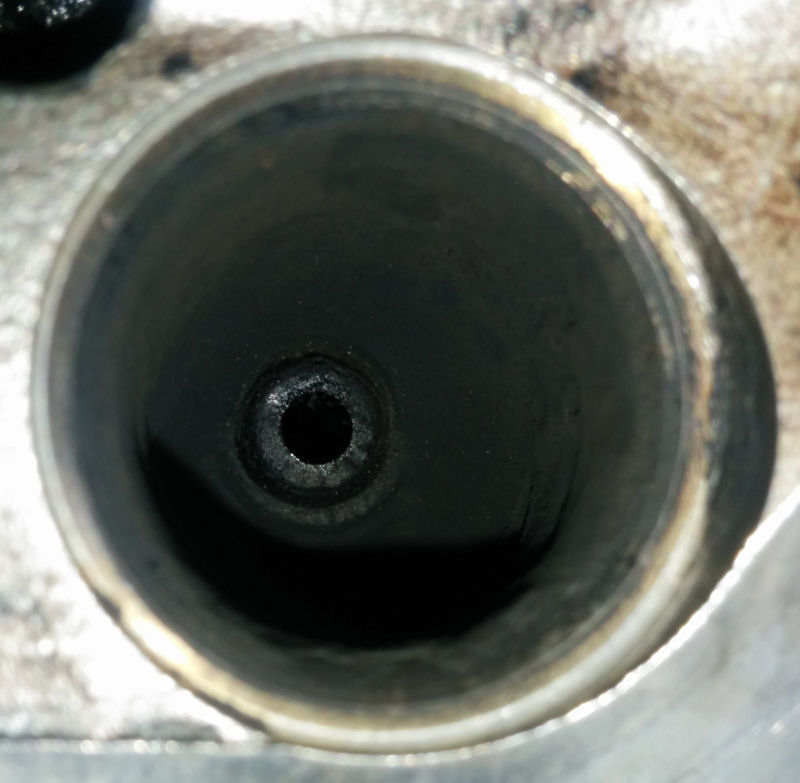
So now I plan on cleaning and polishing up the valves as best I can, lapping them into the seats with a bit of grinding paste, and seeing how I go from there.
Taking the valves out I was a little surprised at how much soot build-up there was on the valve. This included deposits on the part of the valve that sits in the valve seat. So where I had originally thought that the loss of compression was on the intake valves, I now think it is far more likely the exhaust valves.
The valve seats, again, don't look great I don't think. Hopefully just a bit of lapping will make them serviceable though.
Looking inside the exhaust valve ports, once again, there is a significant build-up of soot in them. This cannot be good. I have pulled out the dremel and wire-brush bit and taken to the ports to clean them out as much as I can. A LOT of soot dust came out, and although they are looking better I can still see deposits in there. I'm just not sure how far I go trying to clean them out before I start doing damage.
So now I plan on cleaning and polishing up the valves as best I can, lapping them into the seats with a bit of grinding paste, and seeing how I go from there.
#4
08-02-2014, 04:18 PM
Join Date: May 2014
Location: Frederick
Posts: 17
I agree that your compression problems are due to soot buildup on the exhausts and unburned goo buildup on the intakes. What kind of fuel are you running? How's your plug look? Oil change interval? Additives you'e been putting in?
How many miles, BTW?
As long as the head's off, are you considering putting in a new piston ring? Or maybe a Bill Blue kit (sell the wife on this idea first, LOL)?
How many miles, BTW?
As long as the head's off, are you considering putting in a new piston ring? Or maybe a Bill Blue kit (sell the wife on this idea first, LOL)?
#5
08-03-2014, 09:36 AM
Had a go at lapping the exhaust valves today with my mate John's help. They required medium grinding paste at first, followed by the fine grinding paste. They actually turned out pretty well I think.

When it came to re-fitting the valves things were not so simple. First we nearly lost one of the valve spring holders in the bottom of the valve recess, so if you do plan on doing this job yourself please be careful to note make the same mistake. Here they are in place:
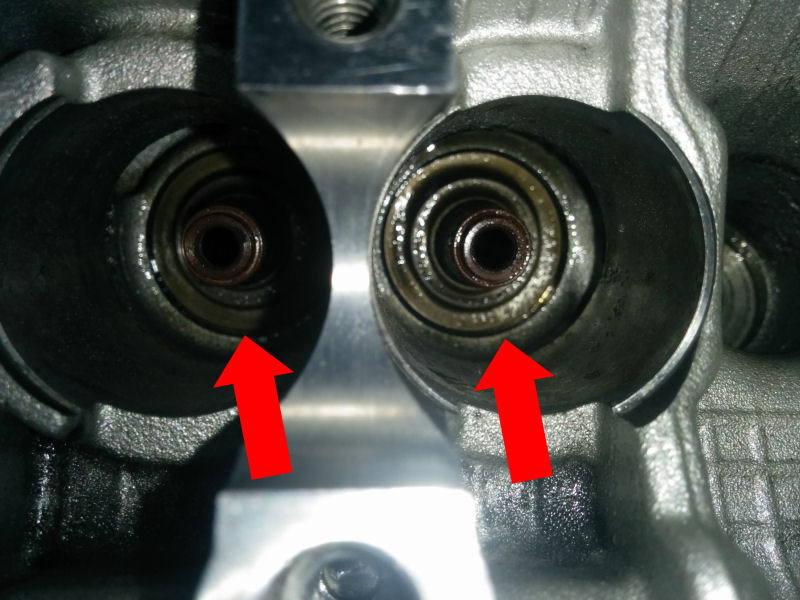
These are the holders removed from the cylinder head.
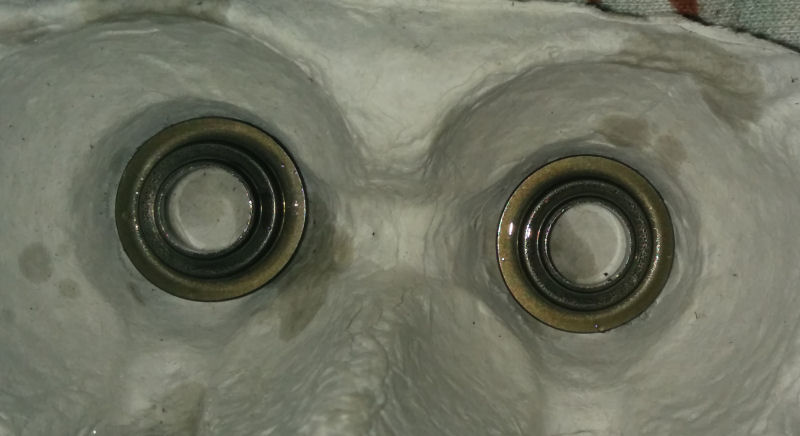
Unfortunately we did not get to the intake valves as they were just too far gone. I am going to have to make another plan. I am thinking of removing the valves from the replacement head I have on the bike at the moment, although if I can get them nice and quick and cheap I may do that instead. Given I have already spent the money on the replacement head I am thinking I may as well just use those valves... although I do hope to use the head in the future with a larger carb. I guess my patience, or lack thereof, will end up making my decision for me.
When it came to re-fitting the valves things were not so simple. First we nearly lost one of the valve spring holders in the bottom of the valve recess, so if you do plan on doing this job yourself please be careful to note make the same mistake. Here they are in place:
These are the holders removed from the cylinder head.
Unfortunately we did not get to the intake valves as they were just too far gone. I am going to have to make another plan. I am thinking of removing the valves from the replacement head I have on the bike at the moment, although if I can get them nice and quick and cheap I may do that instead. Given I have already spent the money on the replacement head I am thinking I may as well just use those valves... although I do hope to use the head in the future with a larger carb. I guess my patience, or lack thereof, will end up making my decision for me.

Thread
Thread Starter
Forum
Replies
Last Post