KLX250s FAQ and links
#31
 02-13-2015, 04:32 AM


So about the clutch cable... I'm pretty sure my 06 KLX250S (KLX250H6F) has risers on it from the previous owner.
The FAQ here implies that the KLX300 cables are shorter than the 06-07 KLX250S clutch cables, but longer than the 2009+ clutch cables.
I'm not sure which clutch cable the PO had on this bike, but it was rubbing against the head stem with the risers.
A 2006 KLX300 clutch cable from motopro looked about the same length or shorter, but once I installed it, it worked fine! No rubbing at all. Maybe the different metallic bend made a difference in the angle, or maybe just utilizing the lower adjustment nut made the difference.
TL;DR - If you have a 06-07 KLX250S and you have issues with your clutch cable, a 2006 KLX300 clutch cable may work just fine (and isn't necessarily worse than the stock cable).
#32
02-13-2015, 05:35 PM
Thanks Zeno. That was my personal experience with the KLX300 cable. I wonder if the cable I received was for something else? I haven't seen a report from any other '06/'07 owners; you're the first one. Do you have a measurement between the two cables? I'd like to post that up.
#33
02-13-2015, 11:12 PM

Join Date: Dec 2013
Location: Maple Ridge, BC Canada
Posts: 288
I have a 2011 and a 2009, I ordered a KLX300 clutch cable (because I'd installed 1" bar risers) from the dealership, when it arrived, it was definitely about 2-3" (I didn't measure the exact difference) longer than the stock 09-up clutch cable. I don't know about the 06-07 cable length. I ended up putting in a Moose Racing EasyPull clutch system (makes the clutch pull much easier), which also adds length to the clutch cable, if needed.

#36
06-04-2015, 01:07 PM

LinkS FOR Google Documents for:
KLX250 Cheap Mods (work on all models)
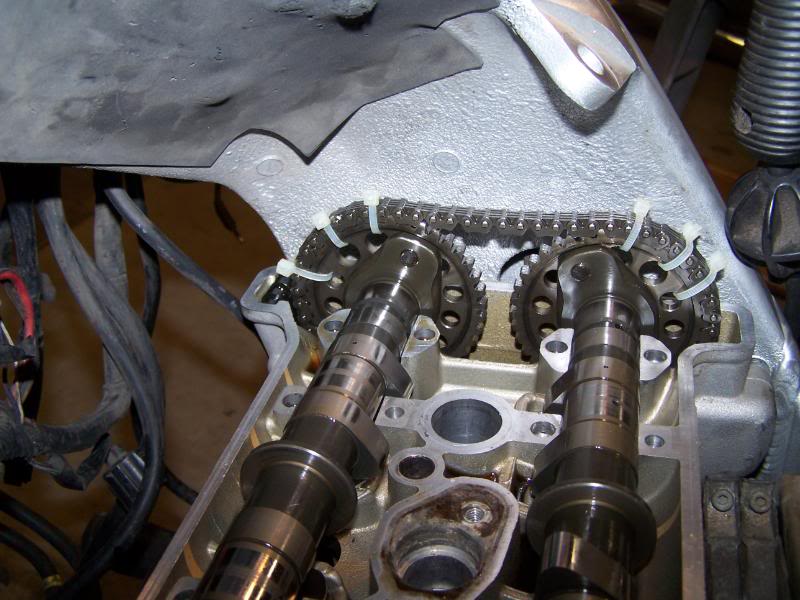
Marcelino Cam Timing Mddification - Just the facts folks (condensed version for the how-to of the modification without all the theory and reasoning)
The files should open. Feel free to PM me if they do not.
KLX250 Cheap Mods (work on all models)
Marcelino Cam Timing Mddification - Just the facts folks (condensed version for the how-to of the modification without all the theory and reasoning)
The files should open. Feel free to PM me if they do not.
#37
11-27-2015, 01:54 PM
Join Date: May 2009
Location: Fond Du Lac, WI
Posts: 63
Originally Posted by 1994klr250, post: 28102911, member: 67273
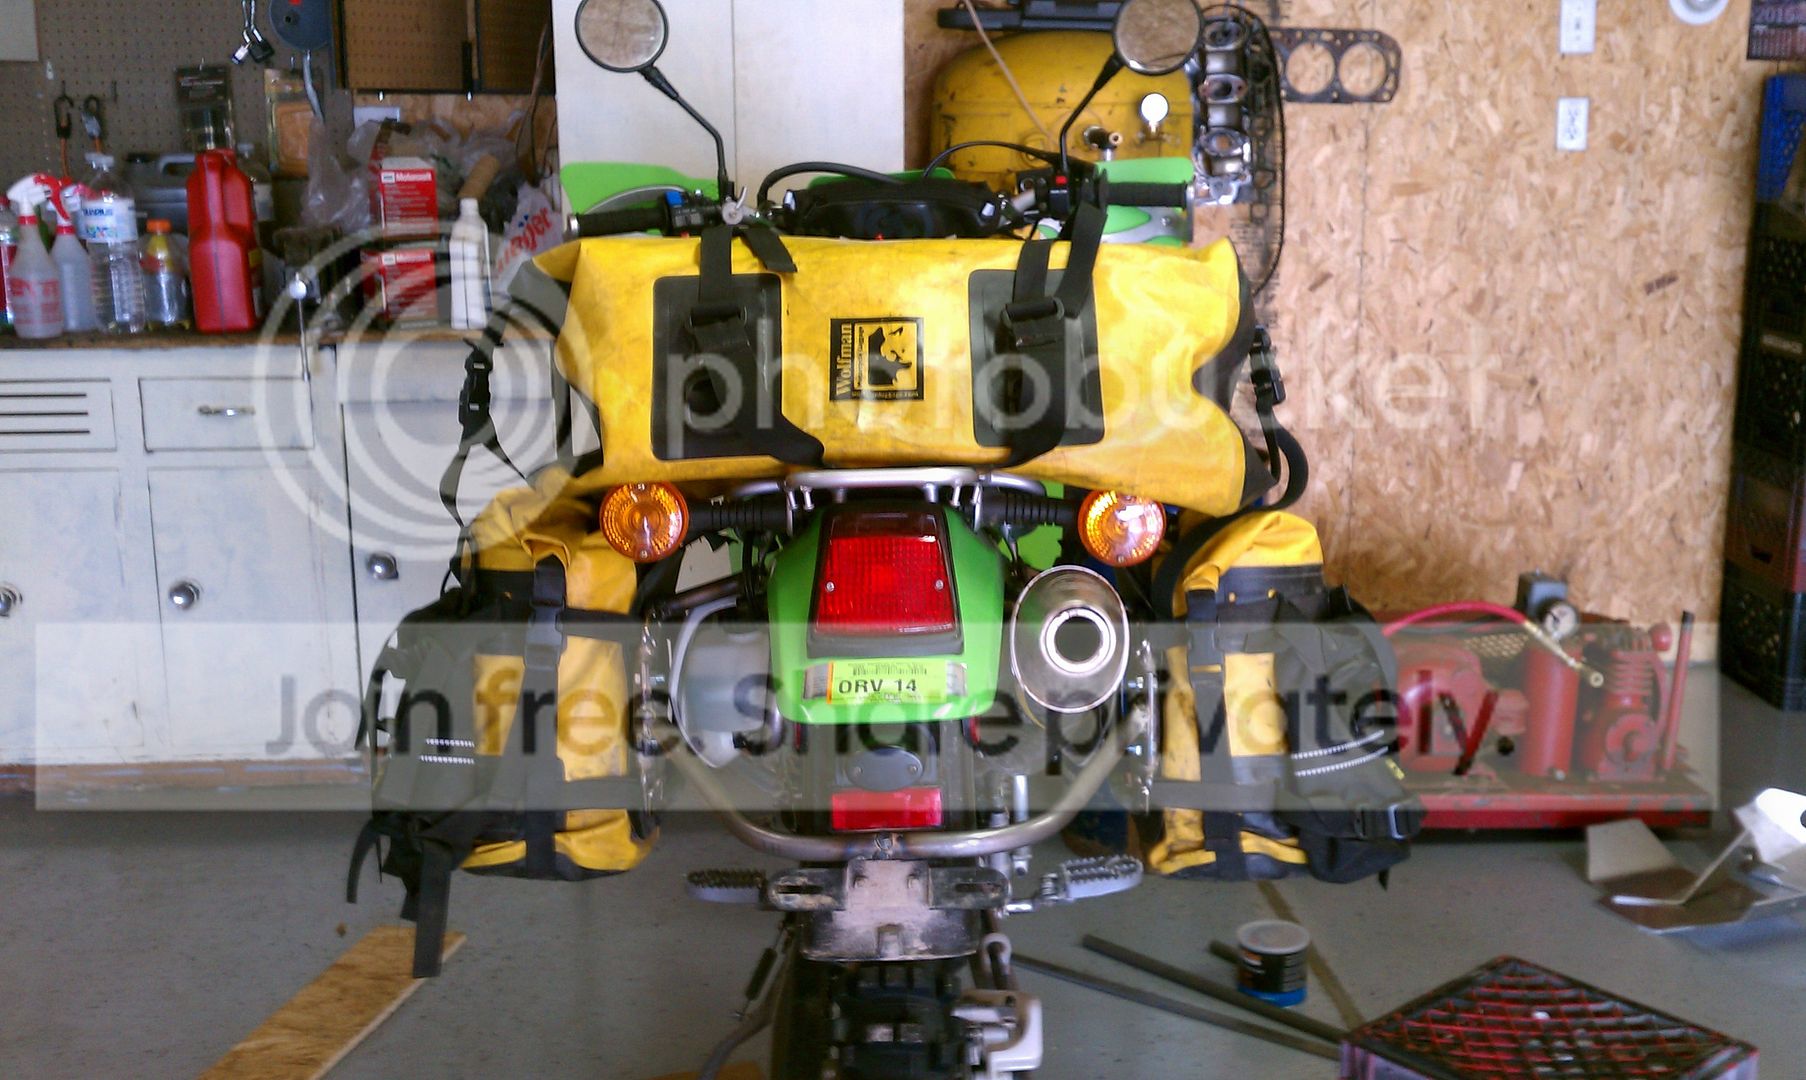
A few pages back in this Thread there was a fair amount of debate over the strength of the sub frame of the KLX 250. I own a 2006 that I've slowly been building into a medium distance adventure bike. I already built a set of rear racks to hold wolfman bags, but I knew I wanted a top rack behind the seat to put a milk crate or bag on. So I did a little bit of digging and found that KLX's can have issues with putting weight behind the seat. Here's a few pictures I came across showing what can happen when carry weight behind the seat while riding over rough terrain.
Not my pictures and this is a KLX 300 which the KLX 250 sub frame is based on.

It seems they snap just aft of the point where the lower sub frame connects to the top tube.
A KLX 250 snapped in the same place.
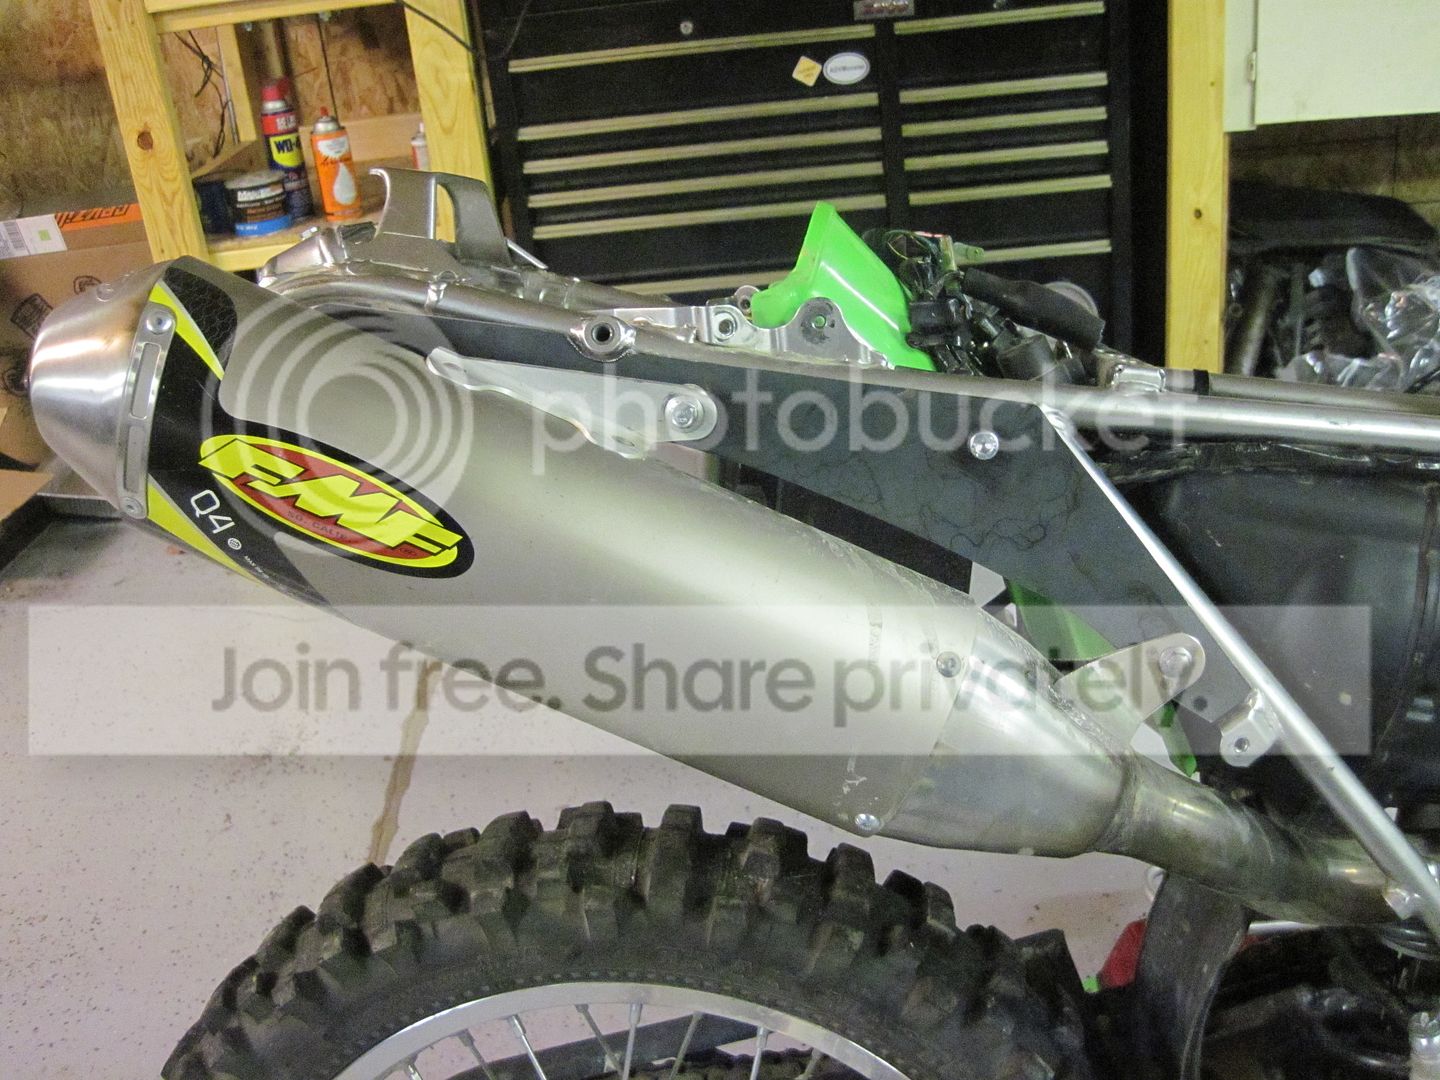
To avoid this issue I saw this on the web if you are no longer using the stock exhaust system, which I am no longer using.
K&T : Seat Rail Reinforcement Plate [180215-08]

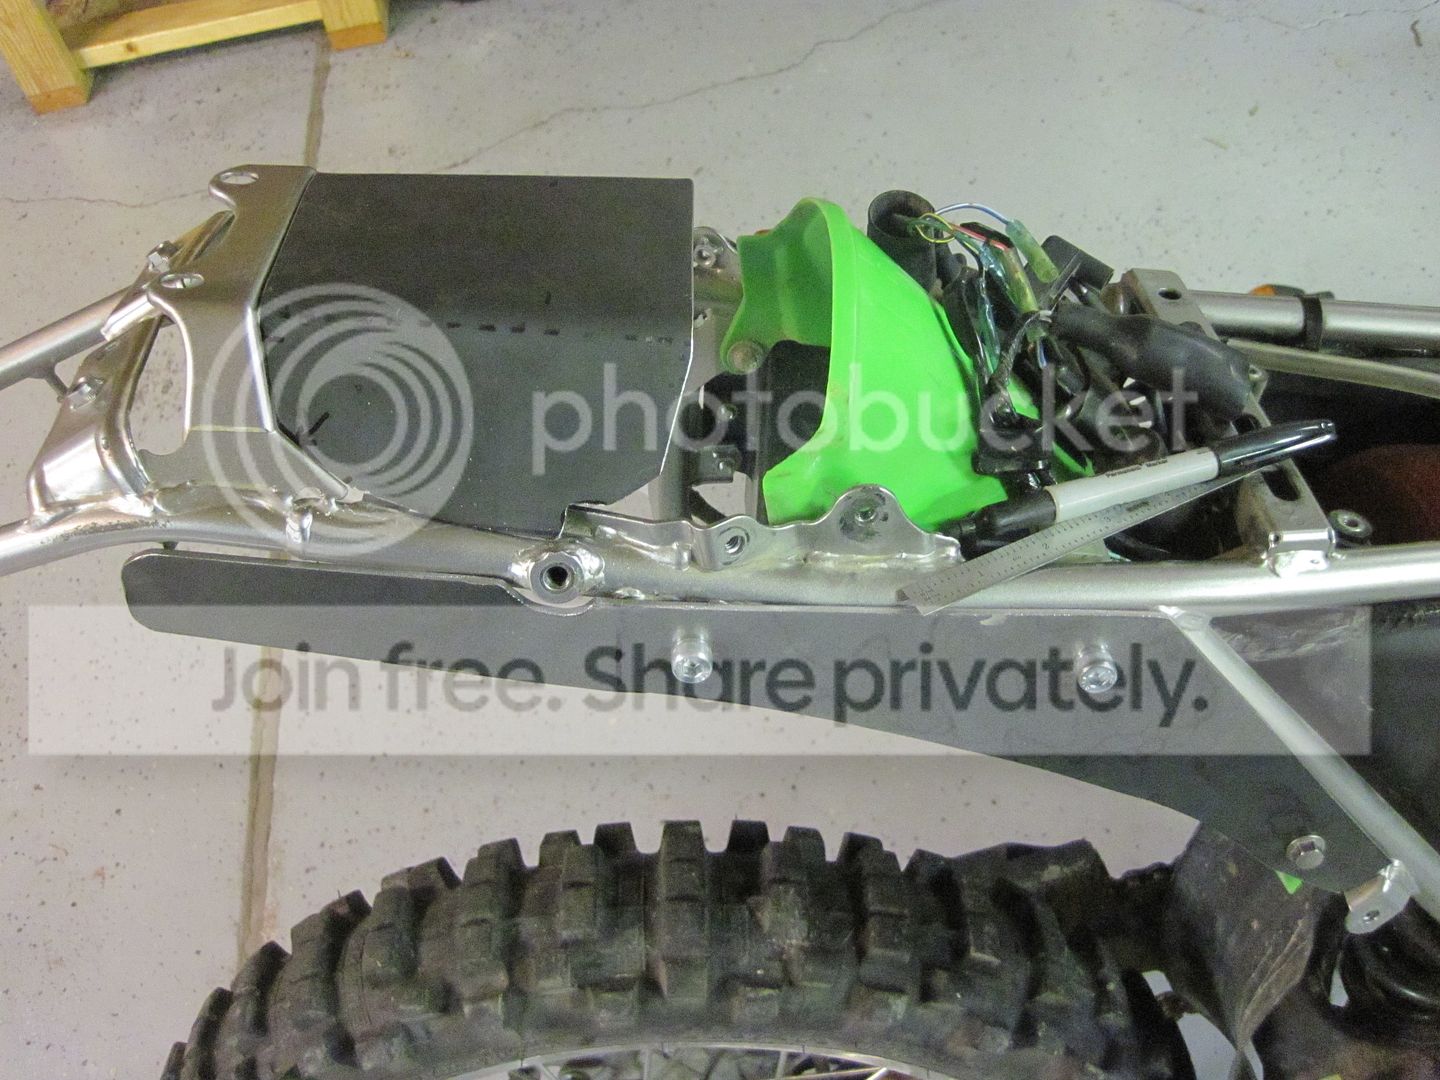
It's just a simple bolt in brace using the 3 bolts that used to be for the stock exhaust system. Better than nothing, but I wanted to take it a bit further. So I stripped the rear of the bike of the plastic fender to take a look for my self to see what it really looked like under the plastics.
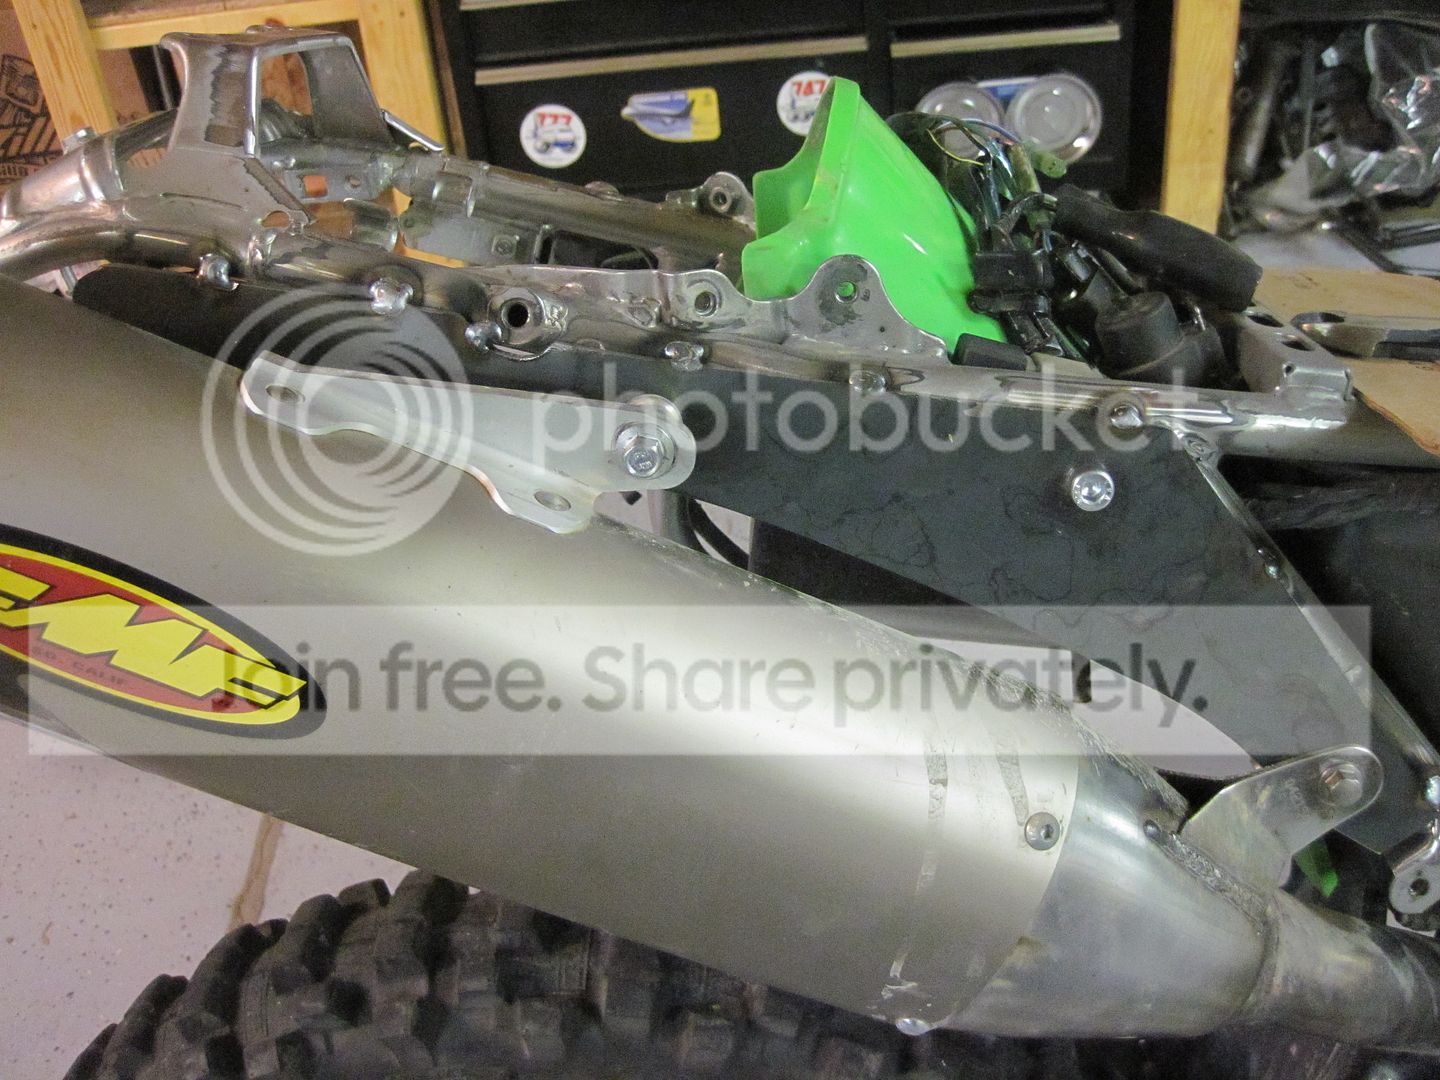
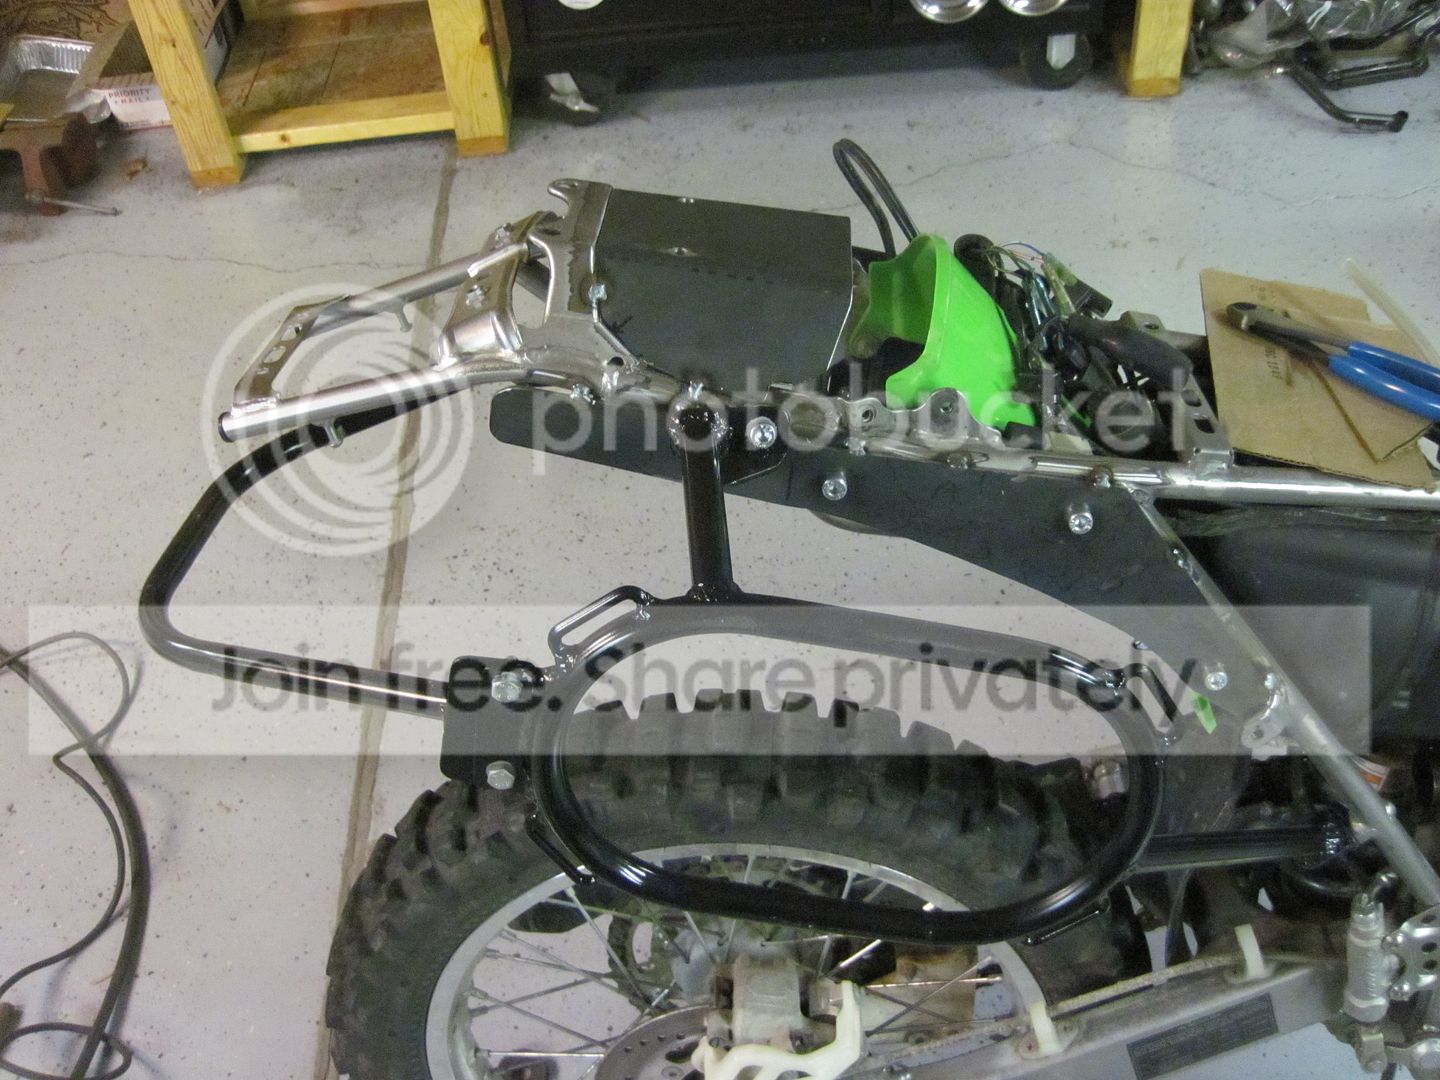
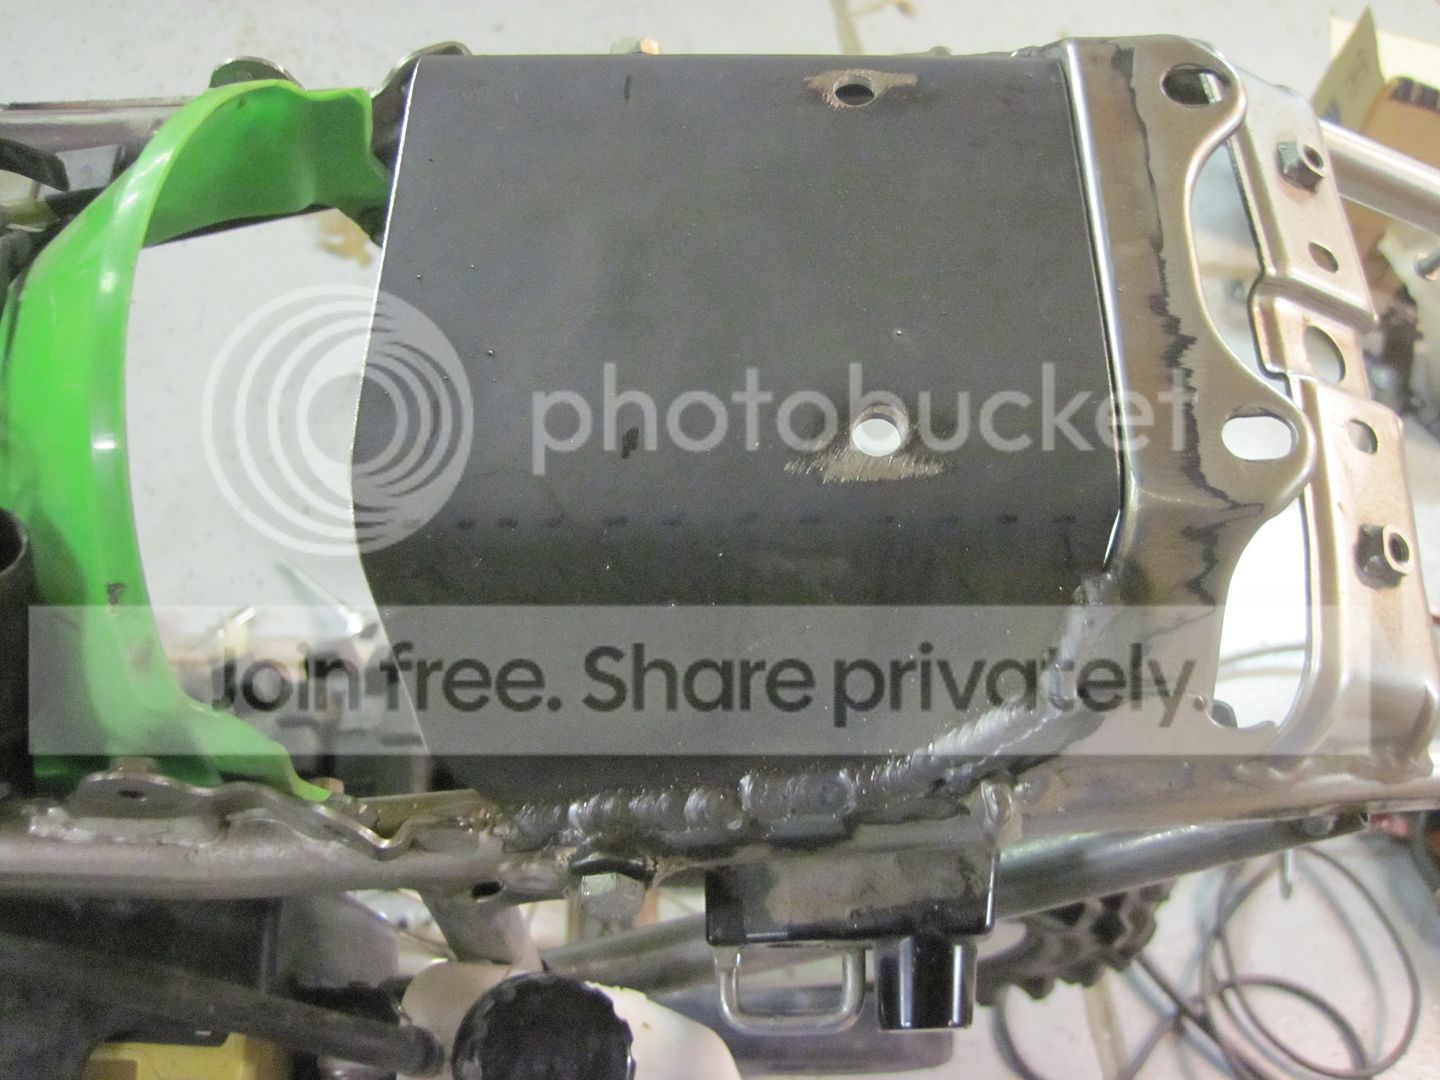
I was a bit surprised by what I found. There isn't much support under those plastics! It's actually quite scary that's all that there is for metal under there!!!
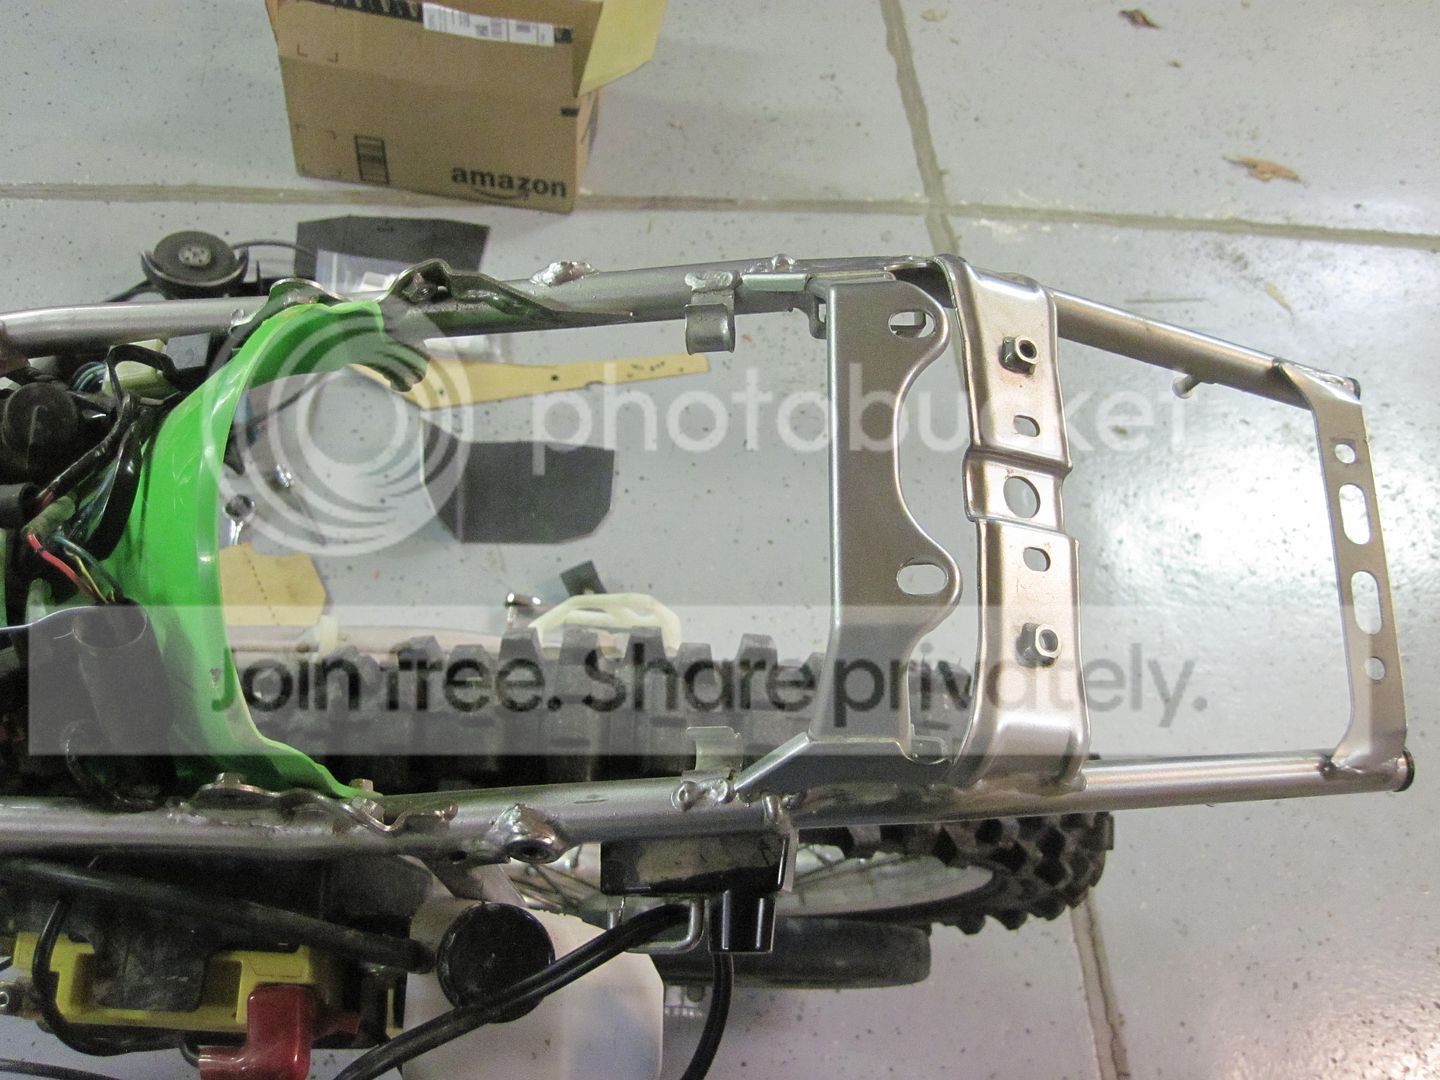

On the left side of the bike there is a vertical tube that holds the battery box for additional support, but the right side has no support it's just a tube acting like a spring board.
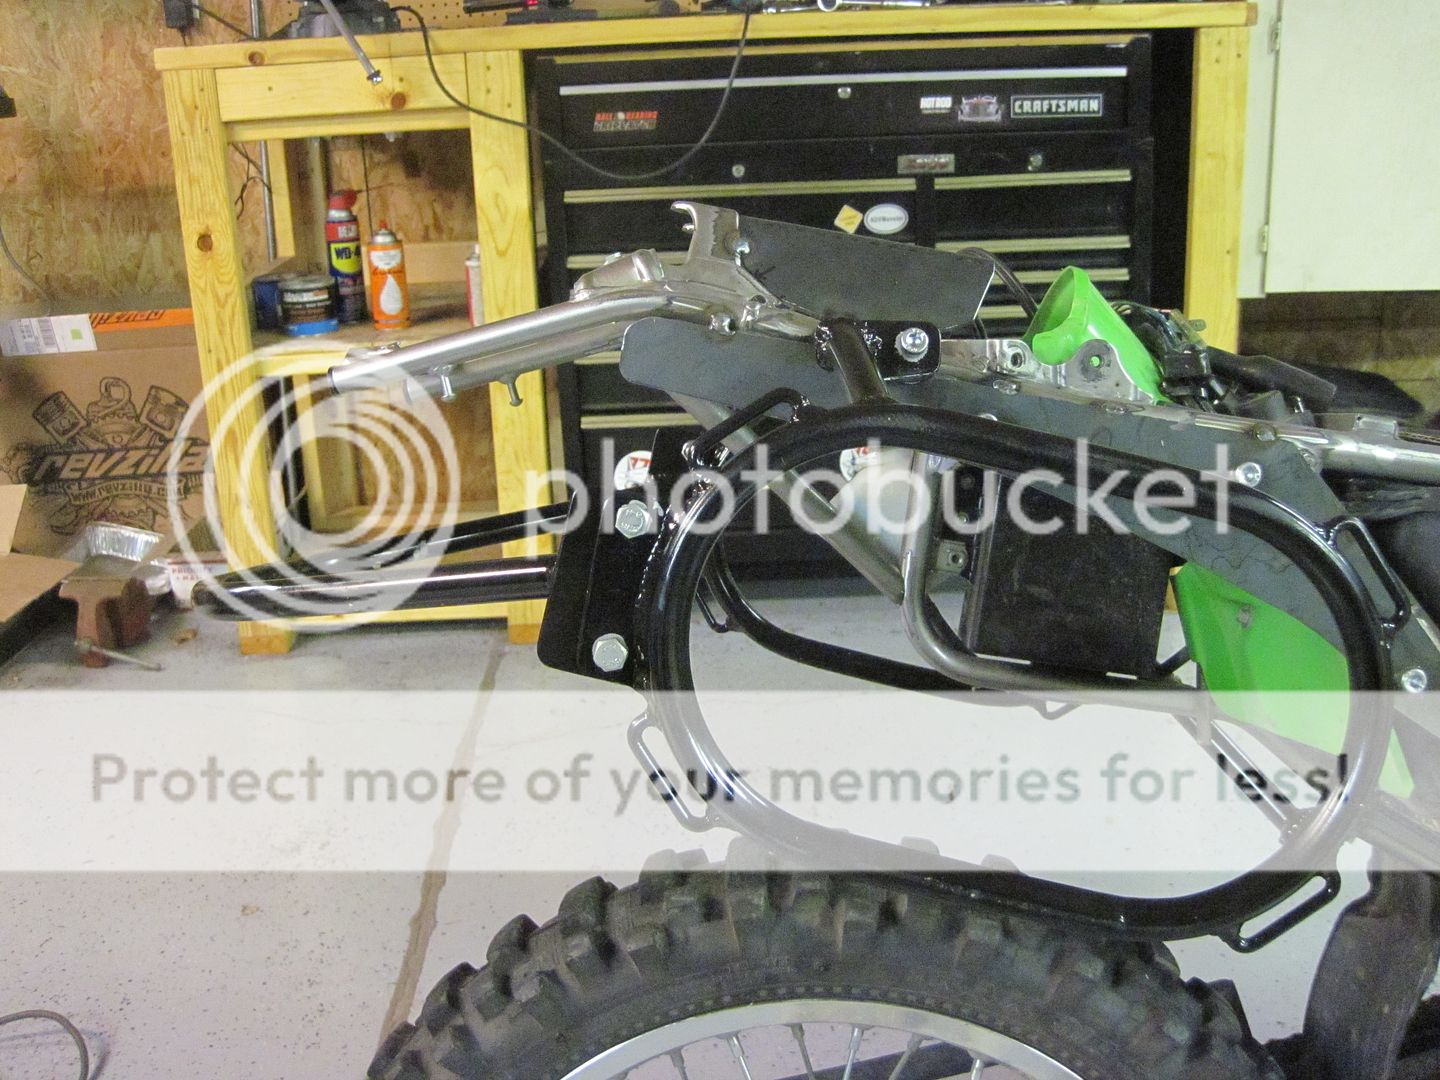
I did some measuring and made a cardboard template using the 3 stock exhaust bolt holes.

Once that was done I traced it over to some 1/8" steel I had from some previous projects and drilled some holes for a test fit.
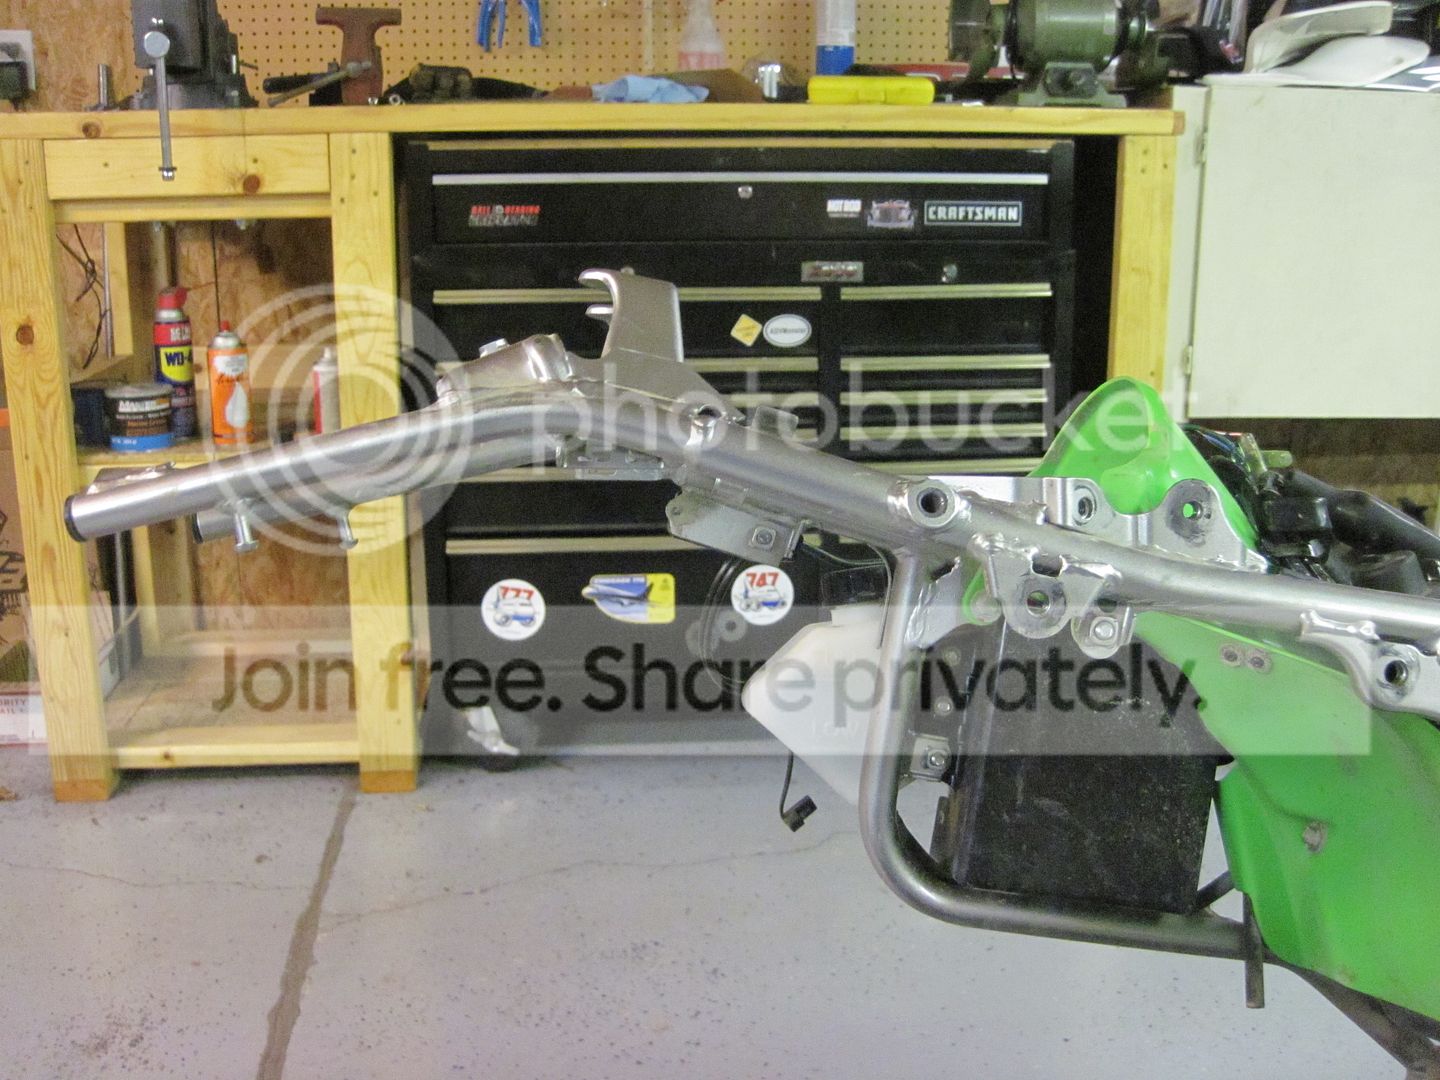
Lets check to make sure it clears the muffler. Sure does, looks good so far!
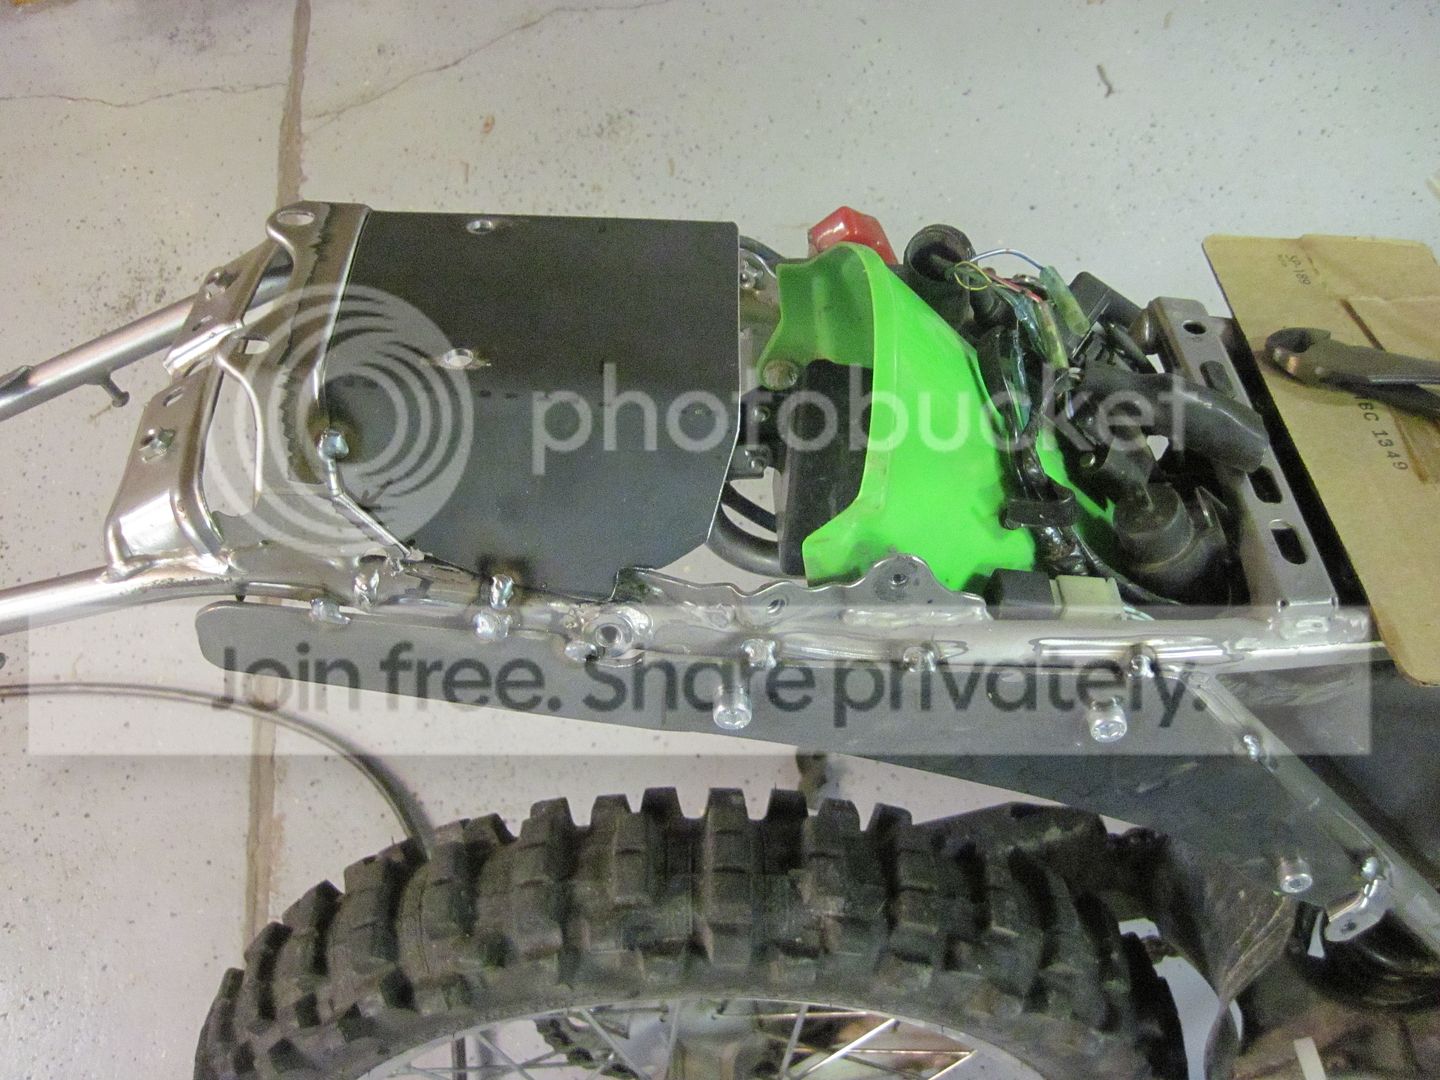
Since I want to put a larger top rack on the bike to replace the small stock one I knew that some additional metal would be needed on the top side as well. I cut another piece of 1/8" thick steel and after some measuring, trimming and bending I had a nice one fabbed up.
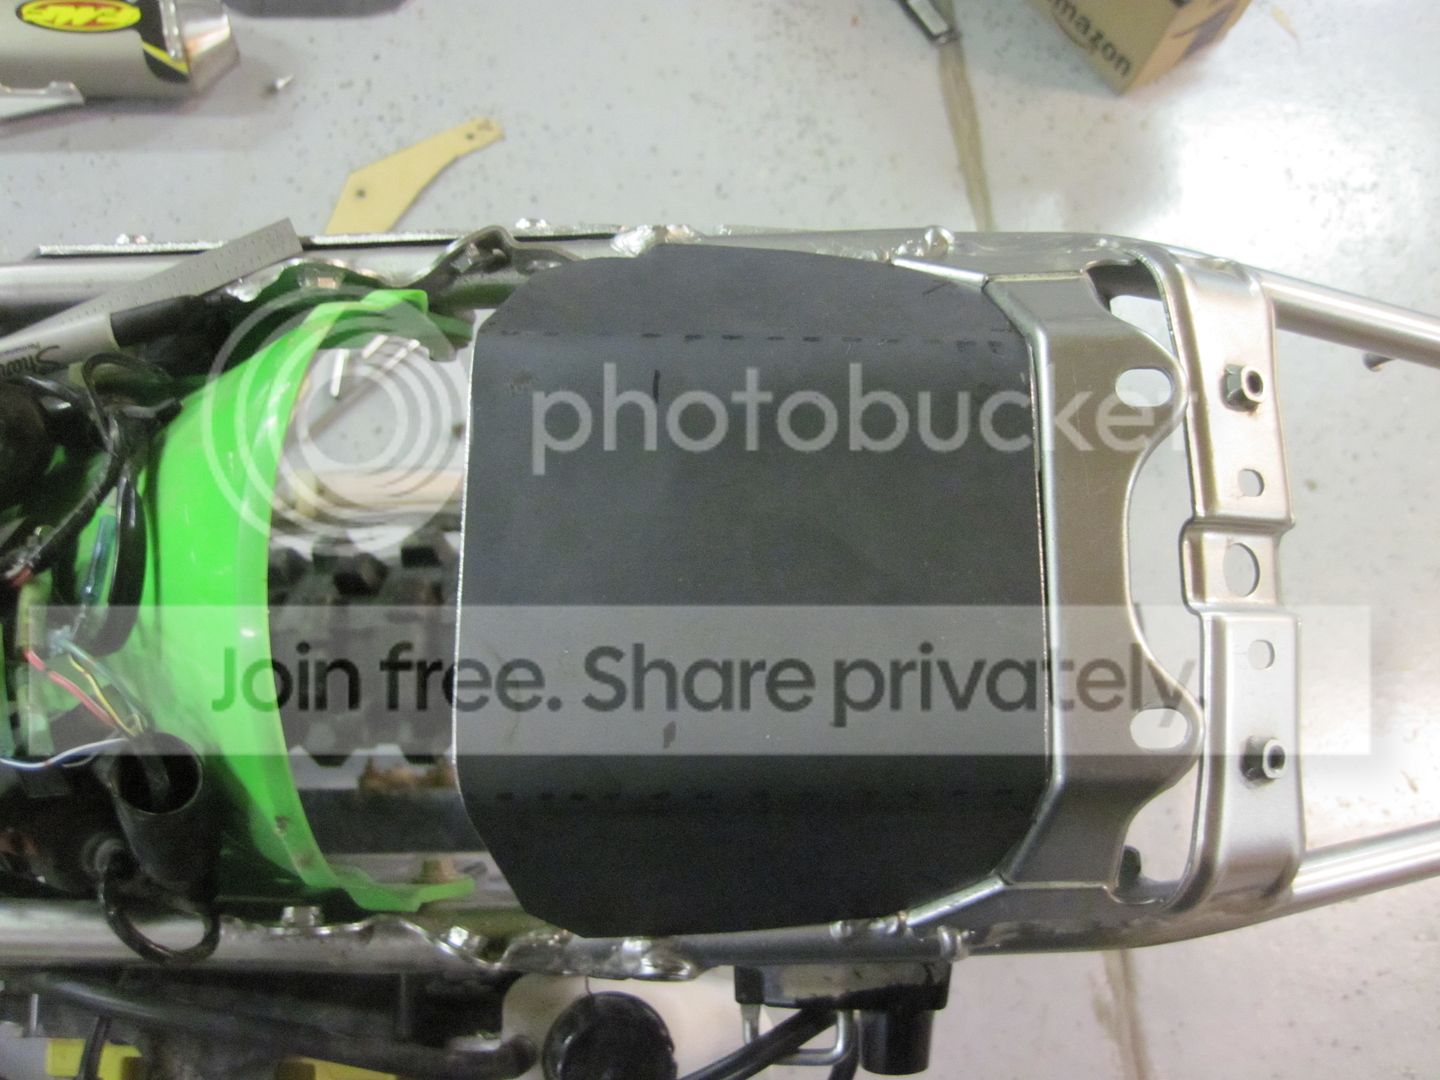
I drilled a couple of holes in the new top brace that will use the existing holes in the fender that held the stock tool bag on.

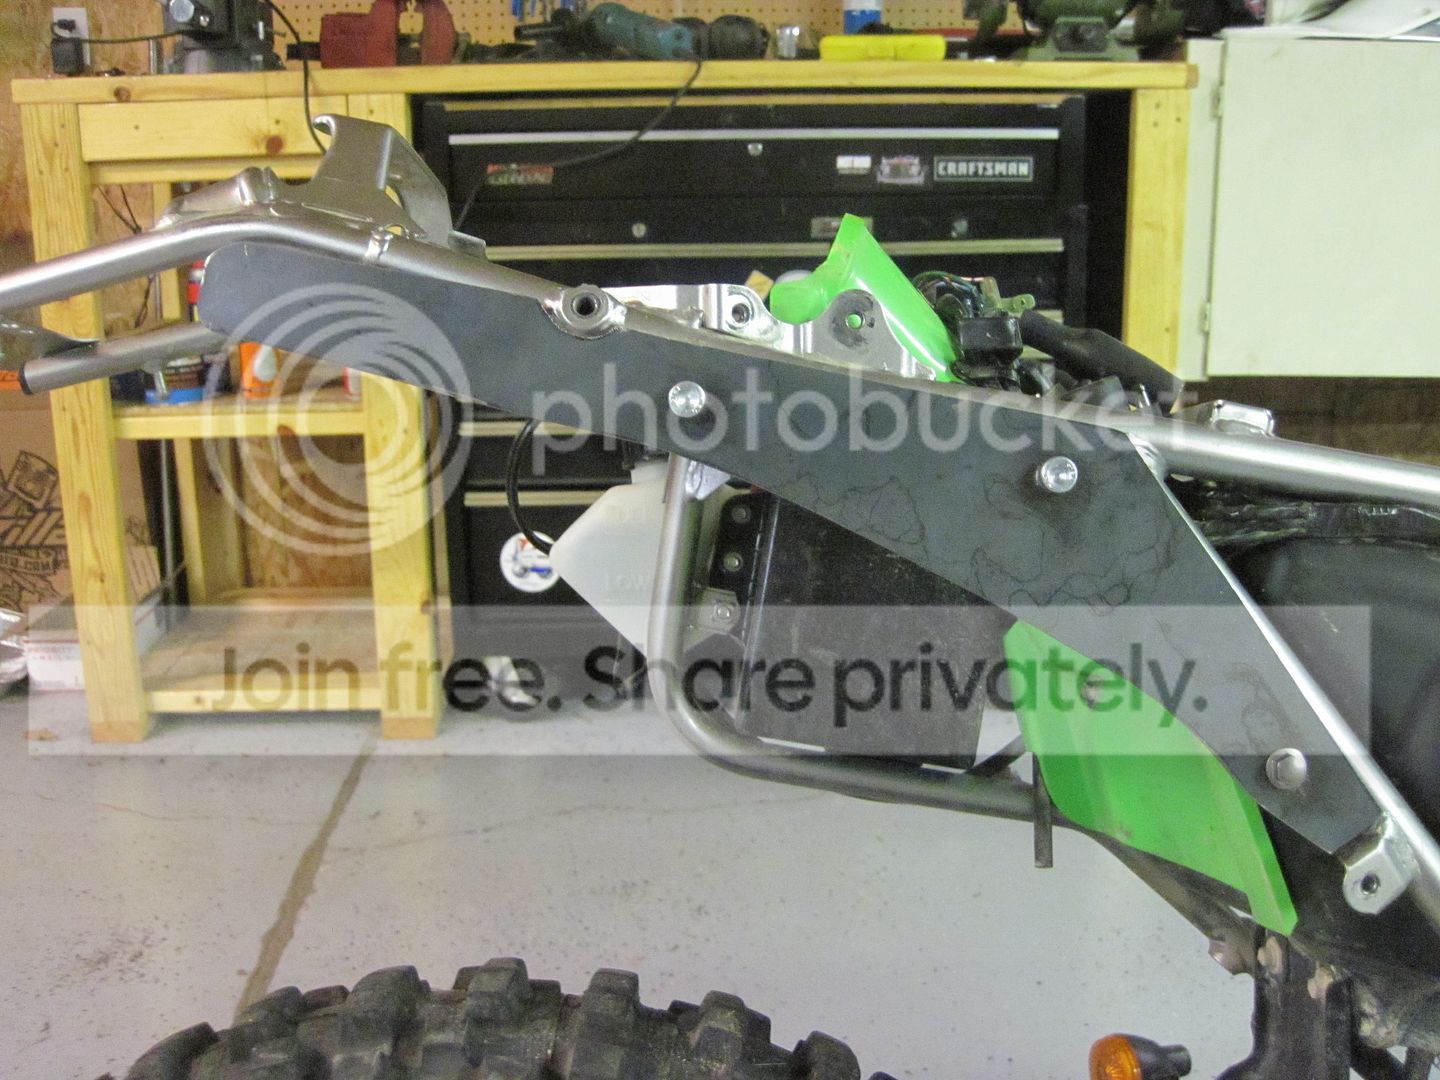
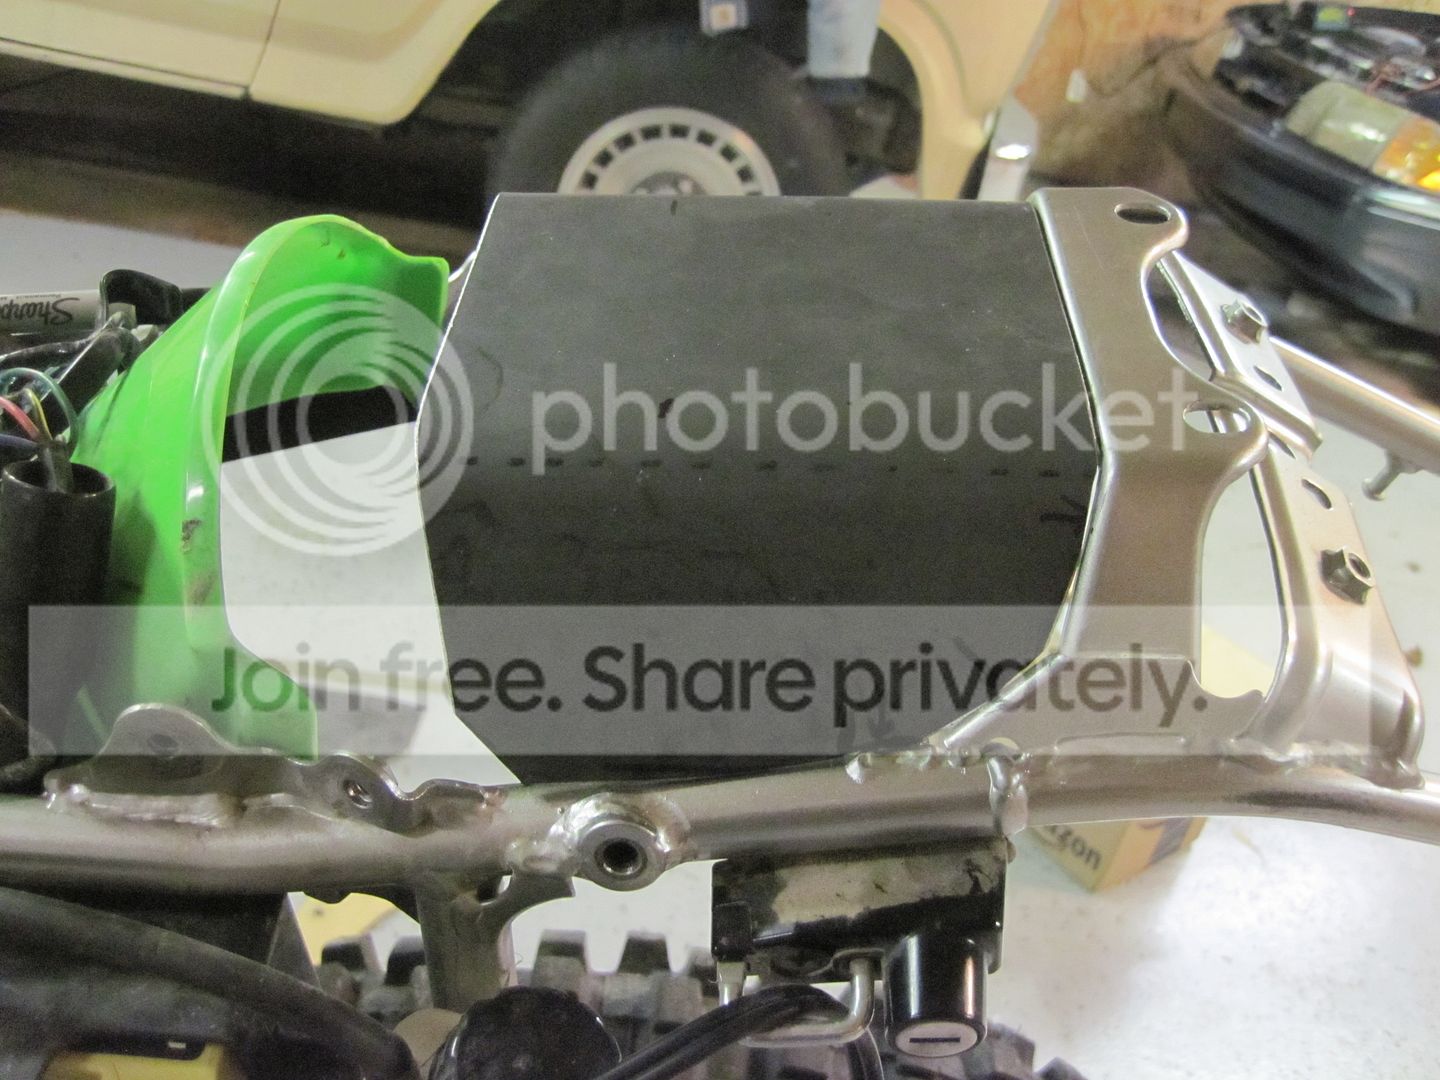
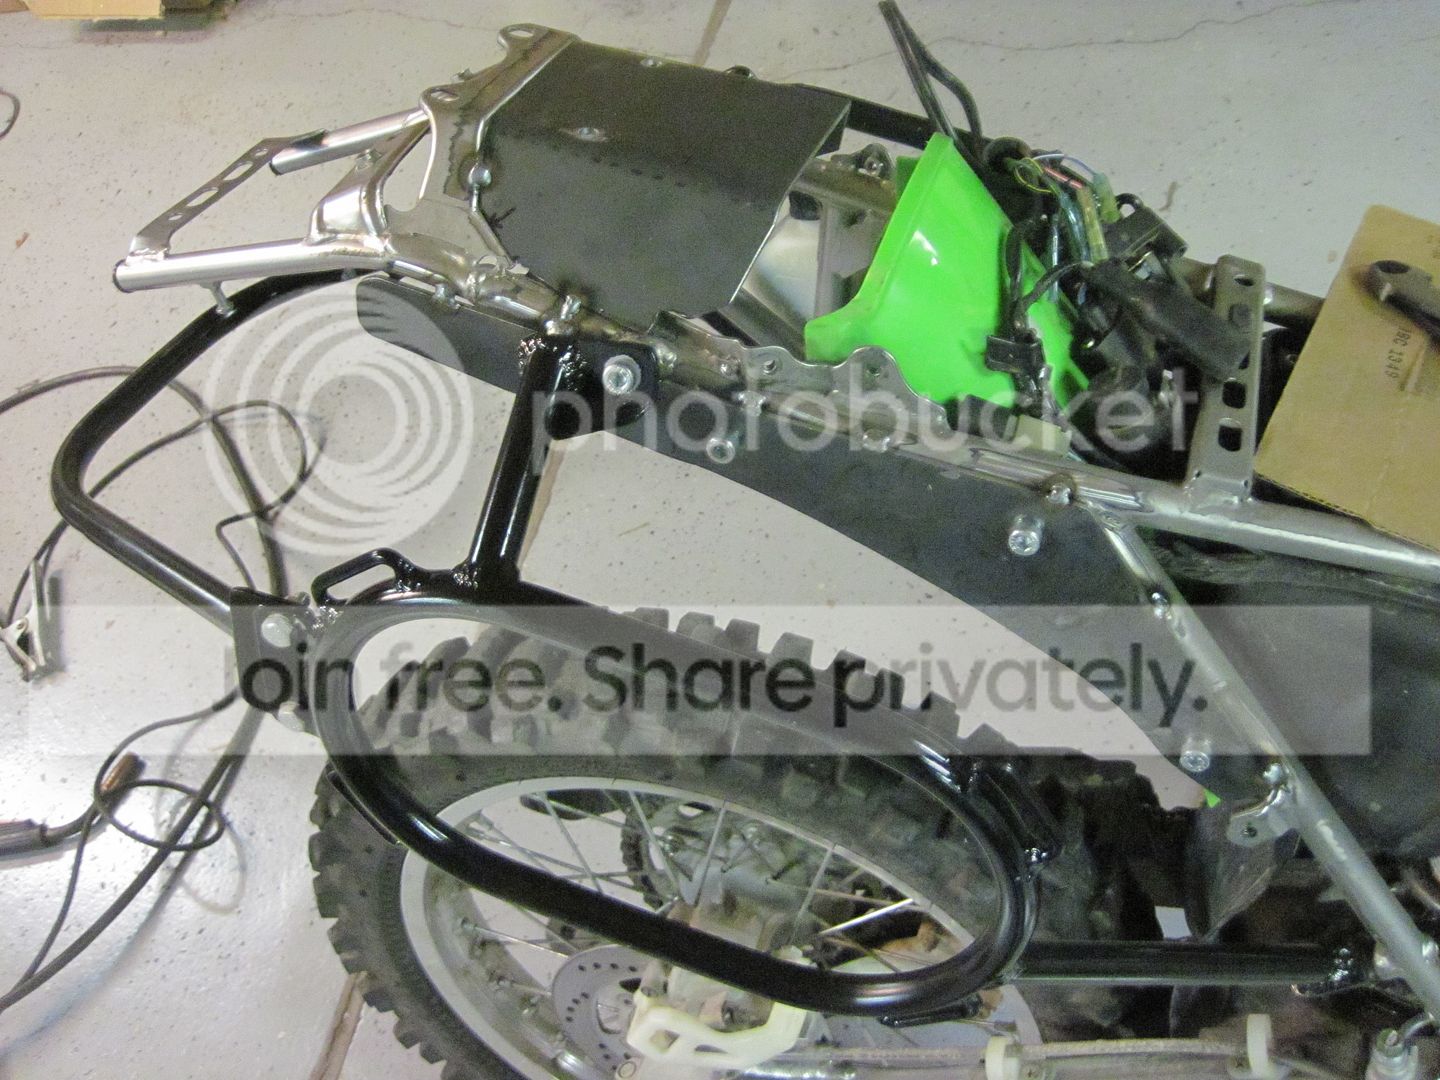
With everything tested fitted and in place it was time to start welding. Just a few tack welds at first.
Top brace tacked into position.
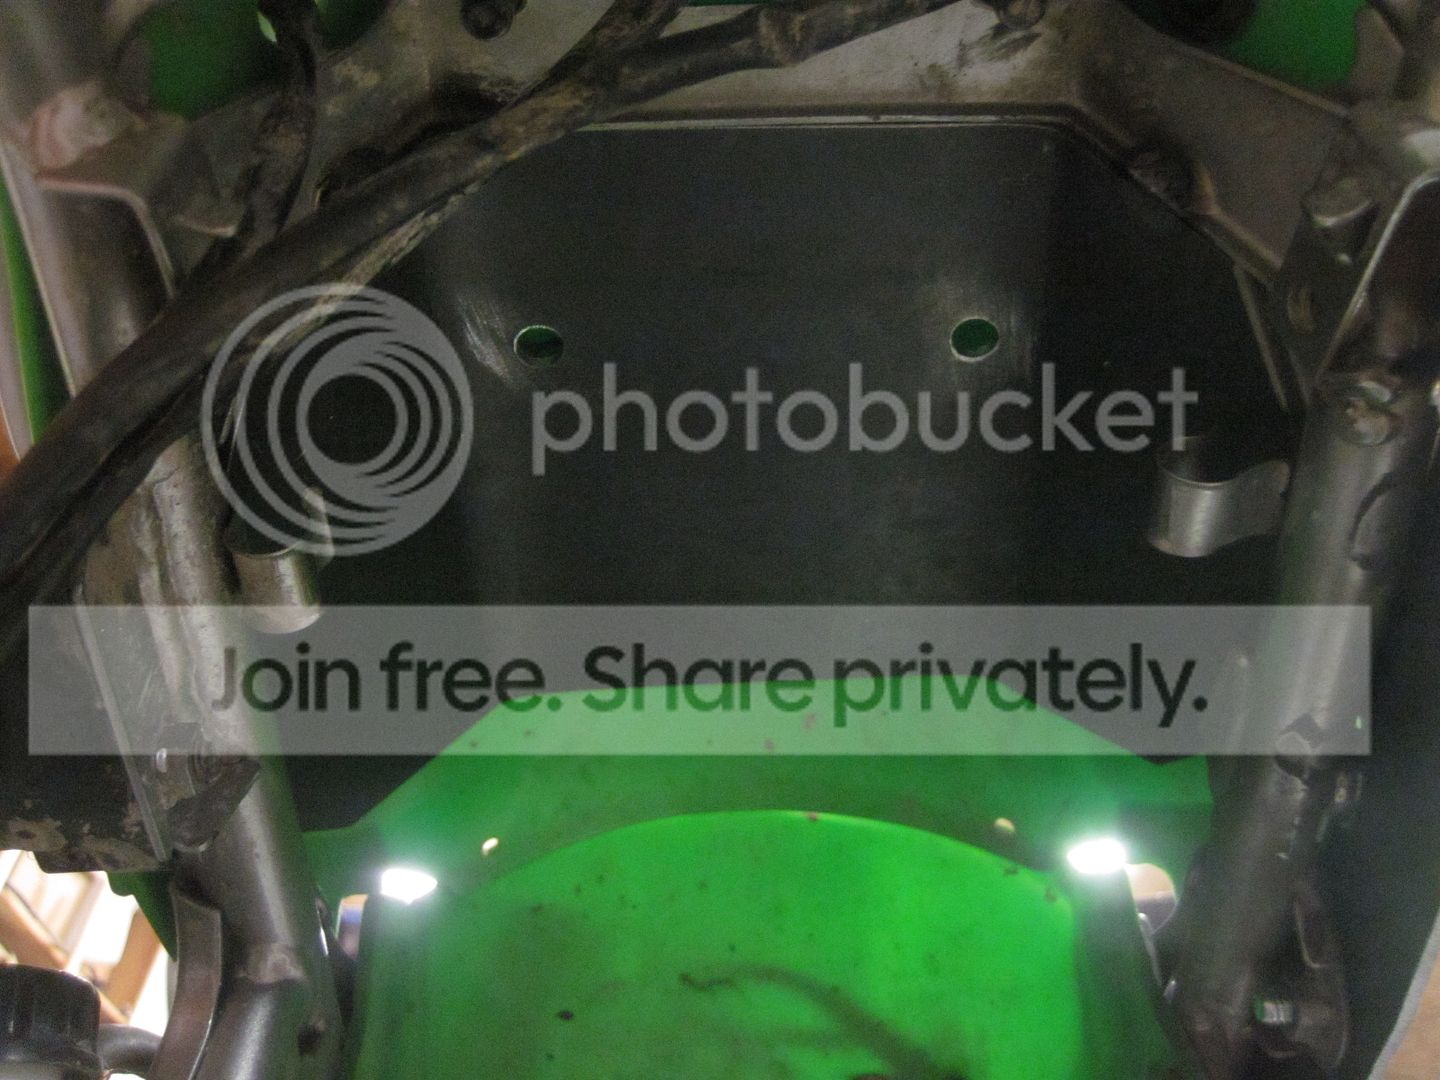
Here's what it looks like under the fender.
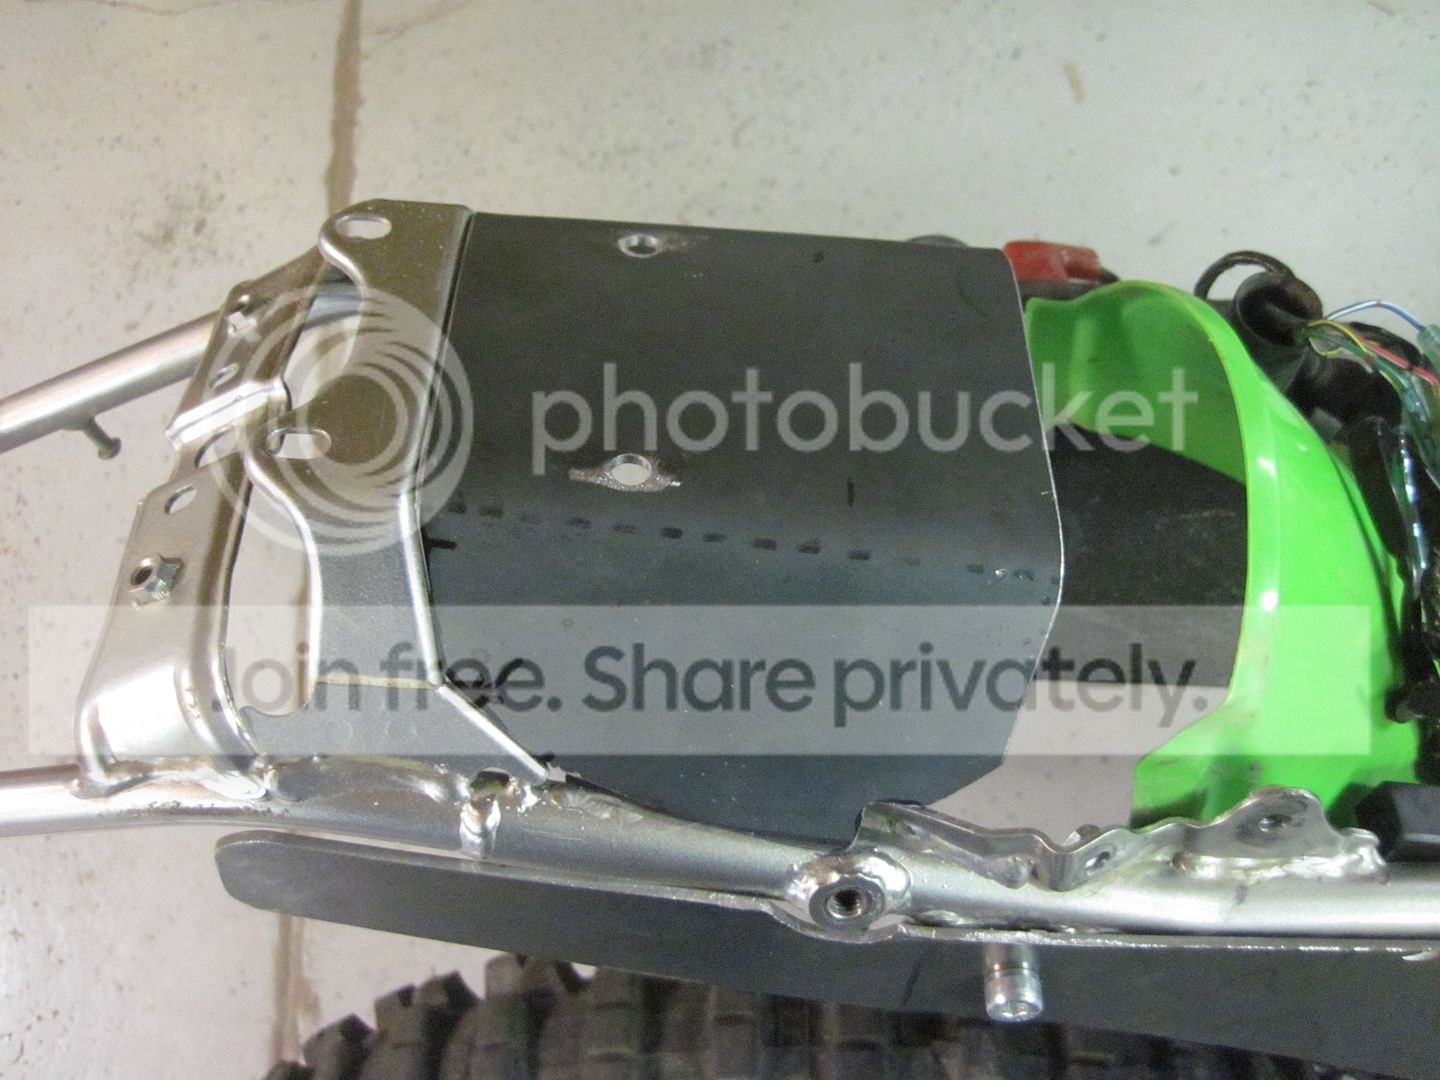
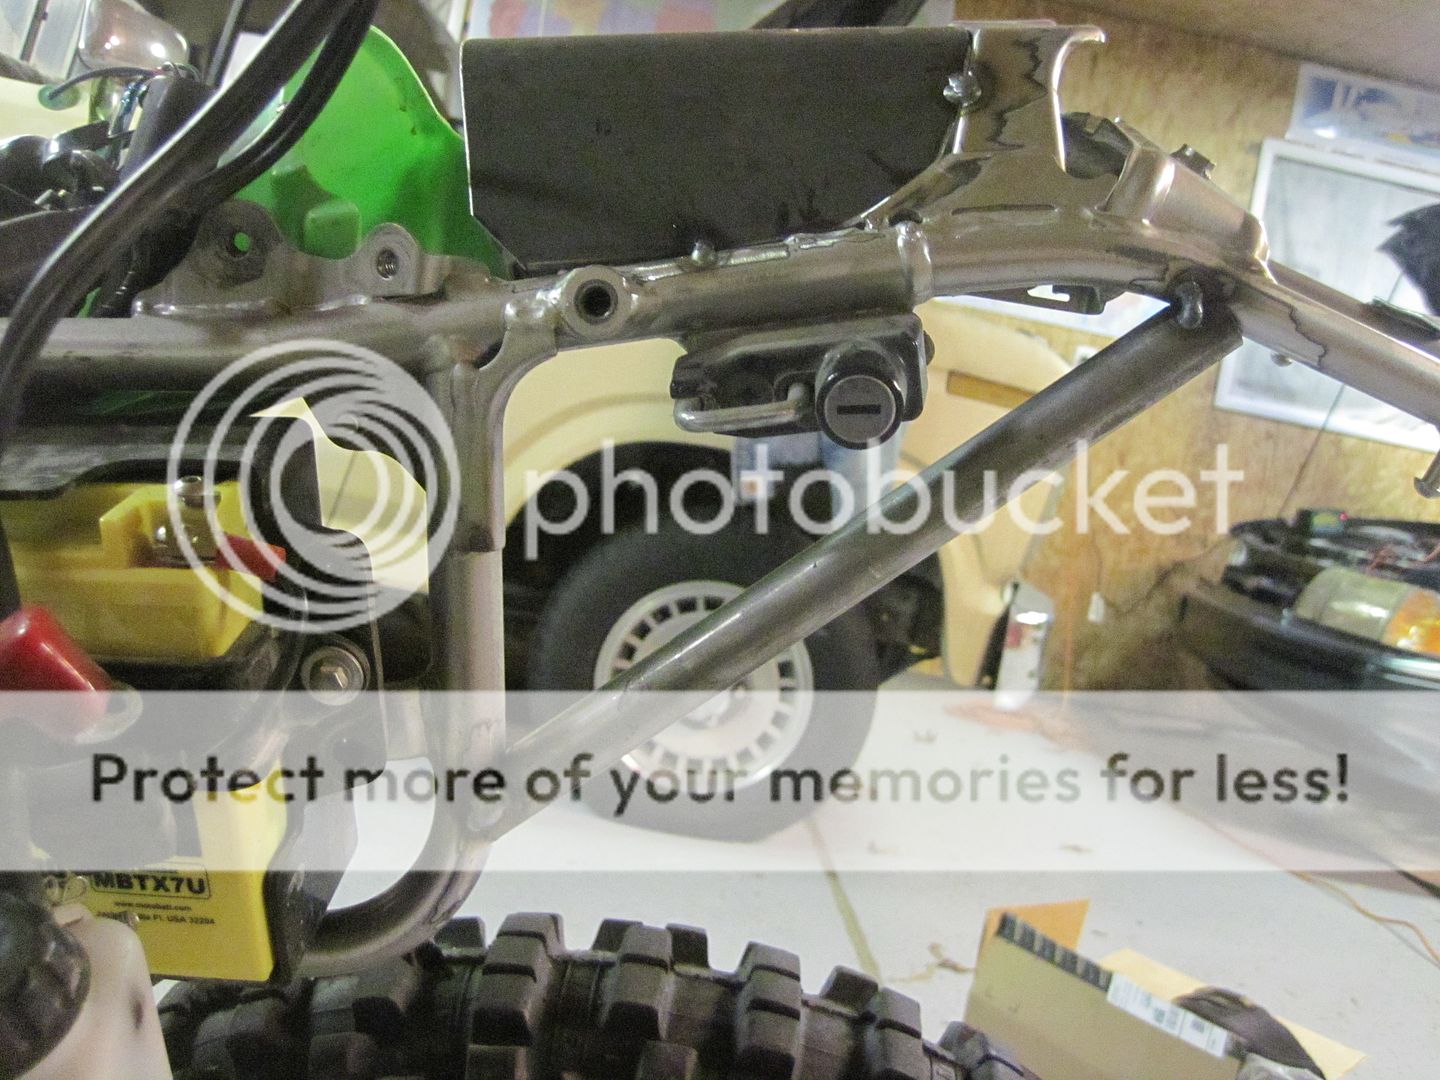
With those two pieces tacked into places, I felt like the left side need a little bit of bracing as well. A simple piece of 3/4 OD .065 wall tube did the trick.
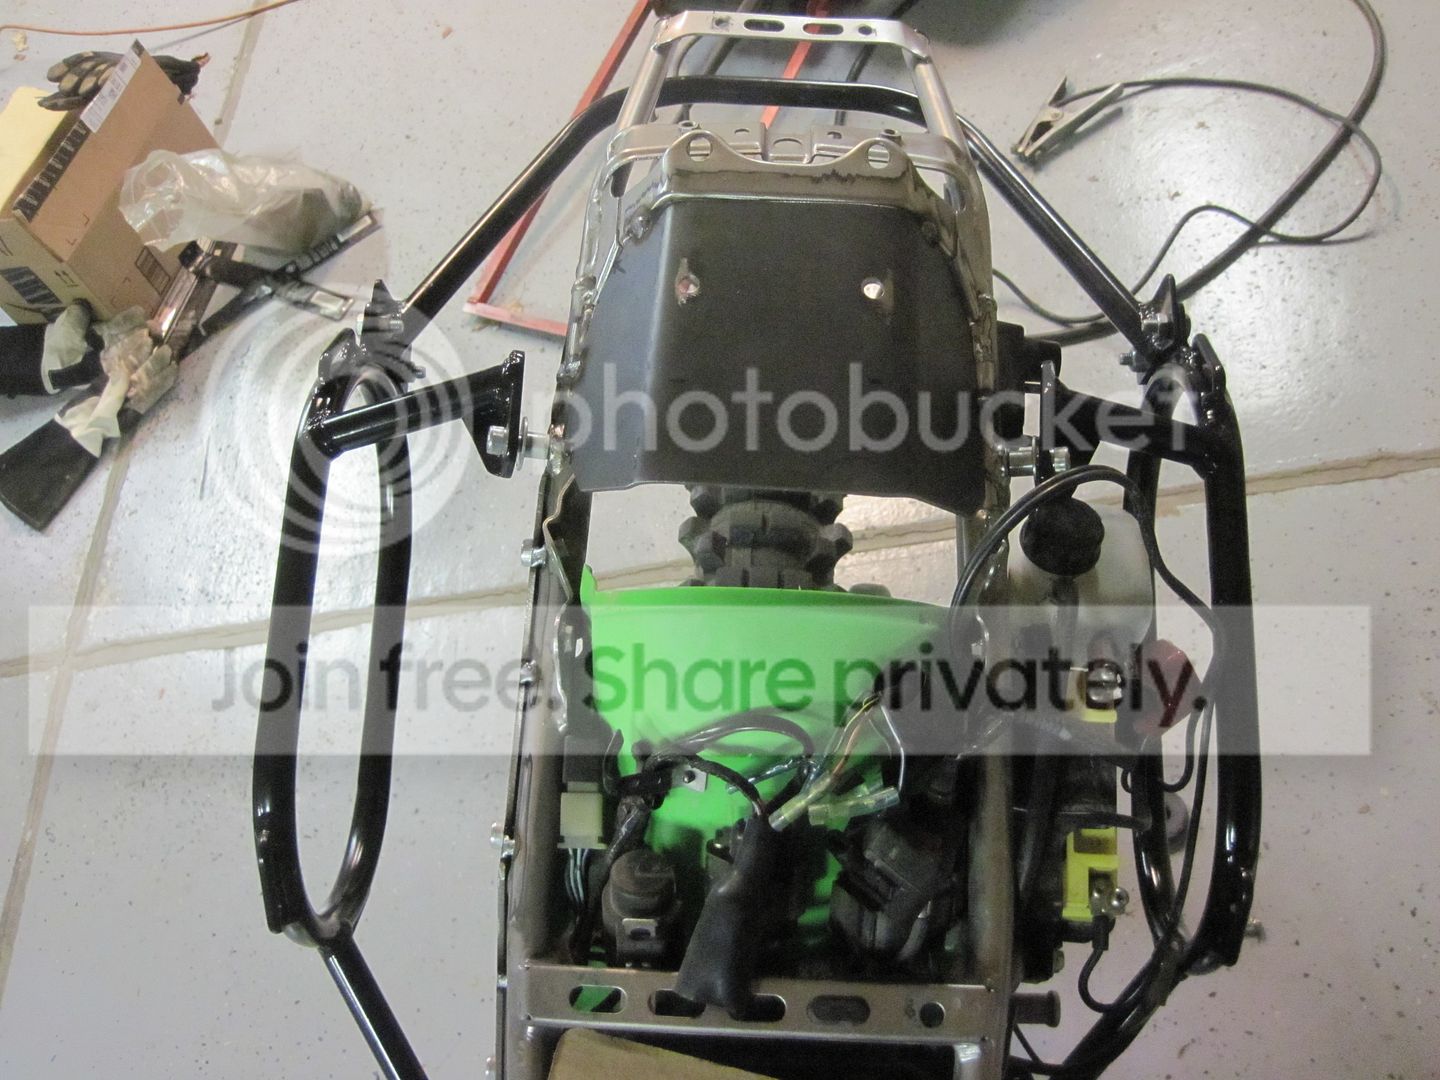
With all of the pieces tacked into place I decided to put my homemade racks on the bike and check how it would look with out plastics on the bike. The racks I made only have two attachment points to the bike on each side. They attach using 12.9 M8 x 1.25 cap head bolts at the stock passenger peg mounts and stock rear rack lower bolt hole. I added a rear bolt in cross brace that really stiffens the racks, but I might added a 3rd attachement point once I get the rear top rack made.

I got about half of the welding done on the top brace still have to finish the part across the top connecting it to the original part.
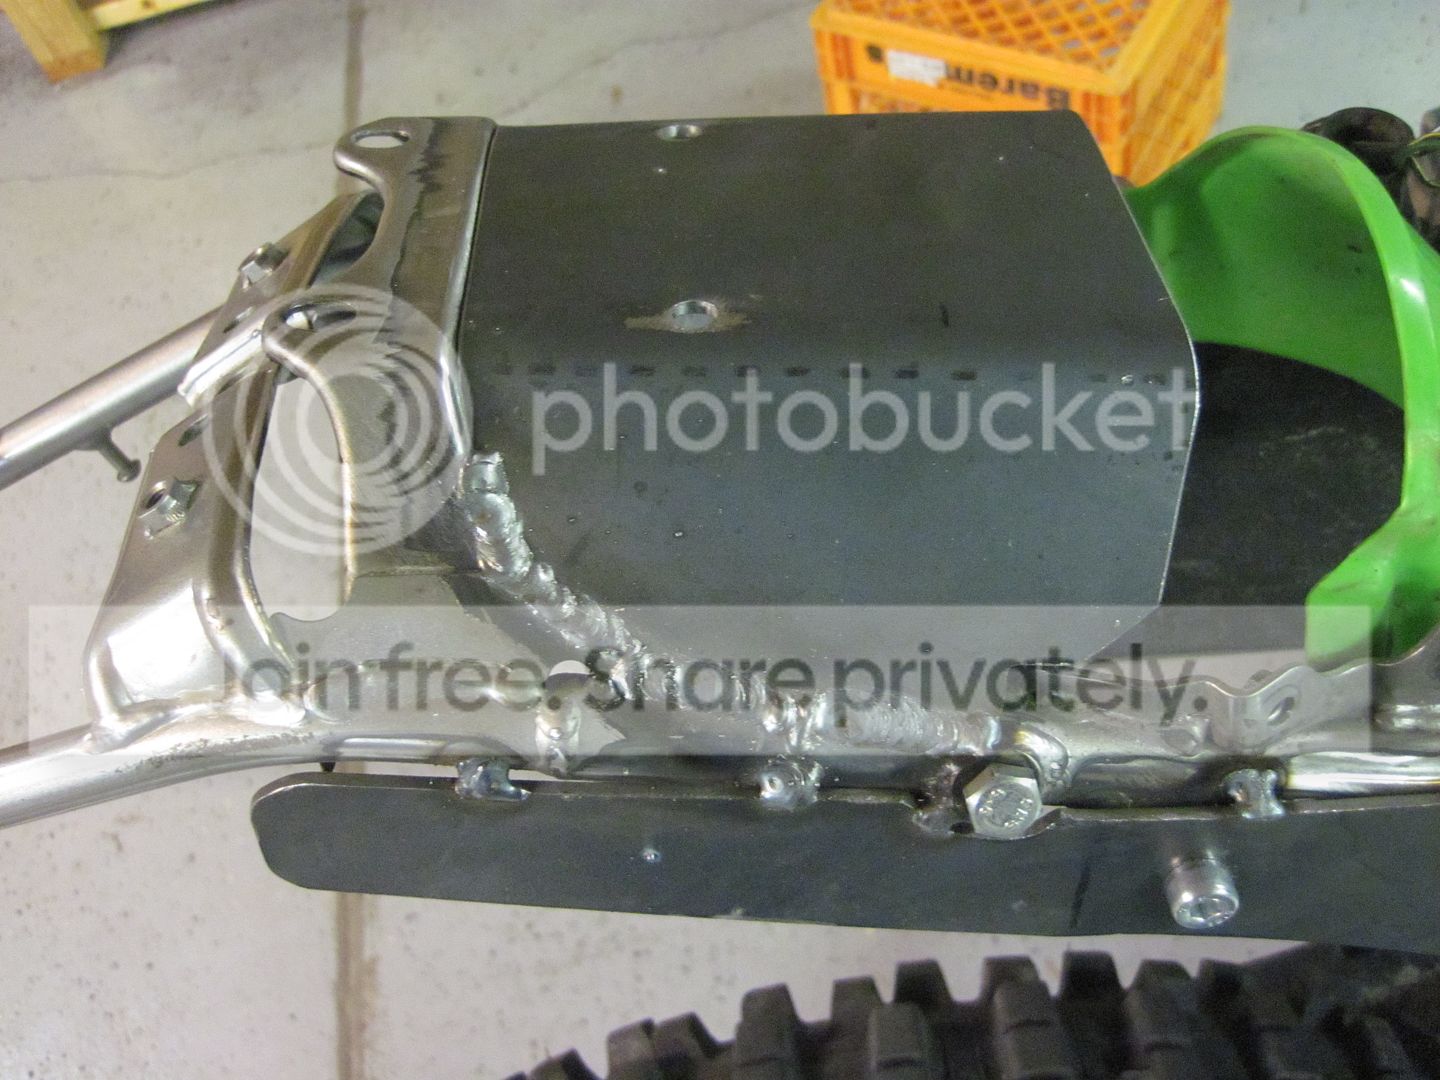
I'll post more as I finish welding up the braces to the sub frame. With the addition of the braces welded in to the sub frame and the rear side racks bolted in, I really don't think there should be and issue carrying a fair amount of weight. I don't carry much when I do go on a long ride, but I would rather do this than have it snap in the middle of a 2,000 mile ride.
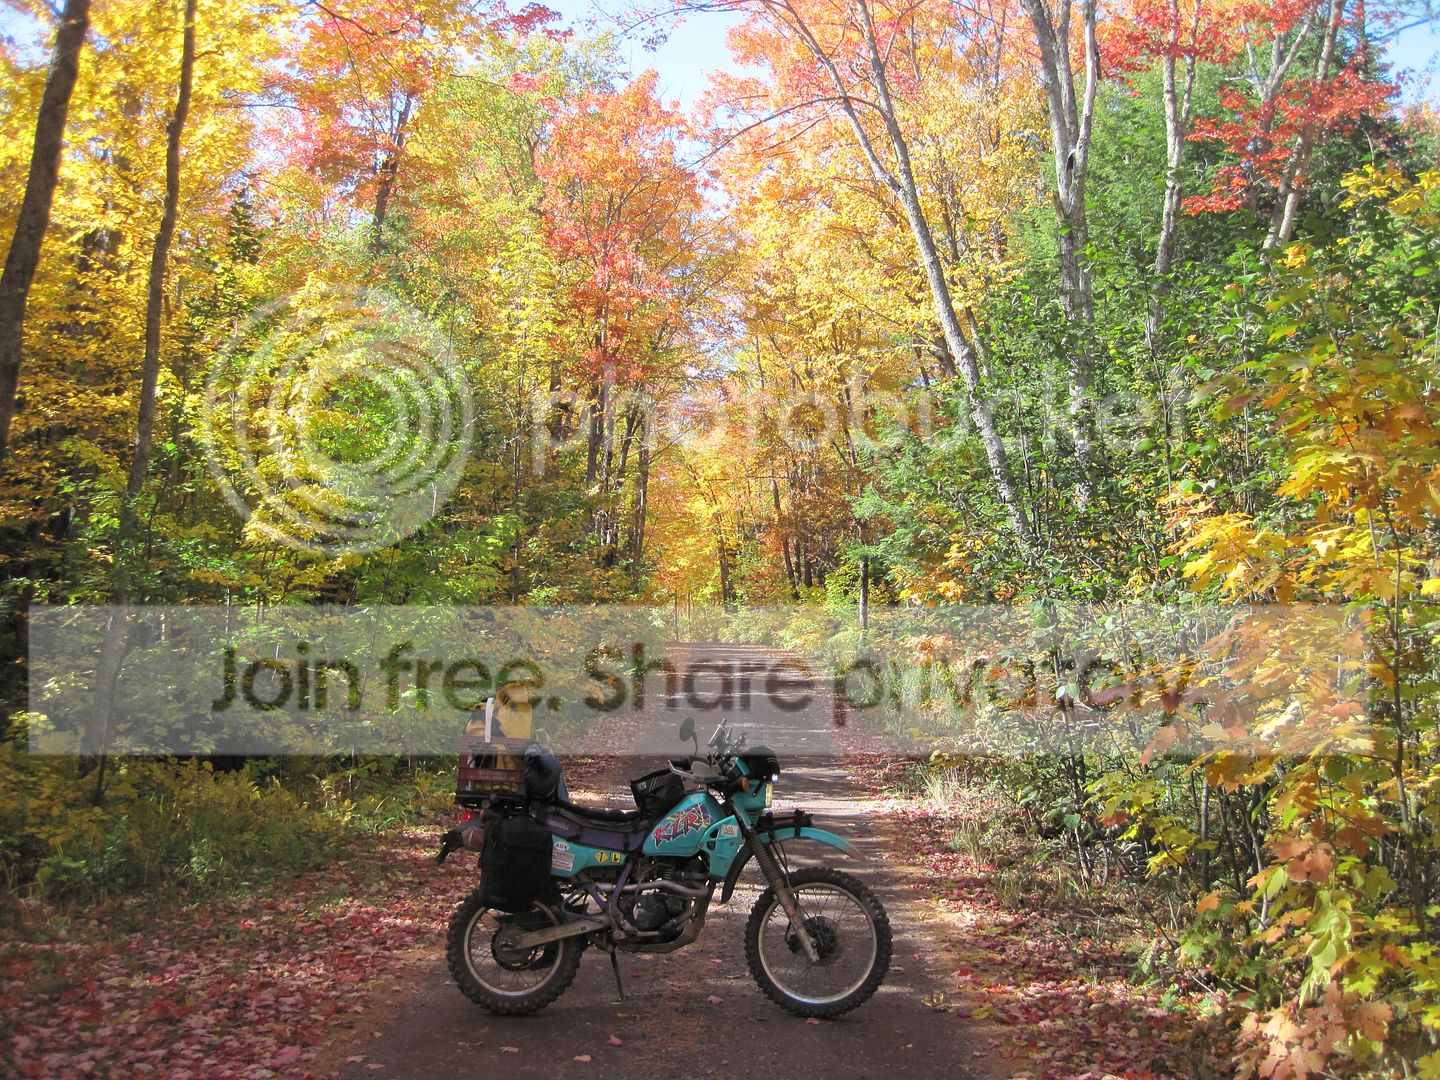
My current minimalist setup on my KLR 250 for a week or longer ride.

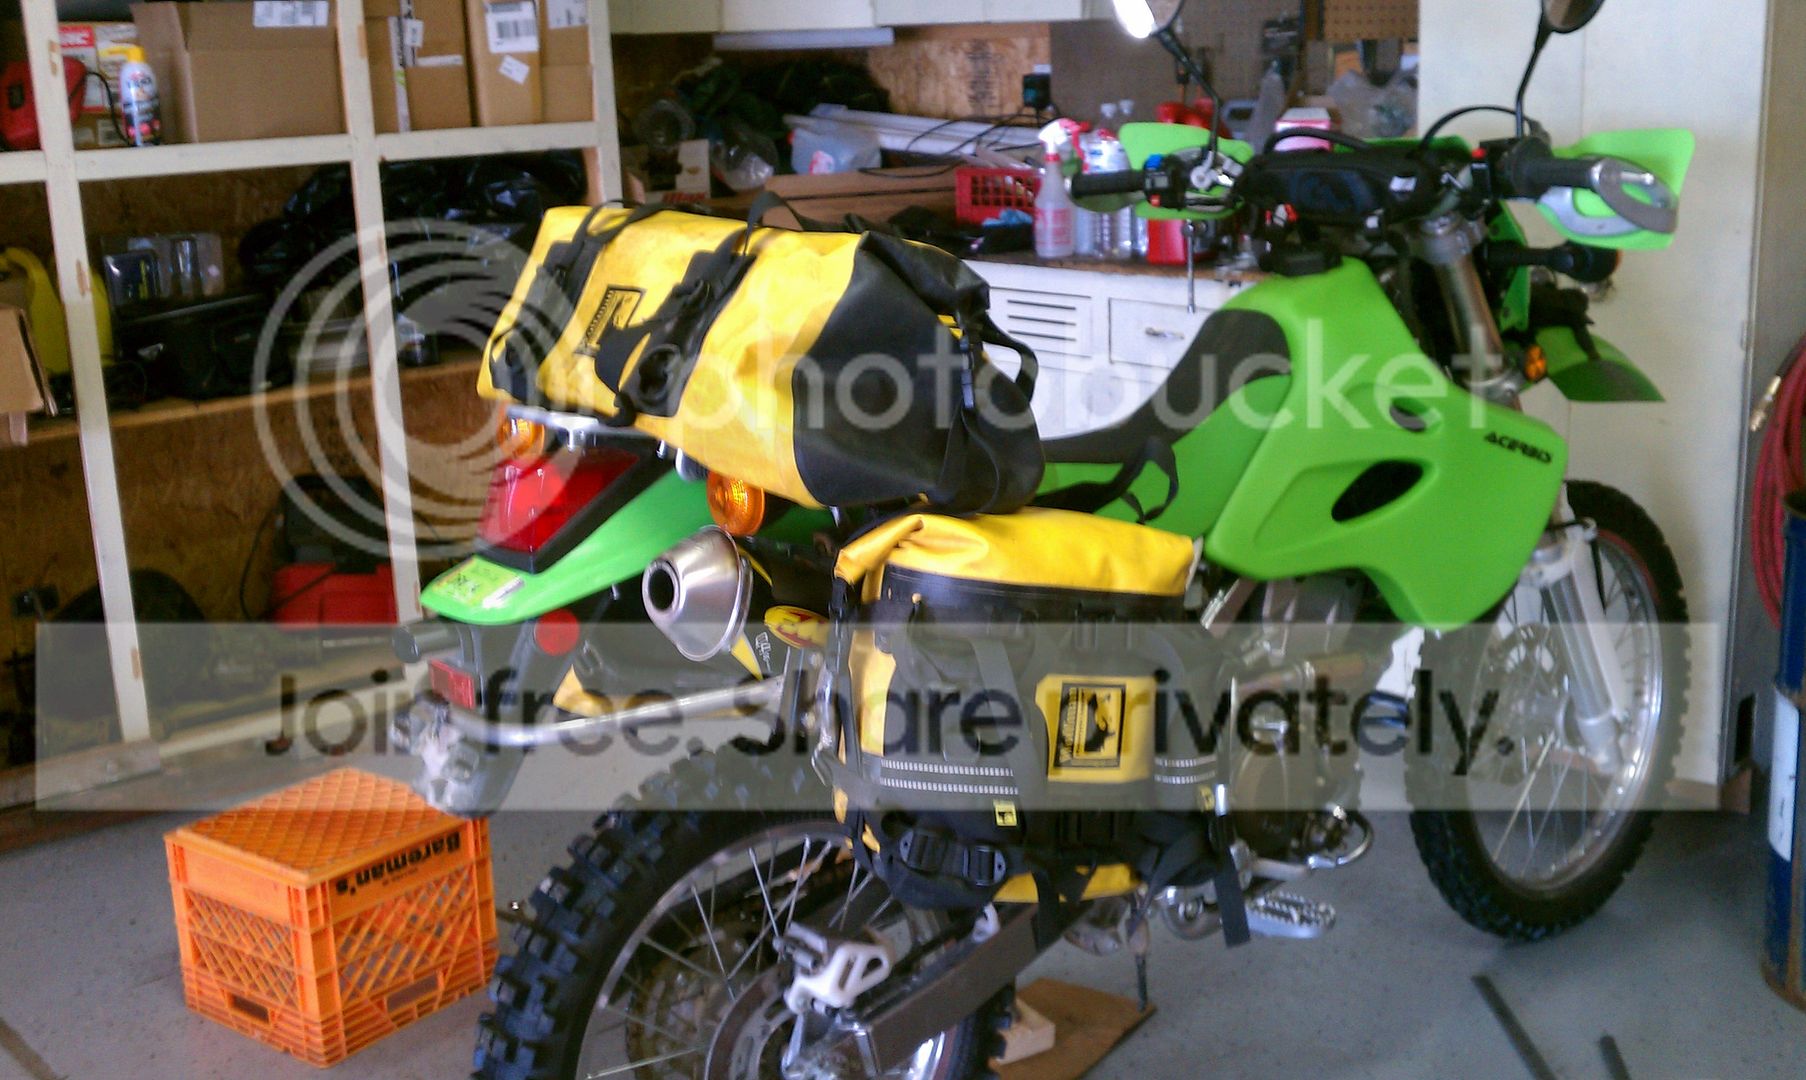
Here's how a plan on using my luggage on the bike and yes I do plan on using a milk crate eventually!
Not my pictures and this is a KLX 300 which the KLX 250 sub frame is based on.

It seems they snap just aft of the point where the lower sub frame connects to the top tube.

A KLX 250 snapped in the same place.


To avoid this issue I saw this on the web if you are no longer using the stock exhaust system, which I am no longer using.
K&T : Seat Rail Reinforcement Plate [180215-08]

It's just a simple bolt in brace using the 3 bolts that used to be for the stock exhaust system. Better than nothing, but I wanted to take it a bit further. So I stripped the rear of the bike of the plastic fender to take a look for my self to see what it really looked like under the plastics.
I was a bit surprised by what I found. There isn't much support under those plastics! It's actually quite scary that's all that there is for metal under there!!!


On the left side of the bike there is a vertical tube that holds the battery box for additional support, but the right side has no support it's just a tube acting like a spring board.

I did some measuring and made a cardboard template using the 3 stock exhaust bolt holes.

Once that was done I traced it over to some 1/8" steel I had from some previous projects and drilled some holes for a test fit.

Lets check to make sure it clears the muffler. Sure does, looks good so far!

Since I want to put a larger top rack on the bike to replace the small stock one I knew that some additional metal would be needed on the top side as well. I cut another piece of 1/8" thick steel and after some measuring, trimming and bending I had a nice one fabbed up.


I drilled a couple of holes in the new top brace that will use the existing holes in the fender that held the stock tool bag on.


With everything tested fitted and in place it was time to start welding. Just a few tack welds at first.

Top brace tacked into position.

Here's what it looks like under the fender.

With those two pieces tacked into places, I felt like the left side need a little bit of bracing as well. A simple piece of 3/4 OD .065 wall tube did the trick.

With all of the pieces tacked into place I decided to put my homemade racks on the bike and check how it would look with out plastics on the bike. The racks I made only have two attachment points to the bike on each side. They attach using 12.9 M8 x 1.25 cap head bolts at the stock passenger peg mounts and stock rear rack lower bolt hole. I added a rear bolt in cross brace that really stiffens the racks, but I might added a 3rd attachement point once I get the rear top rack made.


I got about half of the welding done on the top brace still have to finish the part across the top connecting it to the original part.


I'll post more as I finish welding up the braces to the sub frame. With the addition of the braces welded in to the sub frame and the rear side racks bolted in, I really don't think there should be and issue carrying a fair amount of weight. I don't carry much when I do go on a long ride, but I would rather do this than have it snap in the middle of a 2,000 mile ride.
My current minimalist setup on my KLR 250 for a week or longer ride.


Here's how a plan on using my luggage on the bike and yes I do plan on using a milk crate eventually!


[SIZE="6"][/SIZE][SIZE="6"]
[/SIZE]
Just4Fun11Been
New
jeepgeek2002 said: ↑oh yeah an other question... BB says not to run Synthetic for the break in period .. you figure i run standard 15/40 for about 500 miles then switch back to T6?
My clutch seemed ok until I ran synthetic 10/40 then it slipped on the top of 5th n 6th gear. I’ve got stronger clutch springs (3) to help out the upgraded Barnett springs. I’m running 14x46 sprockets.
My thoughts are don’t run synthetic till you upgrade your clutch springs. I’d suggest Barnett 501-40-06017 (run 3 oem springs & 3 upgraded springs) vs the Barnett 501-40-06043 which are the mildly stronger klx250s springs they had recommended (which aren’t much better than the ebc springs in their klx clutch kit).
I run synthetic in the husky so I wonder if a big bore klx owner installed stronger clutch springs before noticing any slippage could run synthetic without problems?
I might have glazed my clutch plates already
Last edited by klasjm; 05-15-2018 at 03:13 AM.
#38
04-05-2019, 01:05 PM
Join Date: May 2009
Location: Fond Du Lac, WI
Posts: 63
Here are a few info pages:
Click here for :
Great info page
Turn your timid little KLX250S into a Fire Breathing 330cc Monster
Great info from livetorideridetolive & KLX250S Home Page .
Thanks
Click here for :
Great info page
Turn your timid little KLX250S into a Fire Breathing 330cc Monster
Great info from livetorideridetolive & KLX250S Home Page .
Thanks
#39
04-03-2020, 04:21 PM
Join Date: May 2009
Location: Fond Du Lac, WI
Posts: 63
#40
06-25-2021, 09:24 AM


Thread
Thread Starter
Forum
Replies
Last Post
buick_gn
KX85
0
10-11-2016 06:17 AM