The "Travel Light, Travel Far" KLX
#21
 02-20-2017, 11:56 AM


Finally bookmarked the "amazing 351" thread lots of good stuff there.
I always enjoy reading what people are doing with their 351s, Keep it coming.
Seeing the pics of your stripped down frame helped me visualize adding a tool tube to the front motor mount at the frame.
Thanks
I always enjoy reading what people are doing with their 351s, Keep it coming.
Seeing the pics of your stripped down frame helped me visualize adding a tool tube to the front motor mount at the frame.
Thanks
Last edited by Iffykid; 02-20-2017 at 11:59 AM.
#22
02-20-2017, 02:28 PM

I did extensive sub frame bracing on my 2006 klx351 along with building the racks for the wolfman saddle bags. I did a write up on advrider and took plenty of pictures. If you are able to weld and fabricate some steel brackets you can significantly strengthen the sub frame. Here's the link to sub frame bracing:
Long term KLX250S review | Page 653 | Adventure Rider
I've been building my 2006 klx351 for the past 3 years. Like you I bought it 100% stock with 800 miles on the odometer. Good luck with the build.
Long term KLX250S review | Page 653 | Adventure Rider
I've been building my 2006 klx351 for the past 3 years. Like you I bought it 100% stock with 800 miles on the odometer. Good luck with the build.
#23
02-21-2017, 02:16 AM

Finally bookmarked the "amazing 351" thread lots of good stuff there.
I always enjoy reading what people are doing with their 351s, Keep it coming.
Seeing the pics of your stripped down frame helped me visualize adding a tool tube to the front motor mount at the frame.
Thanks
I always enjoy reading what people are doing with their 351s, Keep it coming.
Seeing the pics of your stripped down frame helped me visualize adding a tool tube to the front motor mount at the frame.
Thanks
#24
02-21-2017, 02:19 AM
I did extensive sub frame bracing on my 2006 klx351 along with building the racks for the wolfman saddle bags. I did a write up on advrider and took plenty of pictures. If you are able to weld and fabricate some steel brackets you can significantly strengthen the sub frame. Here's the link to sub frame bracing:
Long term KLX250S review | Page 653 | Adventure Rider
I've been building my 2006 klx351 for the past 3 years. Like you I bought it 100% stock with 800 miles on the odometer. Good luck with the build.
Long term KLX250S review | Page 653 | Adventure Rider
I've been building my 2006 klx351 for the past 3 years. Like you I bought it 100% stock with 800 miles on the odometer. Good luck with the build.
#25
02-21-2017, 02:29 AM
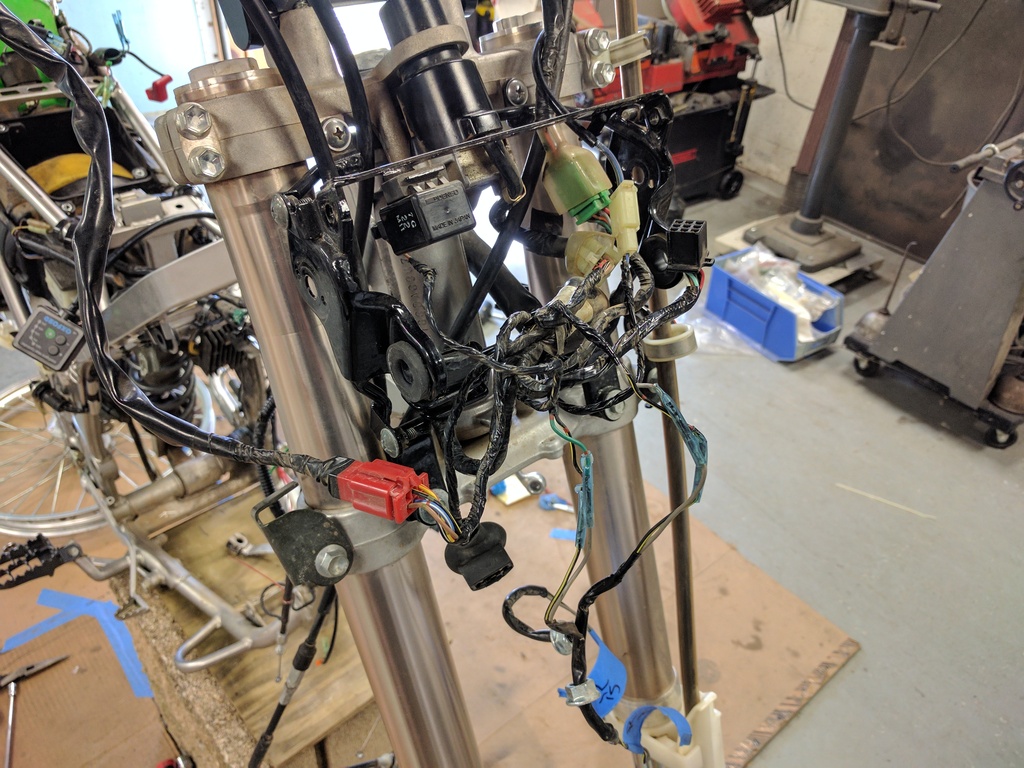
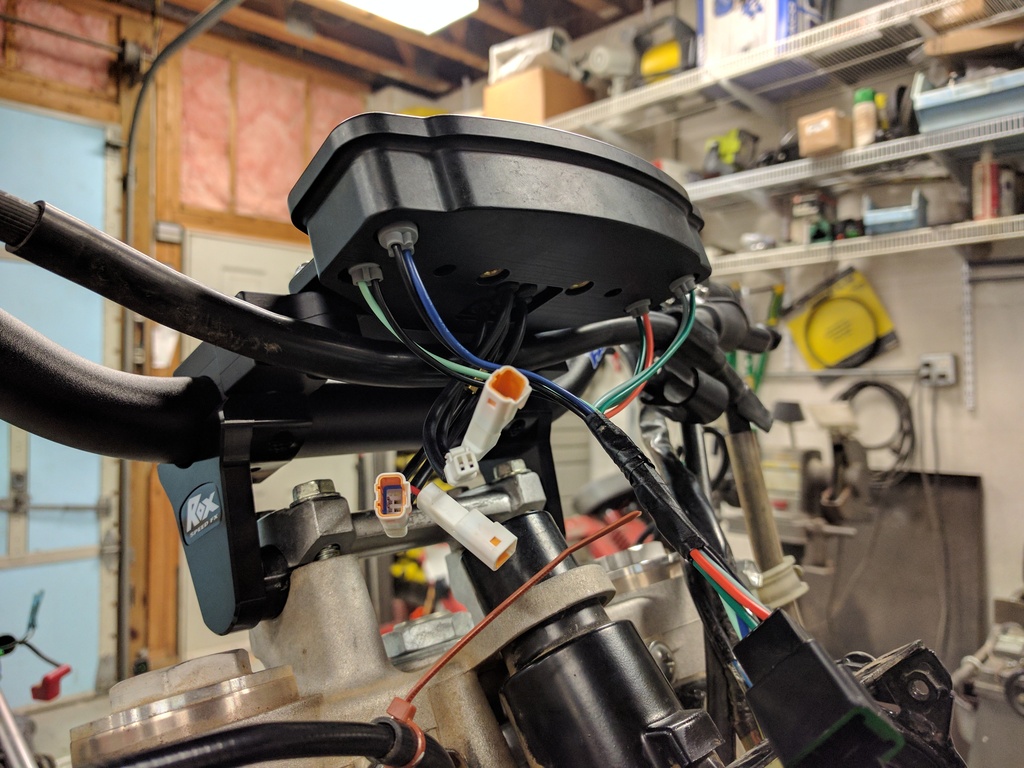
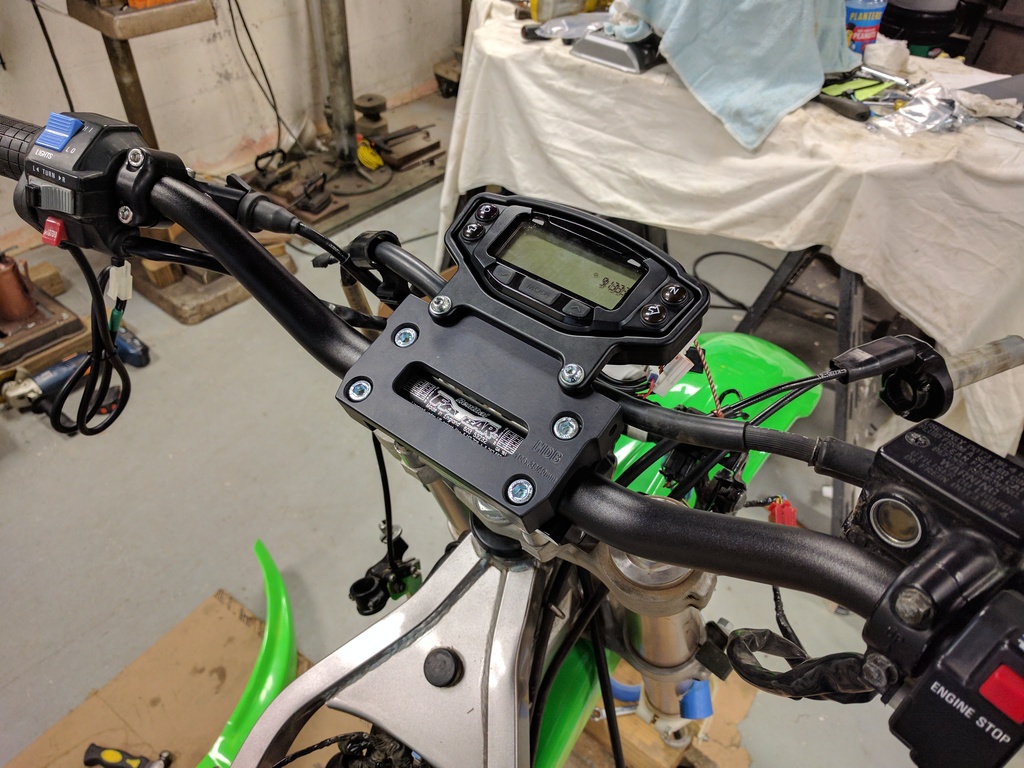
Trying to find things to do while waiting for valve shims, but more and more things are depending on getting the motor set in the frame. I did a bit more on the Vapor install.
Removed the stock gauge and unpacked the wiring harness:
Set up the Vapor dash and got it set in the HDB mount, ignition is going to have to move I suppose:
Removed the stock gauge and unpacked the wiring harness:
Set up the Vapor dash and got it set in the HDB mount, ignition is going to have to move I suppose:
#26
02-22-2017, 09:08 AM

Awesome build. Basically building my bike so I can help you out. For reference: My Bike
1st things first. It doesn't what power you have, fix the damn suspension/springs first and foremost. With the extra weight, its going to be way too soft and the dampening/rebound is just going to be out of whack, making the bike harder to feel. Easy way is to get racetech gold valves and new springs. Or hard way is to do the KX125 fork mod (https://i.imgur.com/qsiV3sE.jpg). You can get the Ohlins Rear suspension now (OHLINS : Rear Suspension [KA110018]) but a bit pricy given how much the bike is worth. But already spent enough on my bike, I might as well keep on going and get one eventually.
2nd is the vibration does get to you on the highway. I would look into sacrificing the bark busters and get the bar ends that stop the vibration. Or get the bark buster that don't curve all the way around. Either way, the vibration is really annoying on the handlebars after 200km stint. Its a bit from the tyres and bit from the engine. BB does balance this out much as possible with the piston, but at the end of the day, thumpers go thump. Knobbly tyre knobnobobobobob.
3rd is that subframe. You really do need to reinforce it. Otherwise: https://i.imgur.com/5pcW174.jpg or https://i.imgur.com/zI7hfSi.jpg and needed this as well: https://i.imgur.com/BmfyAjF.jpg.
4rd is fuel milage. I get 250km on 3gal (11ltrs) as I have the IMS tank and BB351 kit. It is running a tad rich but it does get hot here. Annoyingly it is *just* not enough to move around in the Australia and for that reason, I have a Rotopax 2.5gal on the back. That pushes my range to a comfortable 400km road+dirt. I just throw the swag and other stuff on top. In the dirt: https://i.imgur.com/f8VY6Ev.jpg. Problem with the rotopax is that it whacks you in the **** when you go over whoops. It hurts. I would put the rotopax on the sides but will need to strengthen the racks quite a fair amount and that takes effort.
5th is the radiator fan. Wire up a override switch cause it nevers seems to switch on until after the engine needs it. BB351 can only sustain a good 30secs of WOT before it overheats.
6th. Get one of these: ZETA : Oil Filler Cap [ZE89-2110]. Nothing like riding back home and seizing your exhaust cam when earlier during the day you fell and dragged your right foot from under the bike, loosening the oil cap in the process.
7th. You will need to strengthen the clutch. I went with the barnett springs + KX125 plates. Others went with EBC. No idea which one is better. But all I know is that if you do the BB351 mod, you need stronger clutch.
8th. Krieger Cam Chain Tensioners KLX250 engine sounds like a tractor otherwise.
9. https://i.imgur.com/yDT2O6L.jpg. If you do jumps, make sure the number plate doesn't catch the rear tyre.
If you are going to use the megabomb FMF header, get someone to redo the weld around the "bomb" part and use a worm clamp and the OEM guard to make a cheap heat shield. Or do it properly if you have the tools. https://i.imgur.com/m7VZkb1.jpg
Last edited by togenshi; 02-22-2017 at 09:18 AM.
#27
02-22-2017, 10:51 AM
Great ideas with a bit of feedback.
1. The suspension does need help depending on riders weight, Reducing rider weight helps the suspension, adds power to weight ratio, and usually helps the rider by being more fit, 160lbs ready to ride dropping 40lbs helped both me and the bike.
2. Balancing your knobbies helps a lot which most don't do.
3-4 Acerbis 3.7 puts more of the weight up front lower and reduces subframe weight.
If additional range is needed consider adding 2-1gal Rotopacs to side racks keeping the weight lower, Utilize the side racks to strengthen subframe if needed.
5
6 See #1 being more fit might help not dropping the bike as much :-)
Last edited by Iffykid; 02-22-2017 at 10:56 AM.
#28
02-28-2017, 02:14 AM
Awesome build. Basically building my bike so I can help you out. For reference: My Bike
.............
If you are going to use the megabomb FMF header, get someone to redo the weld around the "bomb" part and use a worm clamp and the OEM guard to make a cheap heat shield. Or do it properly if you have the tools. https://i.imgur.com/m7VZkb1.jpg
.............
If you are going to use the megabomb FMF header, get someone to redo the weld around the "bomb" part and use a worm clamp and the OEM guard to make a cheap heat shield. Or do it properly if you have the tools. https://i.imgur.com/m7VZkb1.jpg
#29
02-28-2017, 02:18 AM
Great ideas with a bit of feedback.
1. The suspension does need help depending on riders weight, Reducing rider weight helps the suspension, adds power to weight ratio, and usually helps the rider by being more fit, 160lbs ready to ride dropping 40lbs helped both me and the bike.
2. Balancing your knobbies helps a lot which most don't do.
3-4 Acerbis 3.7 puts more of the weight up front lower and reduces subframe weight.
If additional range is needed consider adding 2-1gal Rotopacs to side racks keeping the weight lower, Utilize the side racks to strengthen subframe if needed.
5
6 See #1 being more fit might help not dropping the bike as much :-)
1. The suspension does need help depending on riders weight, Reducing rider weight helps the suspension, adds power to weight ratio, and usually helps the rider by being more fit, 160lbs ready to ride dropping 40lbs helped both me and the bike.
2. Balancing your knobbies helps a lot which most don't do.
3-4 Acerbis 3.7 puts more of the weight up front lower and reduces subframe weight.
If additional range is needed consider adding 2-1gal Rotopacs to side racks keeping the weight lower, Utilize the side racks to strengthen subframe if needed.
5
6 See #1 being more fit might help not dropping the bike as much :-)
#30
02-28-2017, 02:51 AM
Big milestone on the project complete! Got the motor totally finished and set back in the bike.
Finished checking the valve clearances. Didn't need the valve shims after all, everything seemed to be in spec. I had .15 and .13 on the intake side. Exhaust side was .18 and .19. Getting ready for final assembly:
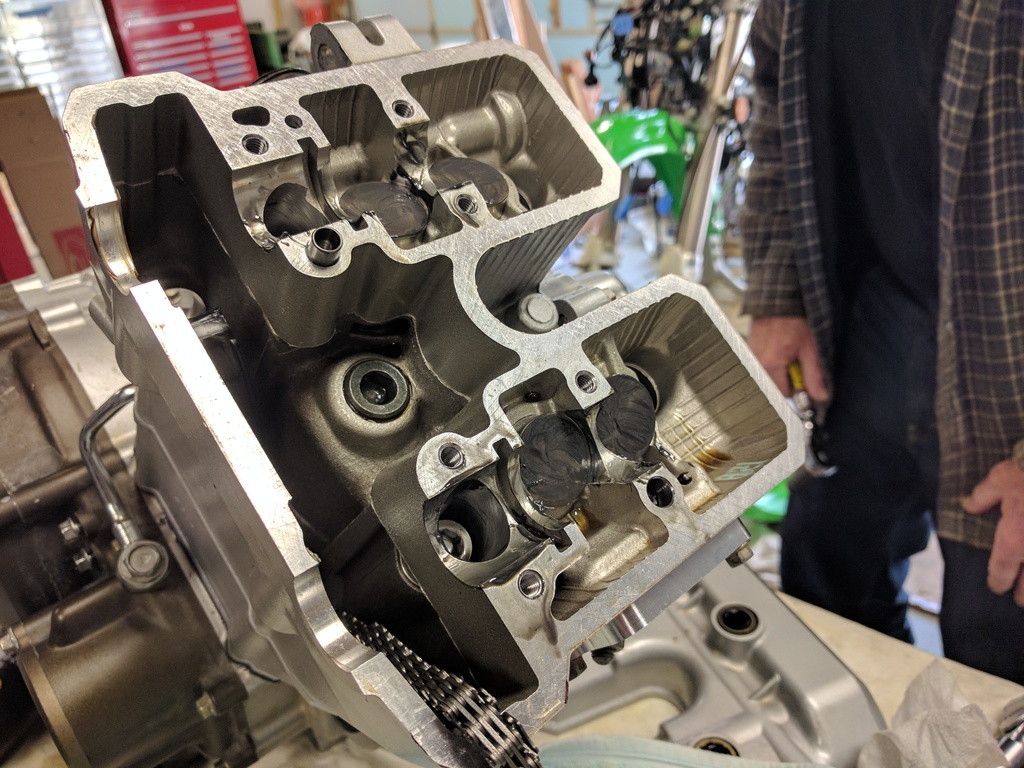
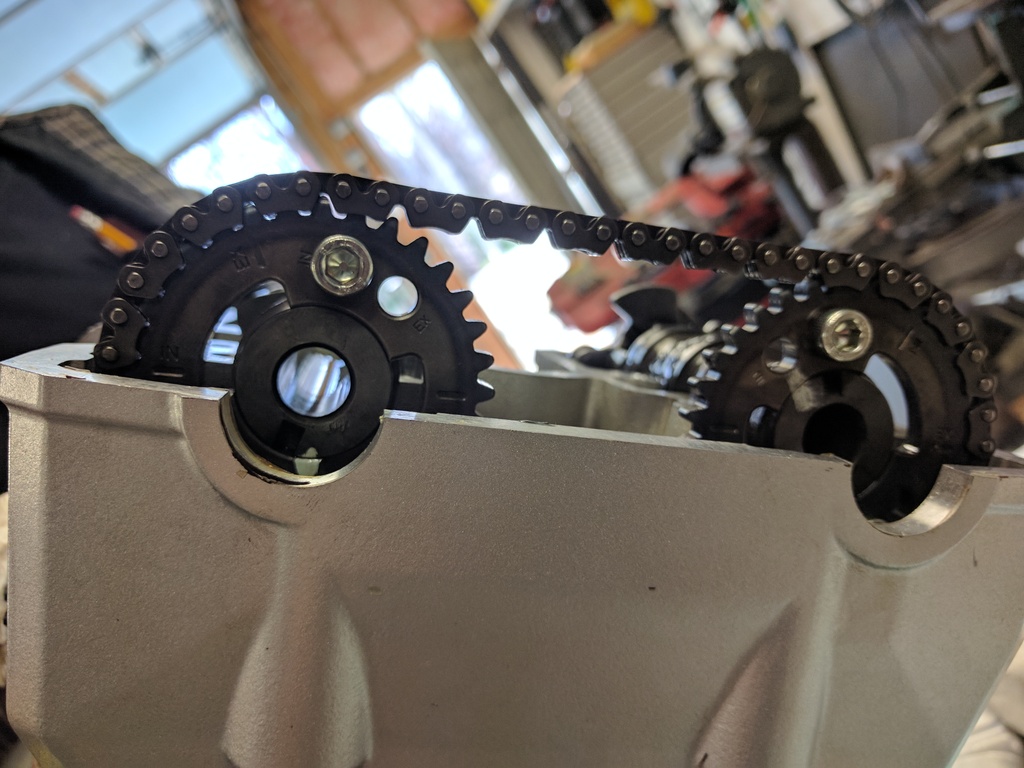
Cam timing set up:
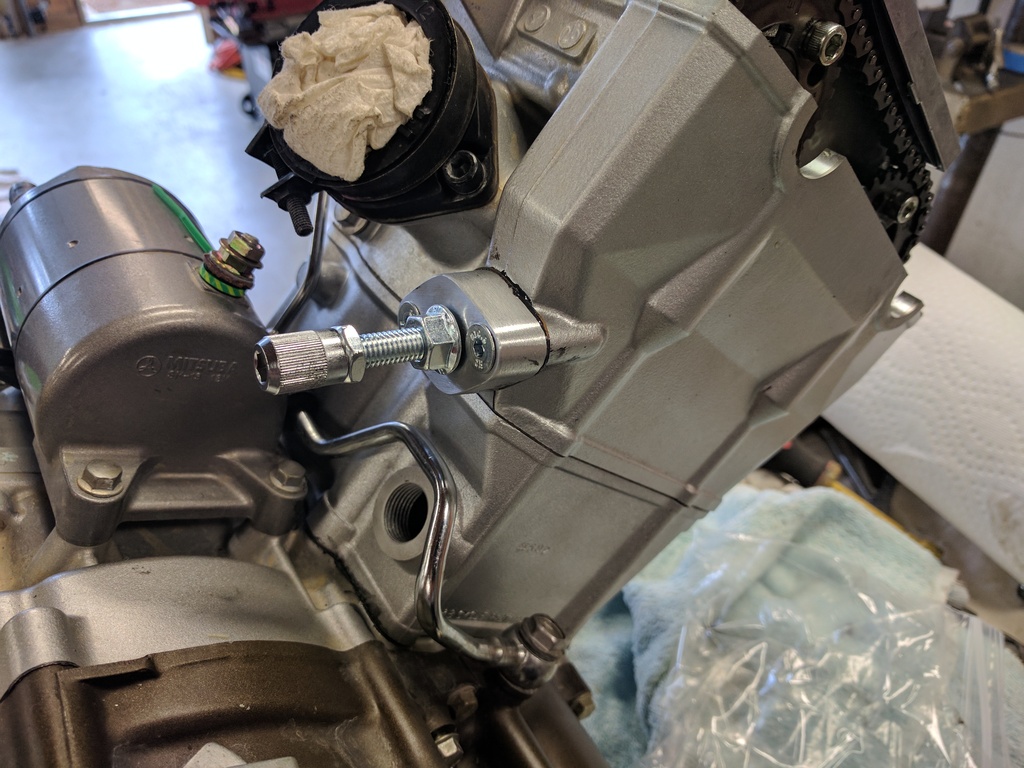
Krieger manual cam chain tensioner in. I'm not sure that my automatic cam chain tensioner was working correctly. It was all the way out when I pulled it initially. It may have just needed to be reset, but I feel better with the manual one in:
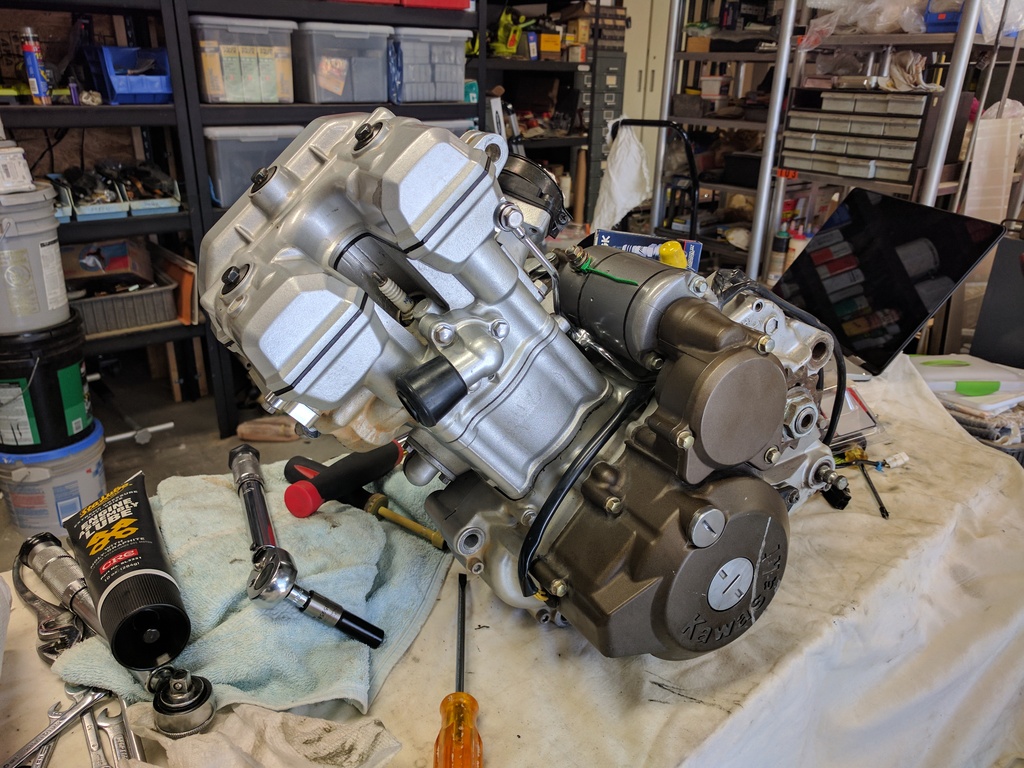
I also did the crankcase vent mod. Unfortunately I didn't take any photos of the process, I'm bad about taking pictures of the important stuff I guess. All the same, it went really well I think. I laid the motor on the clutch/oil fill side, with the head laying on the table it tilts the motor slight downward. I put some scrap 2x4 wood blocks underneath the crankcase to further angle the motor downward. During the process of drilling it out, I took out the oil fill plug and used the opening to send some compressed air through. Between that, grease on the bit, and the motor being tilted downward, I think that I kept it really clean. If you have access to compressed air, it works great for this mod. Here is the motor complete and ready to go in the bike:
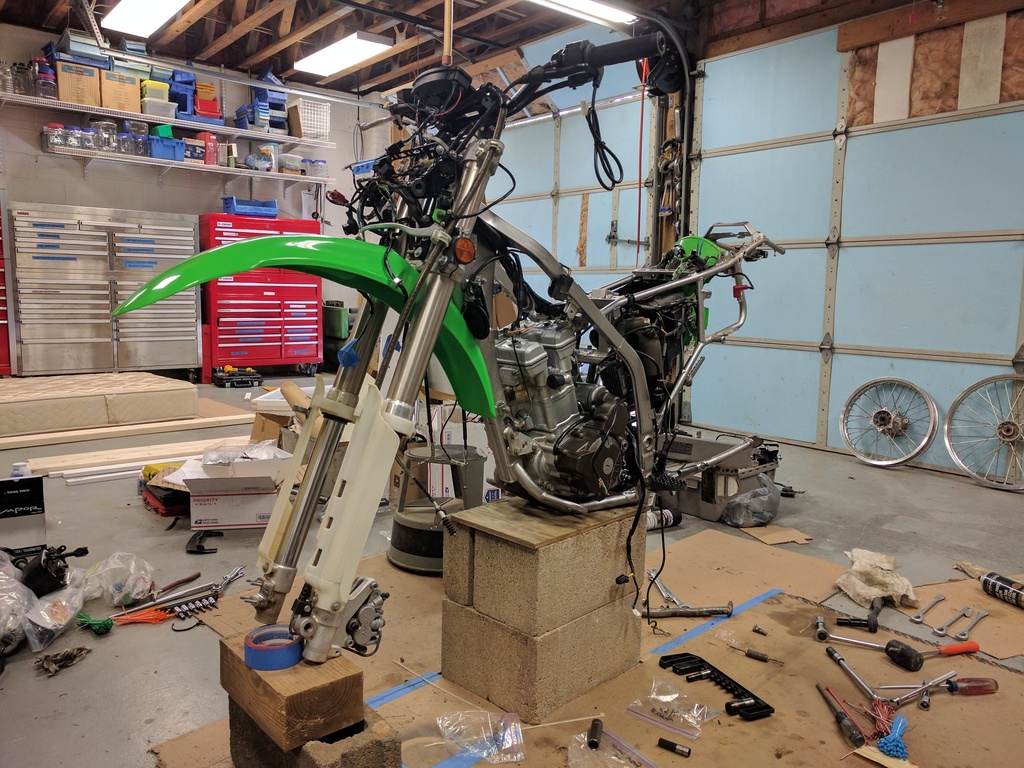
Dropped the motor back in the bike:
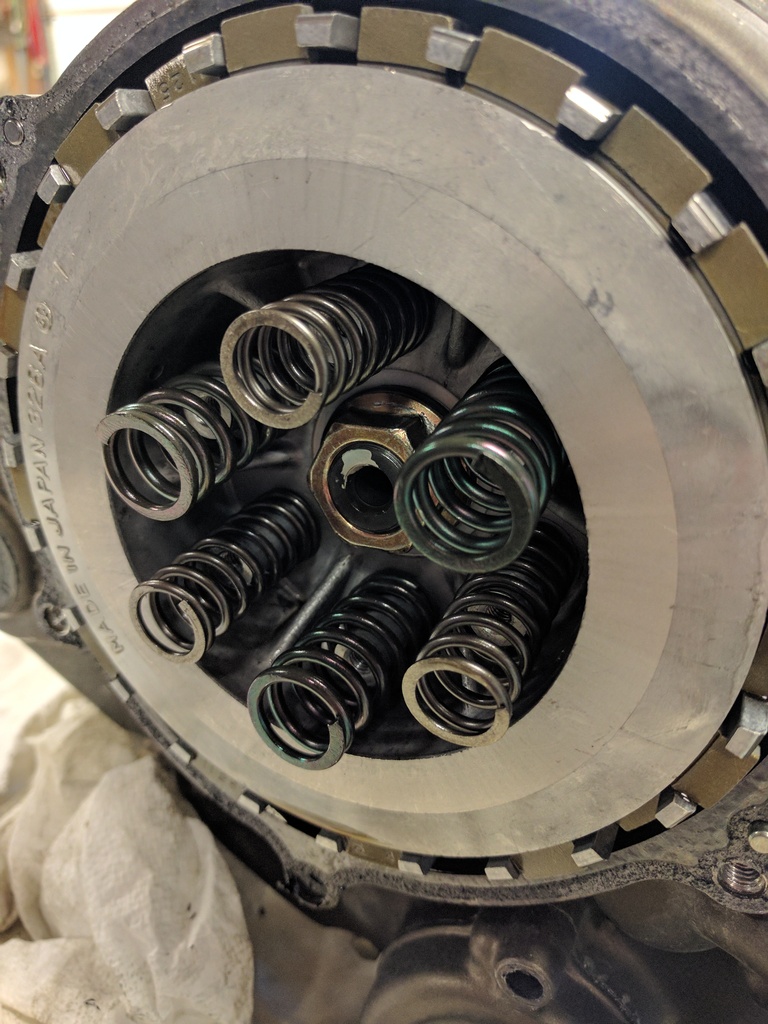
Went ahead and took care of the clutch. I decided to go with a simple spring change out first, if I get slippage I'll go for the clutch plates. I followed a recommendation from Mr Duhfactor's build. It involves changing out 3 of the springs for larger springs of the same length. Here is the video:
I'll be sure to follow up on how this works out. New and old springs side by side:
Finished checking the valve clearances. Didn't need the valve shims after all, everything seemed to be in spec. I had .15 and .13 on the intake side. Exhaust side was .18 and .19. Getting ready for final assembly:
Cam timing set up:
Krieger manual cam chain tensioner in. I'm not sure that my automatic cam chain tensioner was working correctly. It was all the way out when I pulled it initially. It may have just needed to be reset, but I feel better with the manual one in:
I also did the crankcase vent mod. Unfortunately I didn't take any photos of the process, I'm bad about taking pictures of the important stuff I guess. All the same, it went really well I think. I laid the motor on the clutch/oil fill side, with the head laying on the table it tilts the motor slight downward. I put some scrap 2x4 wood blocks underneath the crankcase to further angle the motor downward. During the process of drilling it out, I took out the oil fill plug and used the opening to send some compressed air through. Between that, grease on the bit, and the motor being tilted downward, I think that I kept it really clean. If you have access to compressed air, it works great for this mod. Here is the motor complete and ready to go in the bike:
Dropped the motor back in the bike:
Went ahead and took care of the clutch. I decided to go with a simple spring change out first, if I get slippage I'll go for the clutch plates. I followed a recommendation from Mr Duhfactor's build. It involves changing out 3 of the springs for larger springs of the same length. Here is the video:
I'll be sure to follow up on how this works out. New and old springs side by side: