My KLX 250sf Tail light Job.
#1
 08-06-2016, 06:06 AM

Join Date: Jun 2016
Location: Illinois
Posts: 14
Hello, riders.
I am new to this forum. I have been lurking for a little while now, and I have a bunch of you to thank for informing me on various things about the KLX 250.
Today, I'd like to share with you a tail light job I recently did on my KLX 250sf.
Turned out pretty neat.
I'm quite proud of it. I hardly ever DIY, but provided I have a bike now, I decided to make use of my dad's abundance of tools and garage space.
Here's the process. (Beware, high-res images incoming.)
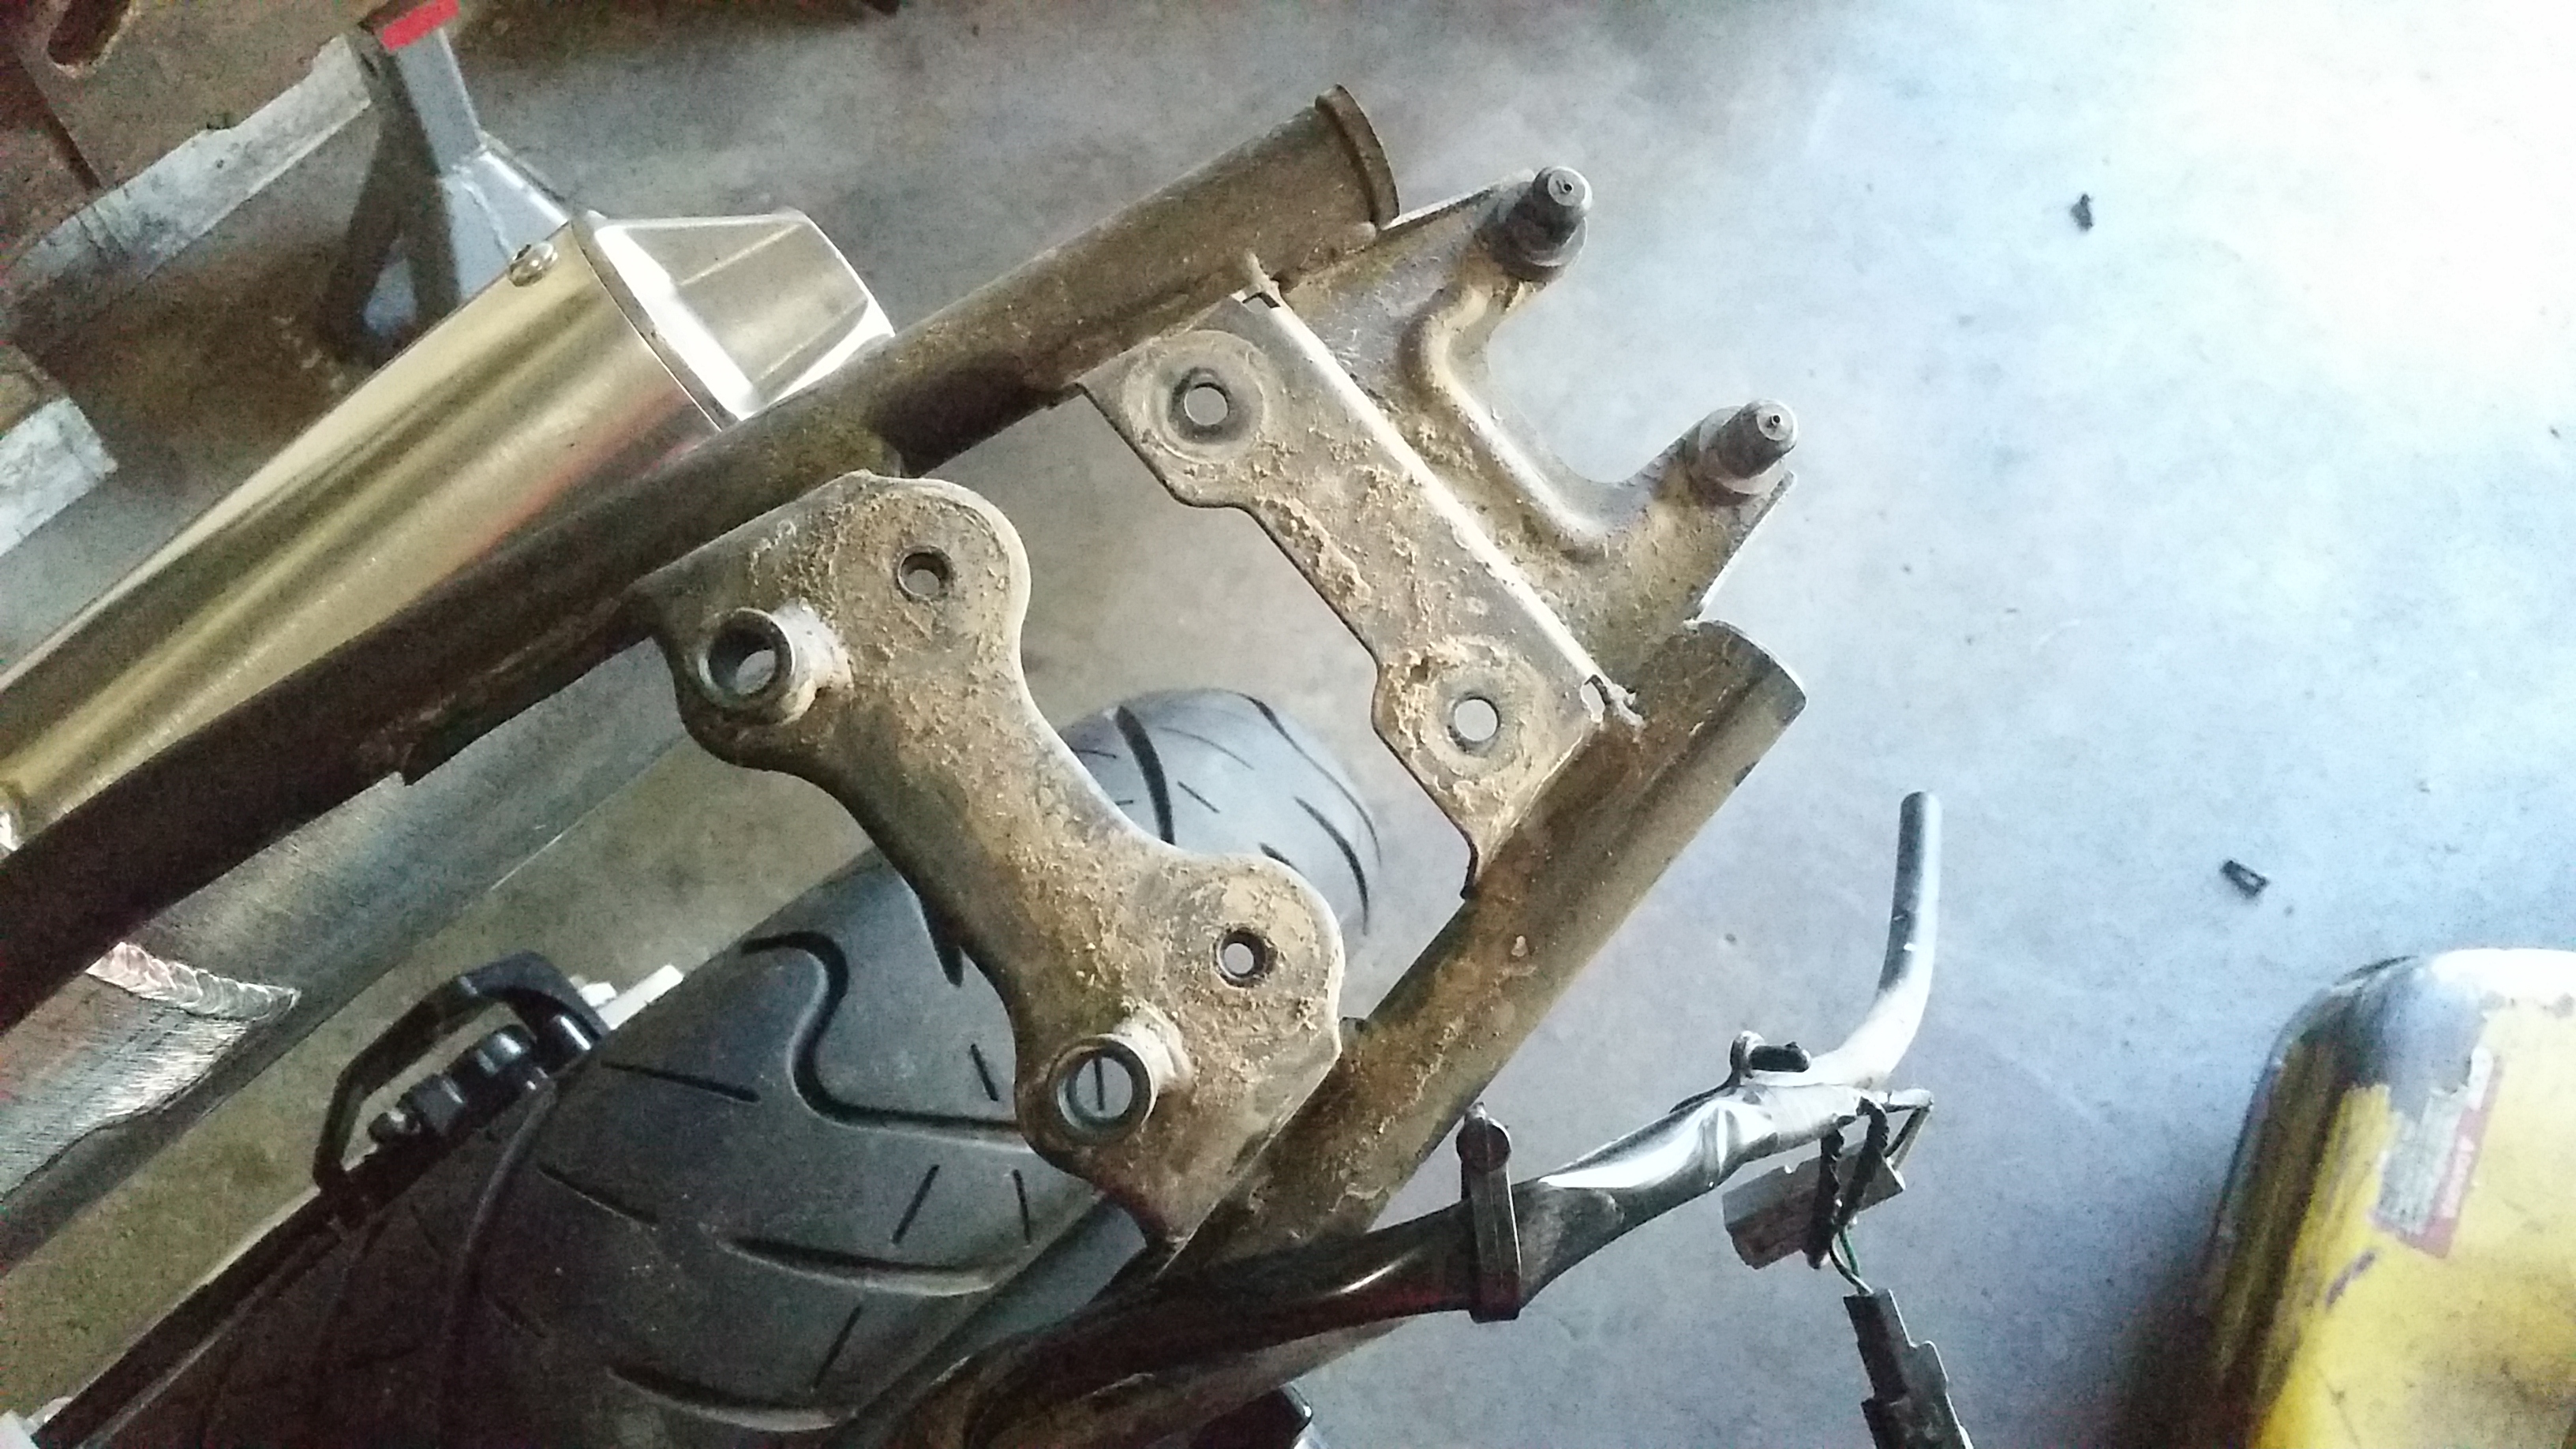
I began taking the stock taillight assembly off, naturally.

The frame under it was quite dirty. Gave it a bit of a cleaning.
Made sure to gather all my parts together, try and work so parts don't get easily lost.
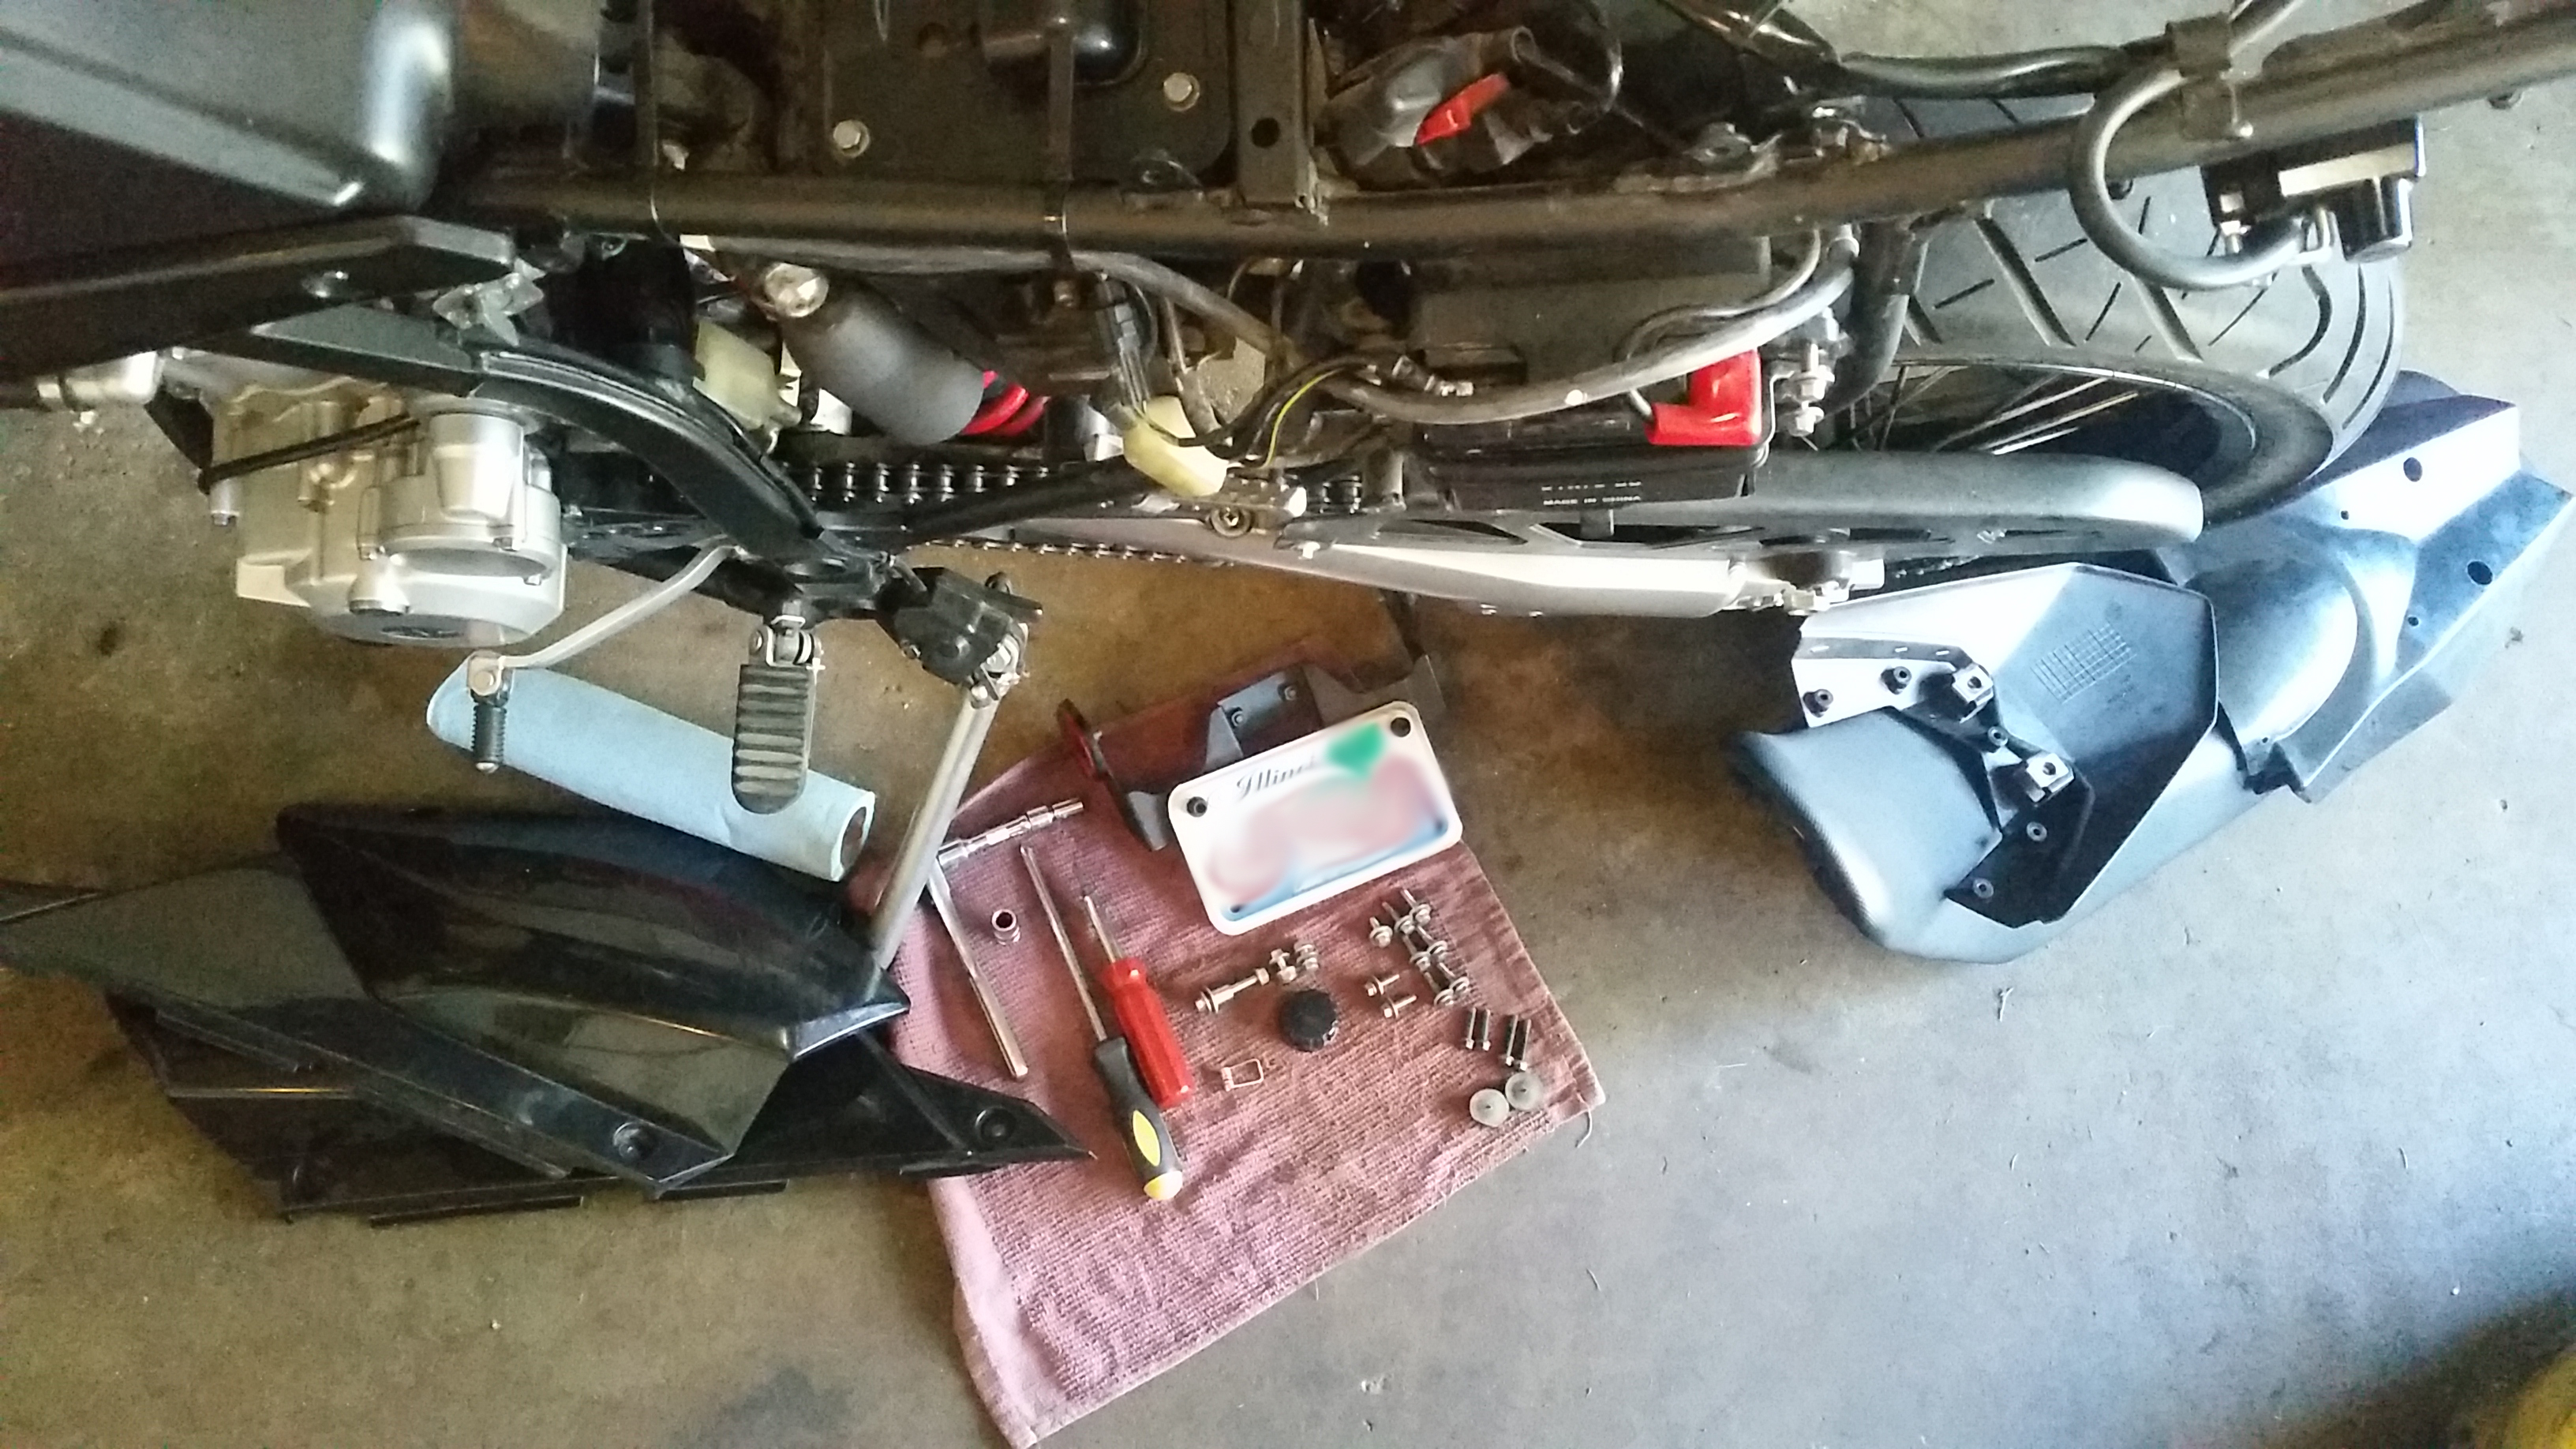
Believe me, much MUCH more tools come into play later, and more parts get scattered on the floor.
My Stuff Arrived!
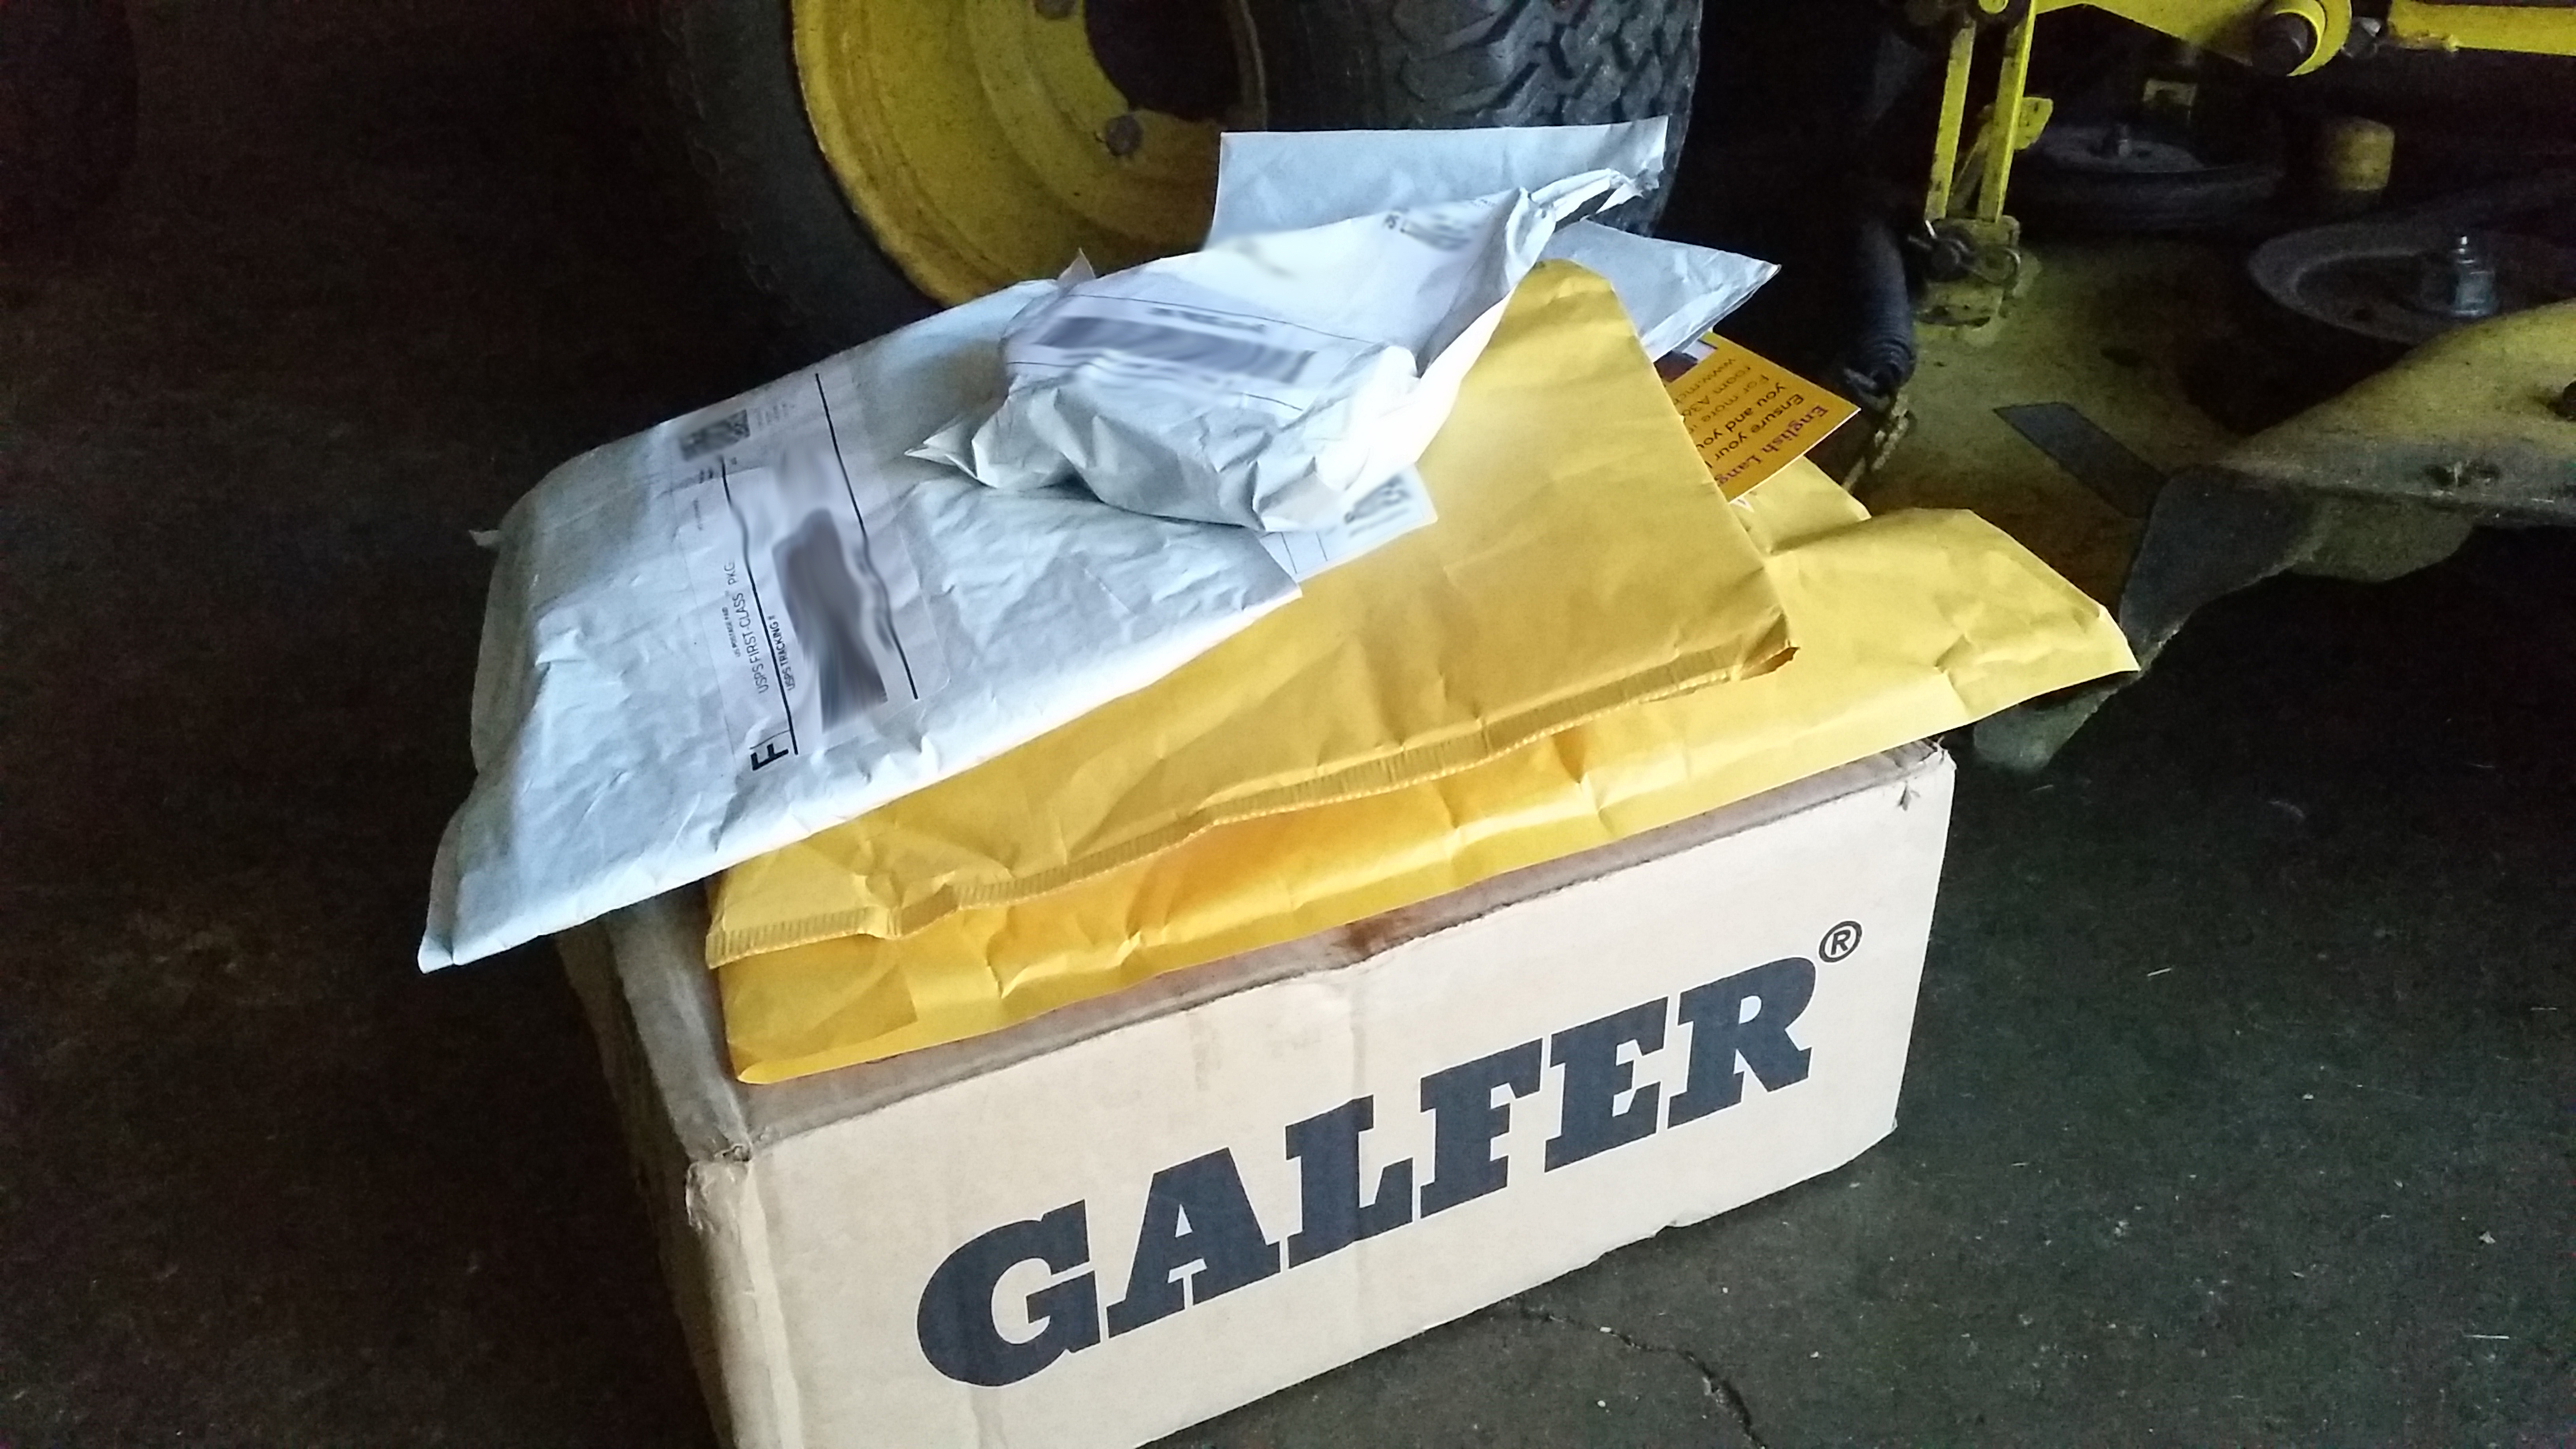
I ordered the DRC Edge 2 tail light in red, listed online here.
Also with this project, I ordered DRC 602 Clear LED Arrow turn signals here.
and Oxford Arrow bulb signals from Revzilla, which by the way, I ended up liking better. They're smaller and brighter.
I should note, if you're installing LED tail lights/signals for the first time, you should know that, since LED lights consume less power than stock lights, you must separately purchase what's called a flasher relay unit that's compatible with LED lights, and replaces your OEM flasher OR purchase resistors that wire to your turn signals. This is to prevent the common problem of "turn signals flashing really fast after switching to aftermarket LEDs"
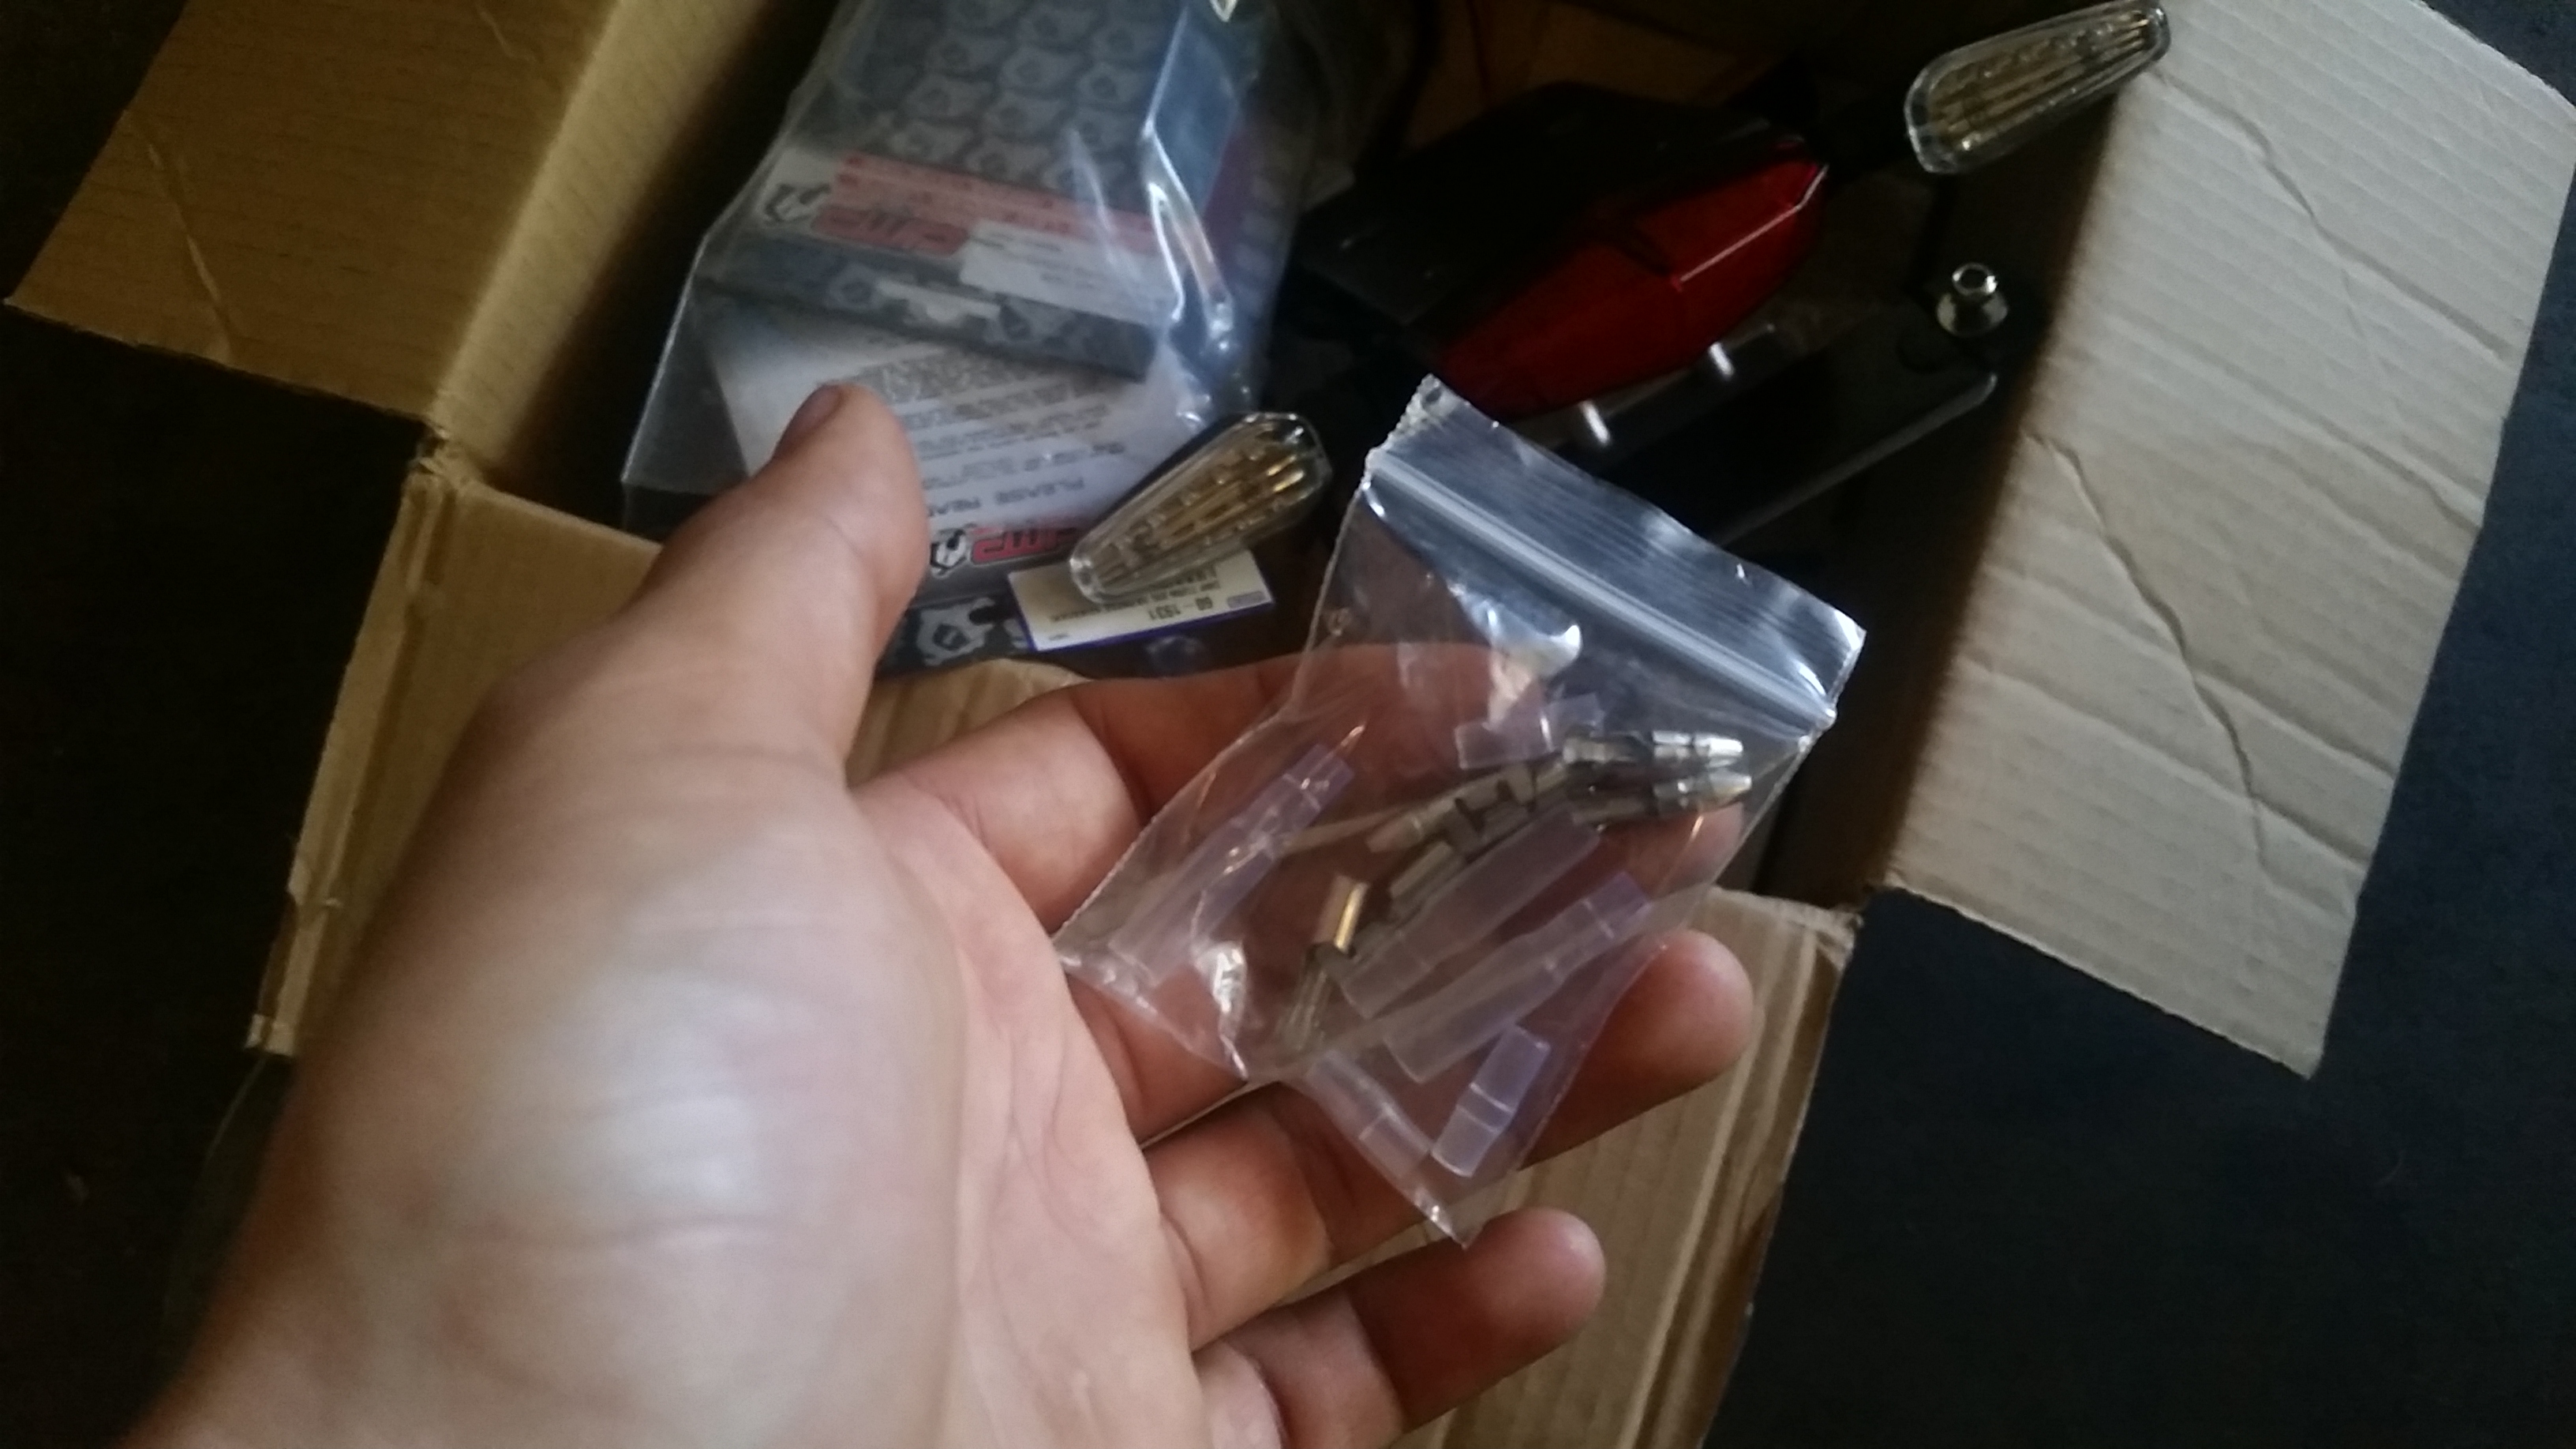
I purchased a relay off ebay.
I also purchased two pairs of OEM Kawasaki turn signal connectors that wire to my aftermarket turn signals, so they can cleanly plug-in and play to the connectors on the bike. (Beware DRC's site offers these connectors to be included in your light purchases for whatever bike you own, at an extra charge, but I did not receive mine.)
Here is a quick glance at the front turn signal installation.
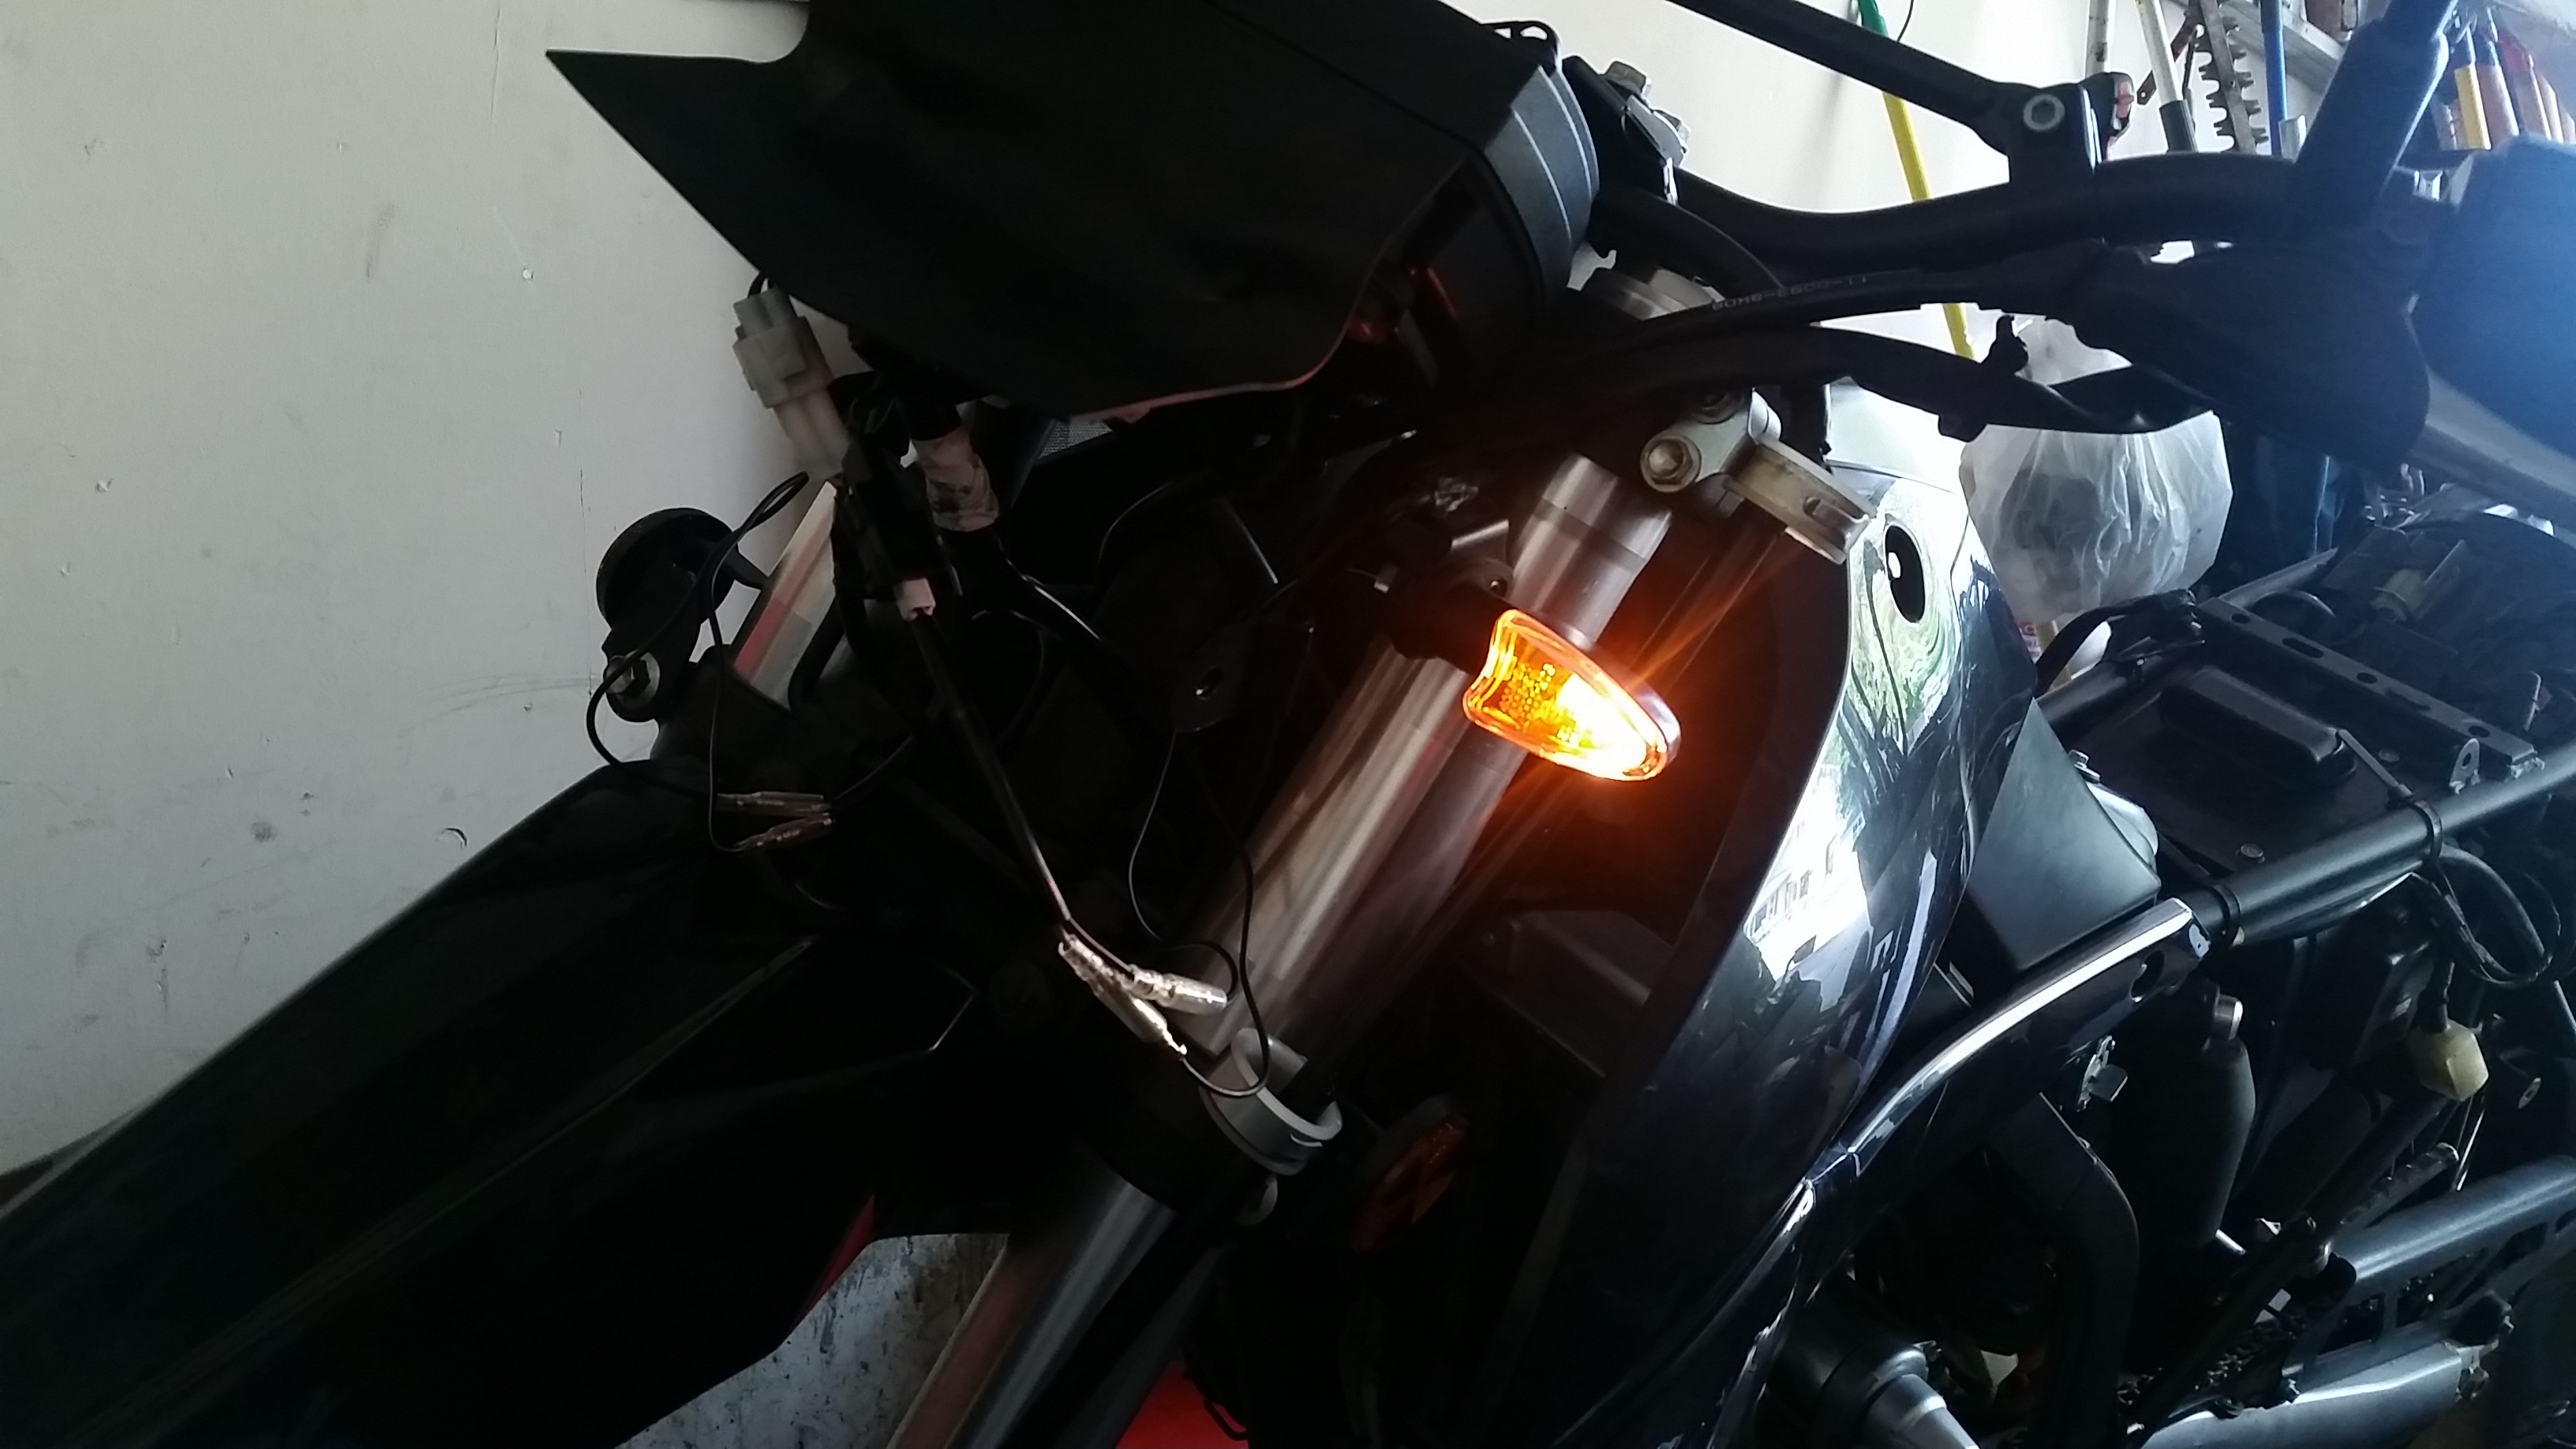
These signals are bright!
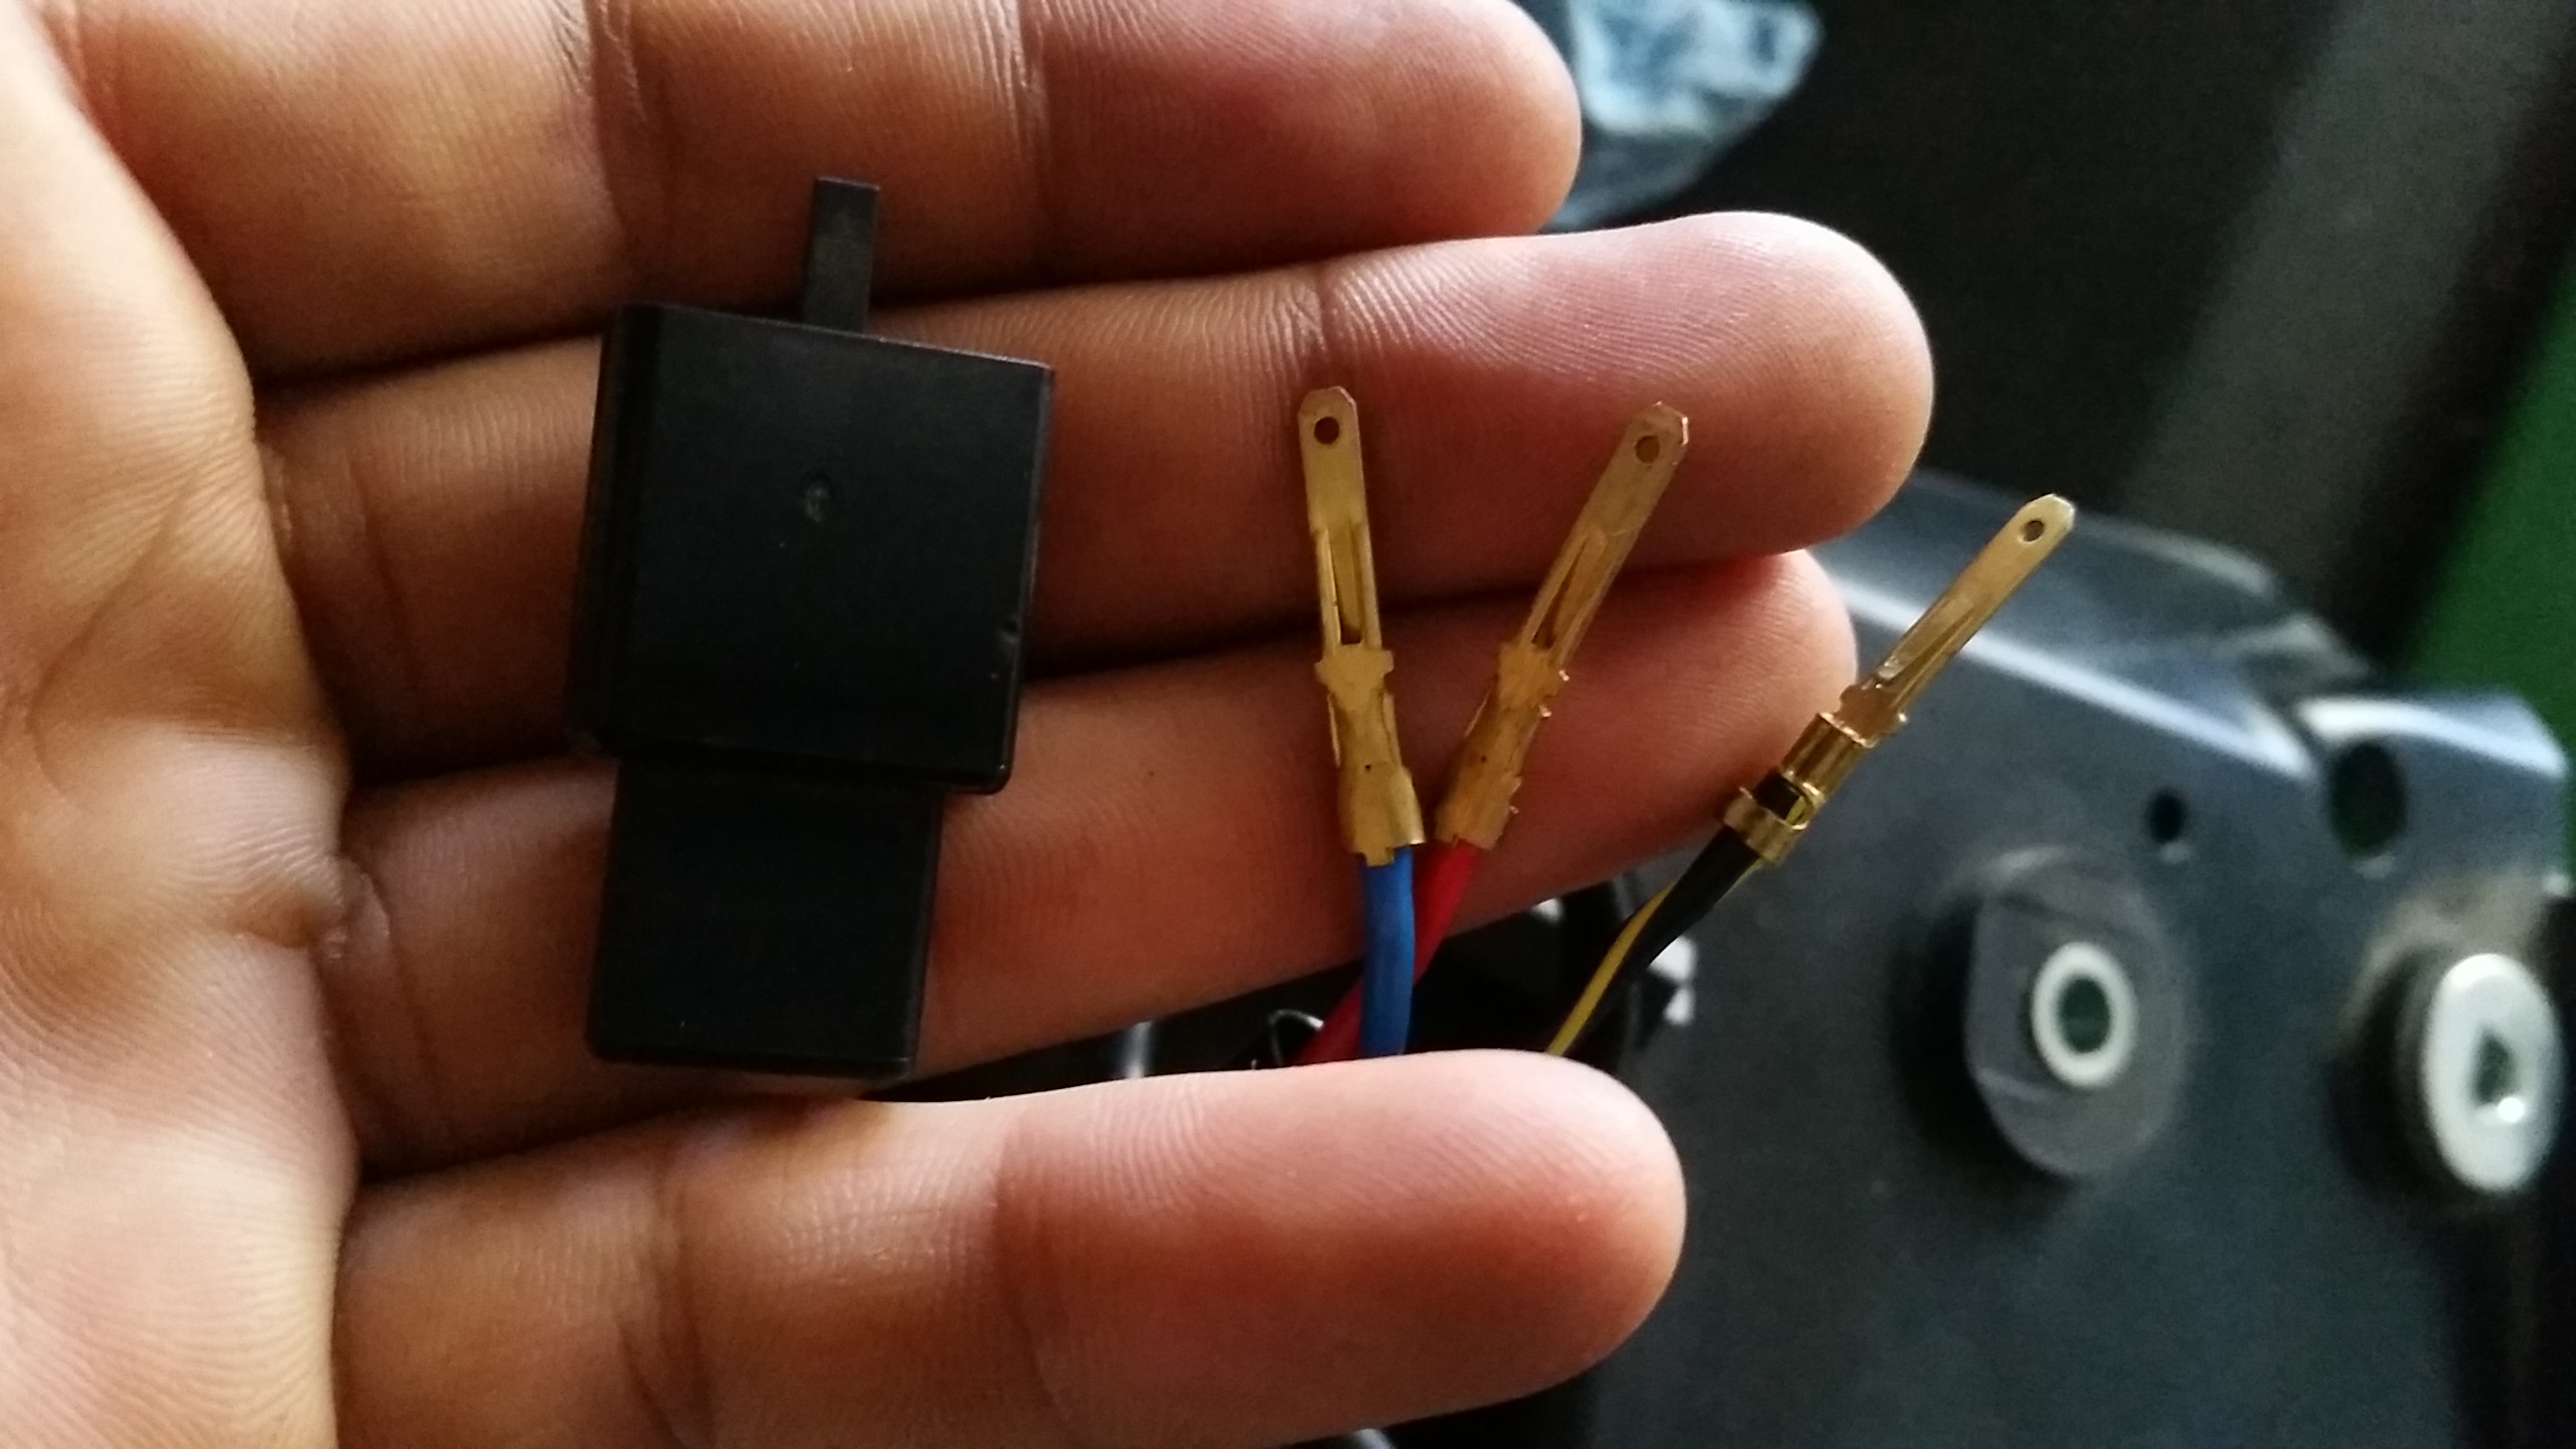
Here is the tail light and signals attached to the aluminum assembly. In my hand are the silly metal connectors that SHOULD HAVE been already crimped onto the turn signal wires. The oxford ones already had the connectors ready to plug-and-play. Thanks drc.
In this picture are the STOCK KLX tail light wires and its connector. I used a paper clip to unlock and slide them out.
I originally wanted to wire my DRC tail light to an OEM Kawasaki connector so I could plug and play to the bikes connector. I didn't want to cut up too many wires, and make the cleanest wiring job.
But as I said earlier, my DRC tail light somehow didn't come with the connector I asked for, so this is what I did instead:
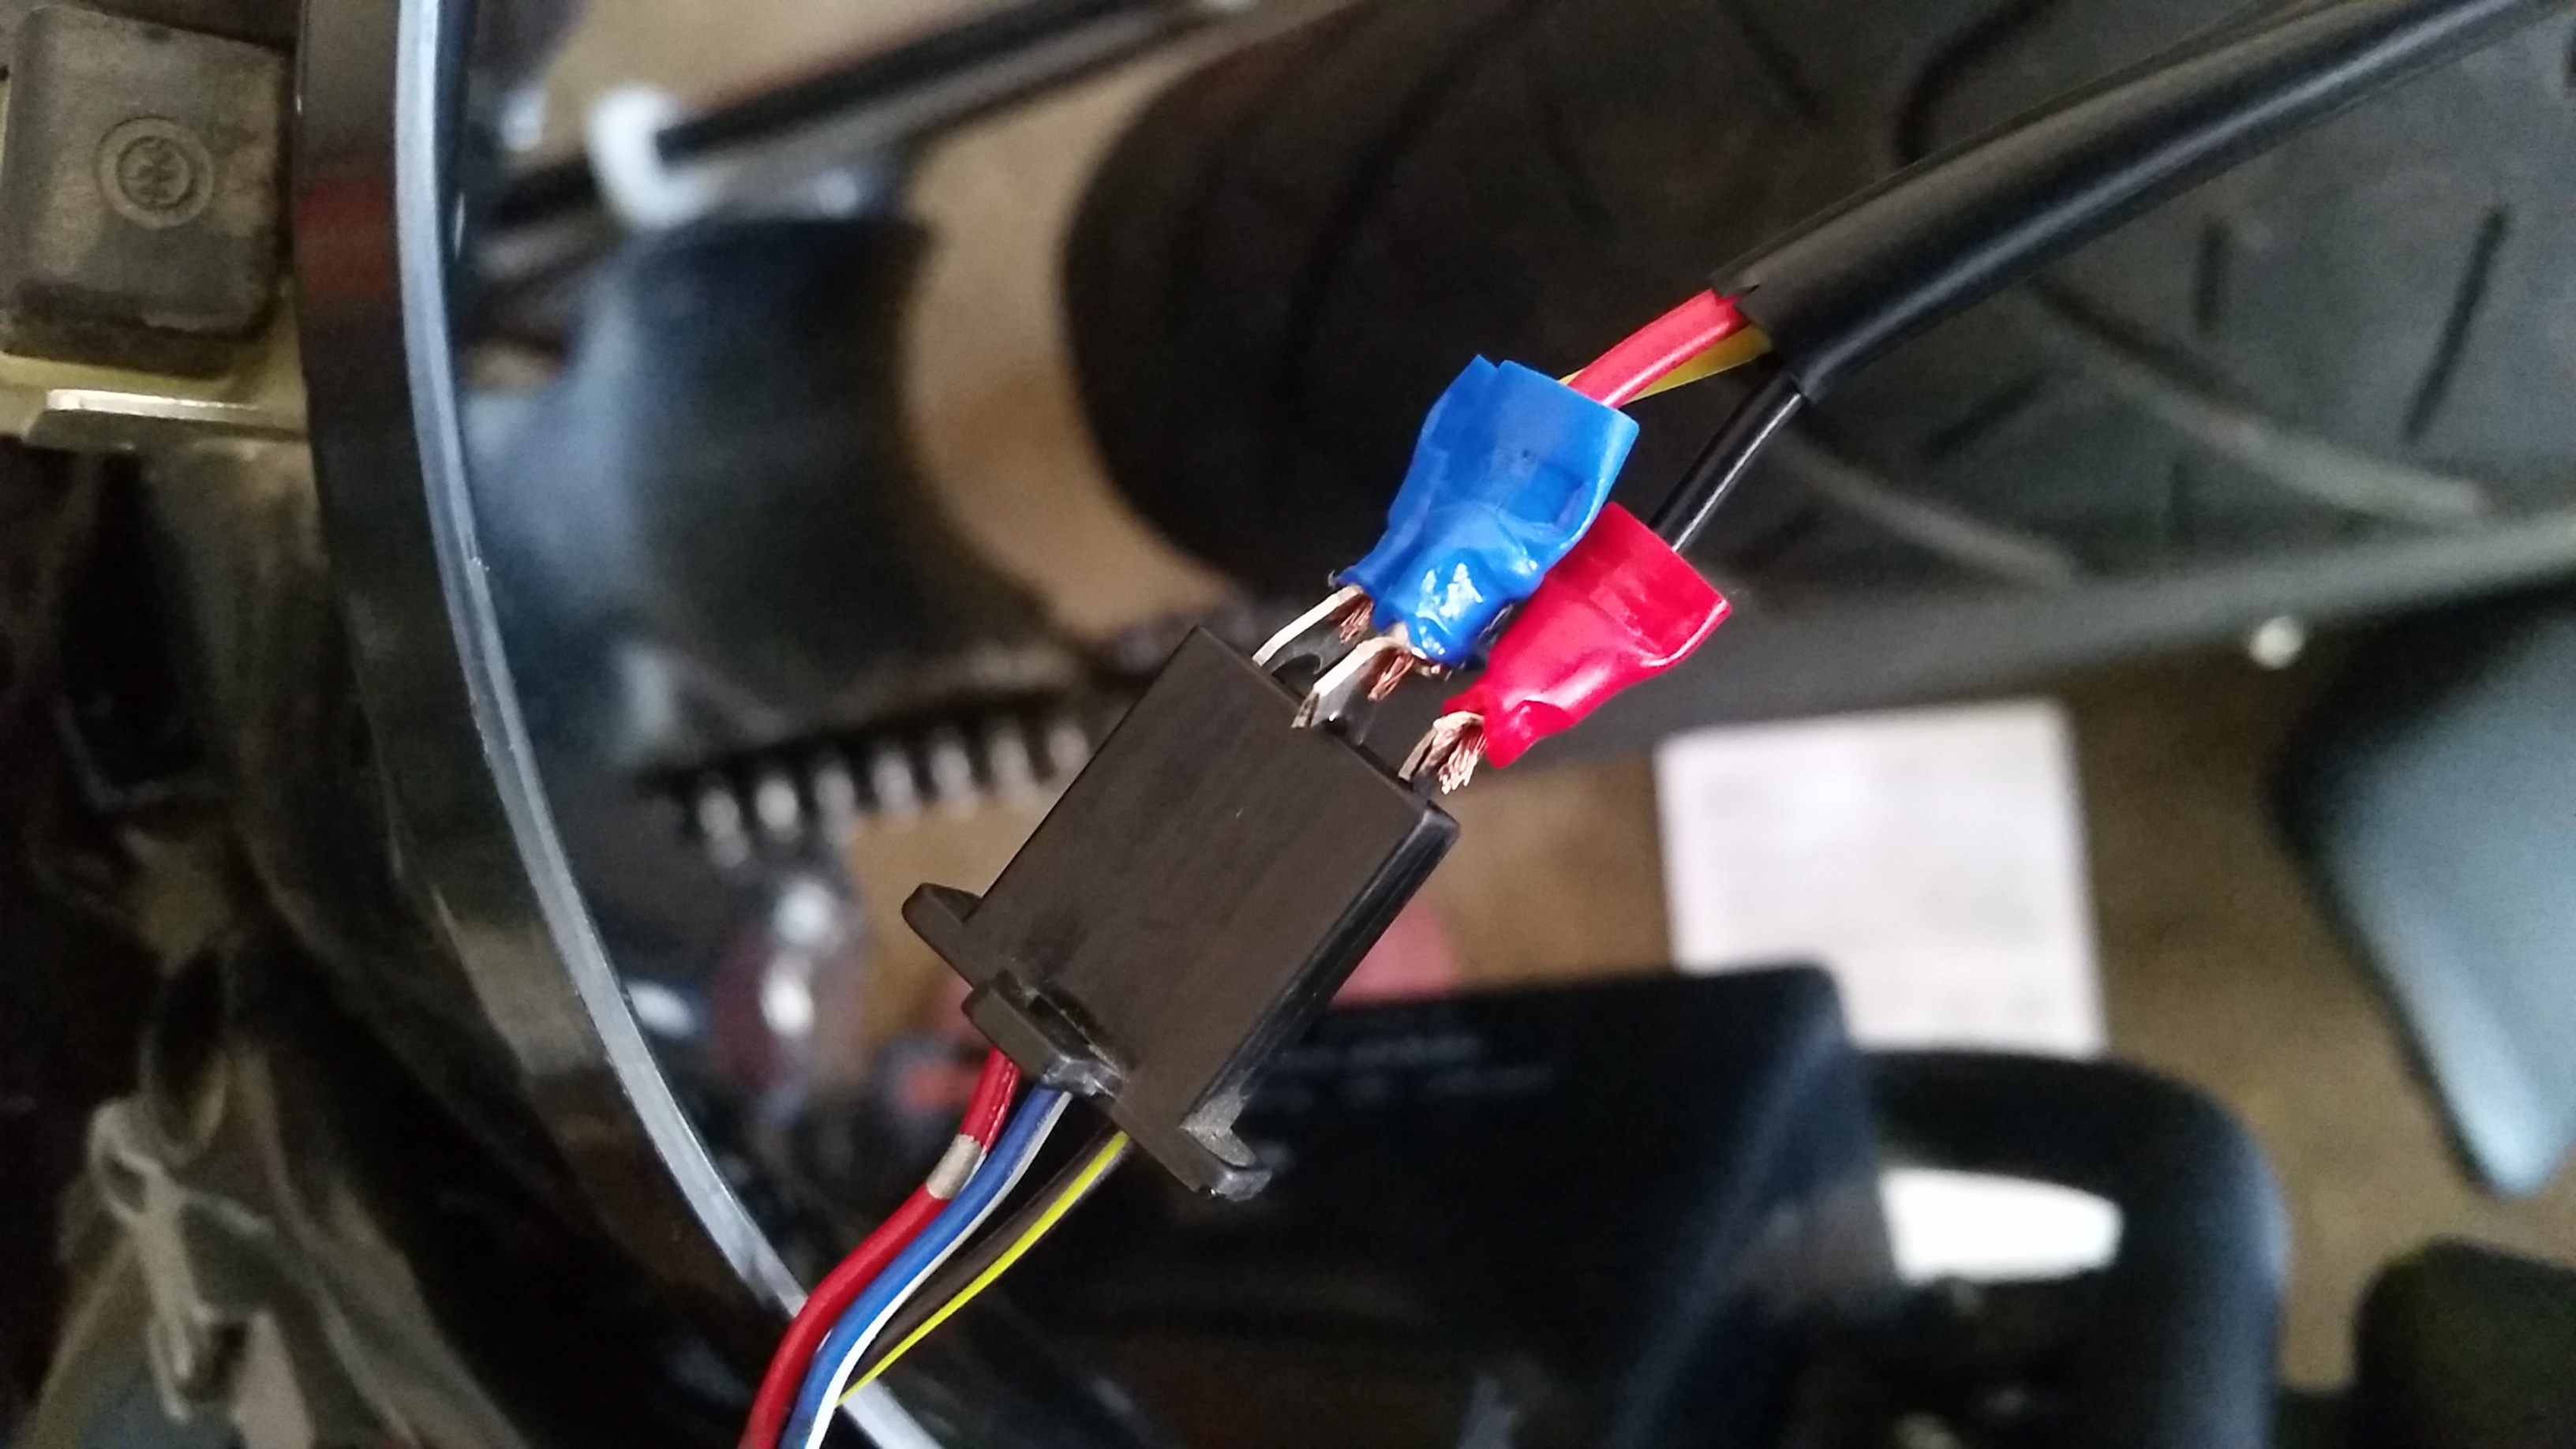
Instead of waiting, I hit up my local hardware store, bought a generic automotive wire crimper and terminal set. Crimped these "Y" terminals to the Edge2 tail light wires and plugged those bitches right in to the bike's connector. Don't worry, I wrapped electrical tape around each wire, and again over everything.
I wrapped everything.
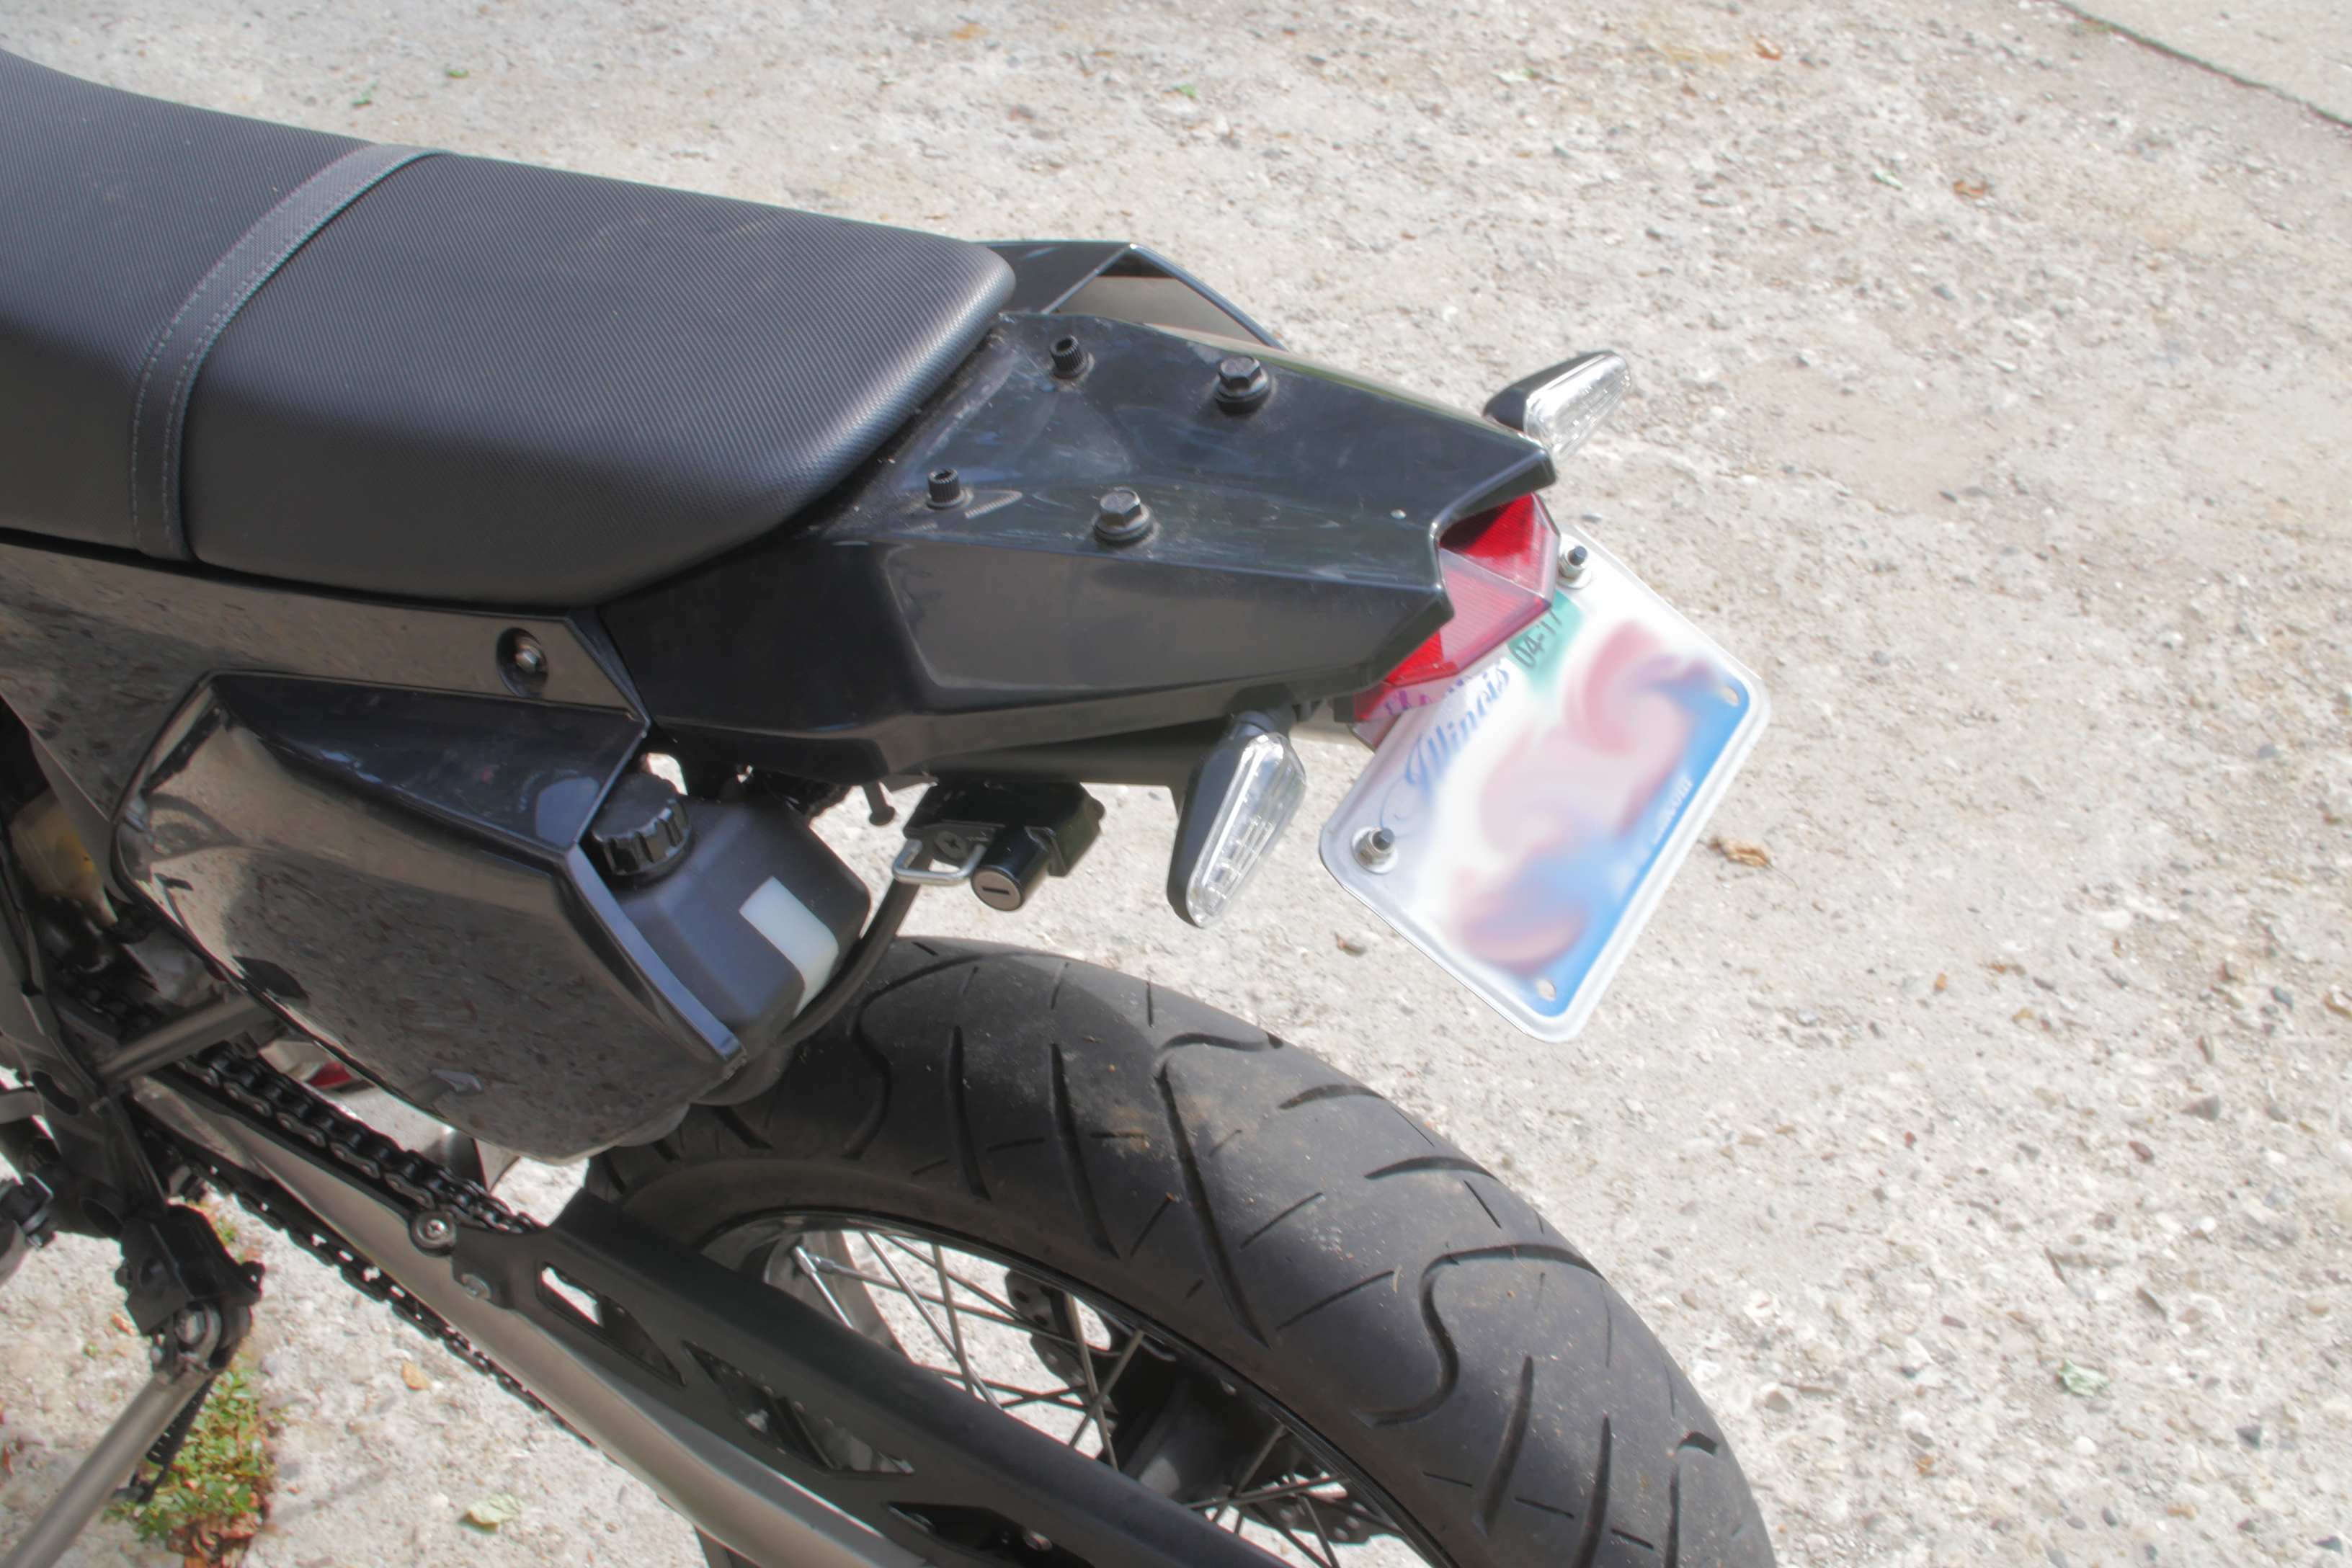
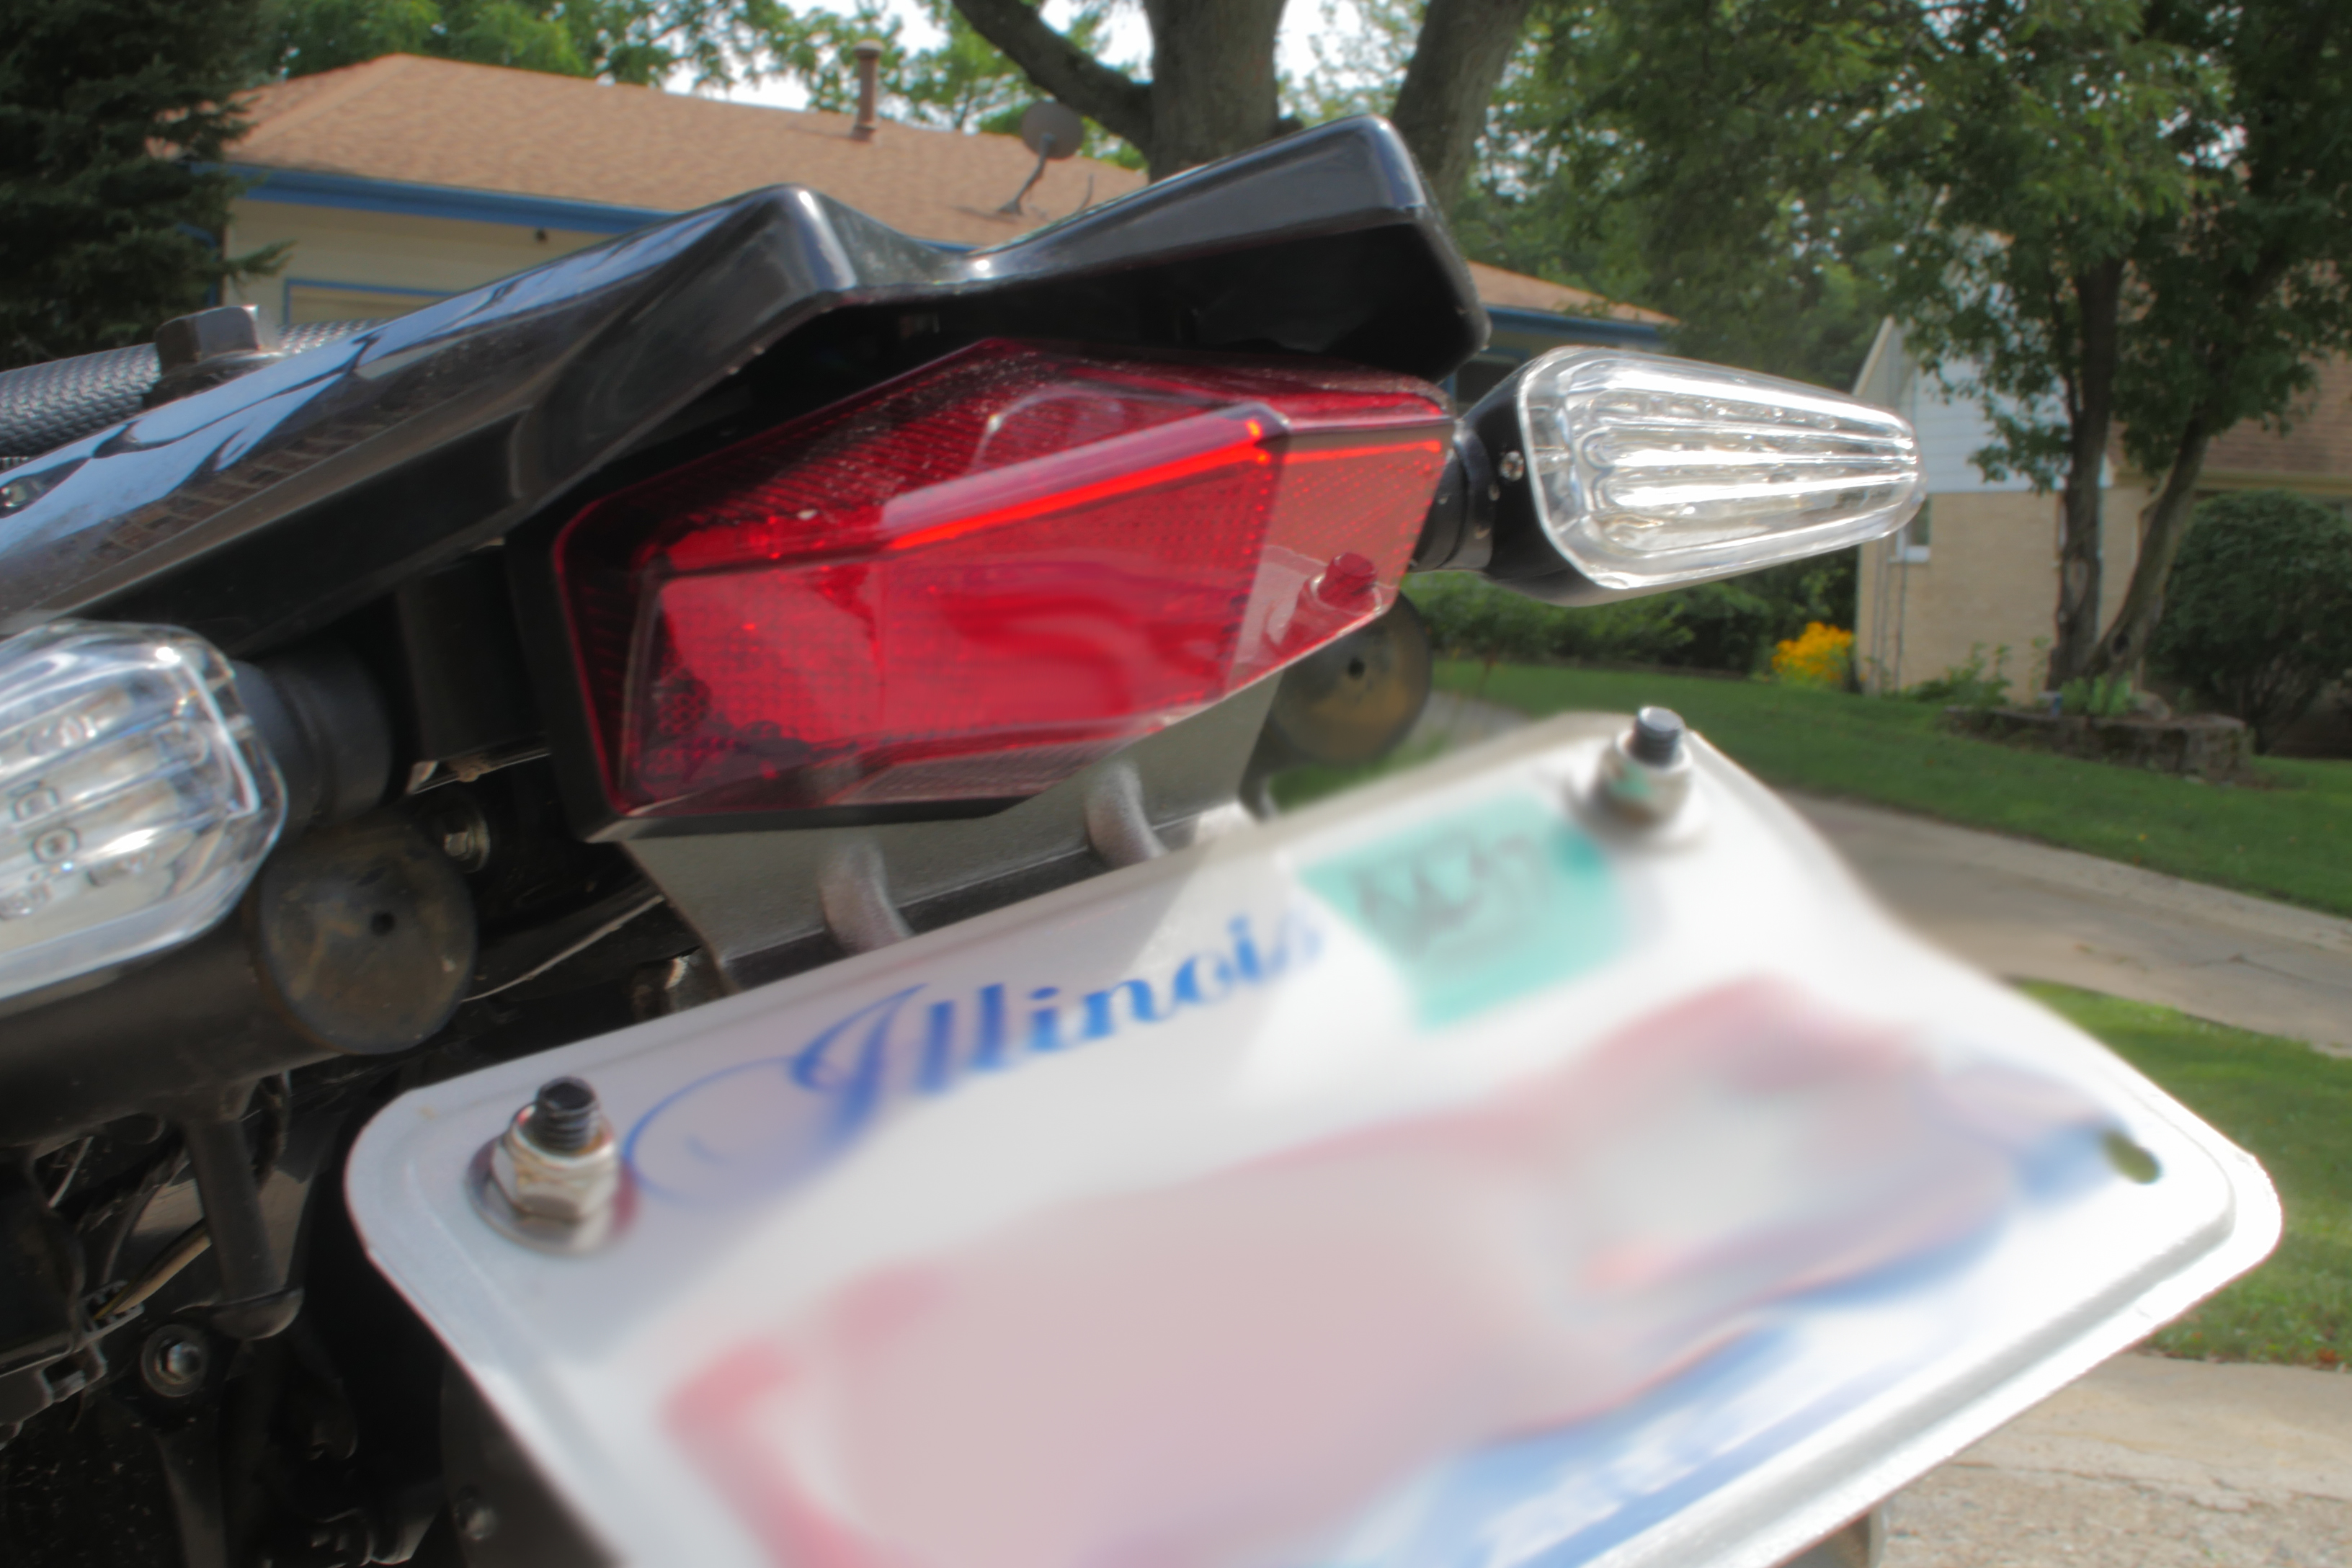
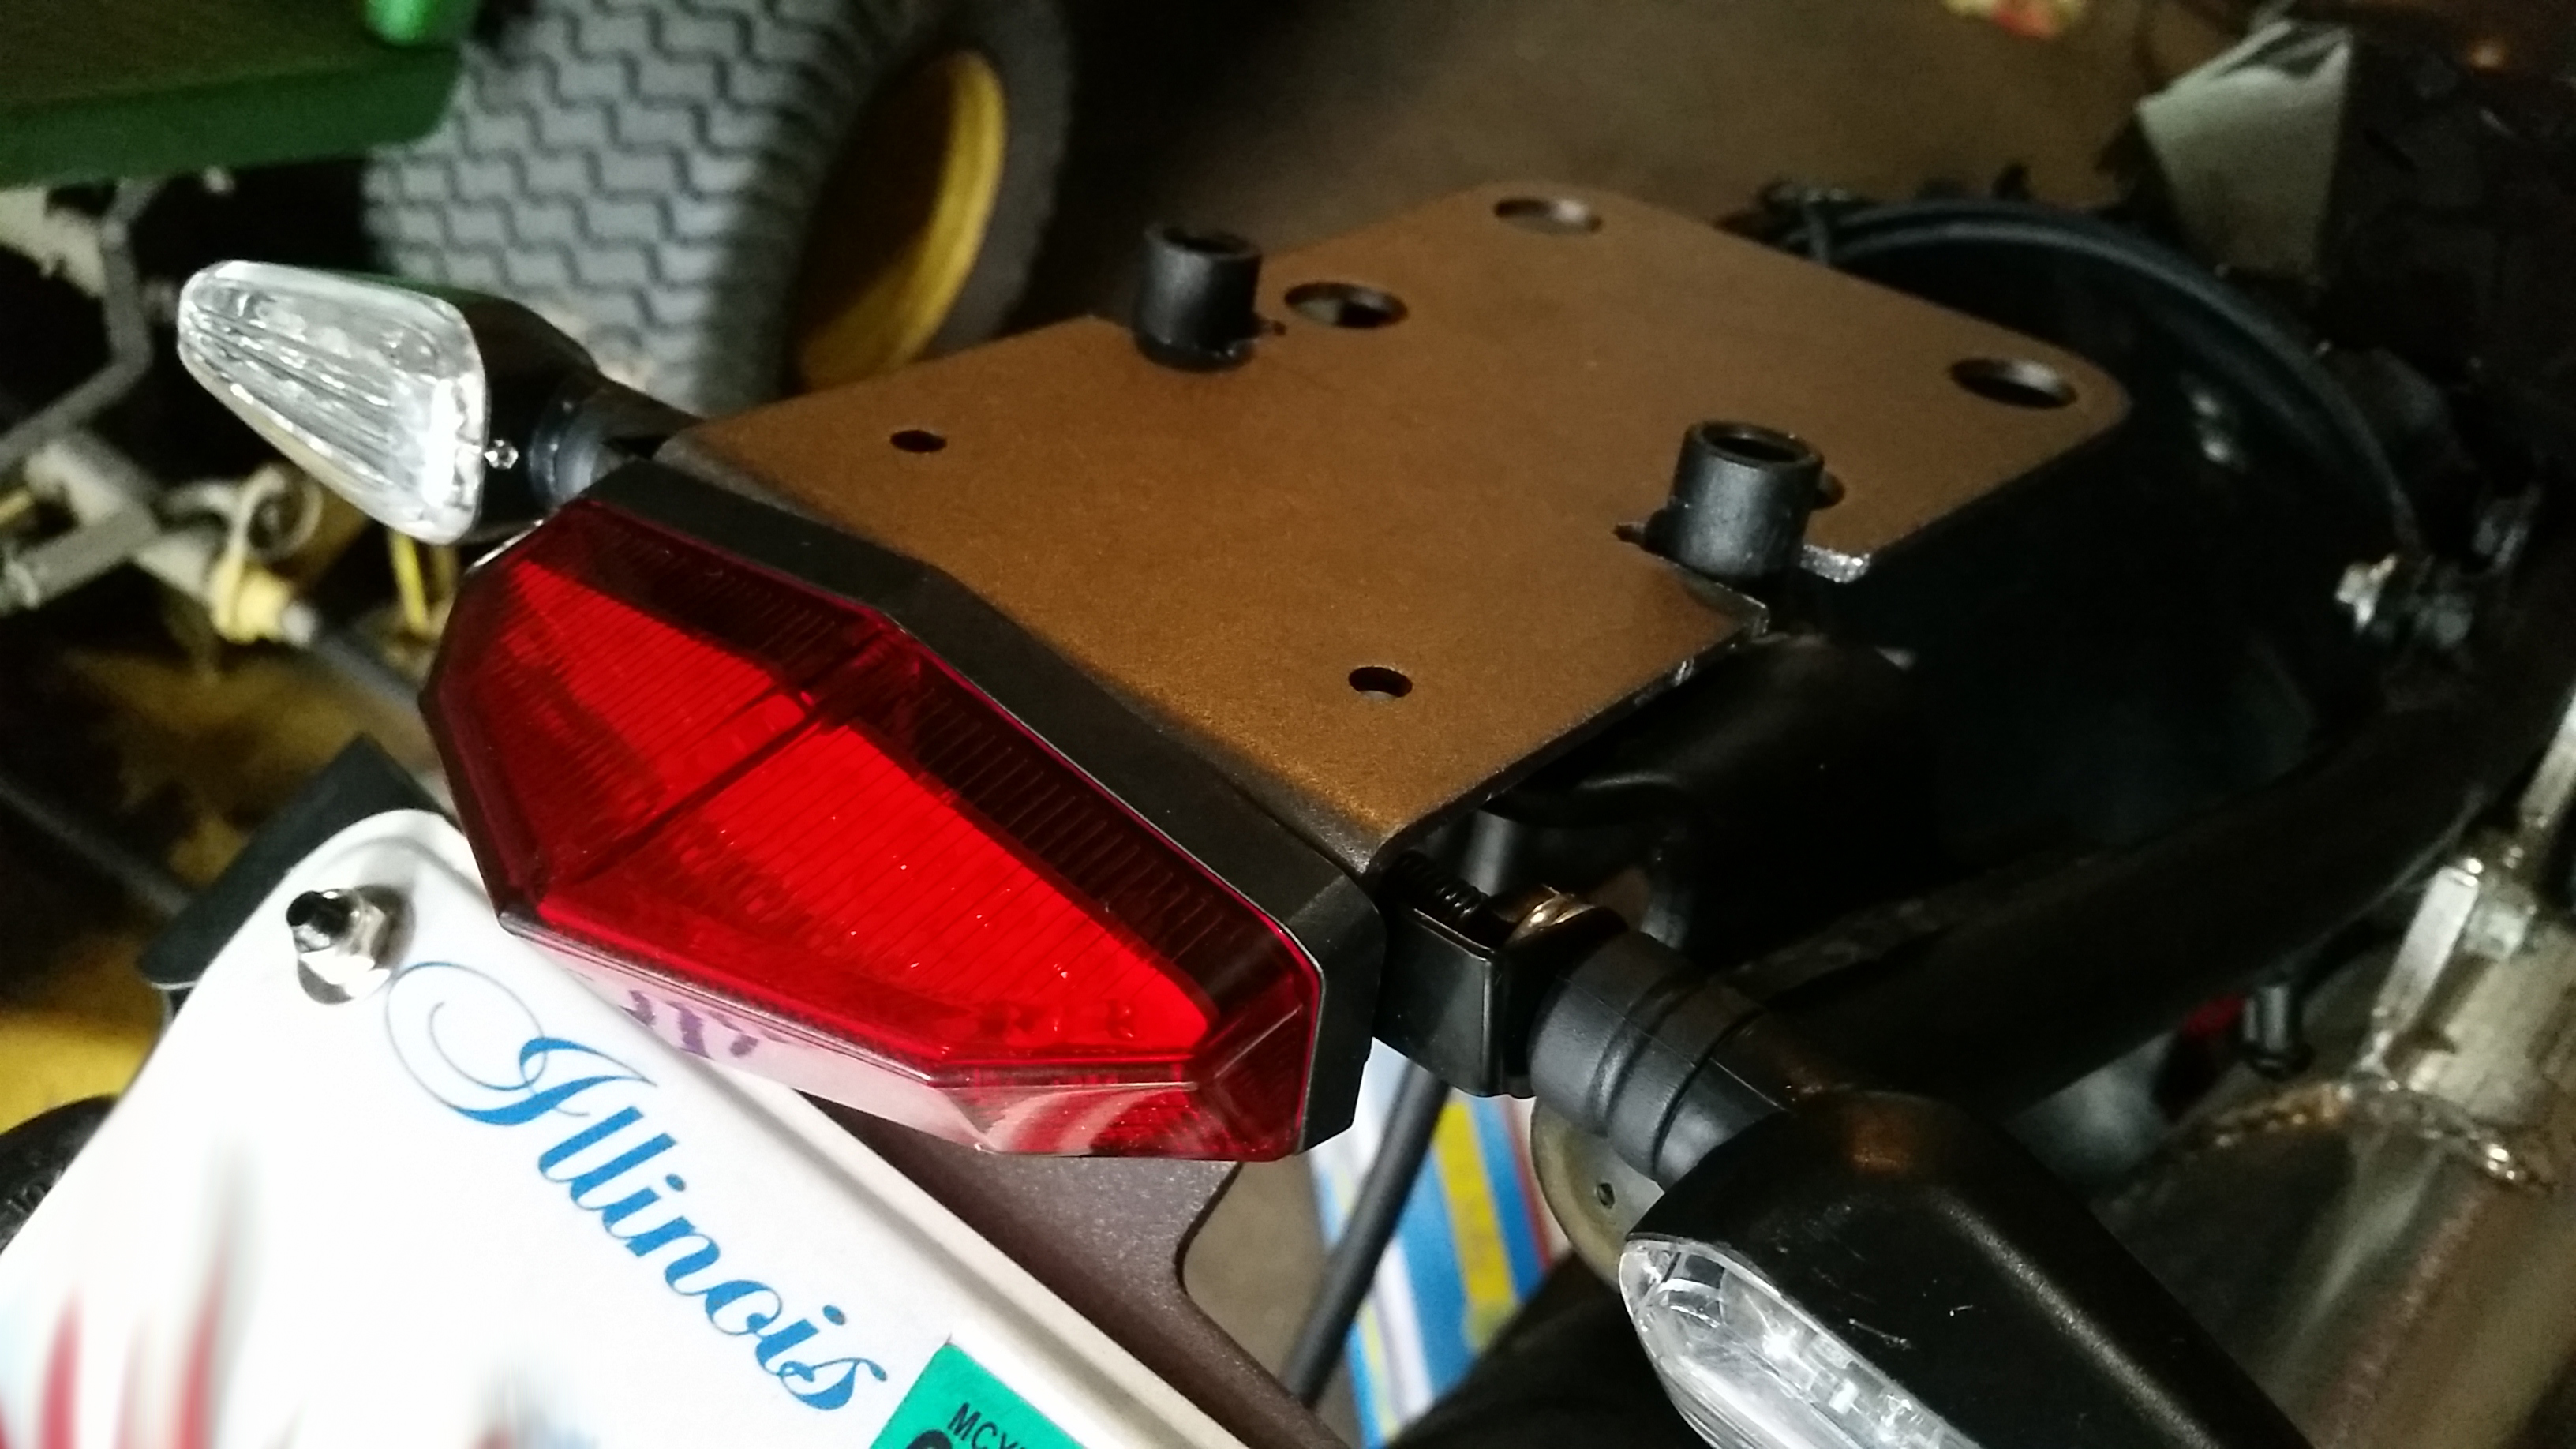
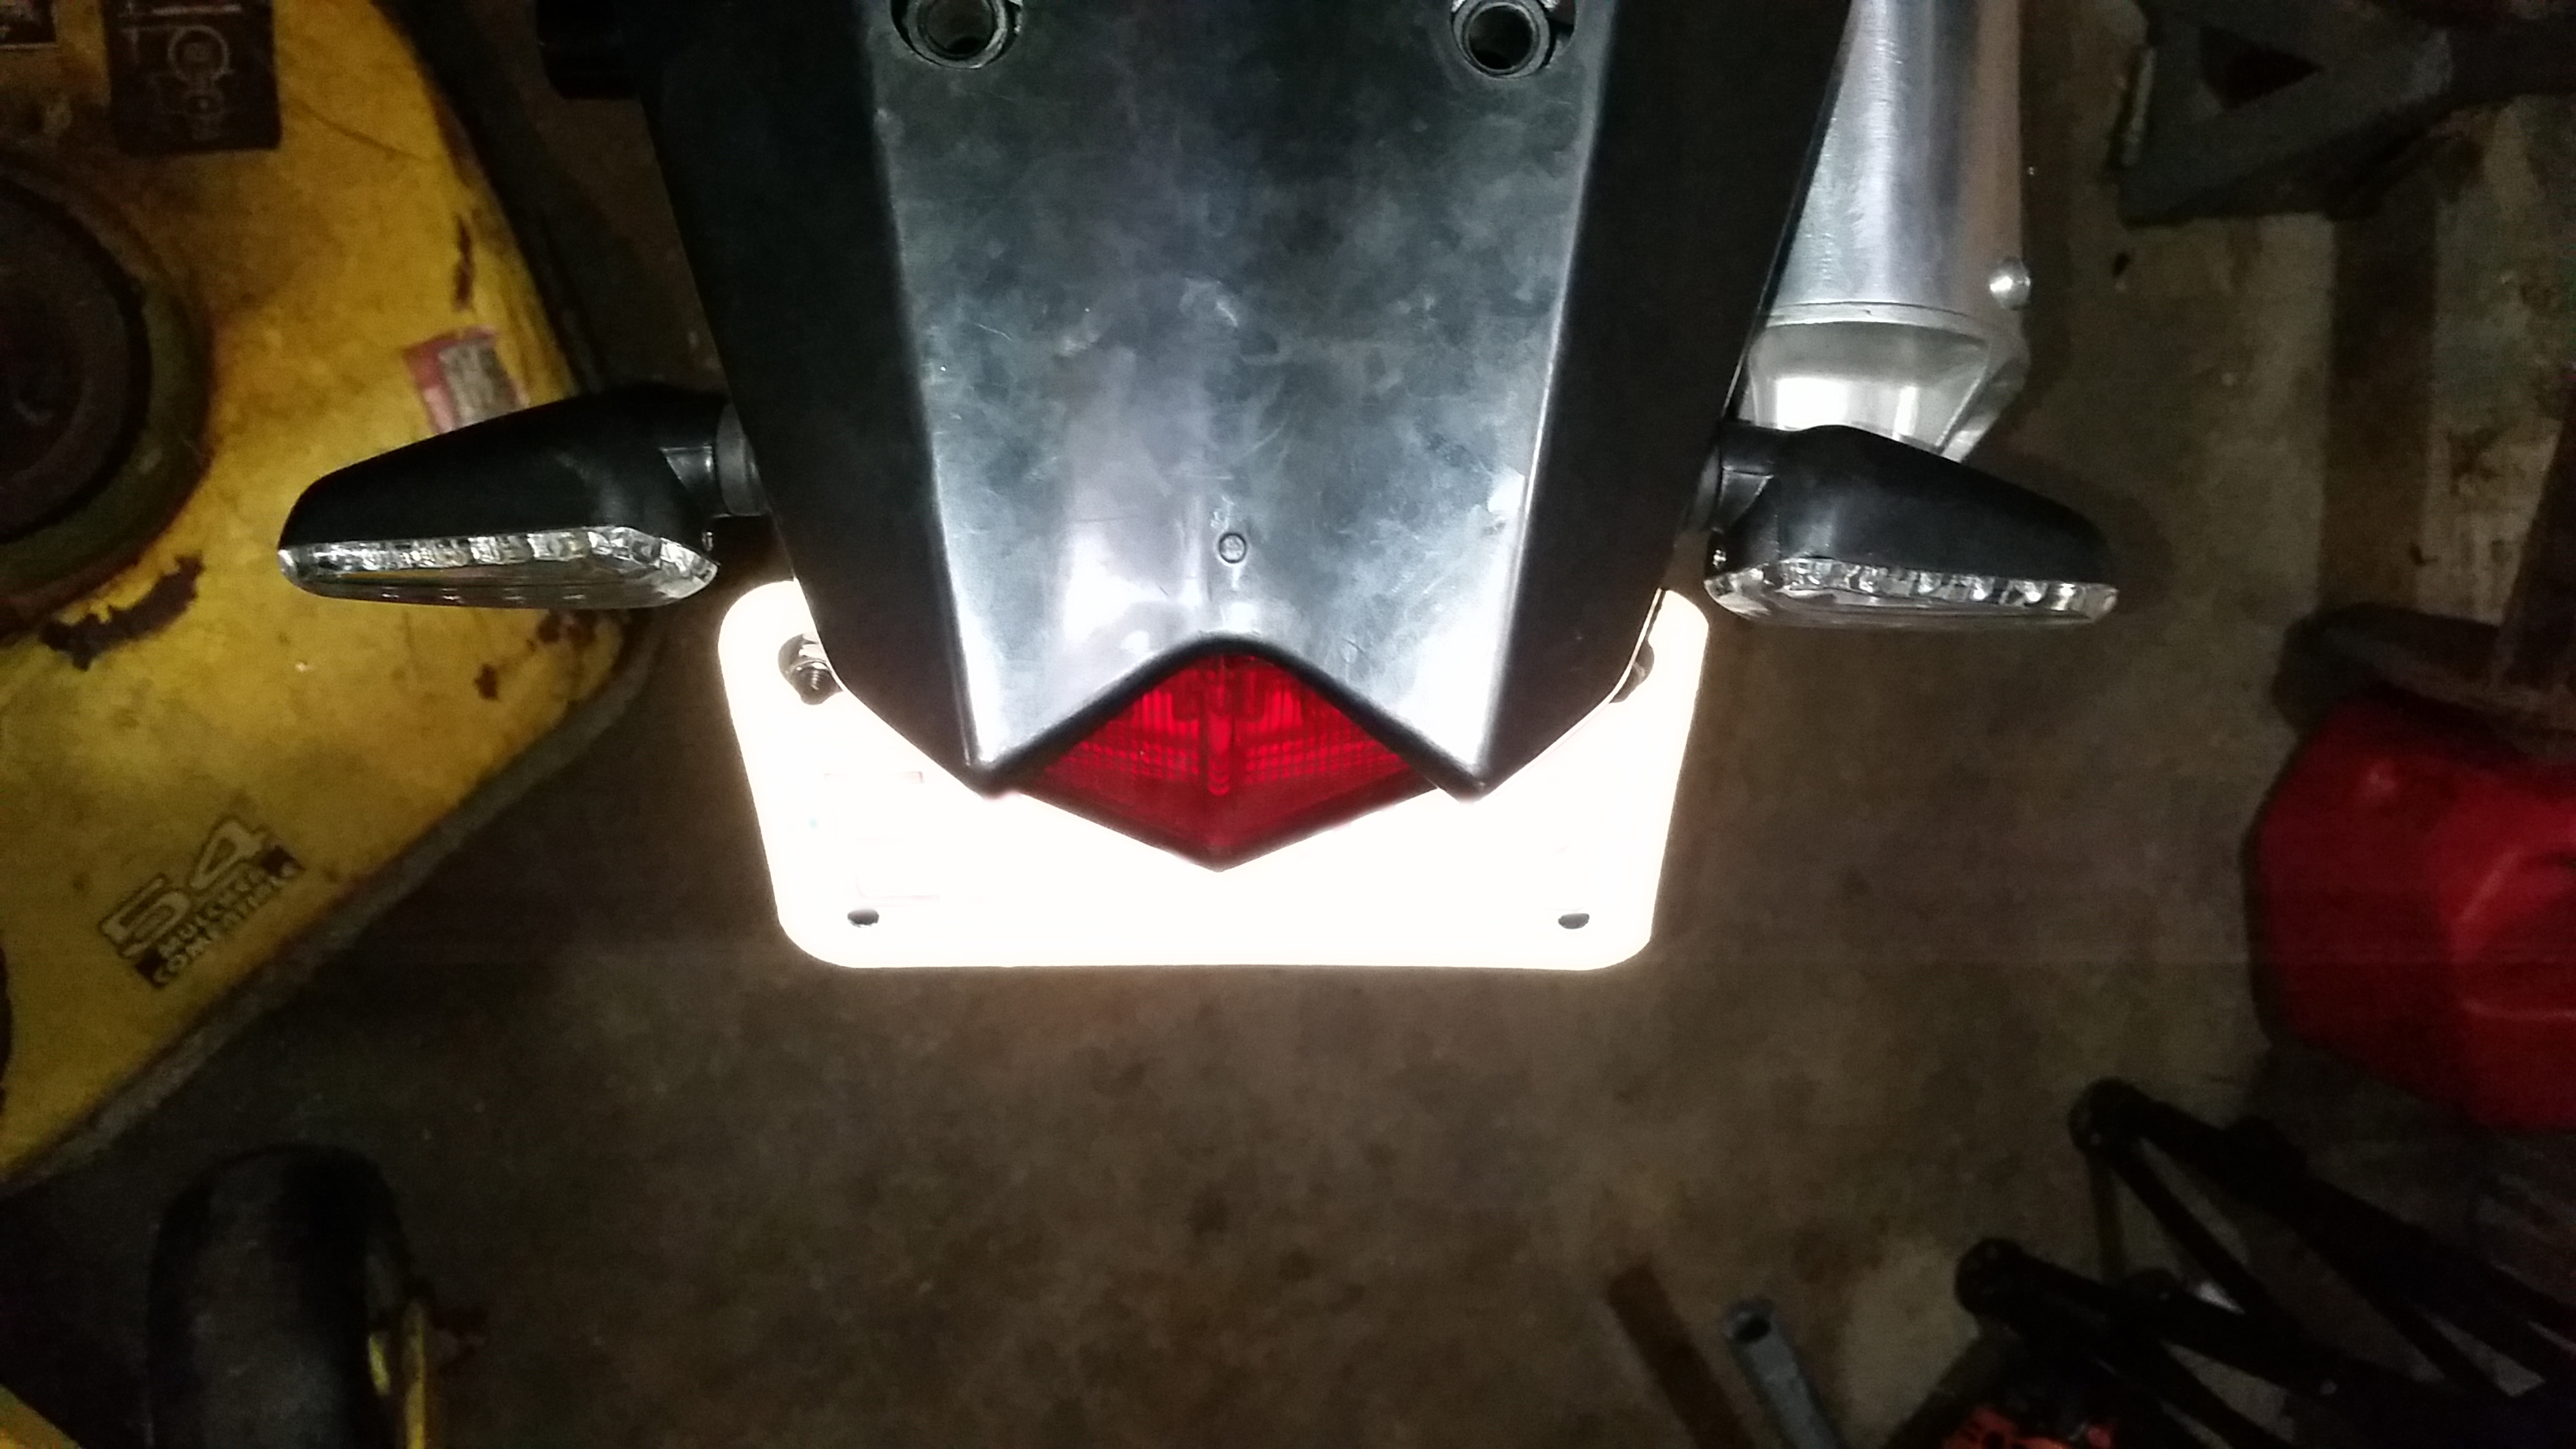
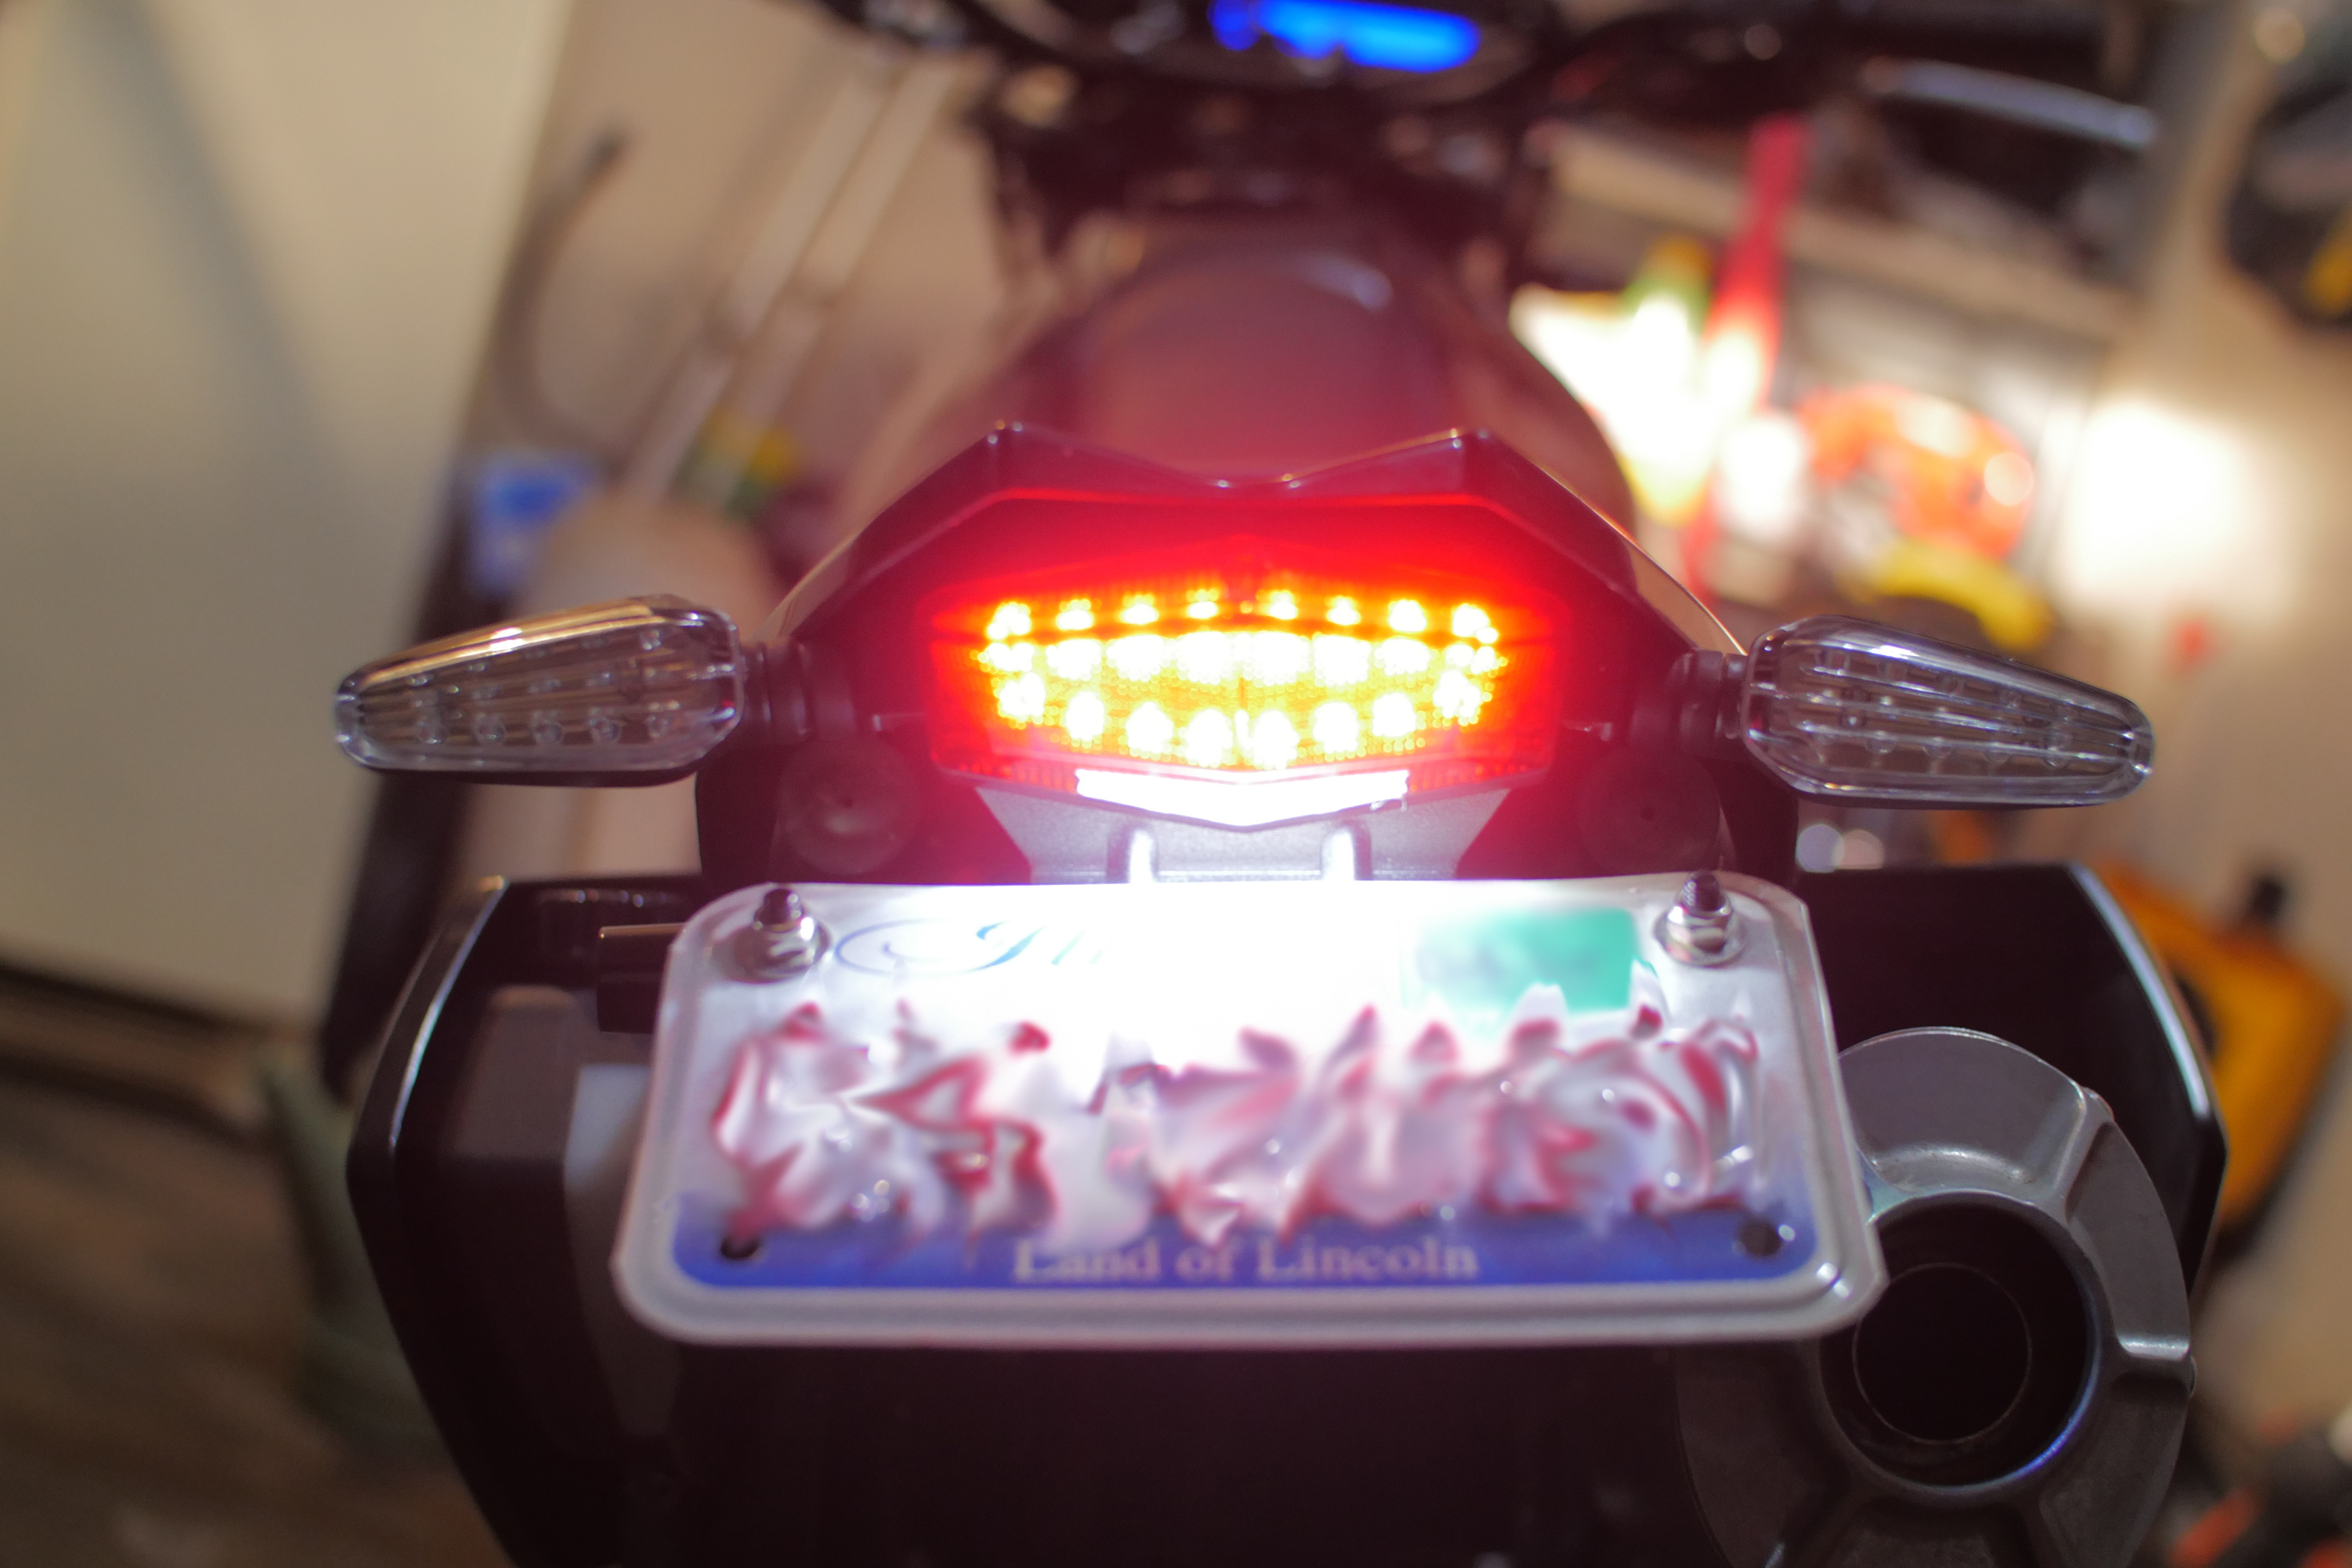
Moving on, here is the DRC tail light and turn signals installed on the bike.
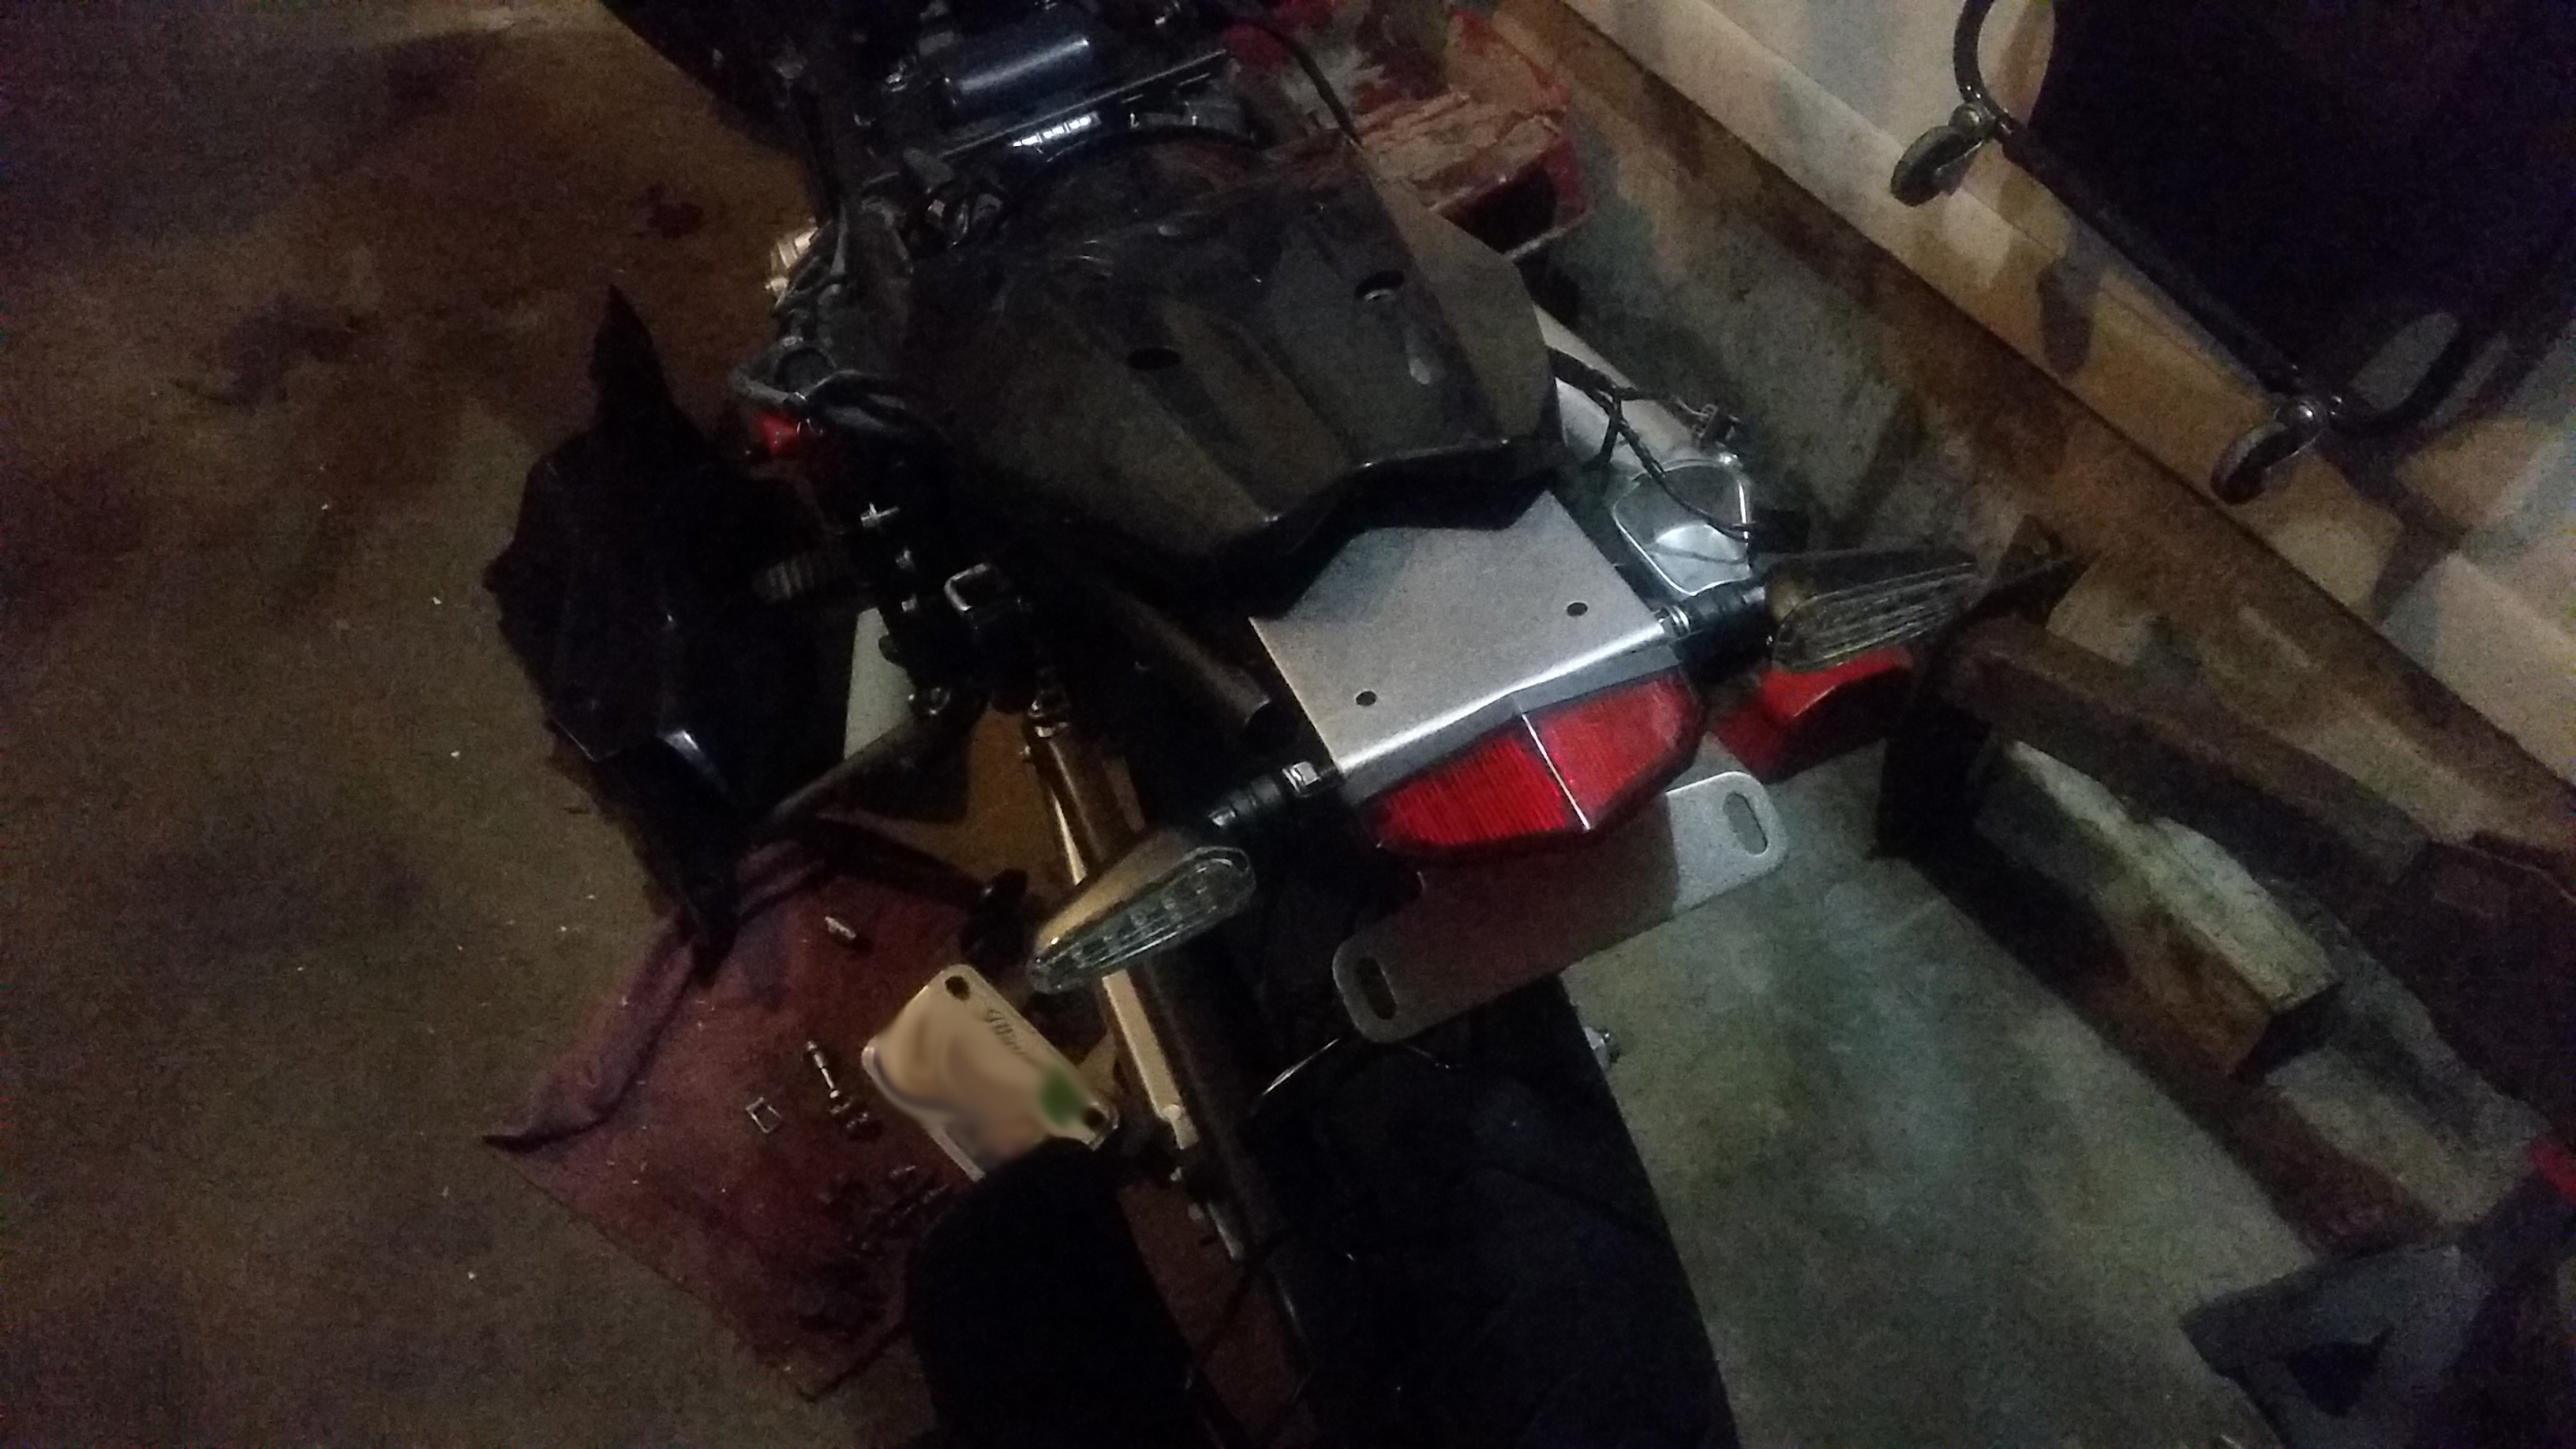
This is how they go on stock. The black "K-Kawasaki" plastic goes on top. I do not like this plastic part at all, and wanted to eliminate it.
Here we go.
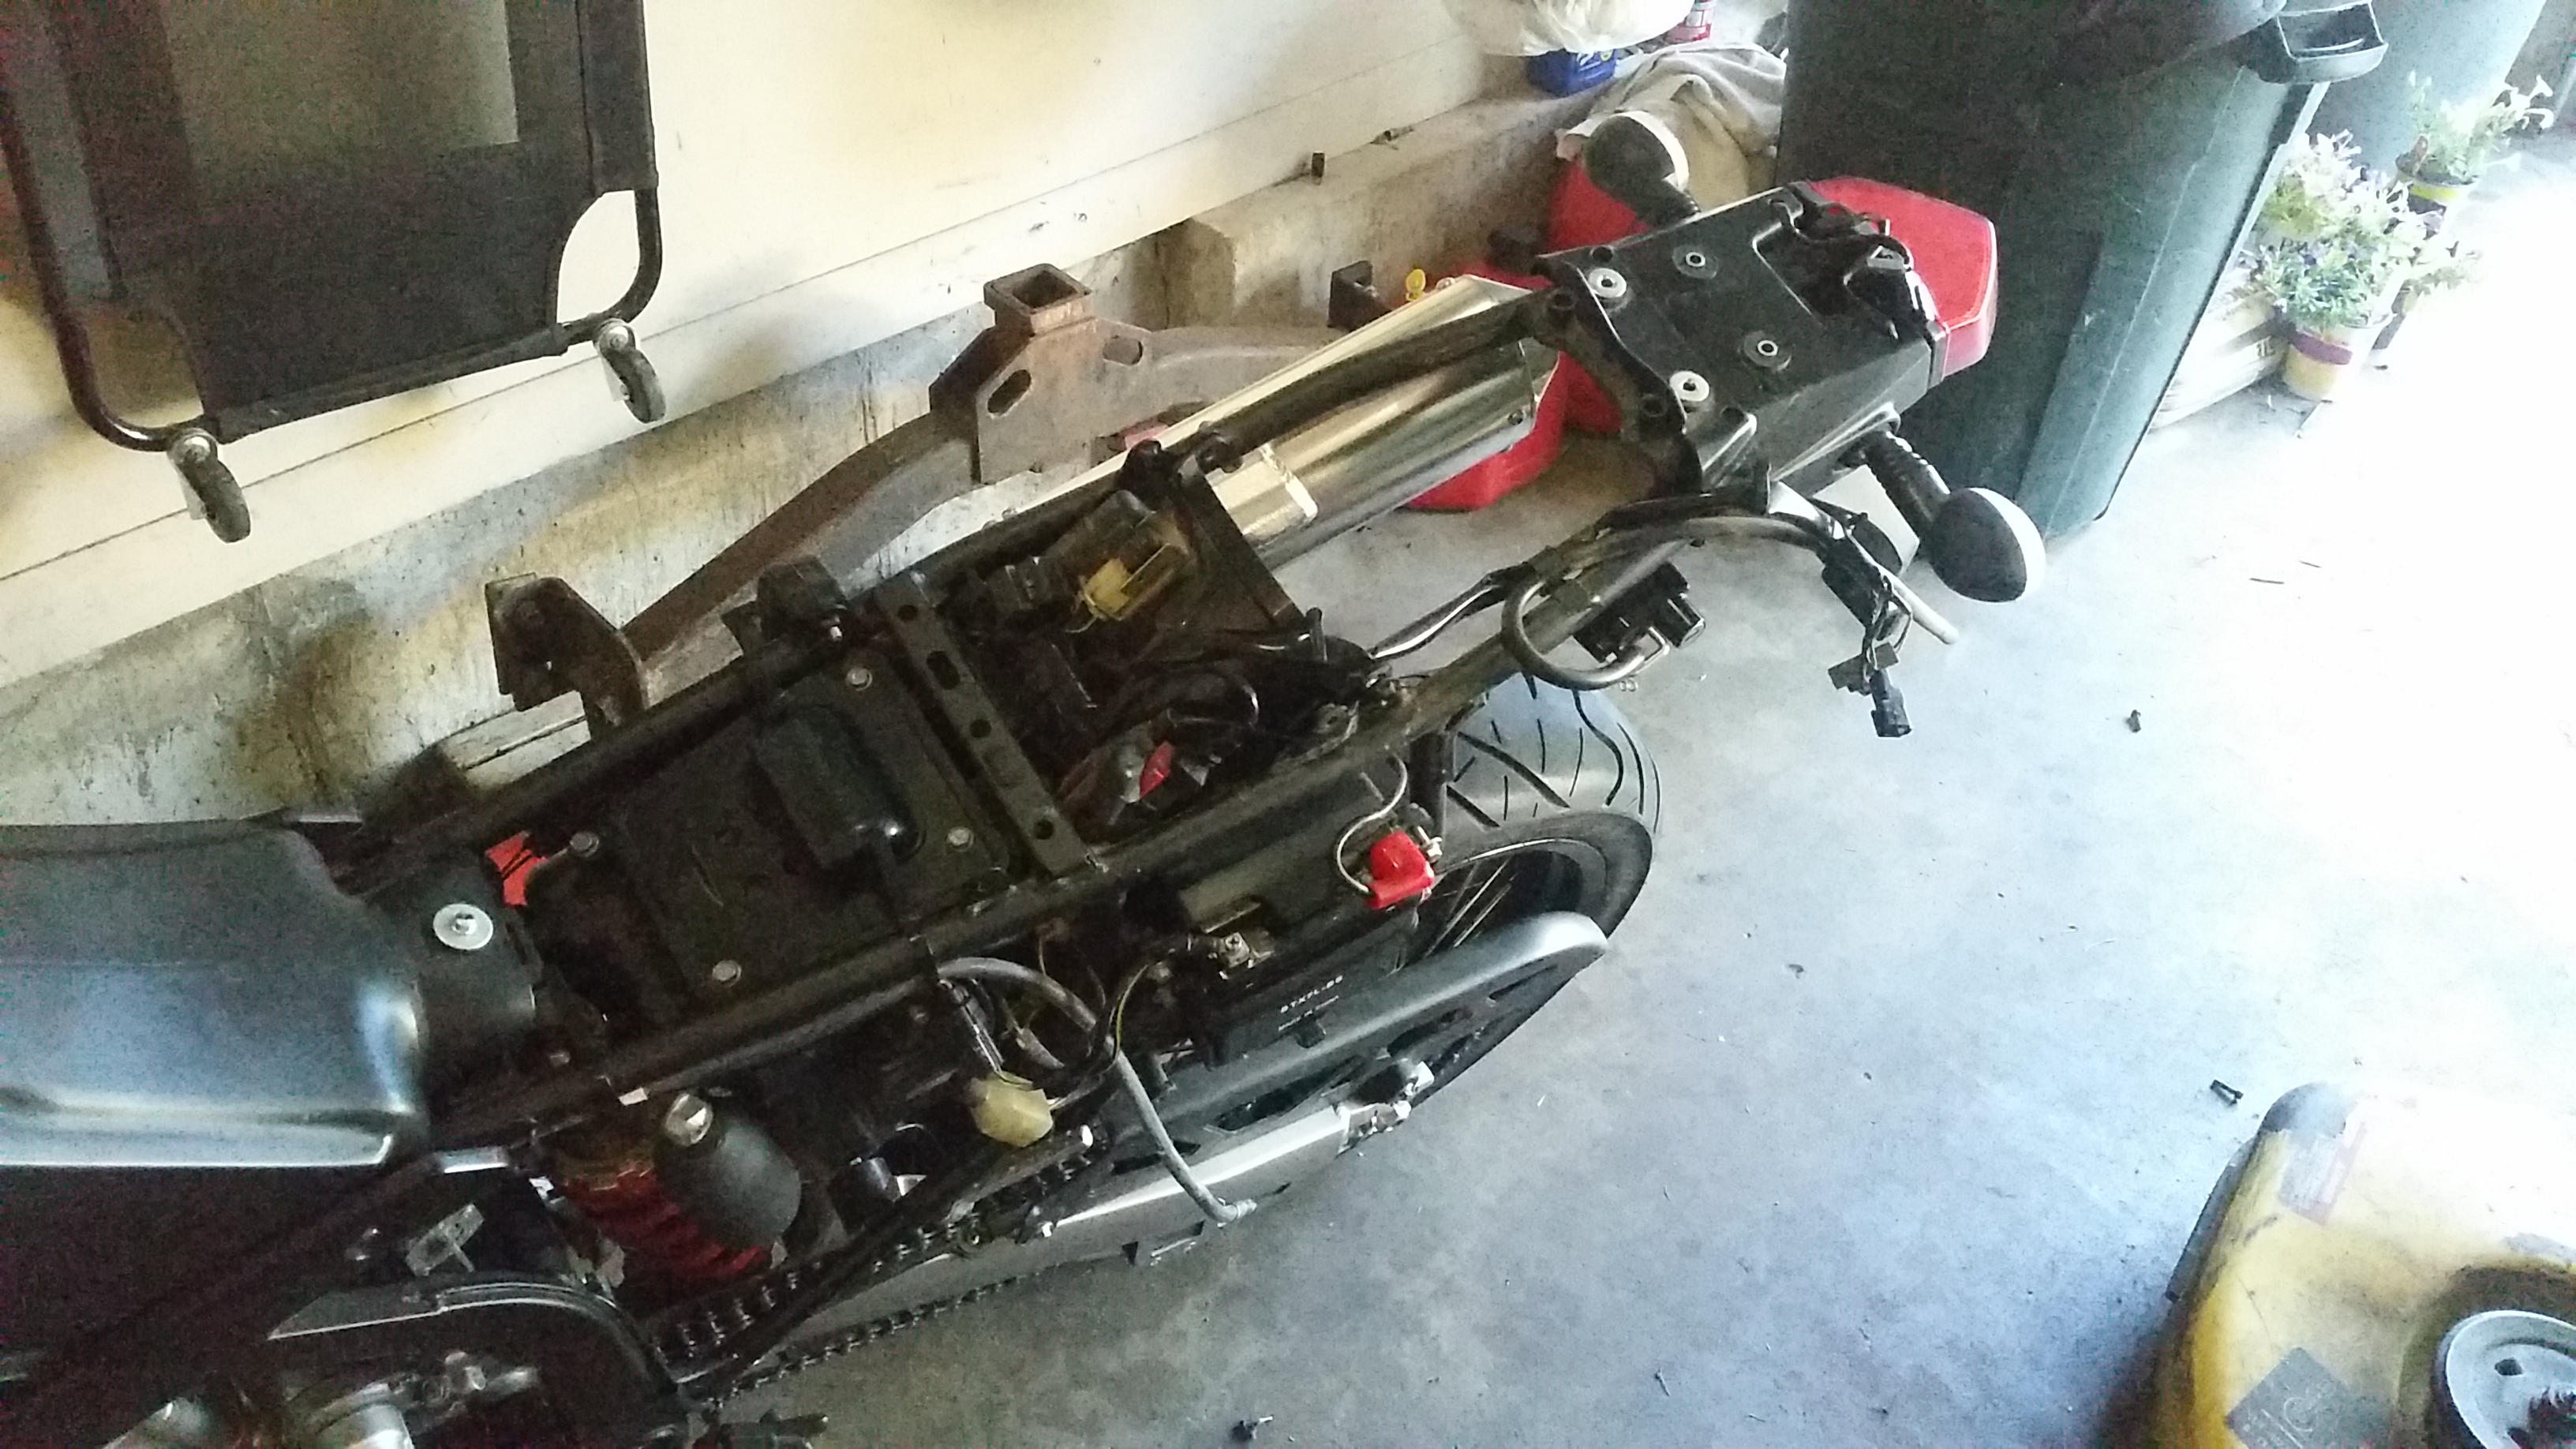
Using a hacksaw, and then a reciprocating saw, I cut off the rearmost part of the bike's subframe off.
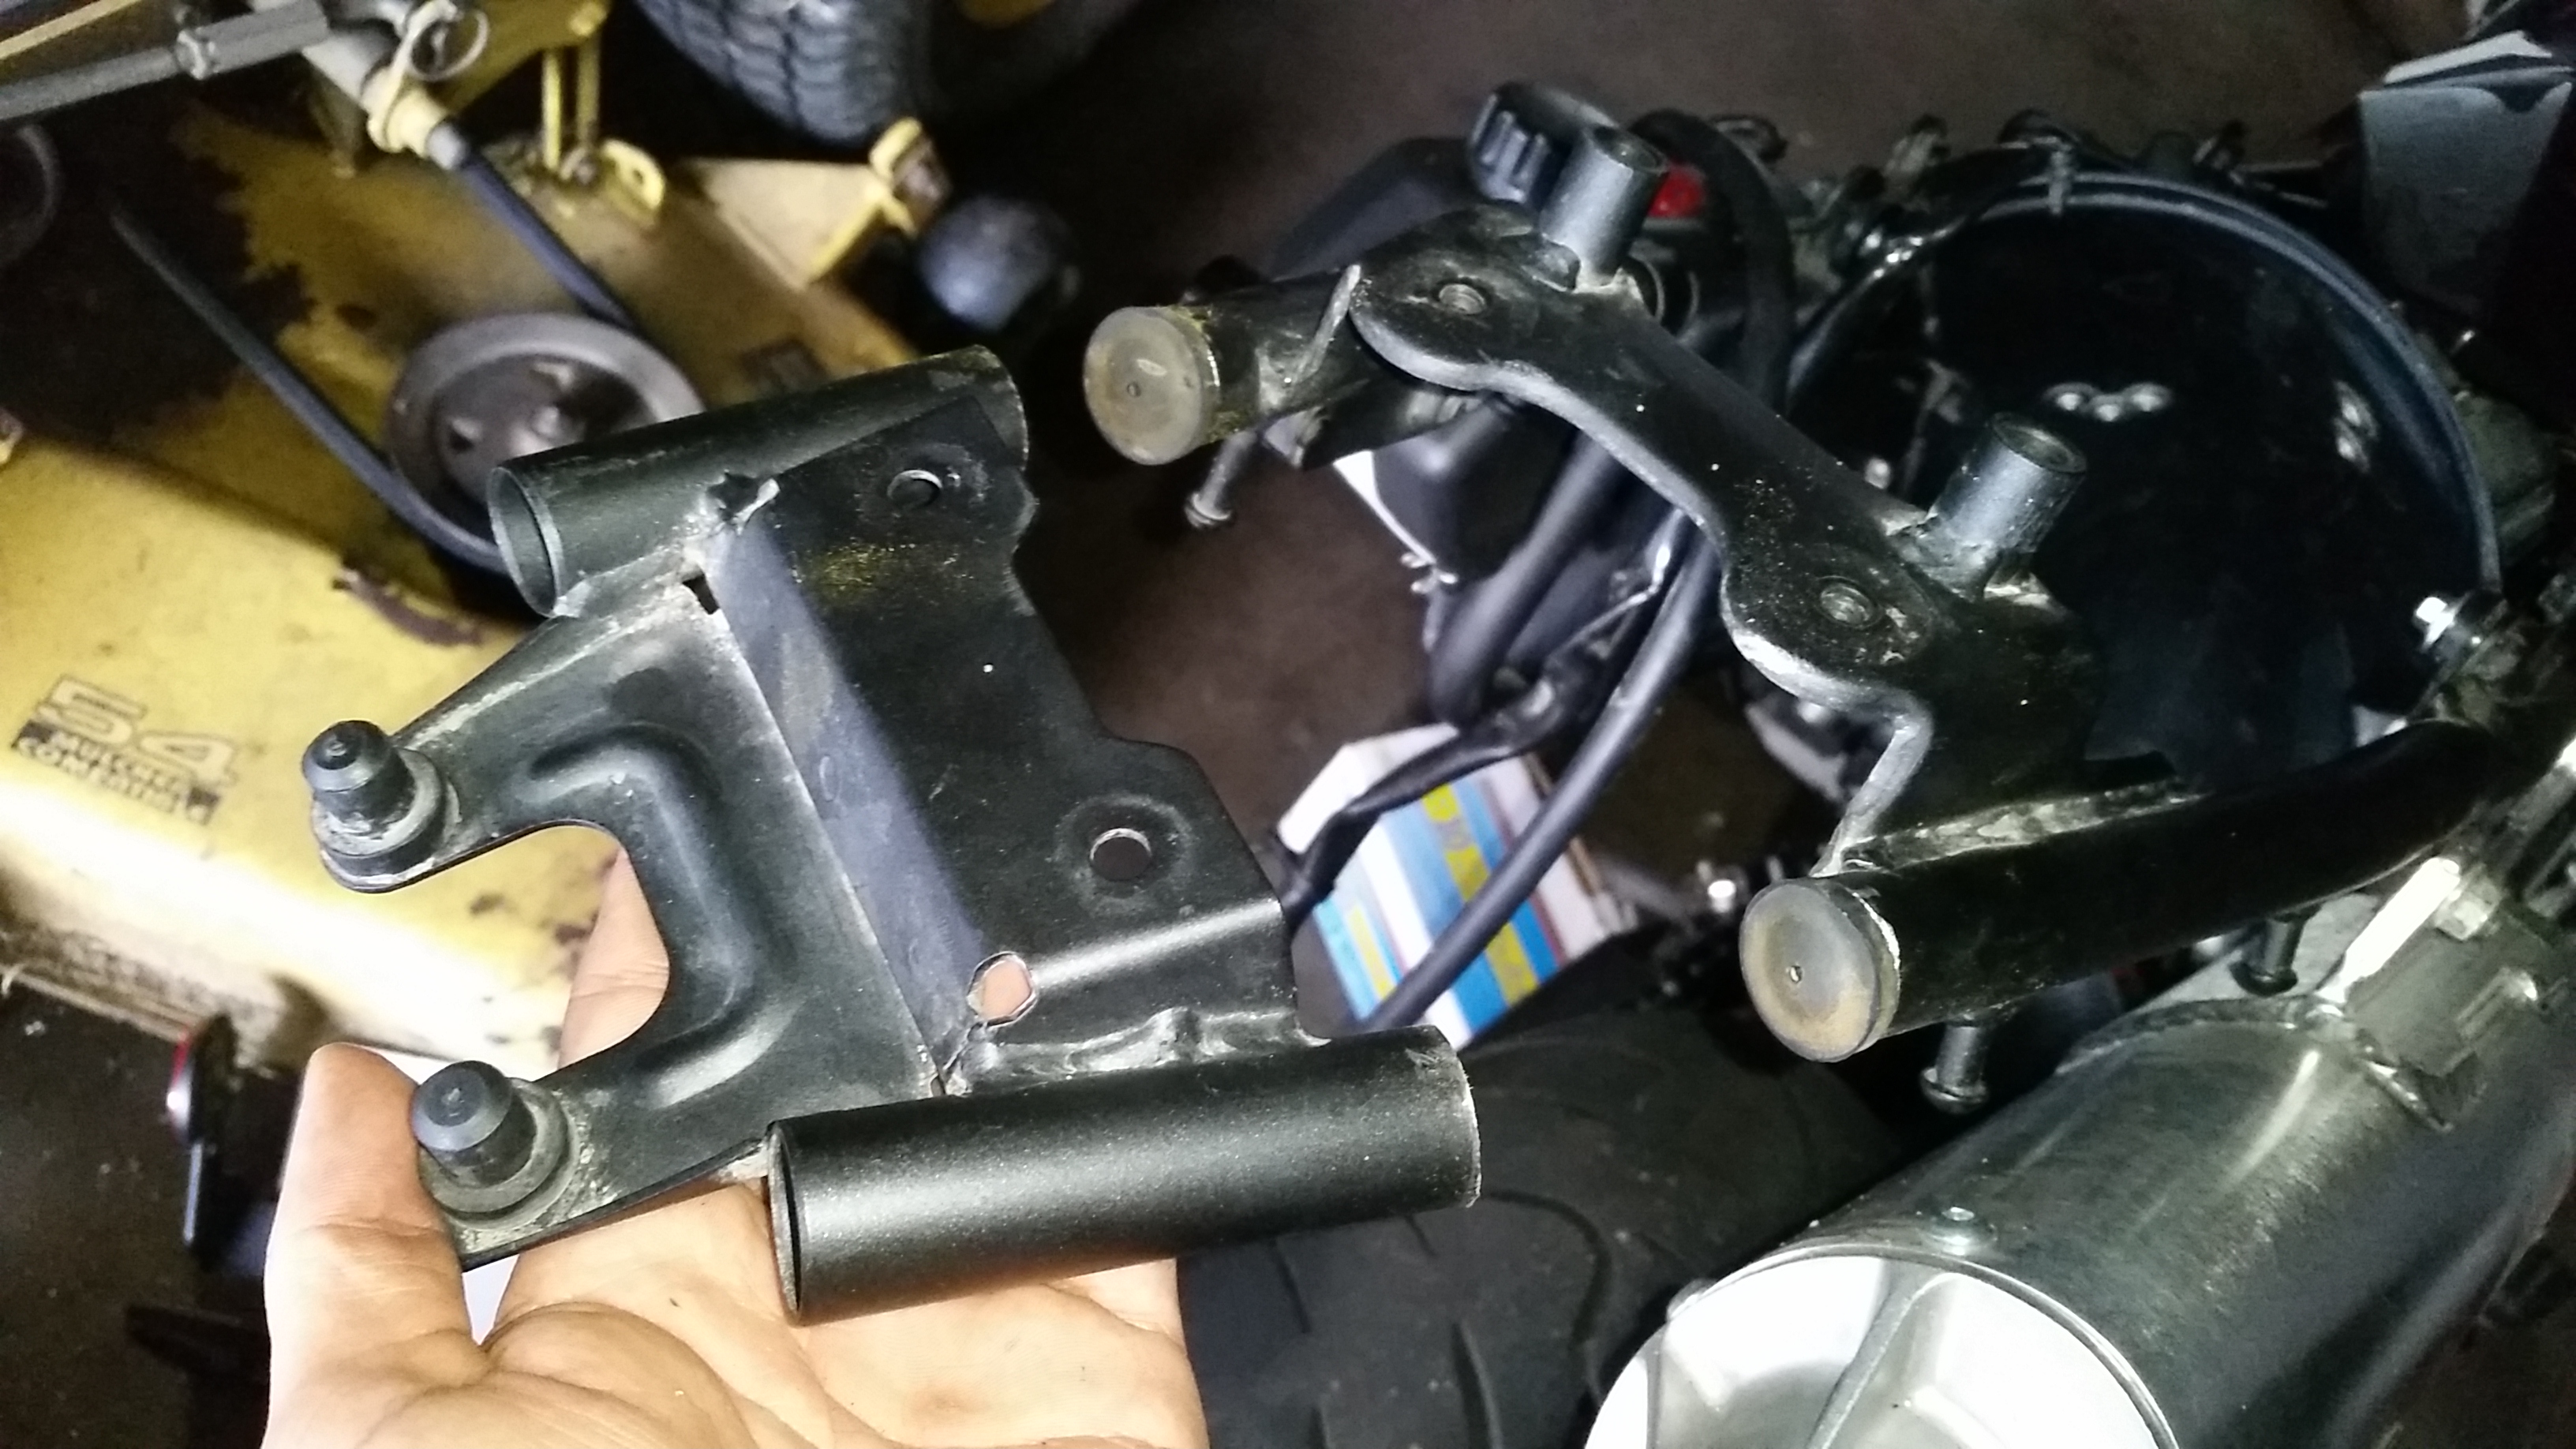
I made sure to cut in the middle of the gap between the two welded planes, so that if I ever wish to return to the stock tail light, I can pipe-clamp this part back on the subframe again and re-assemble my old light.
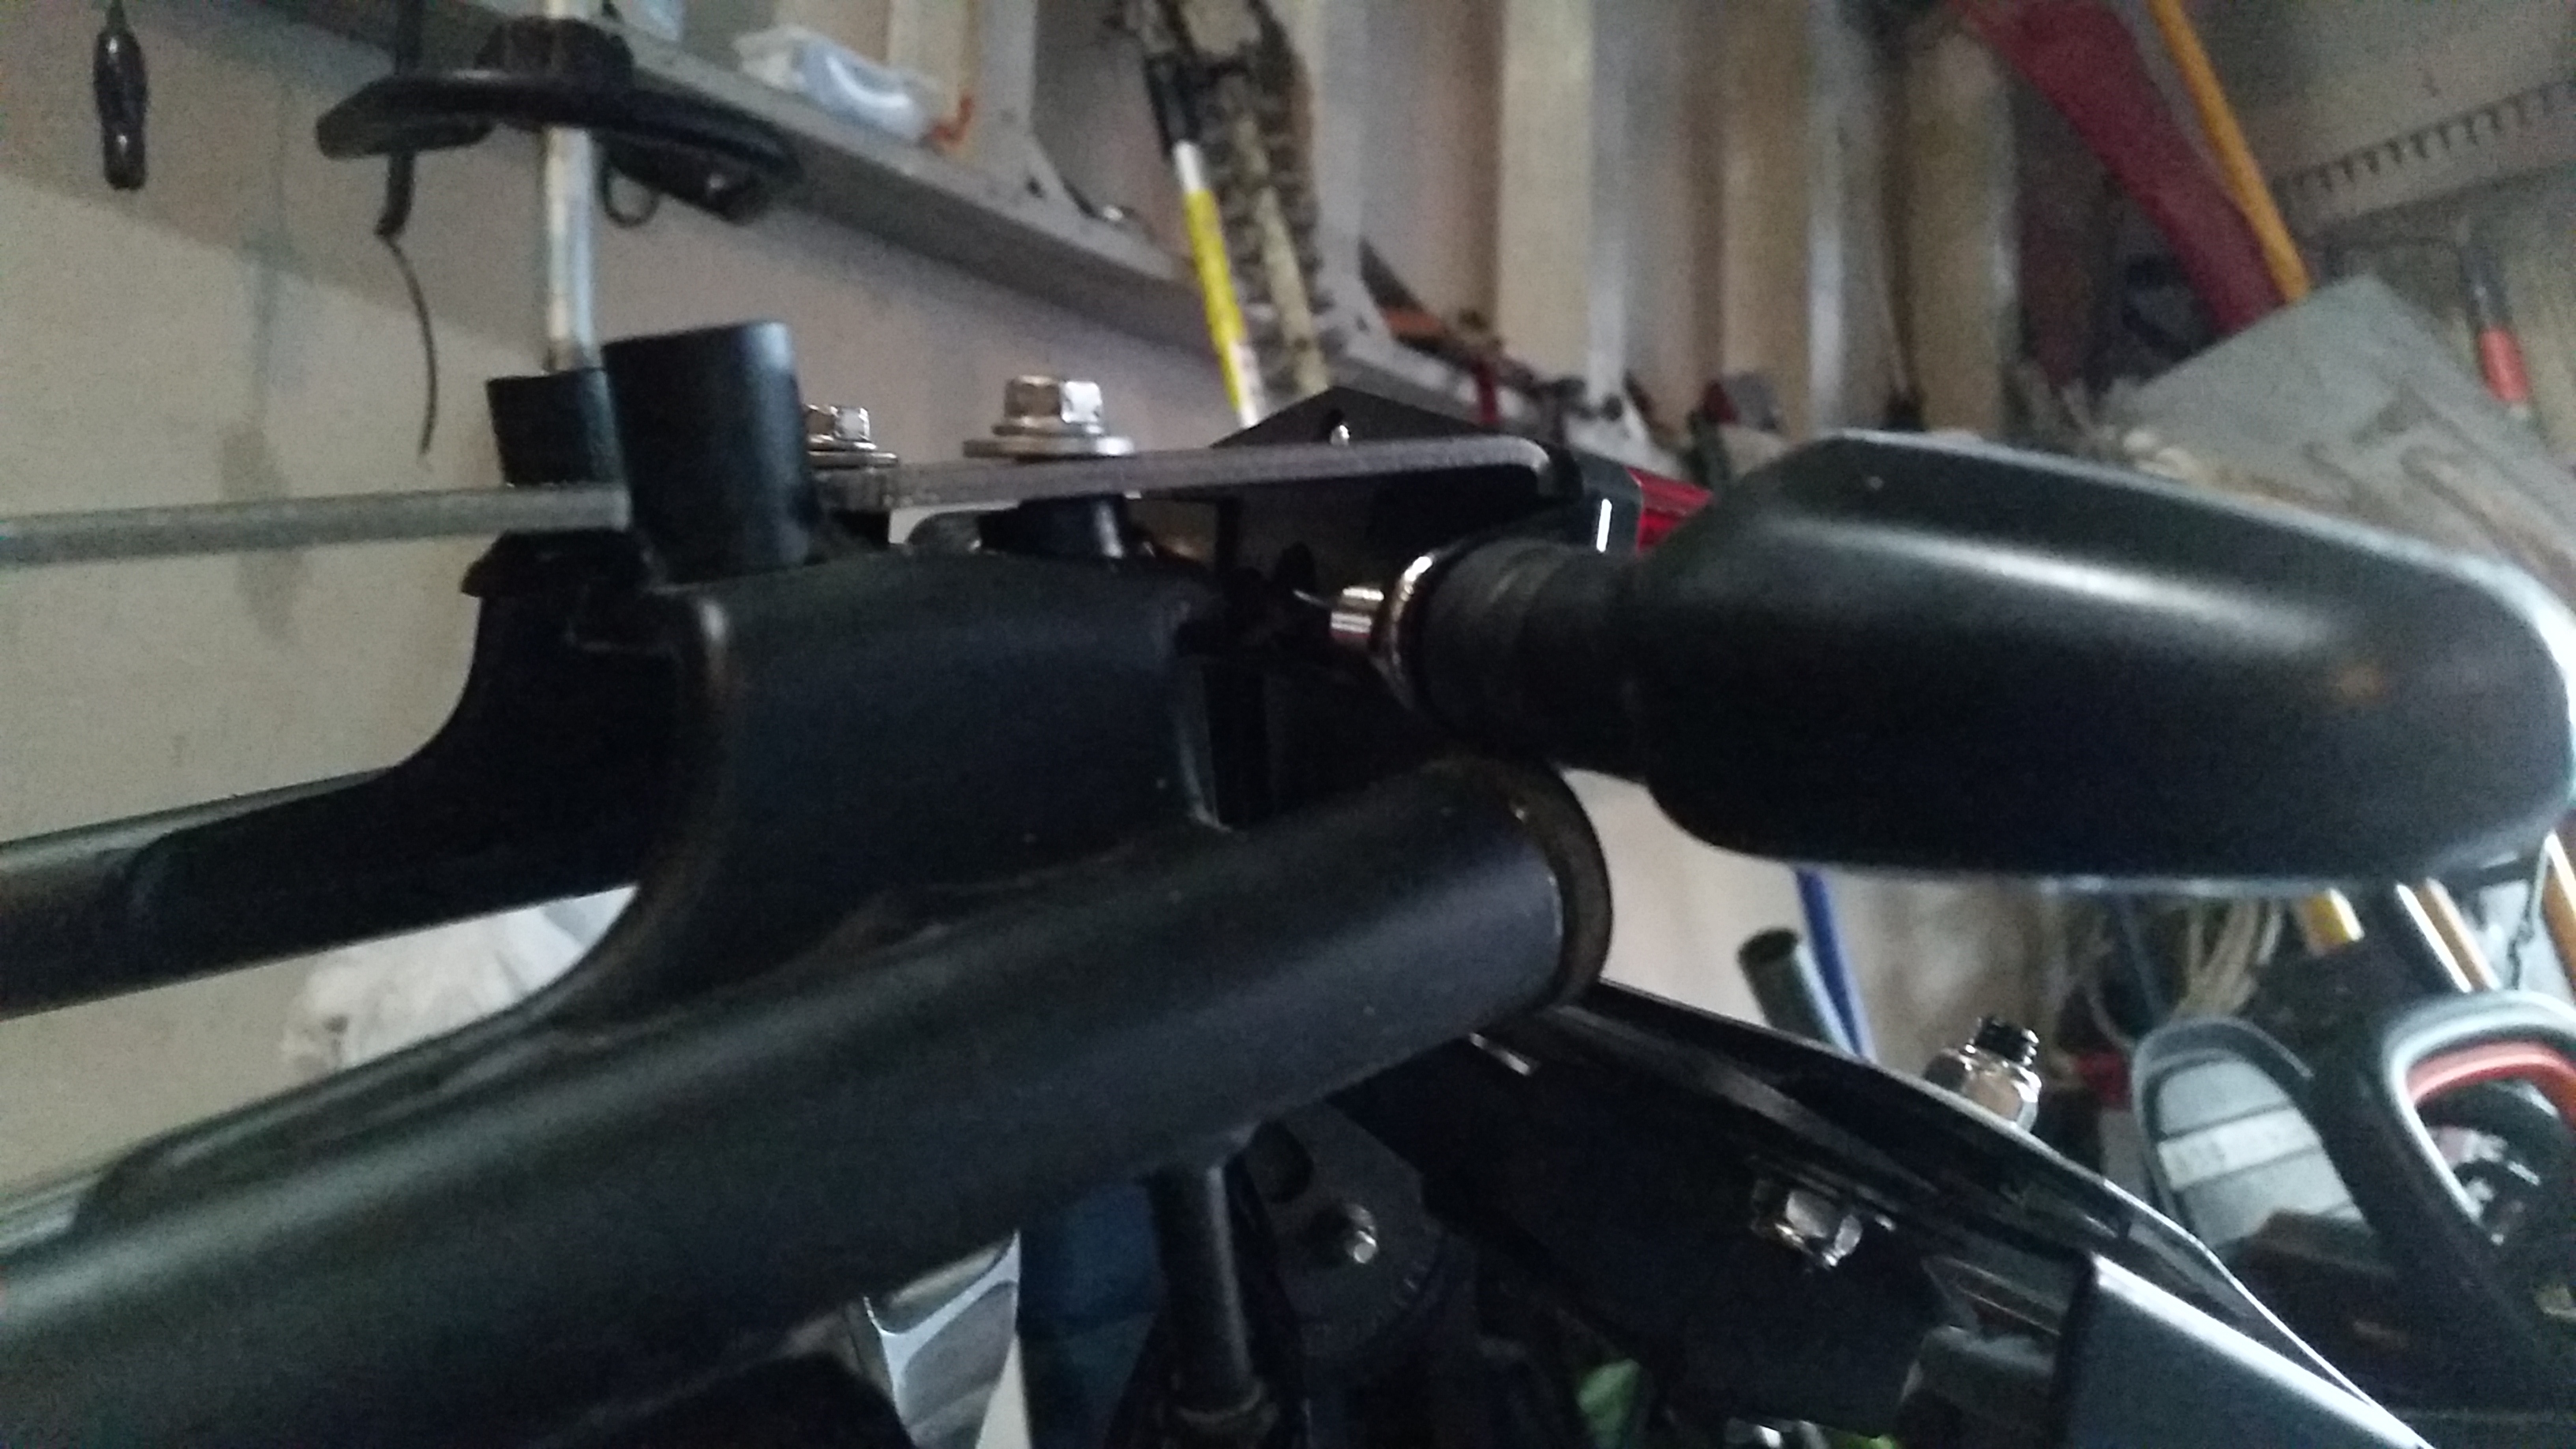
Those rubber end-caps fit very snuggly on the newly shortened bars. Looks very neat.
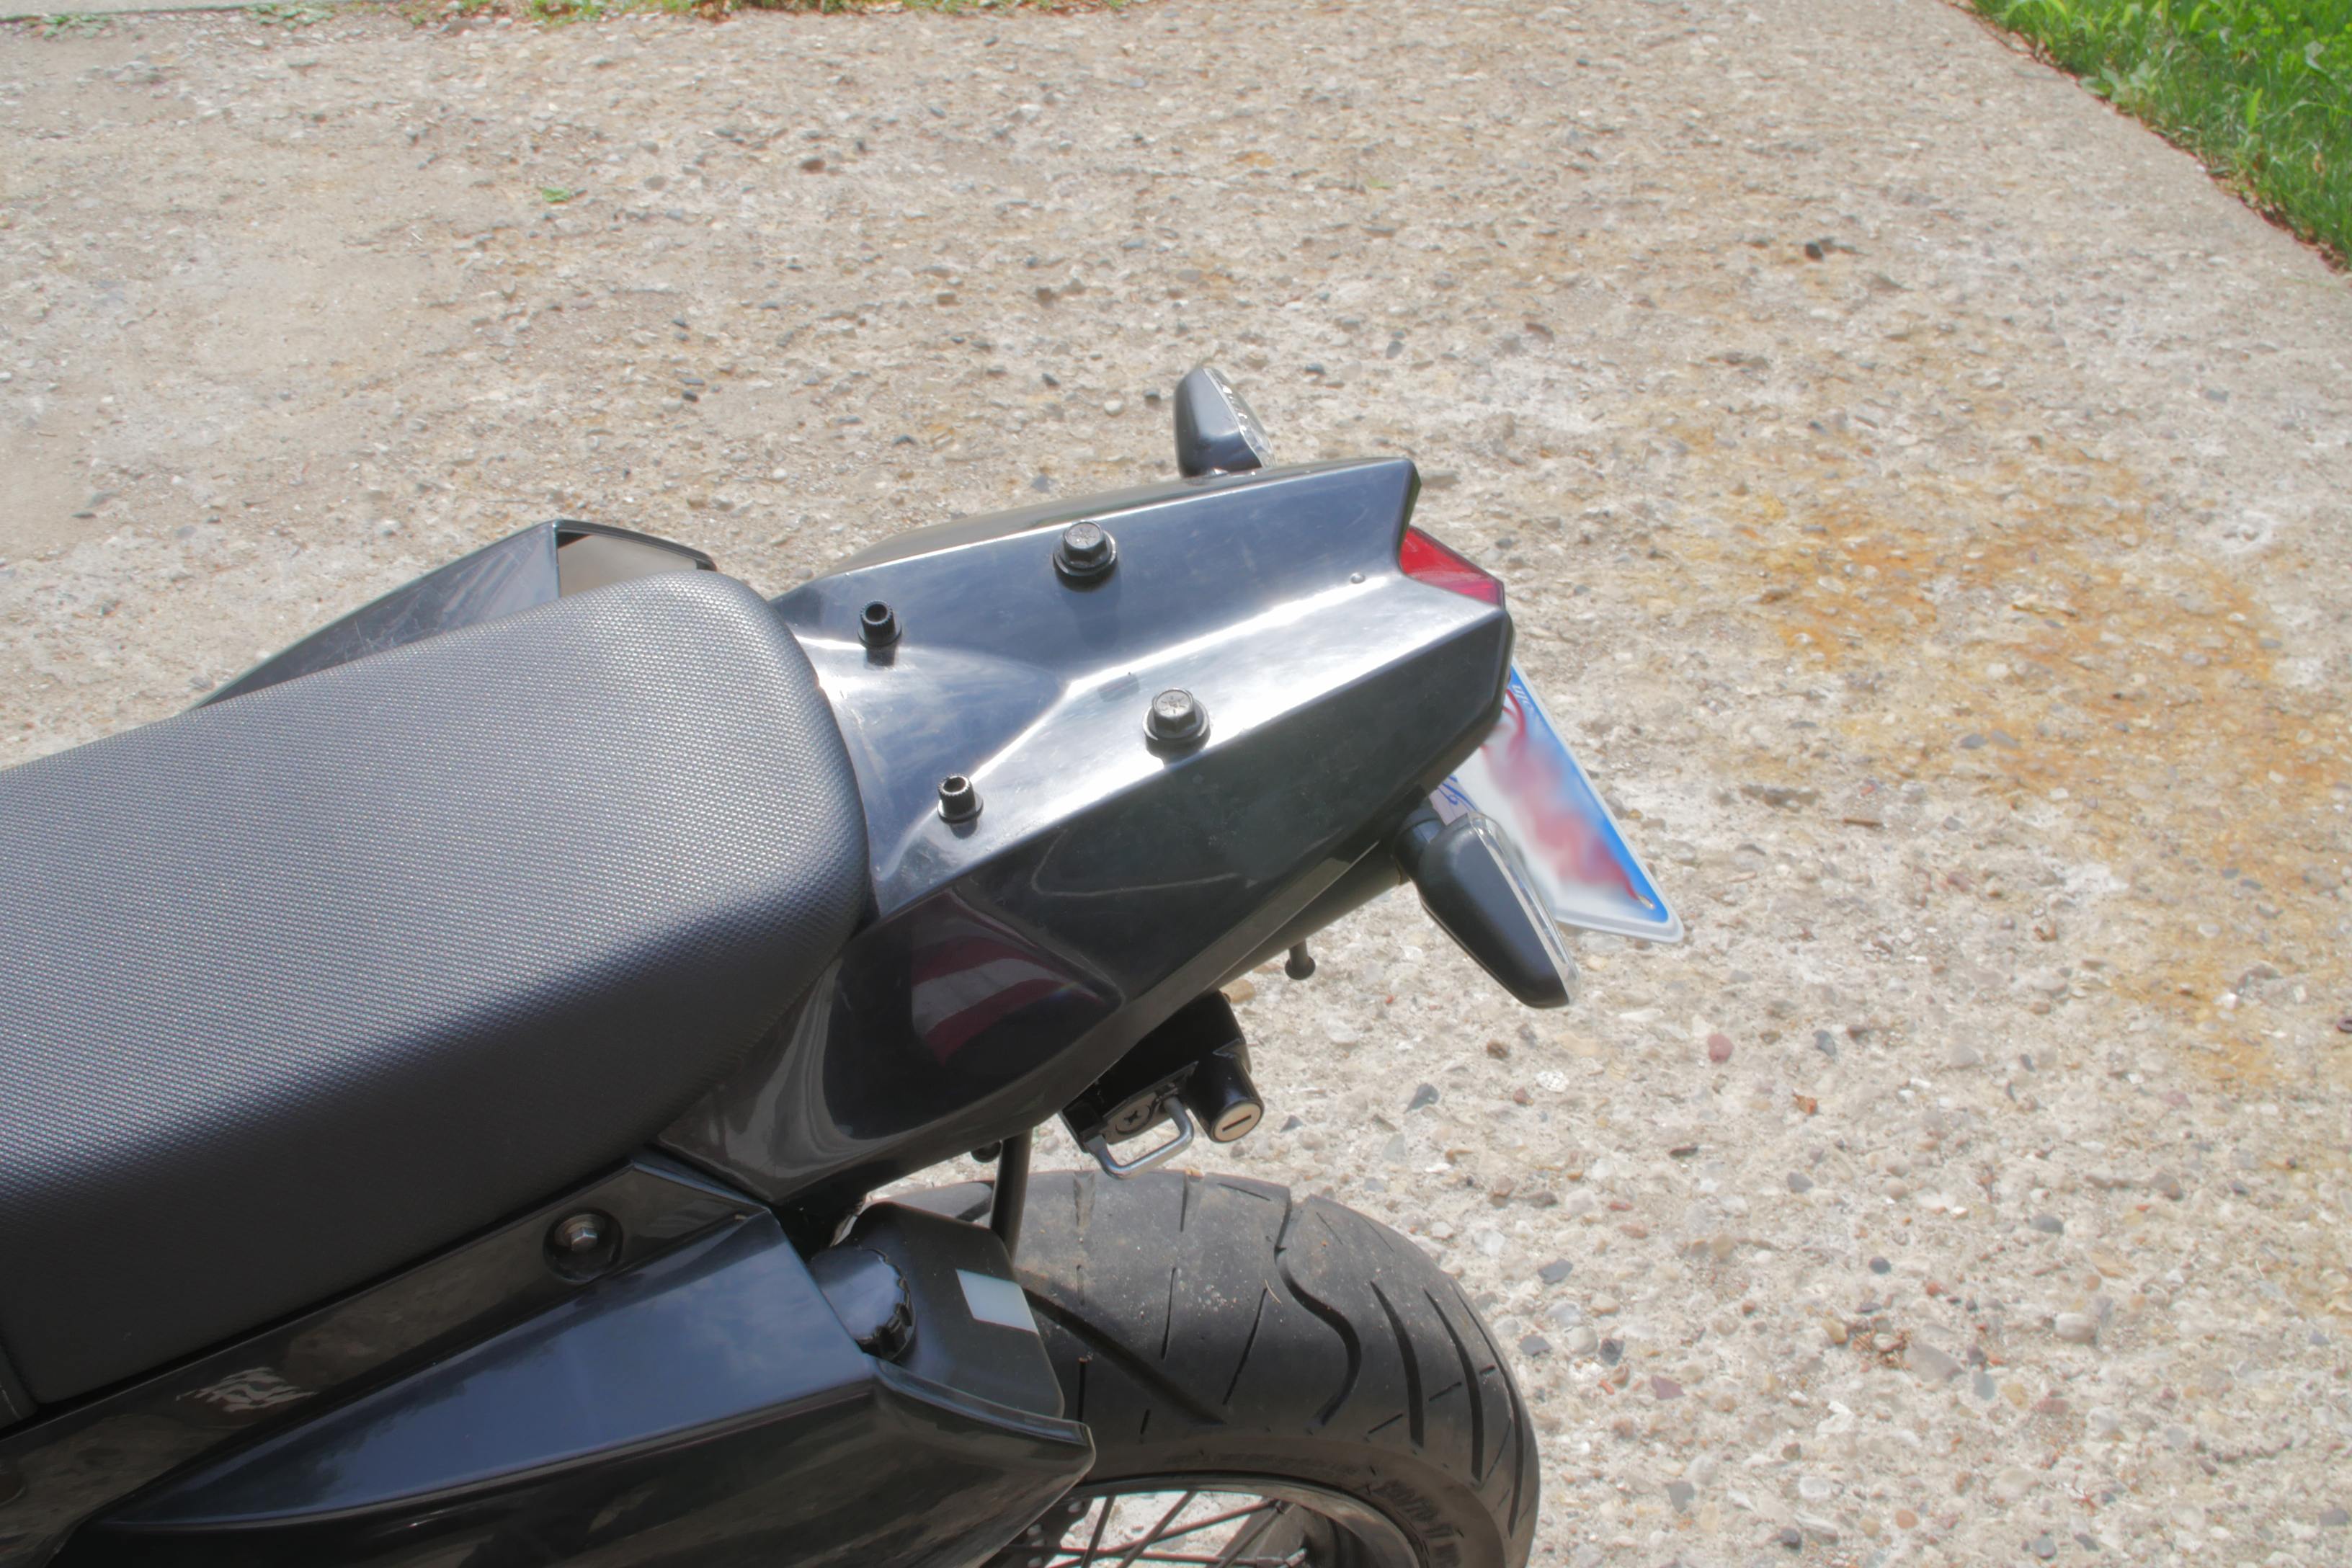
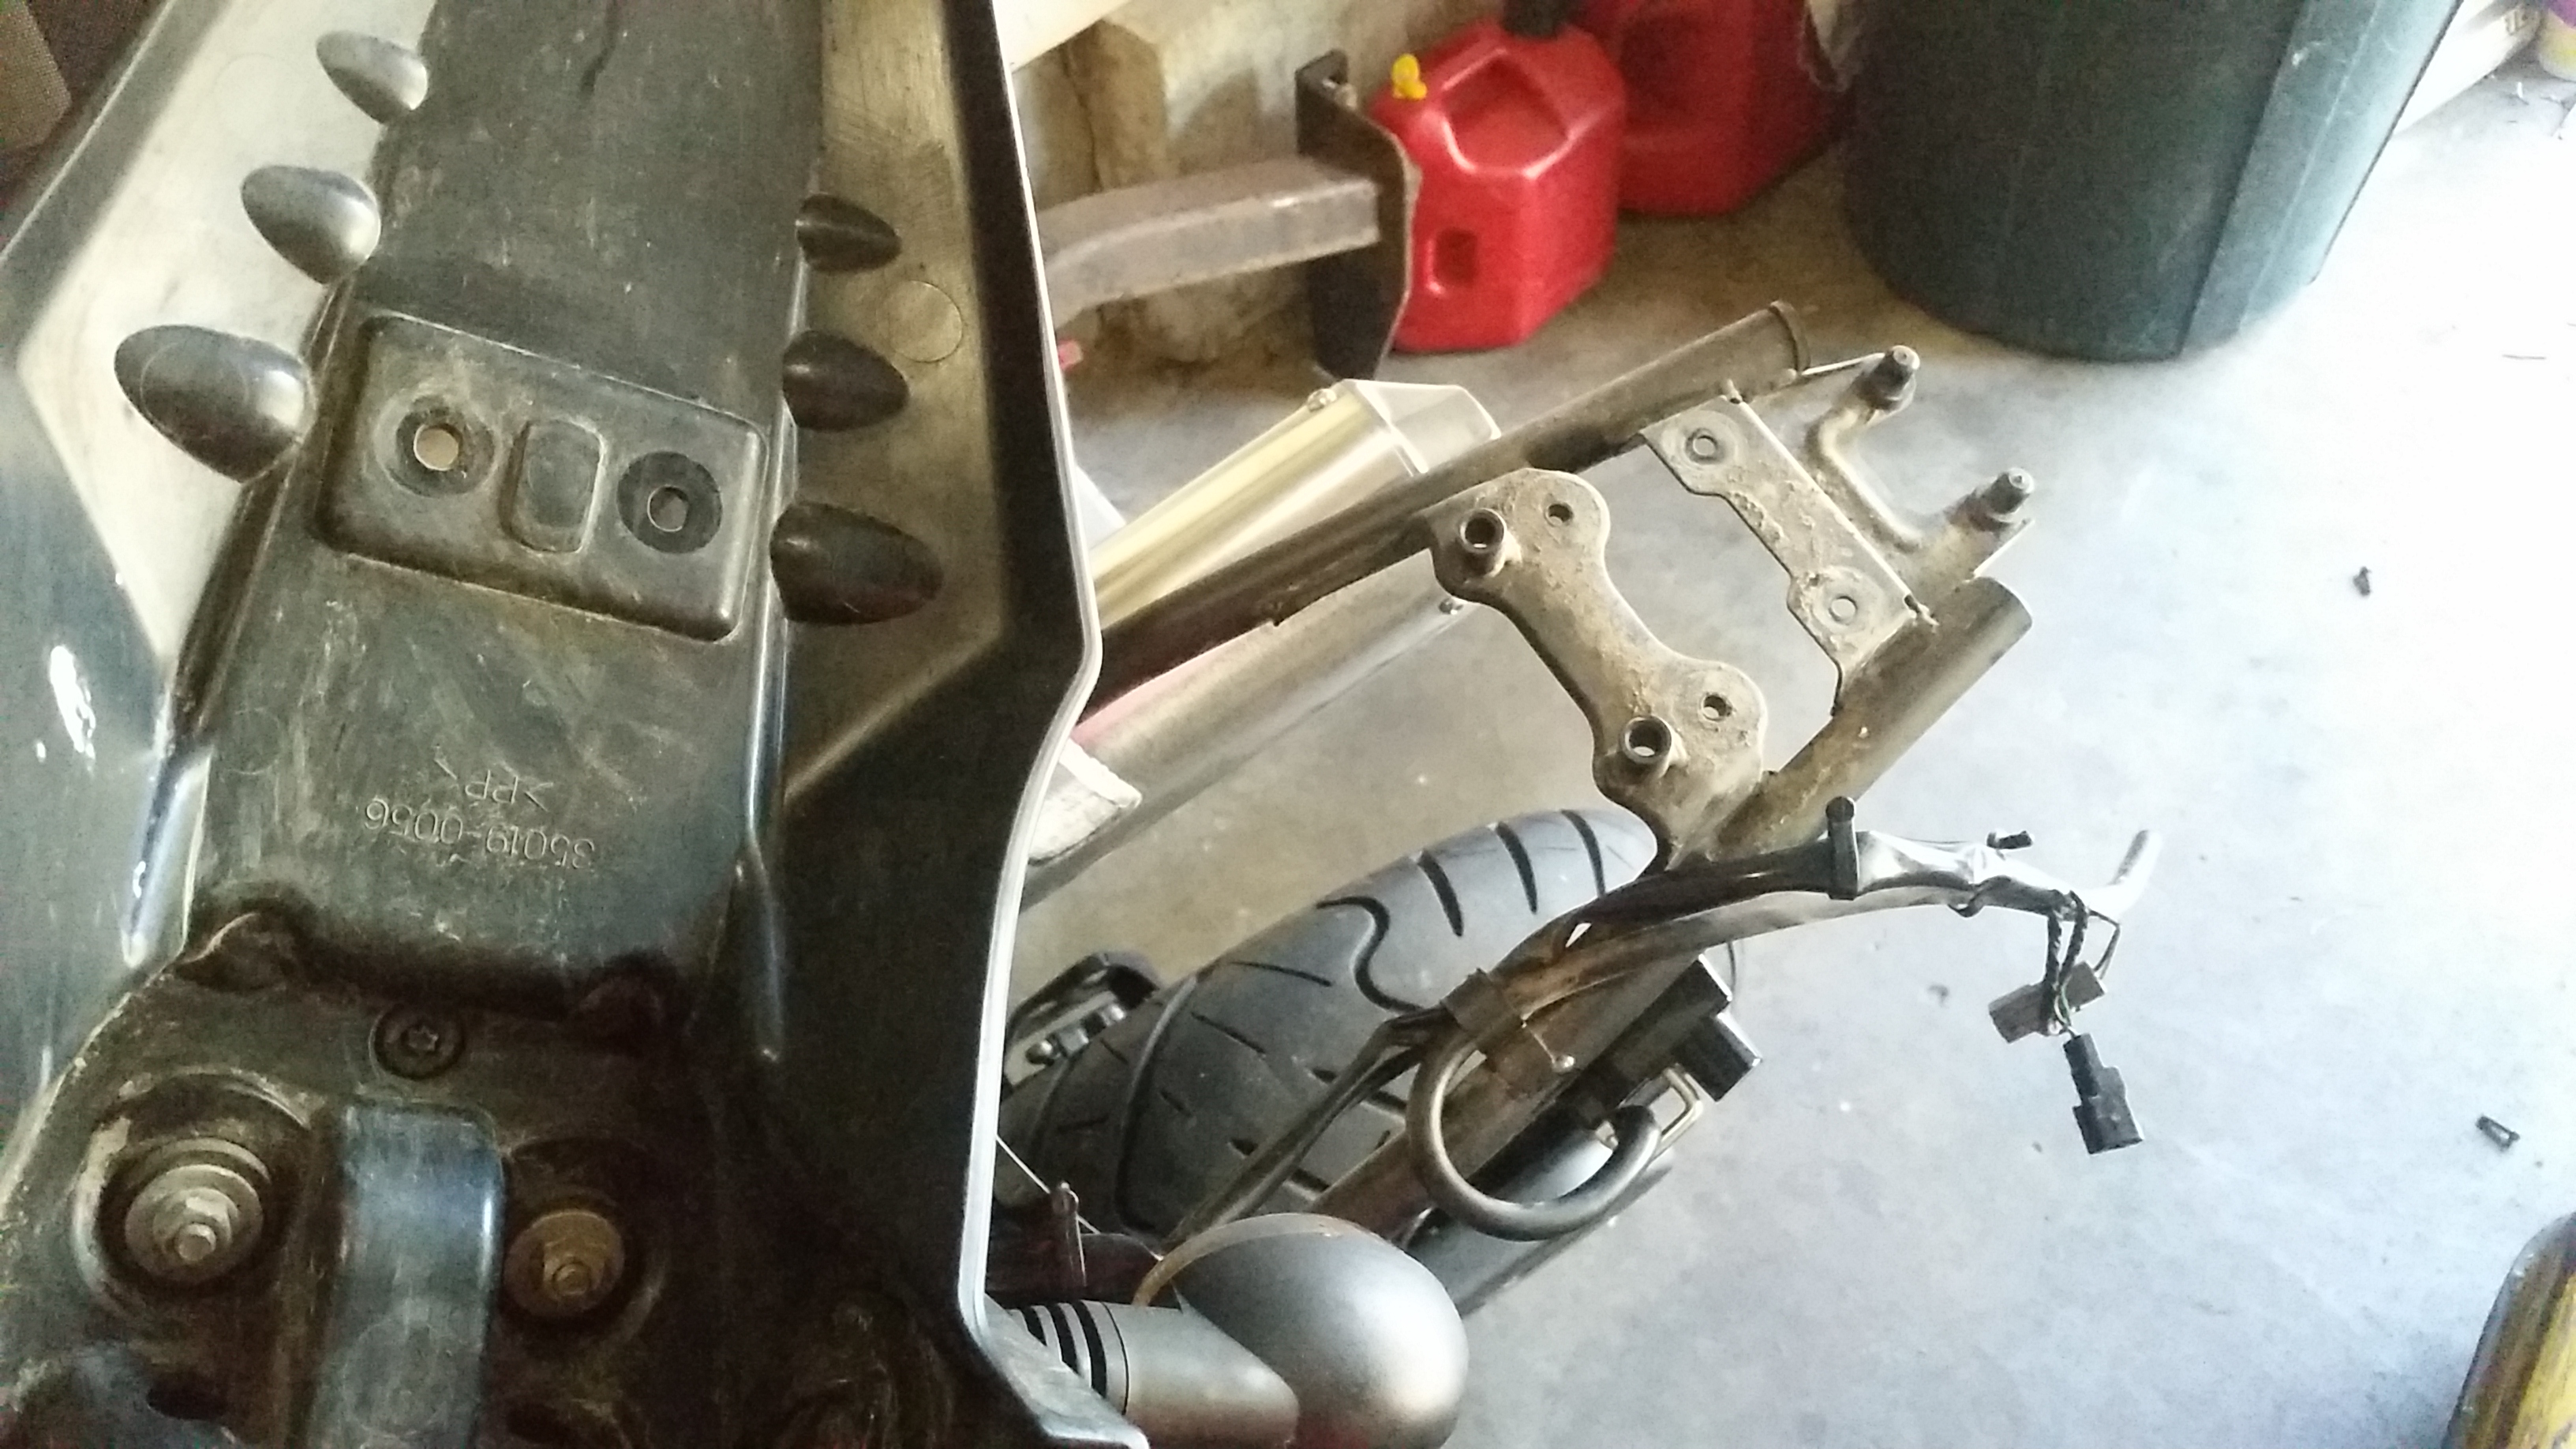
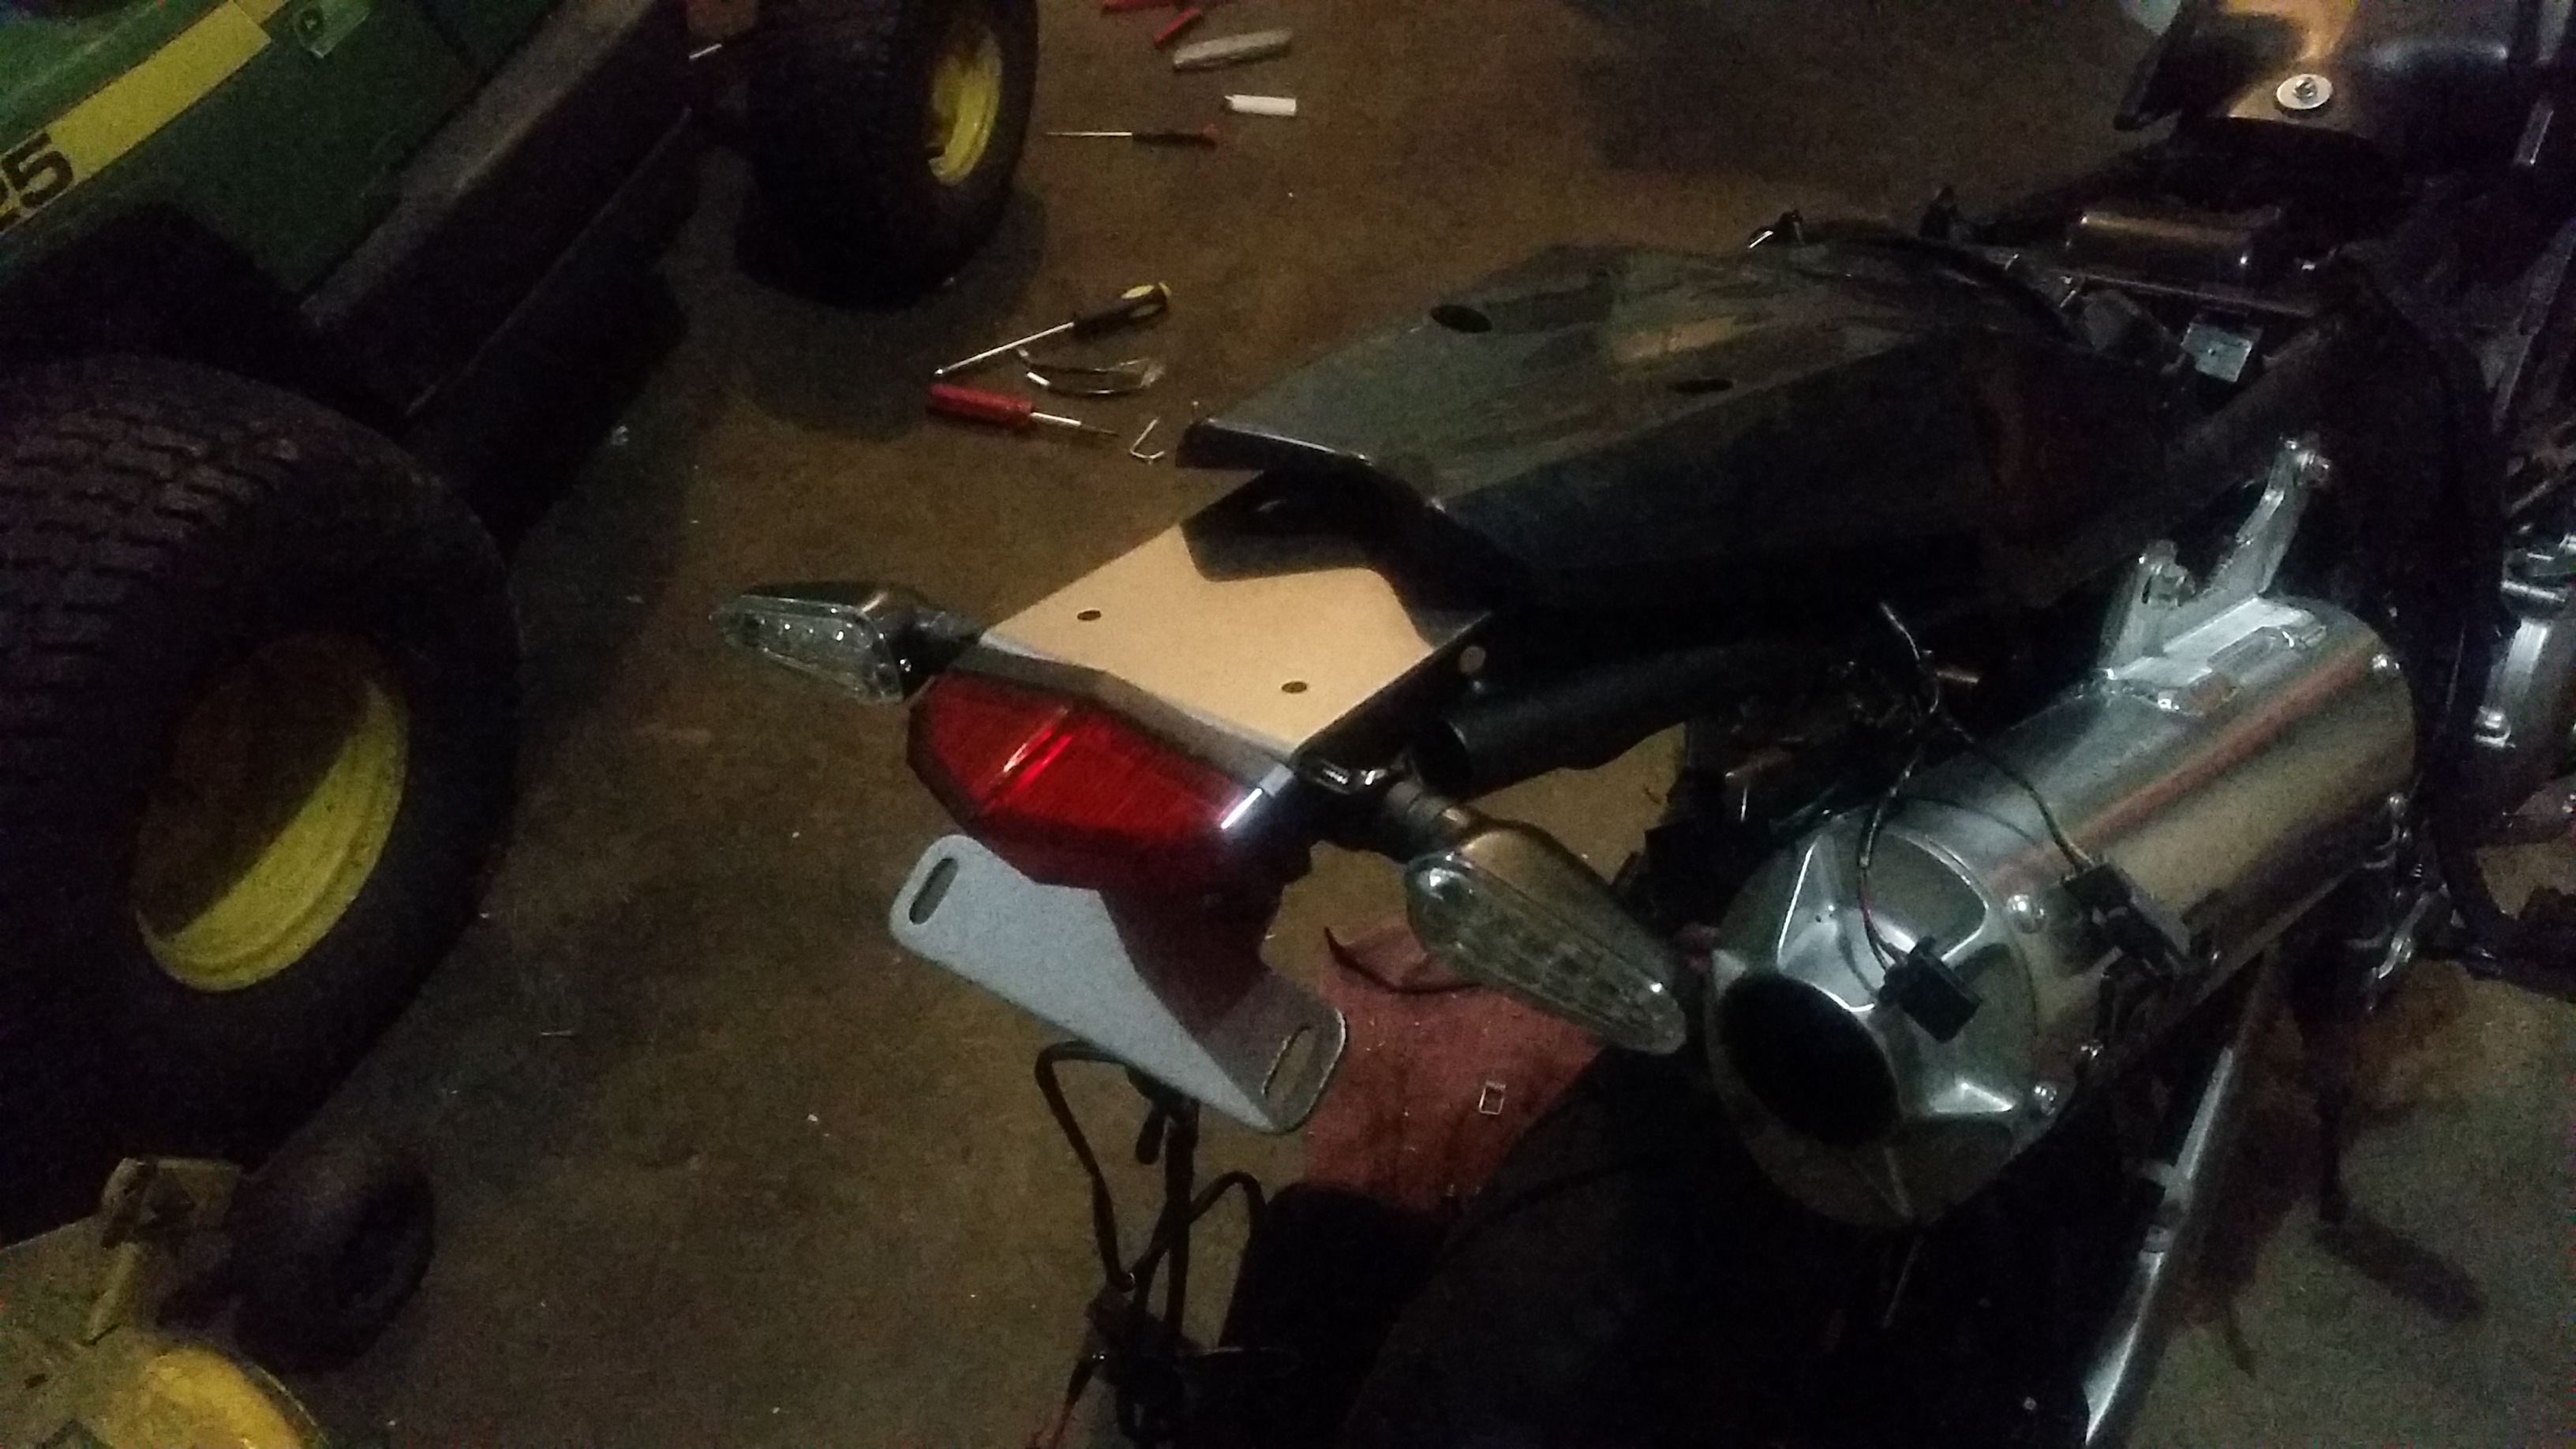
Here is the aluminum plate with new openings to fit on the bikes subframe.
I used a power drill to drill 6 holes, 3 on each side, hugging the inner-part of the little black pillars, and then the reciprocating saw to sloppily cut out the squares.
Drilled 2 new holes to insert screws in to secure the tail light assembly to the subframe.
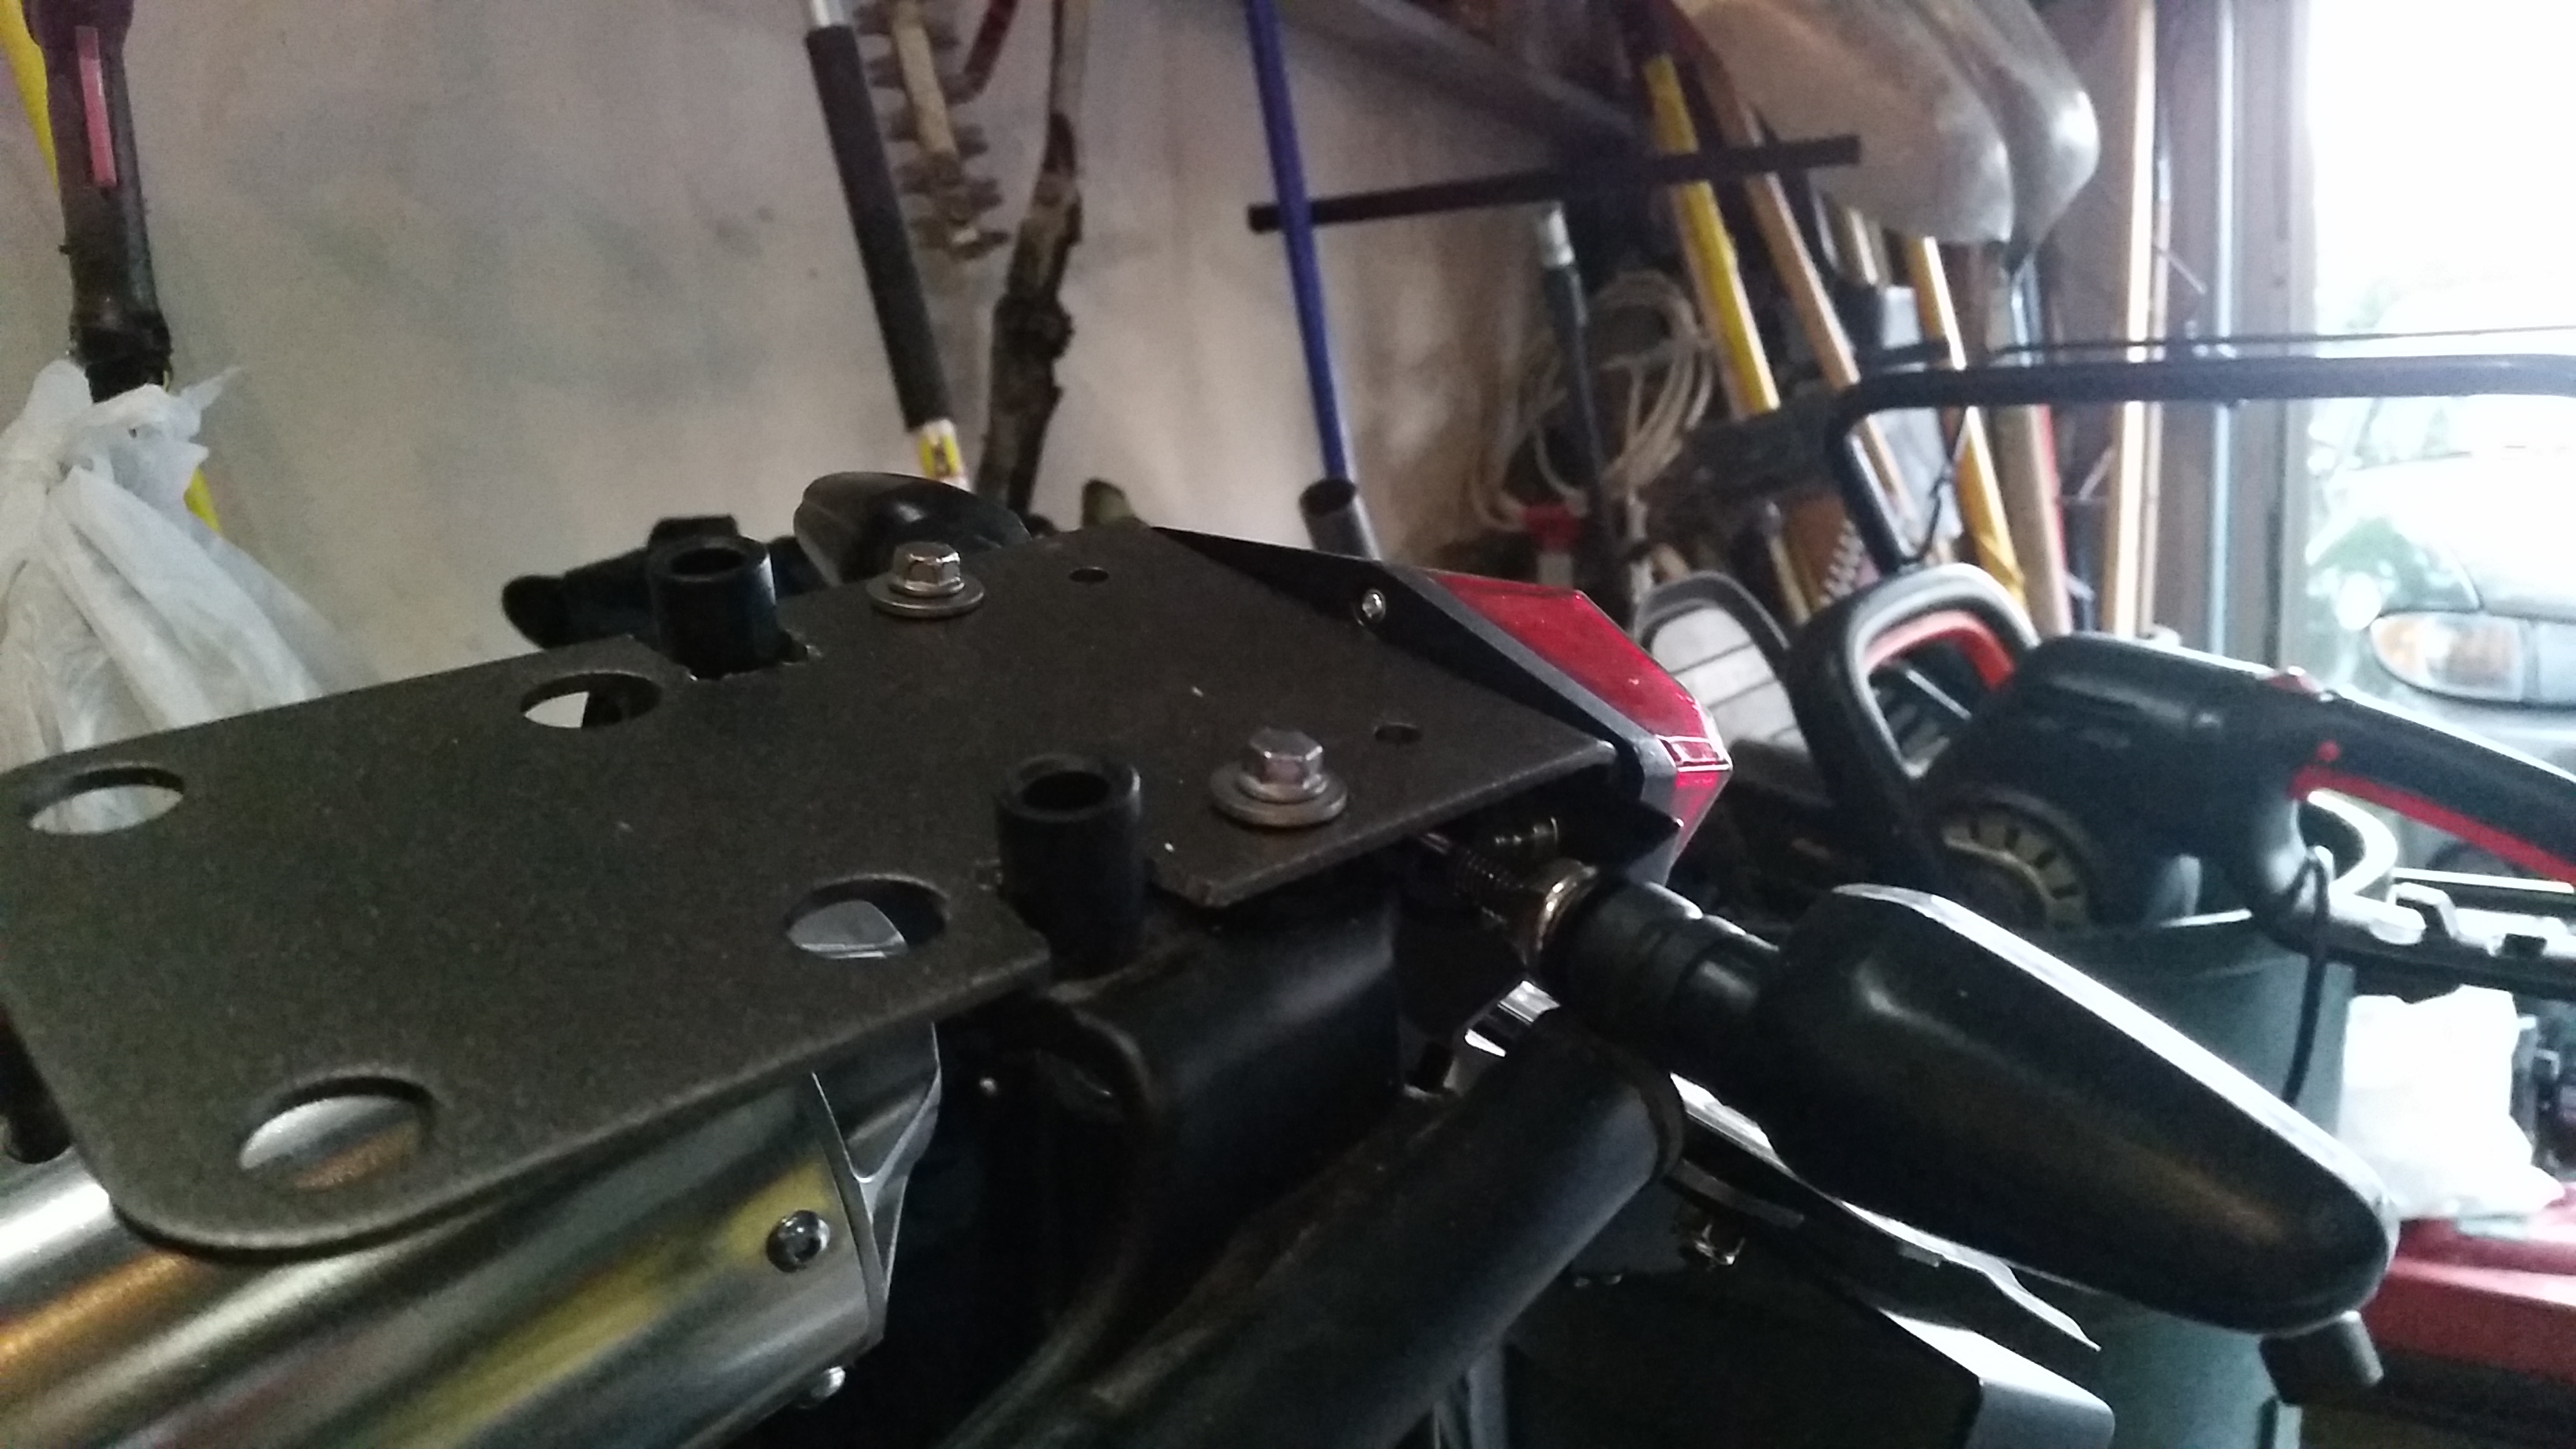
These two screws, and the snug-ness of the openings I cut around the black pillars are really the only things keeping the assembly secure.
I'm amazed at how lucky I got with it fitting, really. I realized later that any milimeters deeper, and the turn signals would've started conflicting with the black plastic on top,
any millimeters further out, and the back of the tail light and aluminum assembly would start to show under the black plastic.
I got REALLY lucky with where I made my cuts.
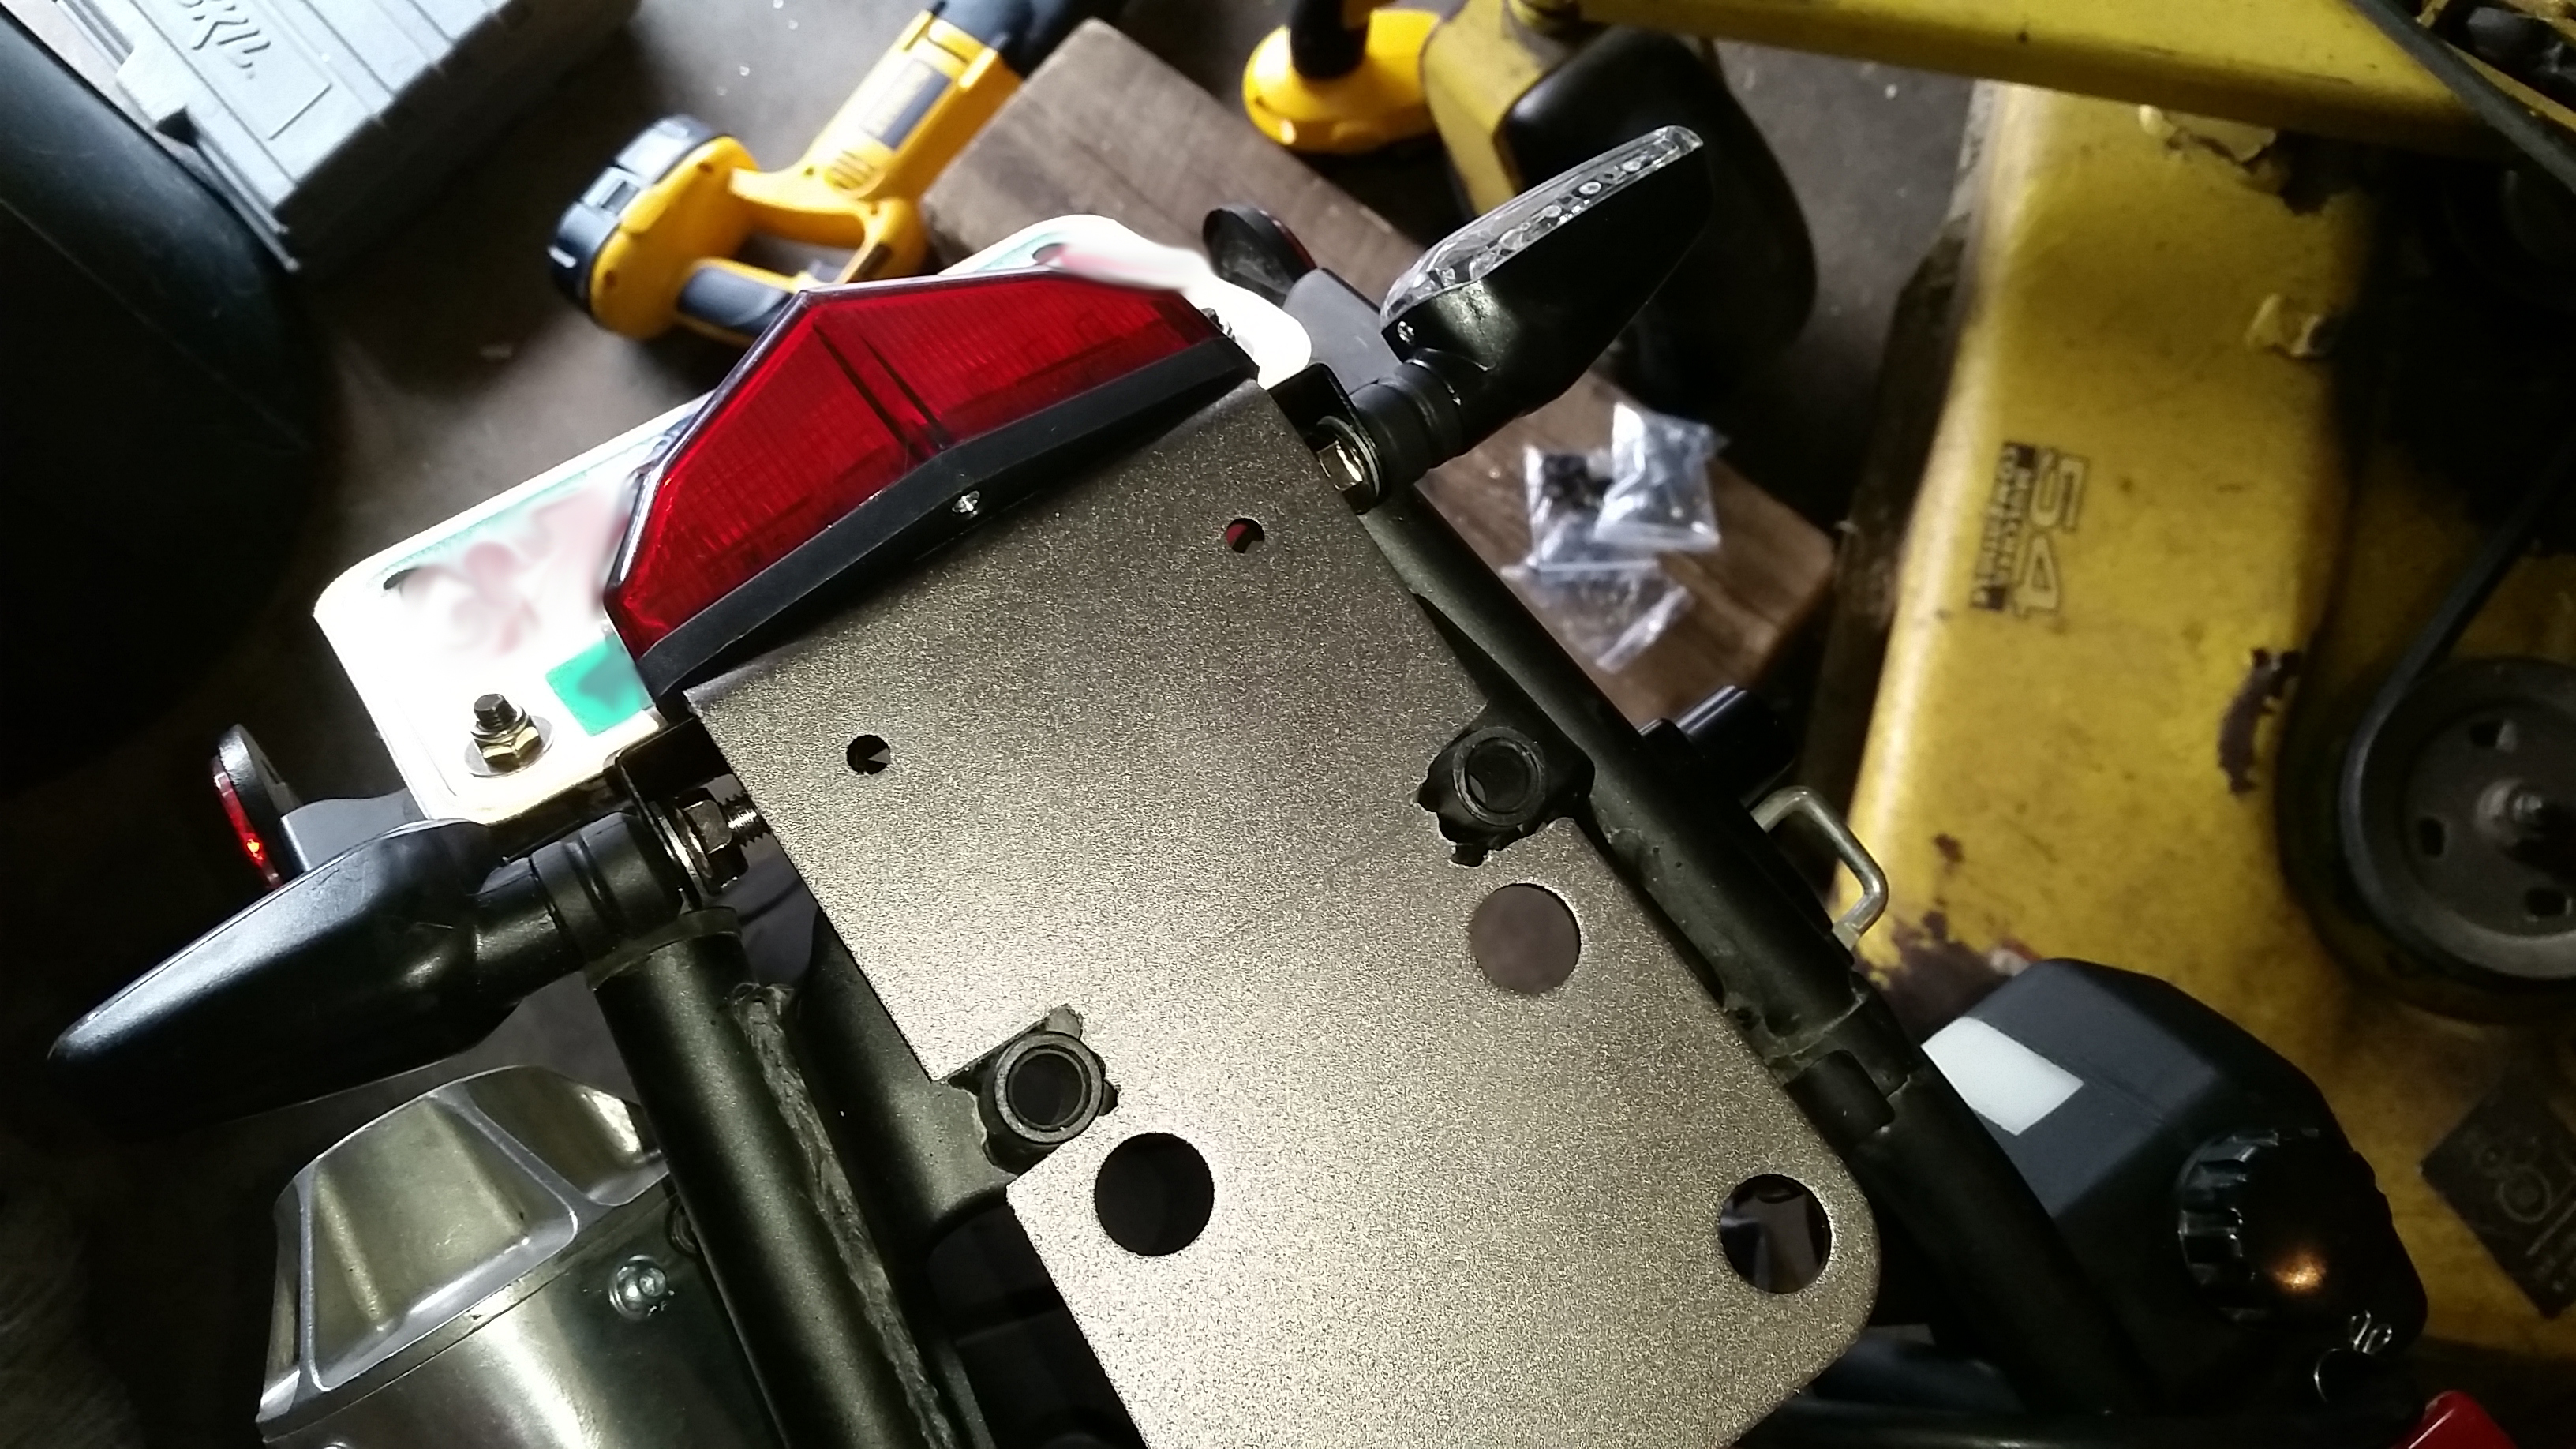
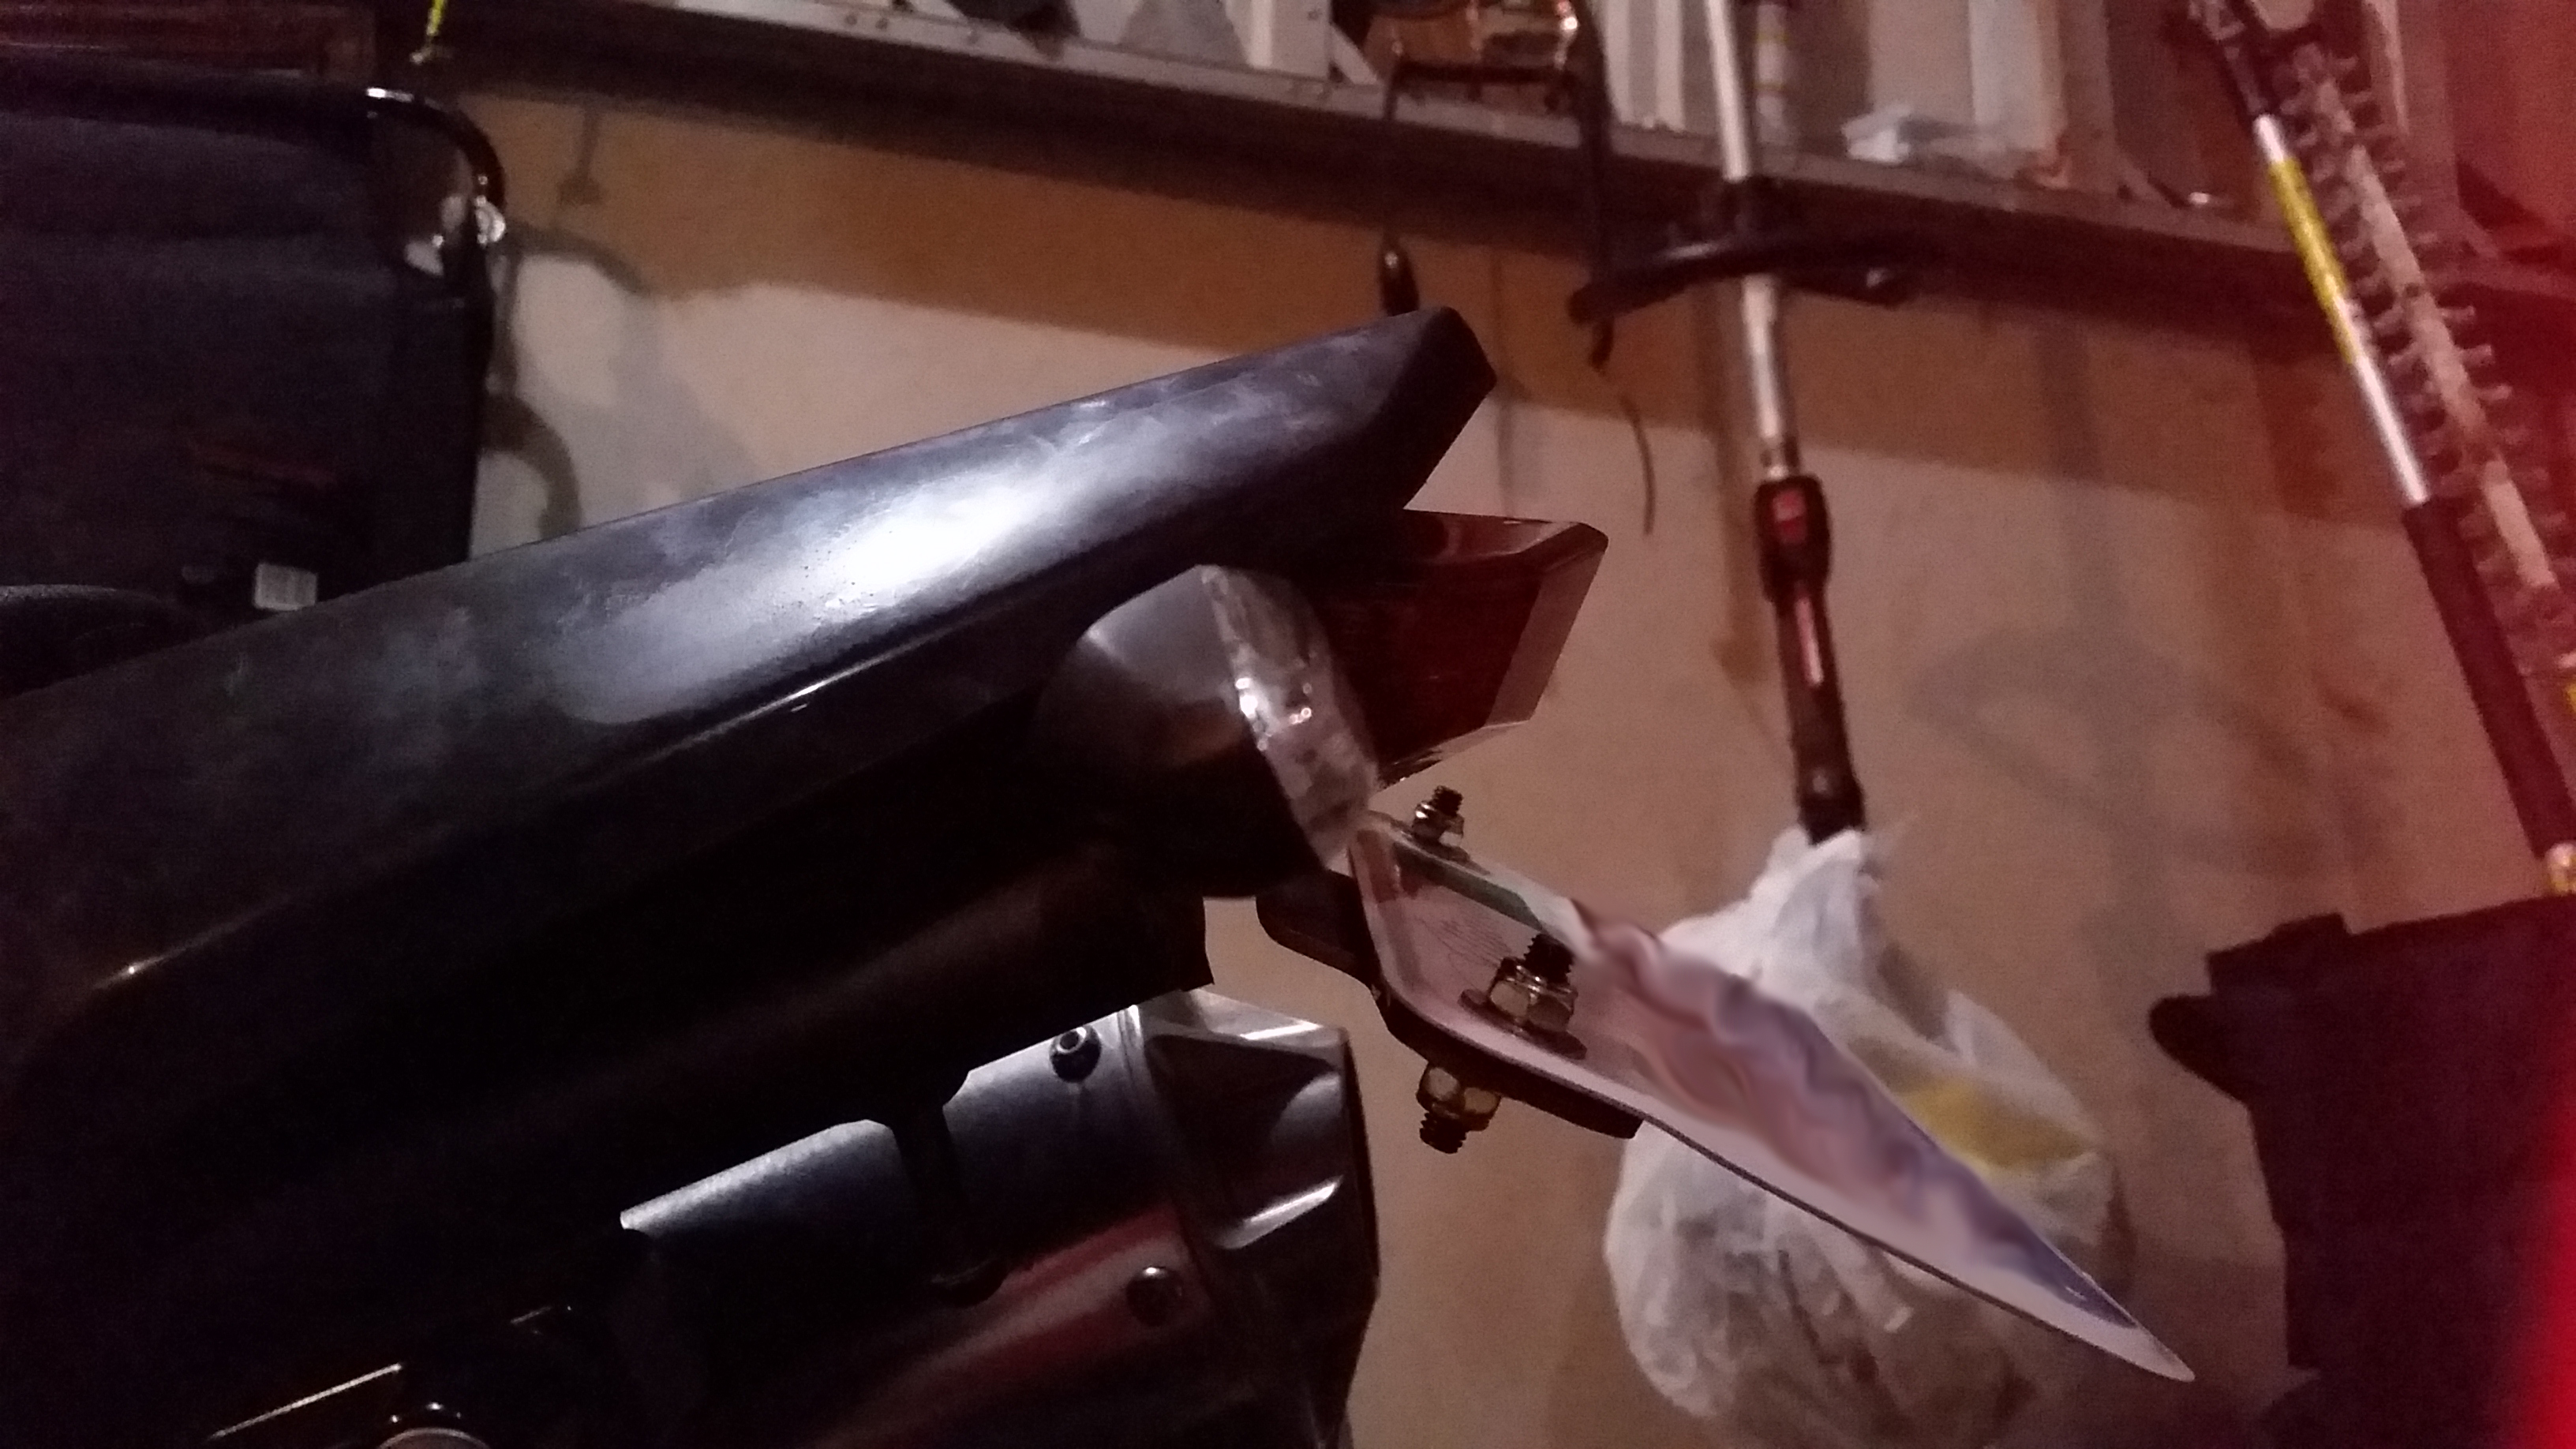
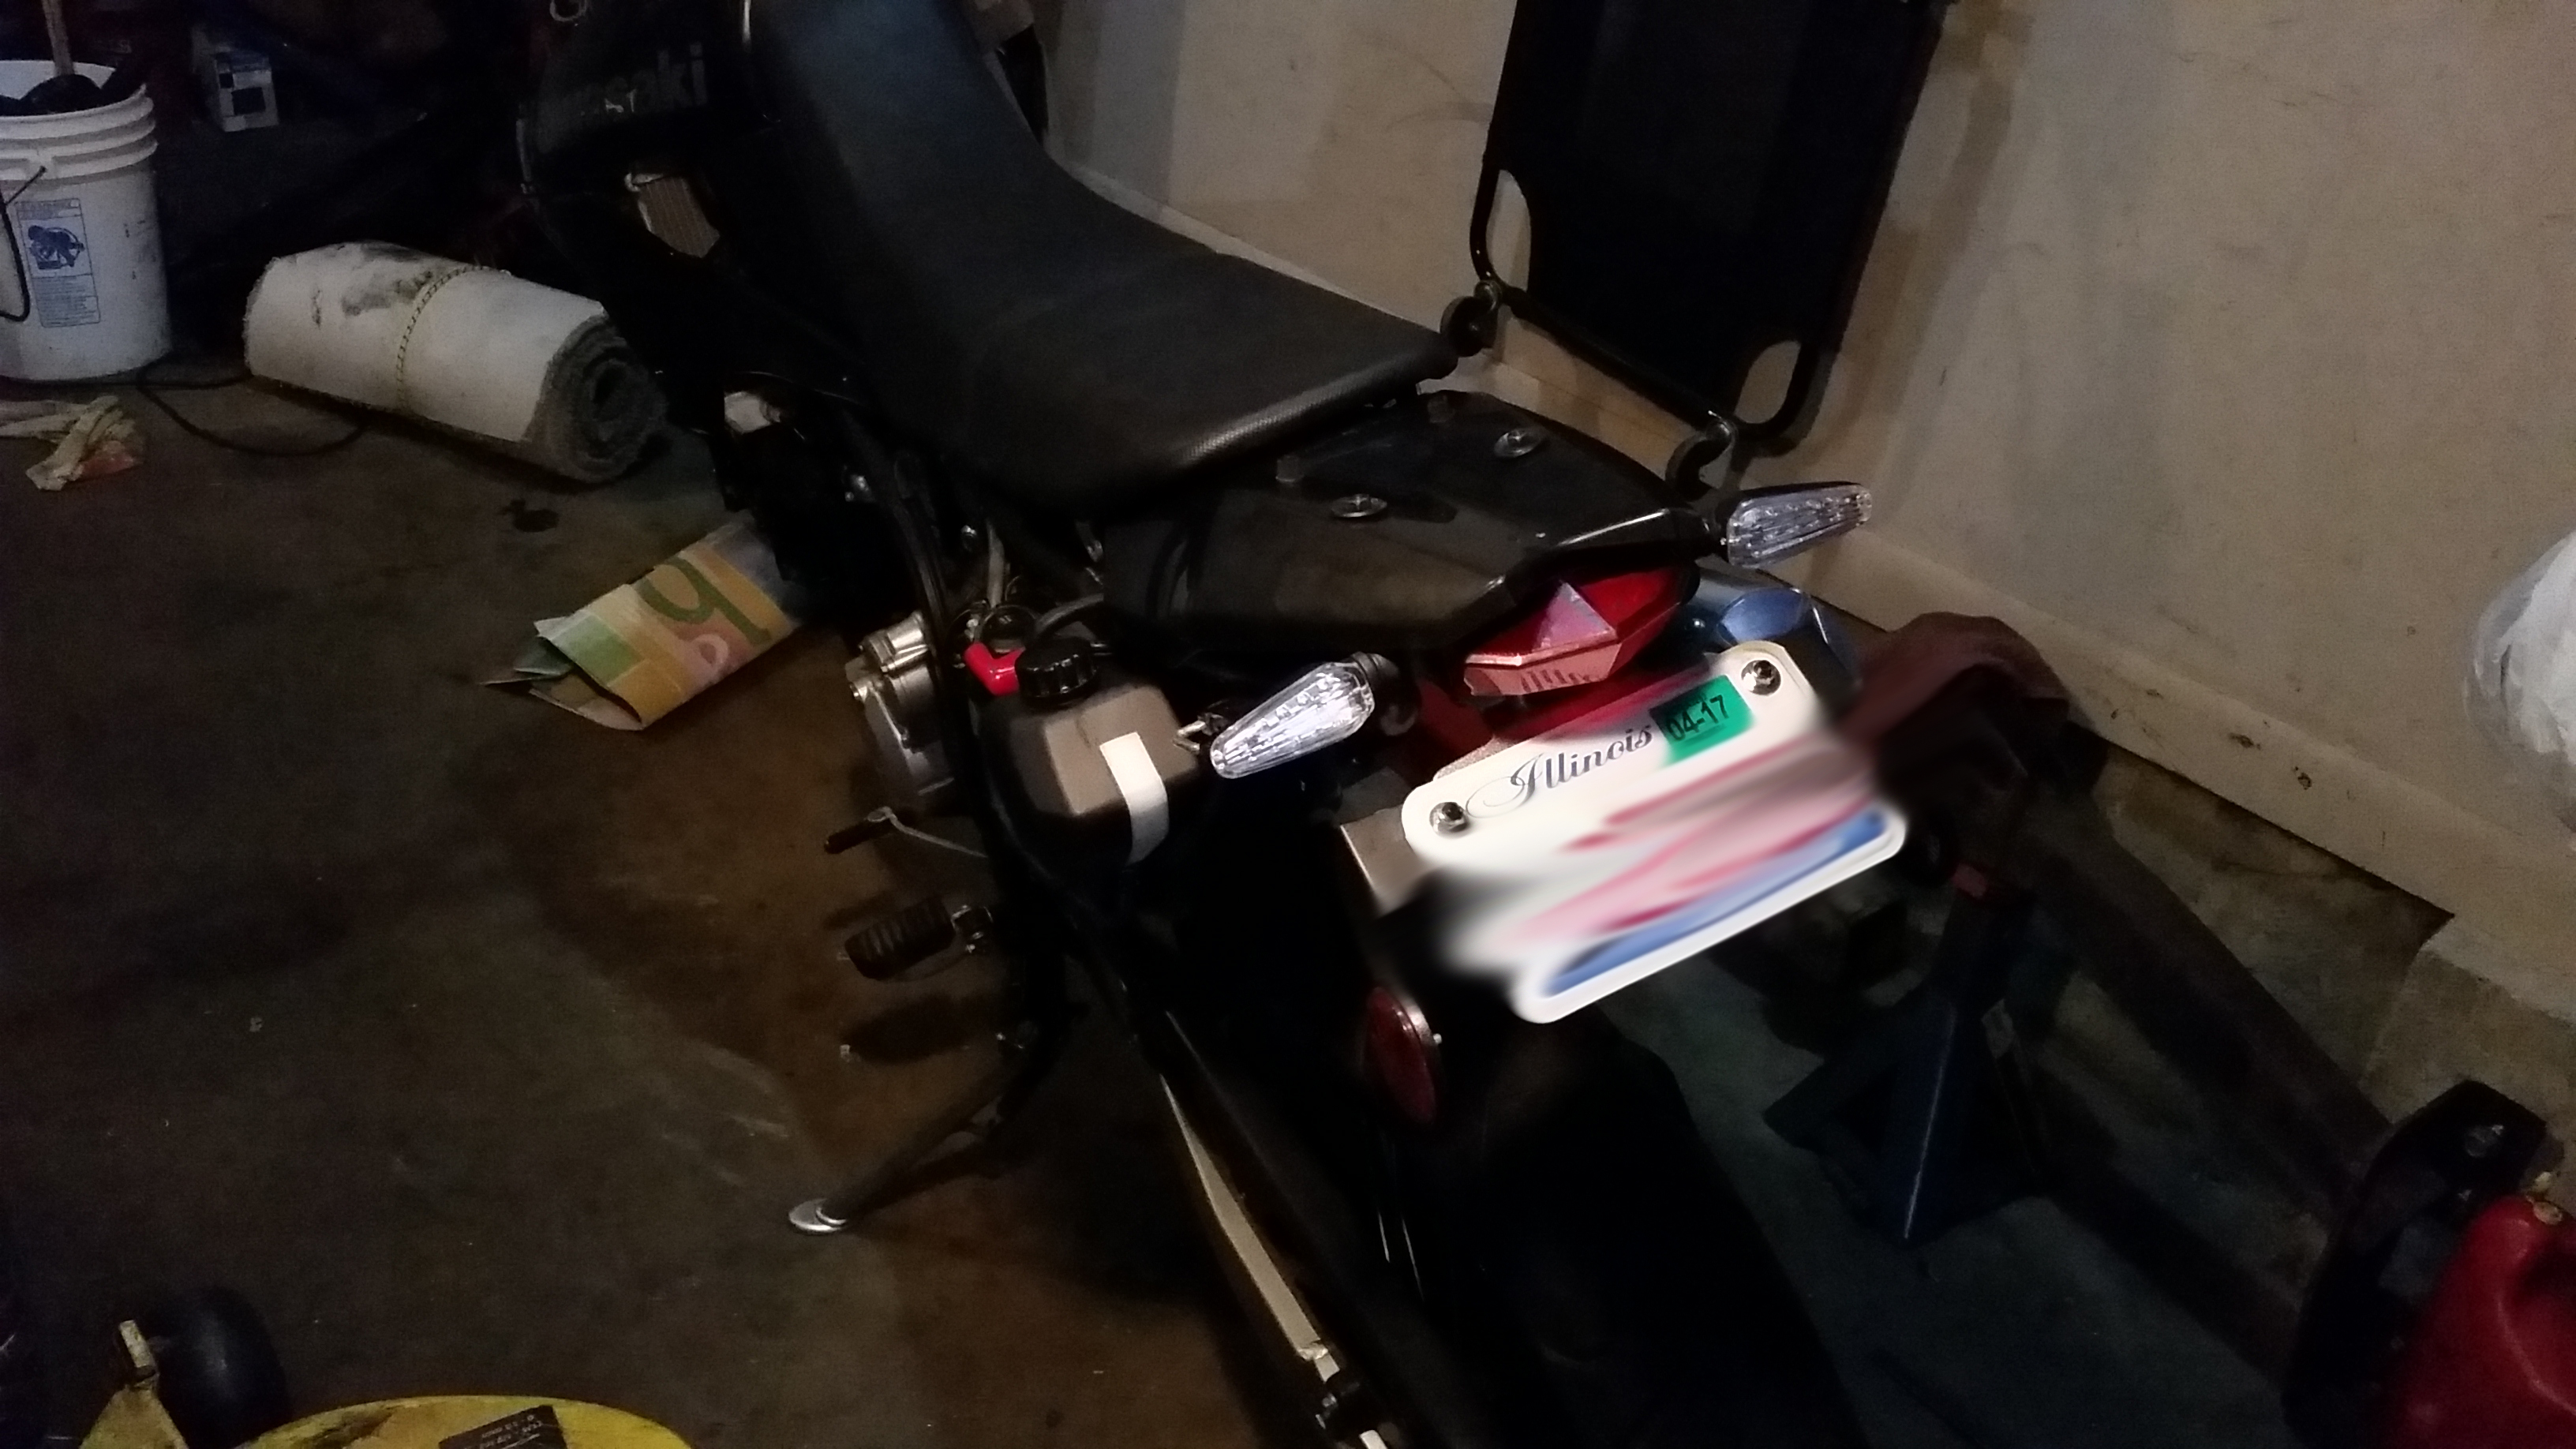
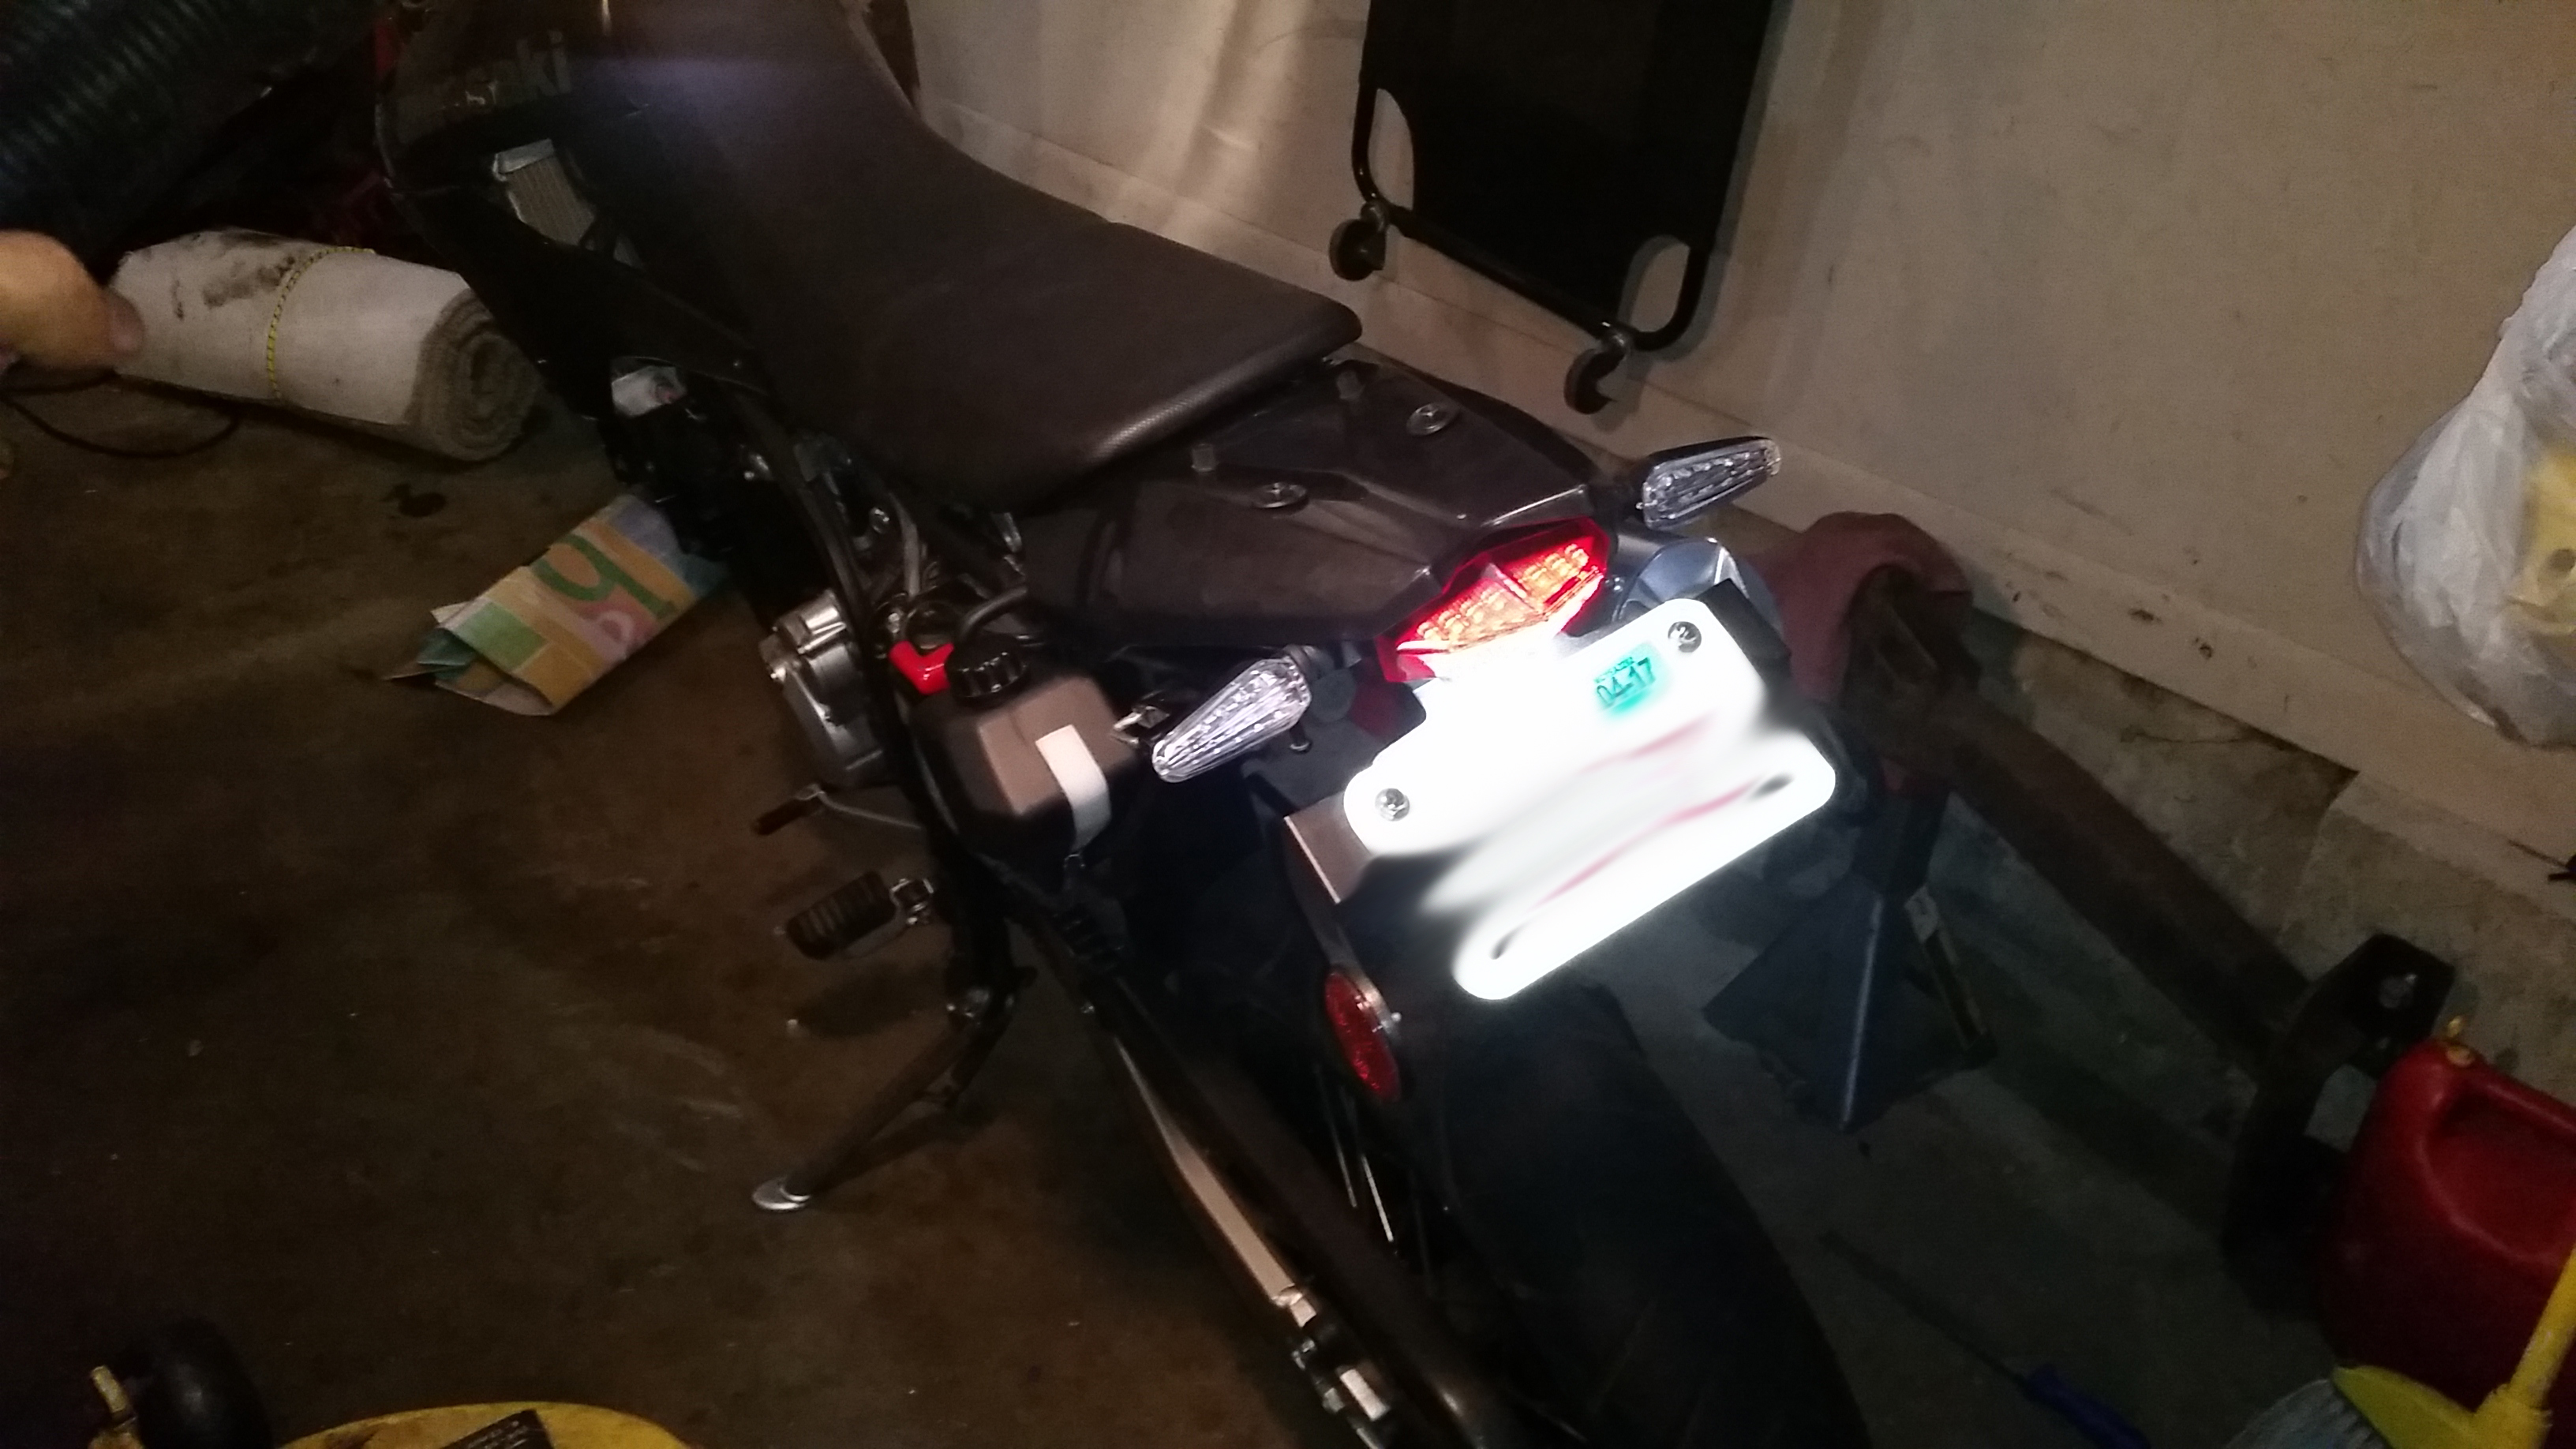
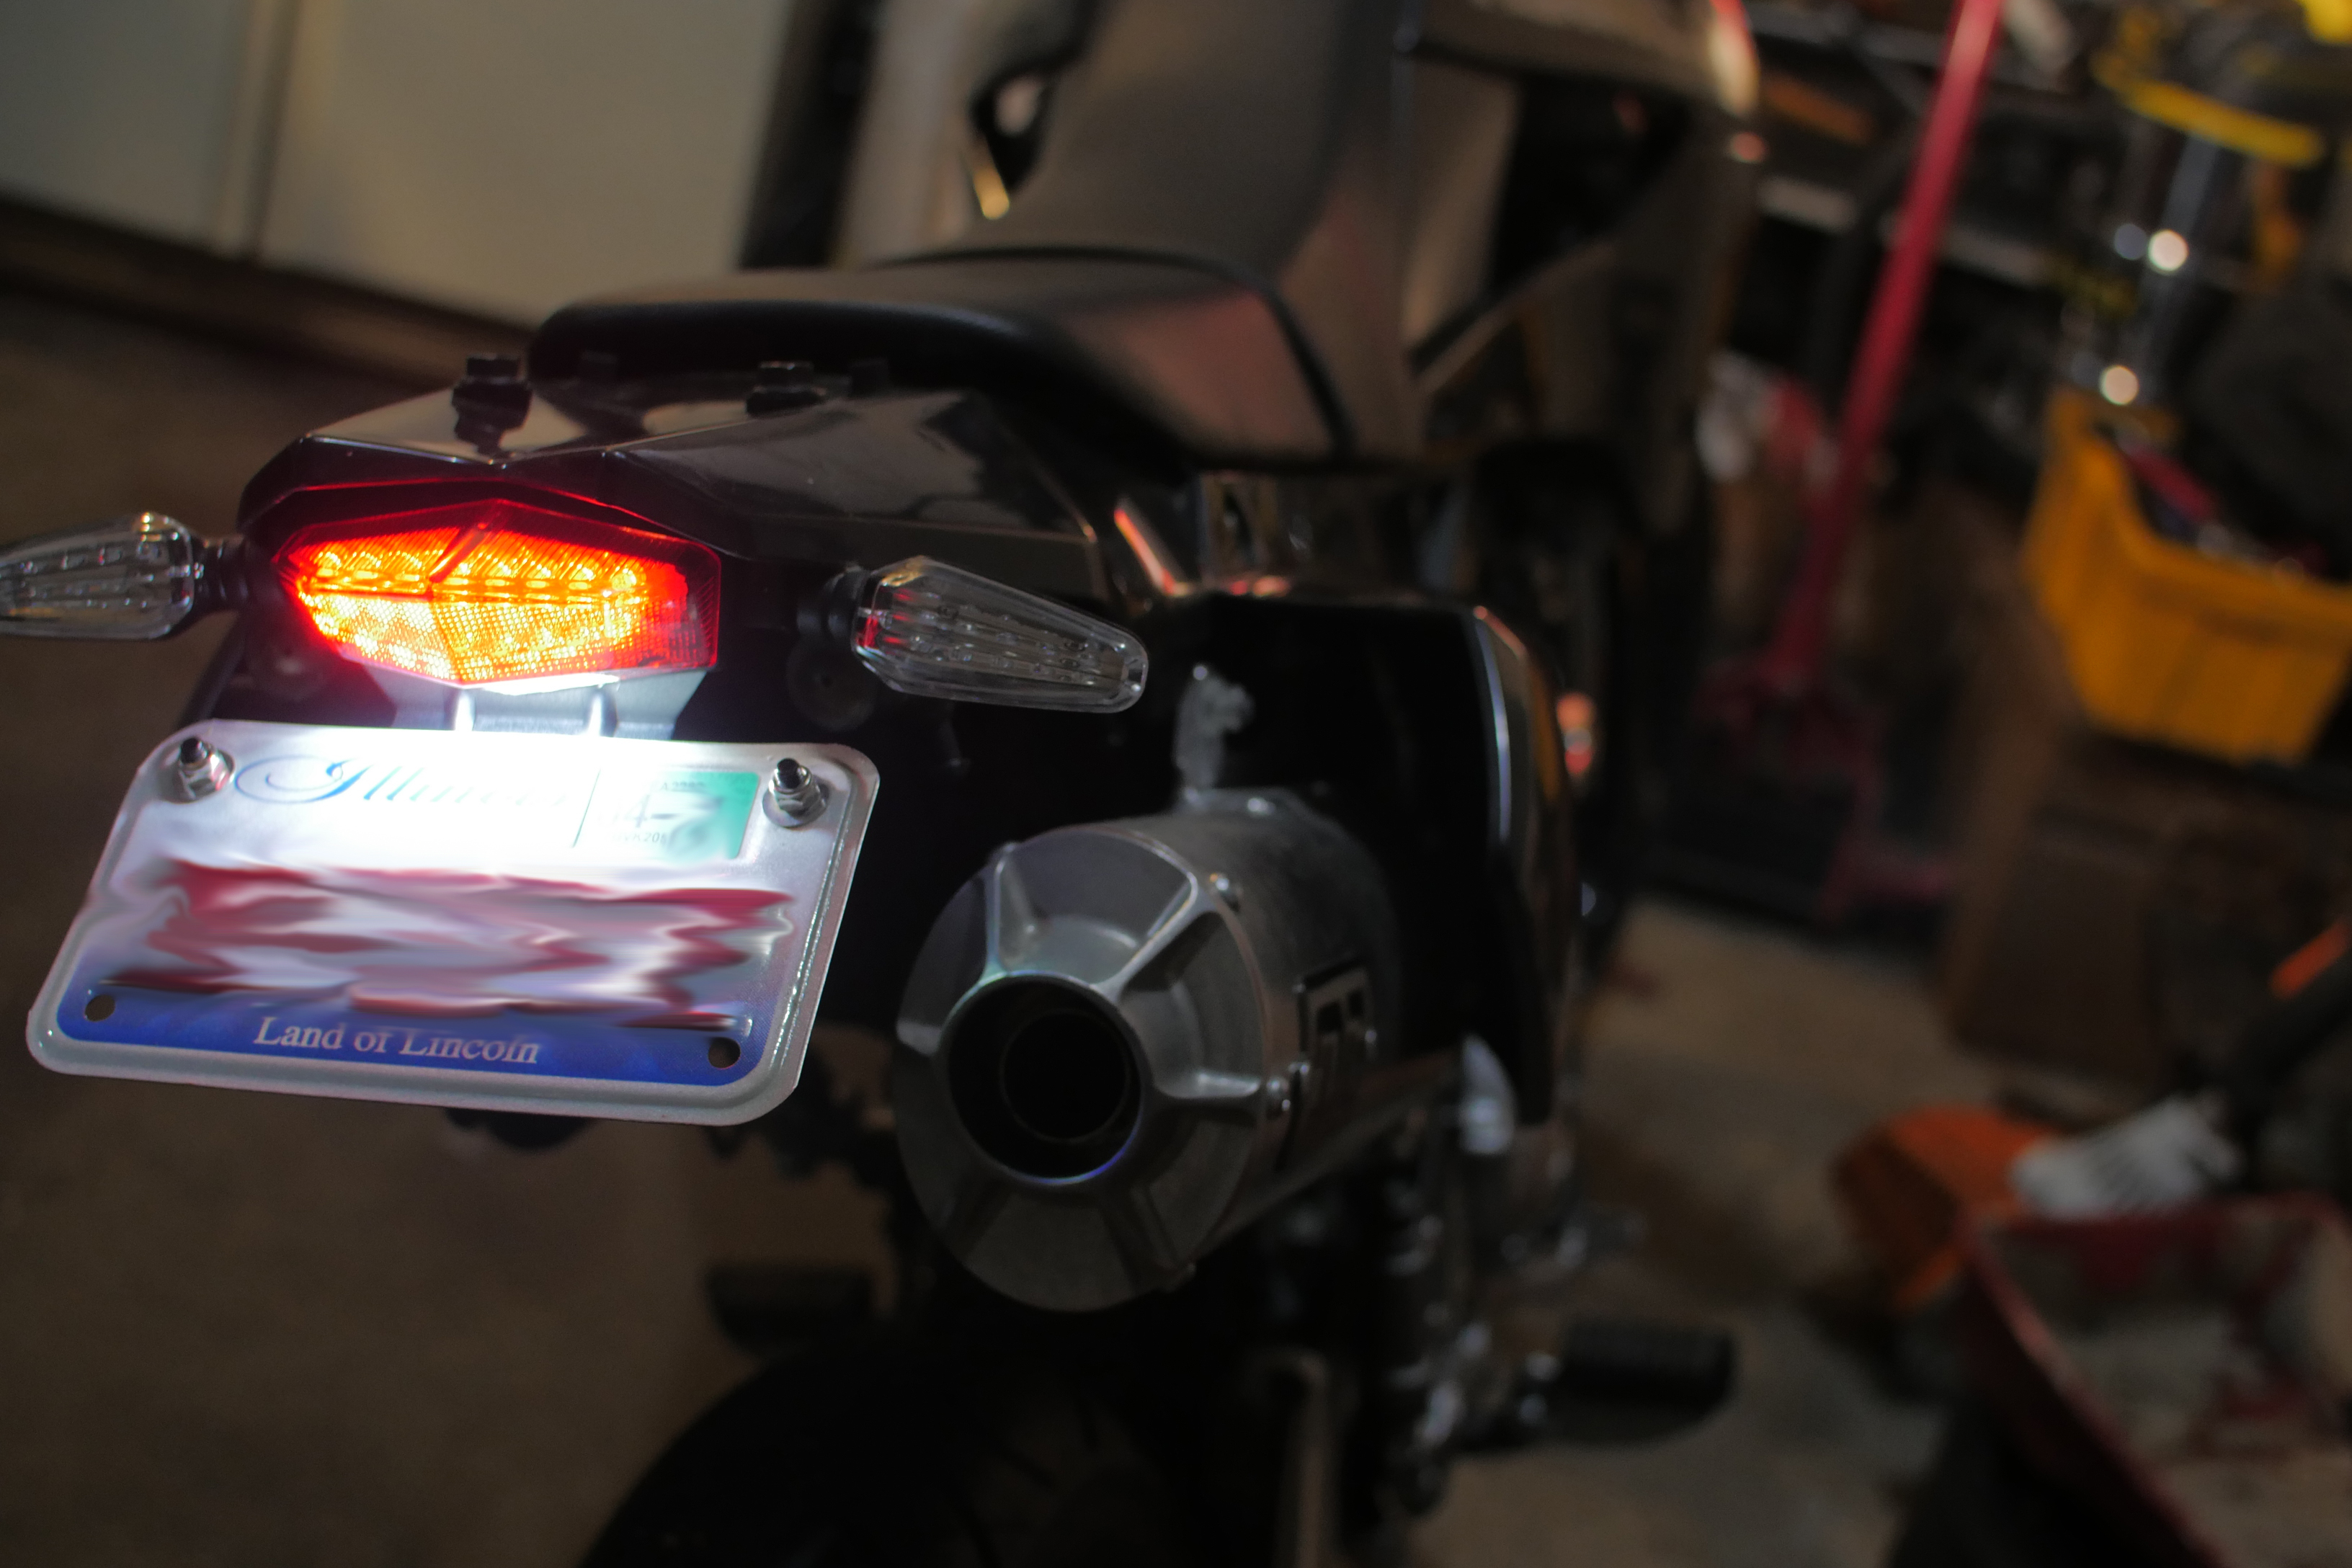
Here are some final pictures of the assembly.
You may have noticed I painted my coolant tank. I saw someone on YouTube who had done it to his KLX and so I did it myself. I like it a lot. I taped the openings and a strip on the rear, then spray painted the tank with a Rustoleum paint and primer. Very easy mod.
Here are some bonus pictures.
So in my initial installation, I put on the stock rear side-reflectors under my plate, and, wouldn't you know it, after a 15 minute ride out on a cold night on my beautiful back roads, I pull into my garage and notice my reflector behind my exhaust has melted.

Must be the elbow grease I poured into the bike burning off, or tail-light break in wearing out my relectors. We might never know, folks.
I simply removed my reflectors. No problems since.
Also, after that same ride, I noticed pair of bolt screws I put on the rear fell off.

This actually happened to the stock screws that go here as well.
No worries, I hit up my hardware store for MORE screws (I bought a lot of different screw assemblies here during this project. Thank you Ace Hardware.) I manged to buy rubber washer rings, combined with nylon washers that screwed on to the bolts. No issues with stuff falling off after that.
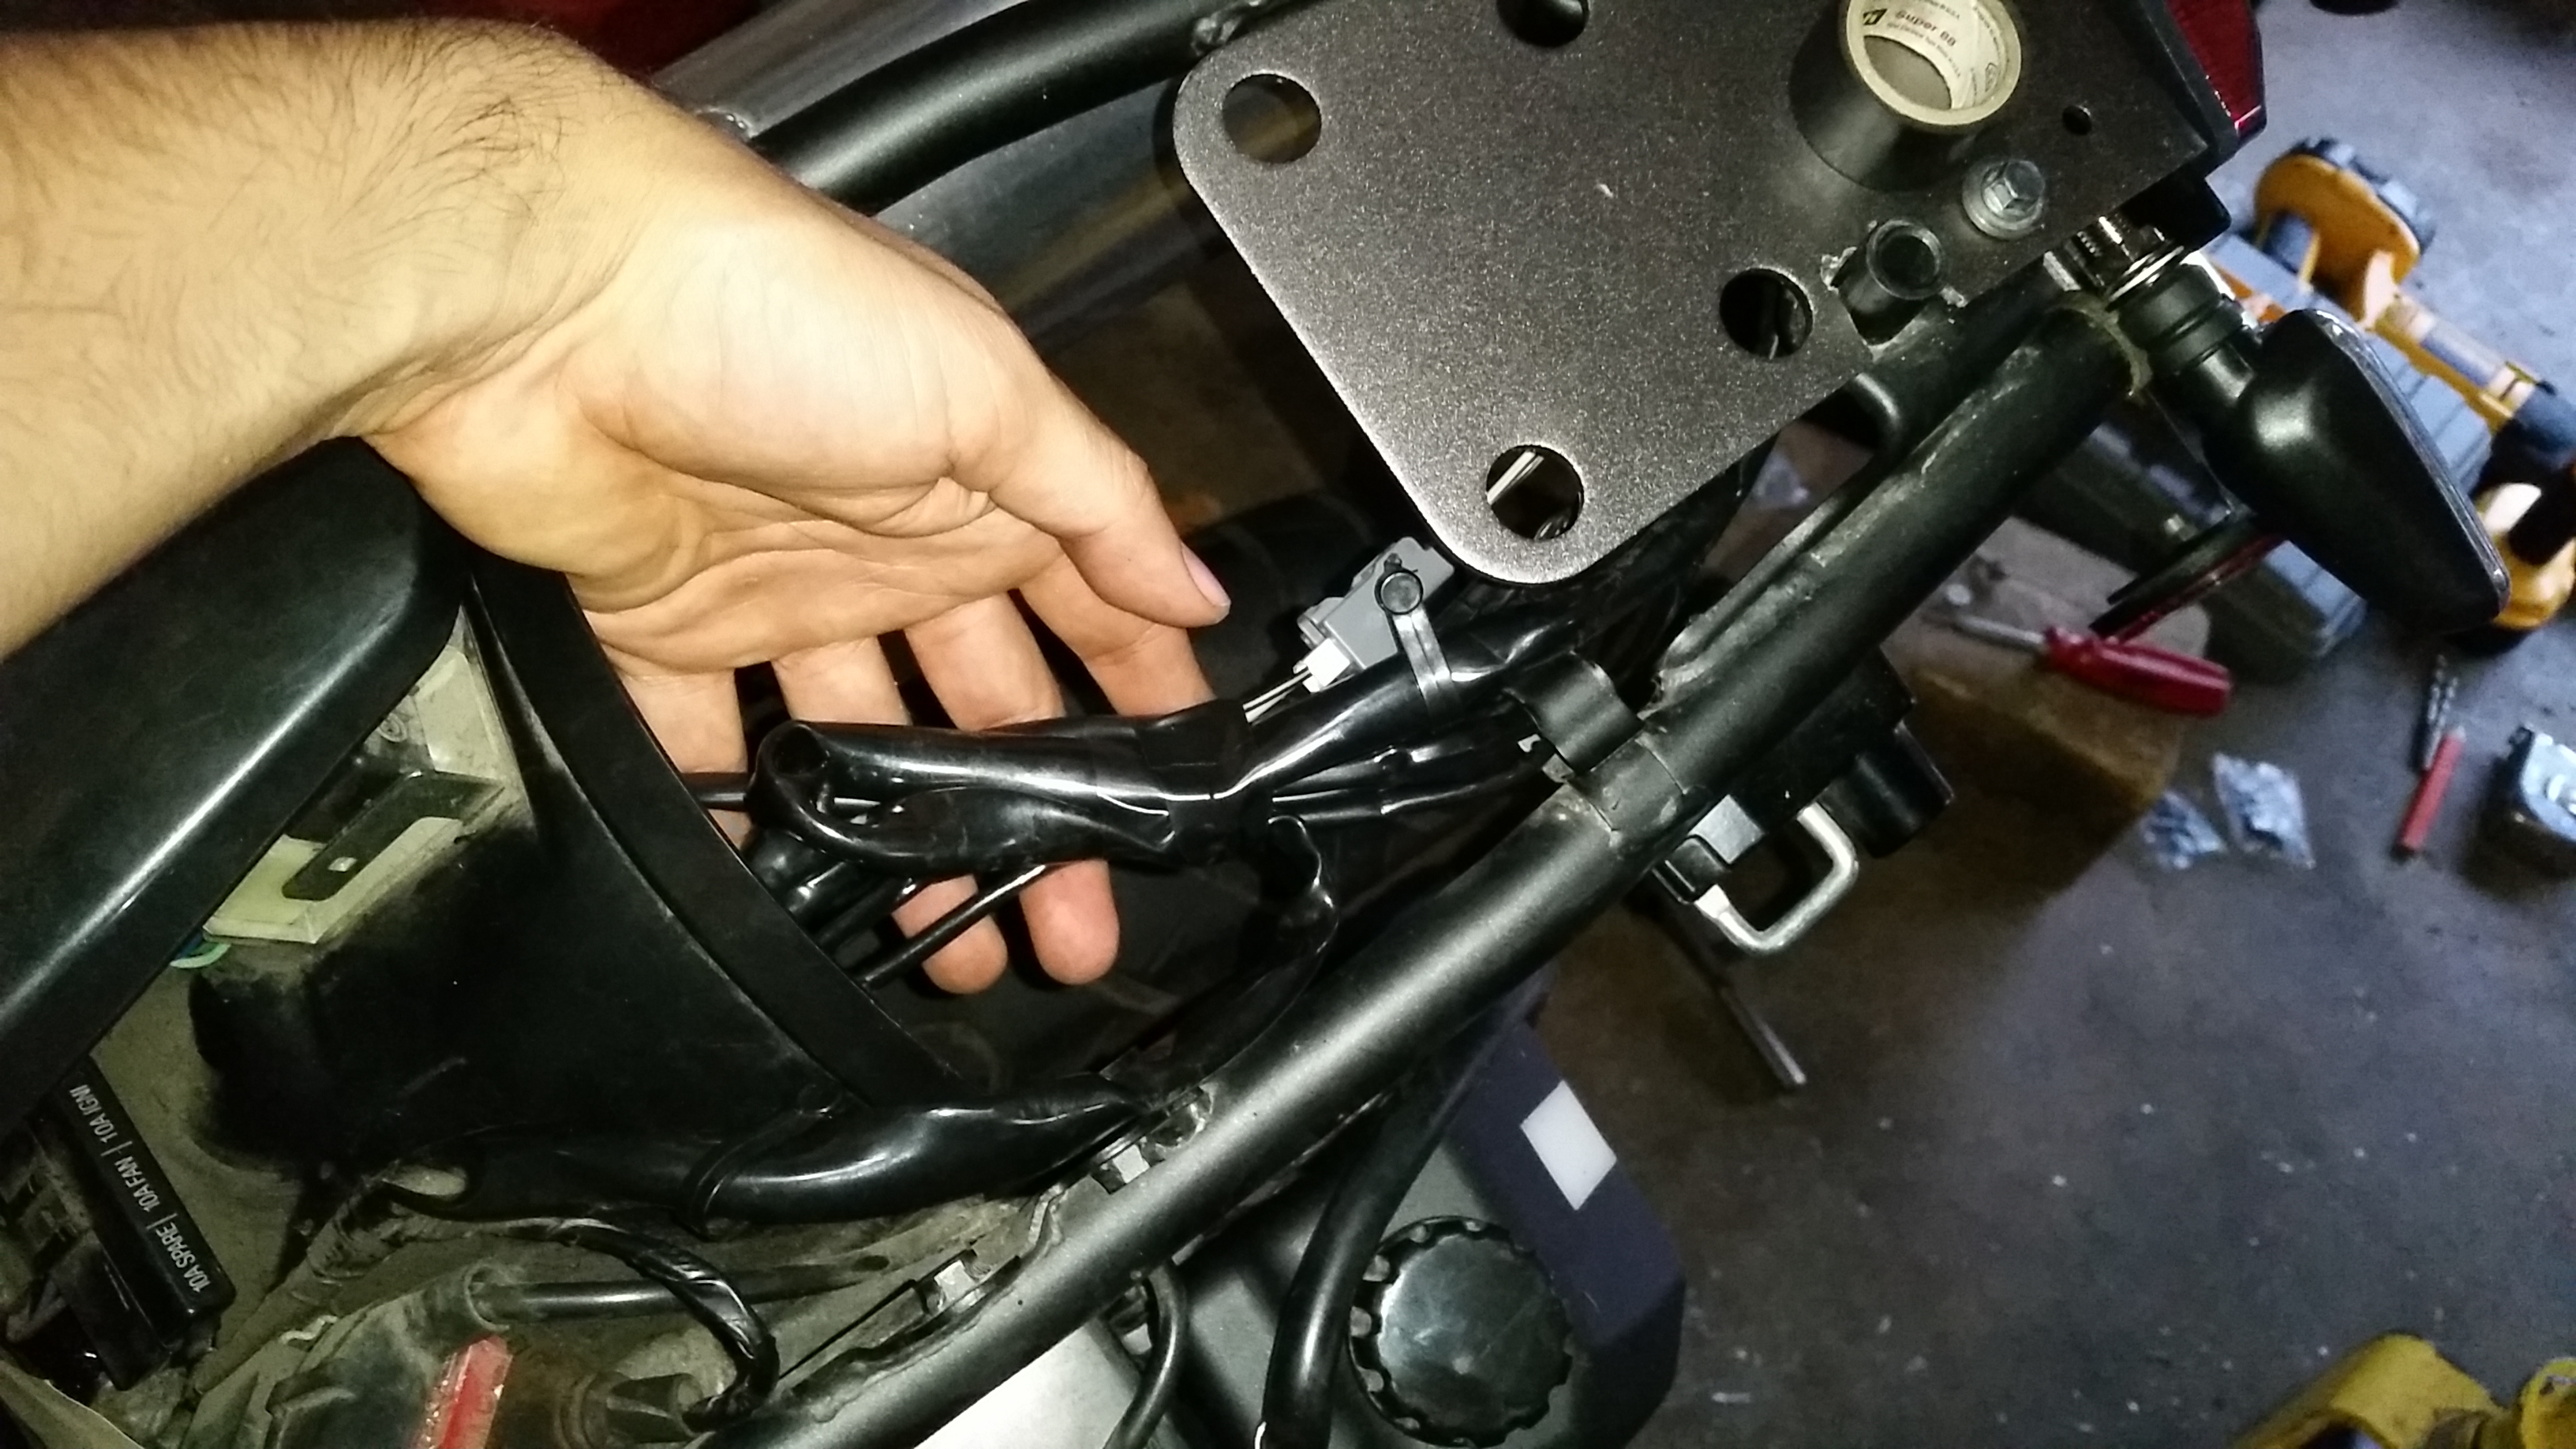
Oh yeah, I also changed my stock handlebars to black Renthal bars. It was quite the serious headache.

I didn't take many pictures but this one of my scratched up stock bar from trying to pry my glued left-grip off the handlebar. The new ones are much nicer, wider, lighter, and of course, stronger. I won't go into detail on installing that, but I'll highlight that with the new handlebar, I had to re-route my throttle cable from in front of my right fork to behind it in order for it to reach.
I hope you all enjoyed my little showcasing. I'm really REALLY happy with how it turned out. I can grab the tip of the tail light with my fingers and shake the whole bike. The assembly stays firm.
I'm ashamed to ever have to sell my bike now, as I put some of my own soul into it now, with this week-long project. I had to visit hardware stores a couple towns over just to buy special tools and stuff that came up being needed. This was my first time doing electrical, and metal-working, and working up serious sweat.
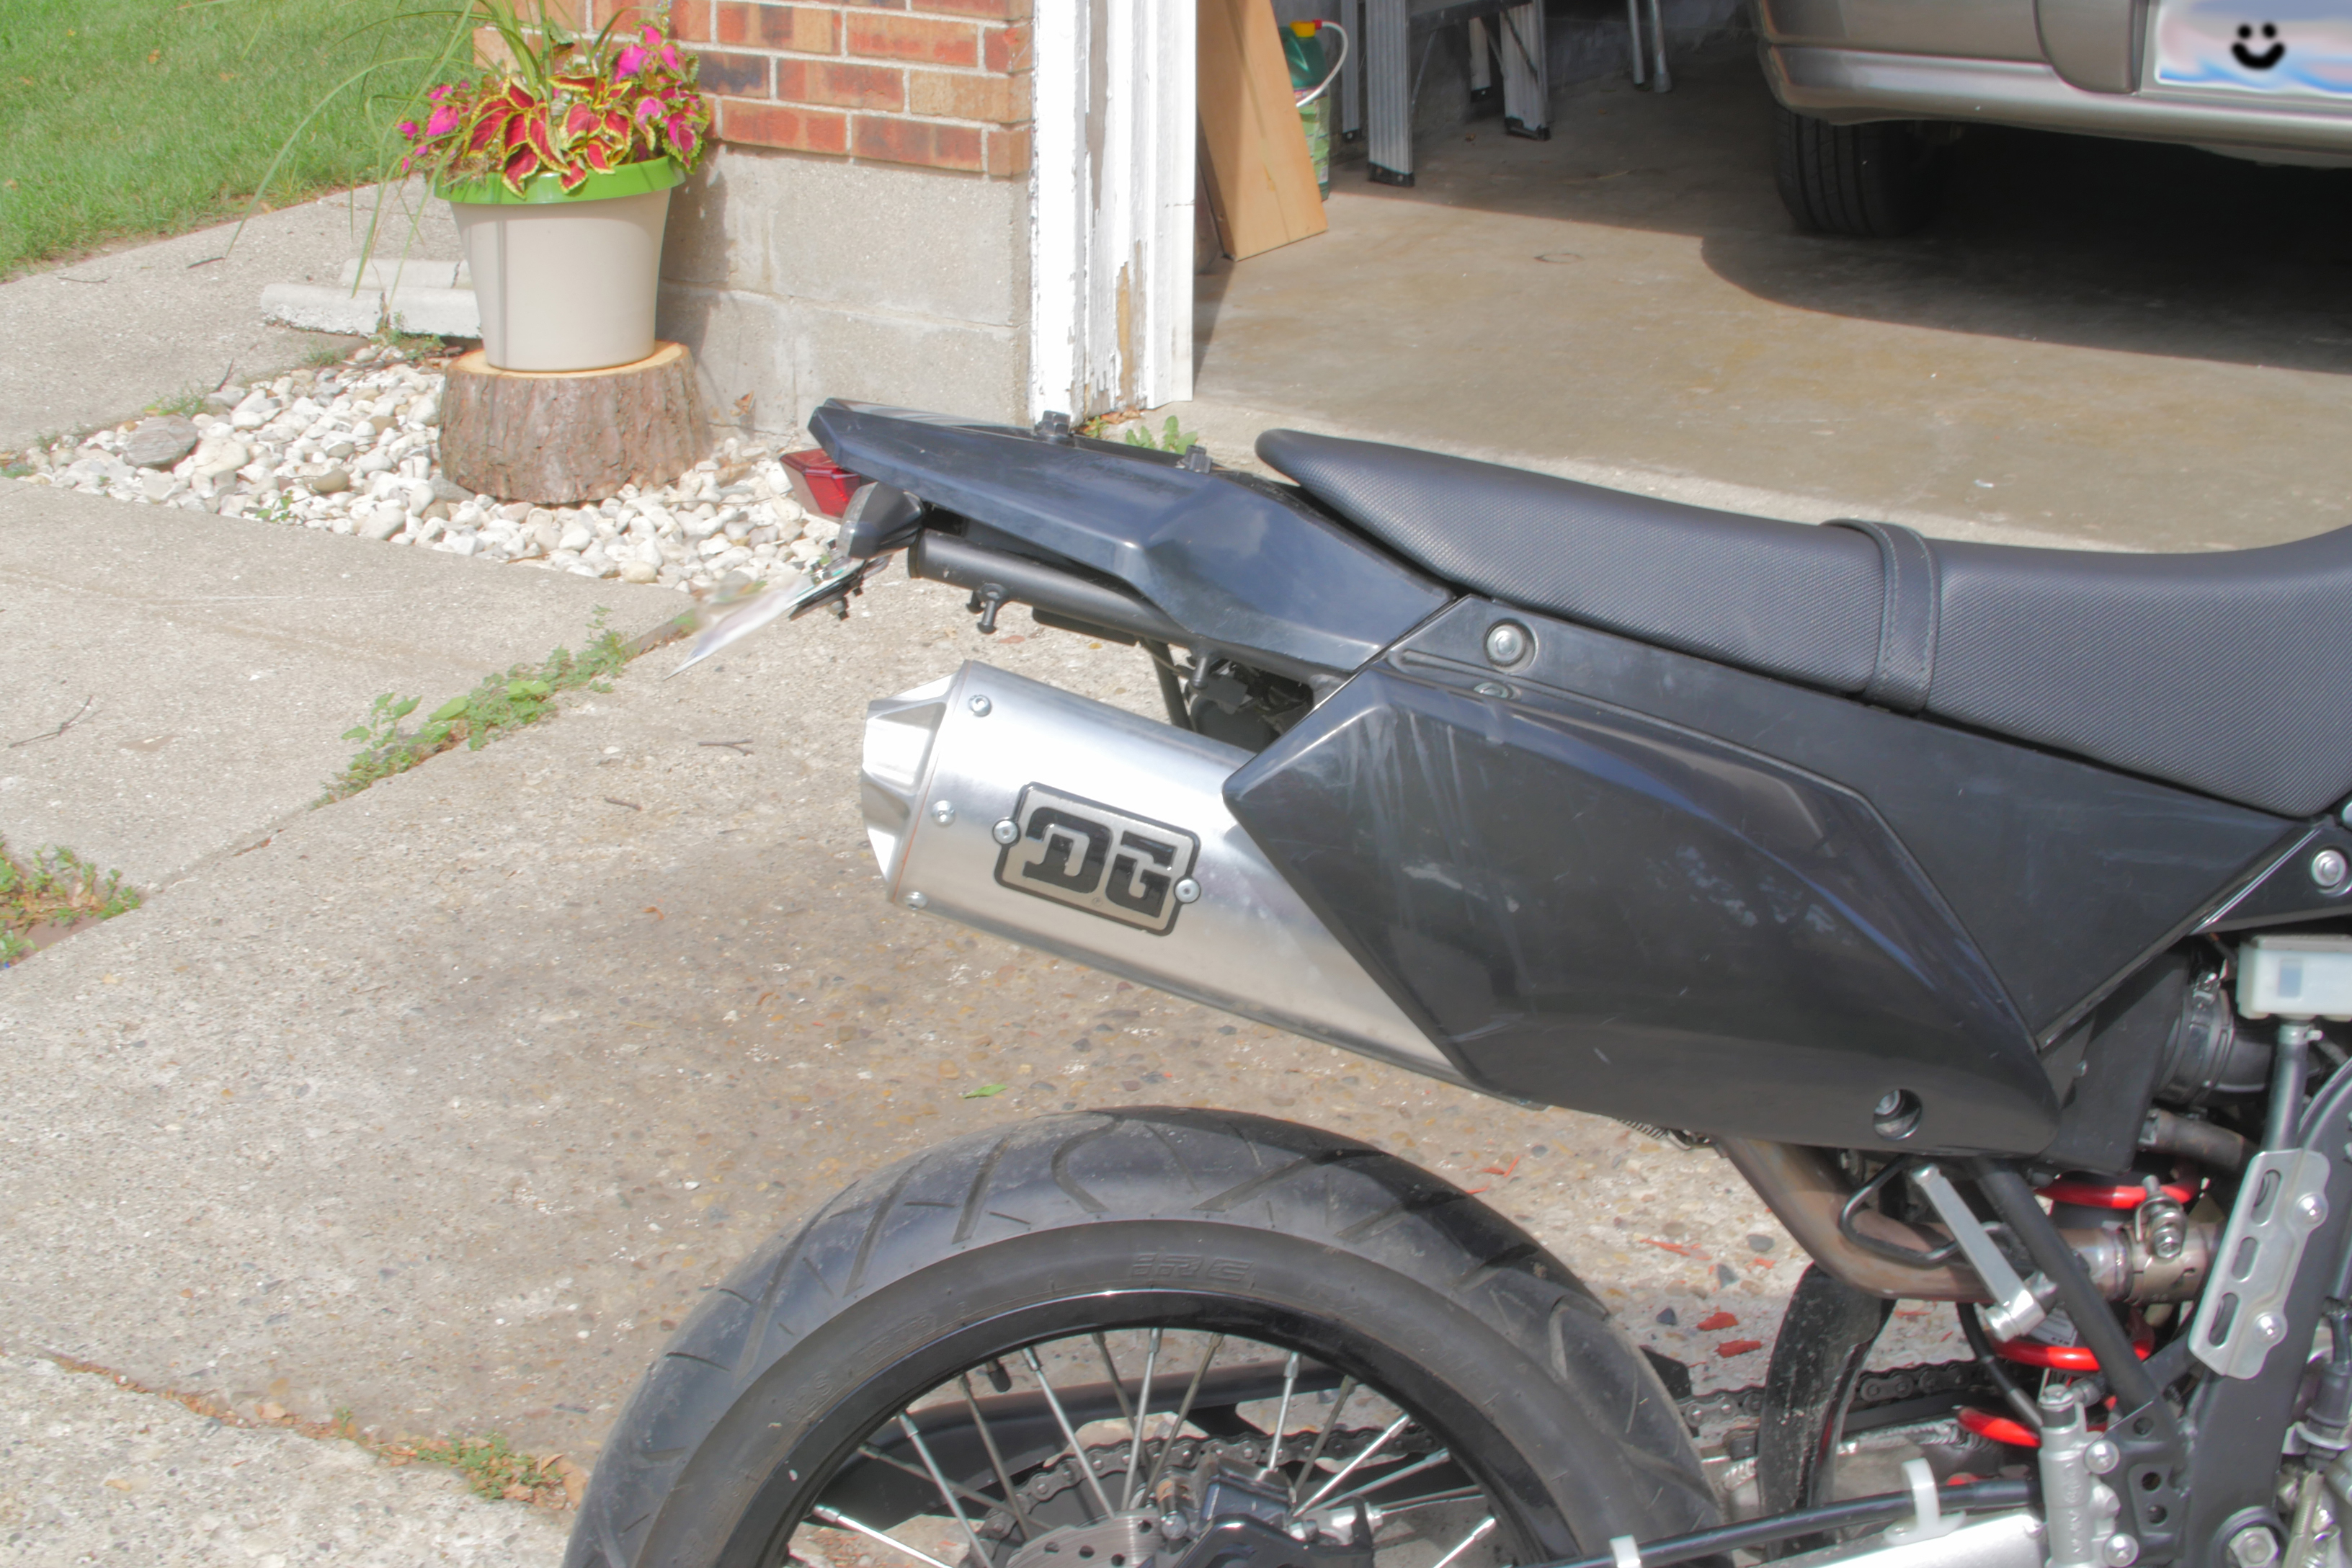
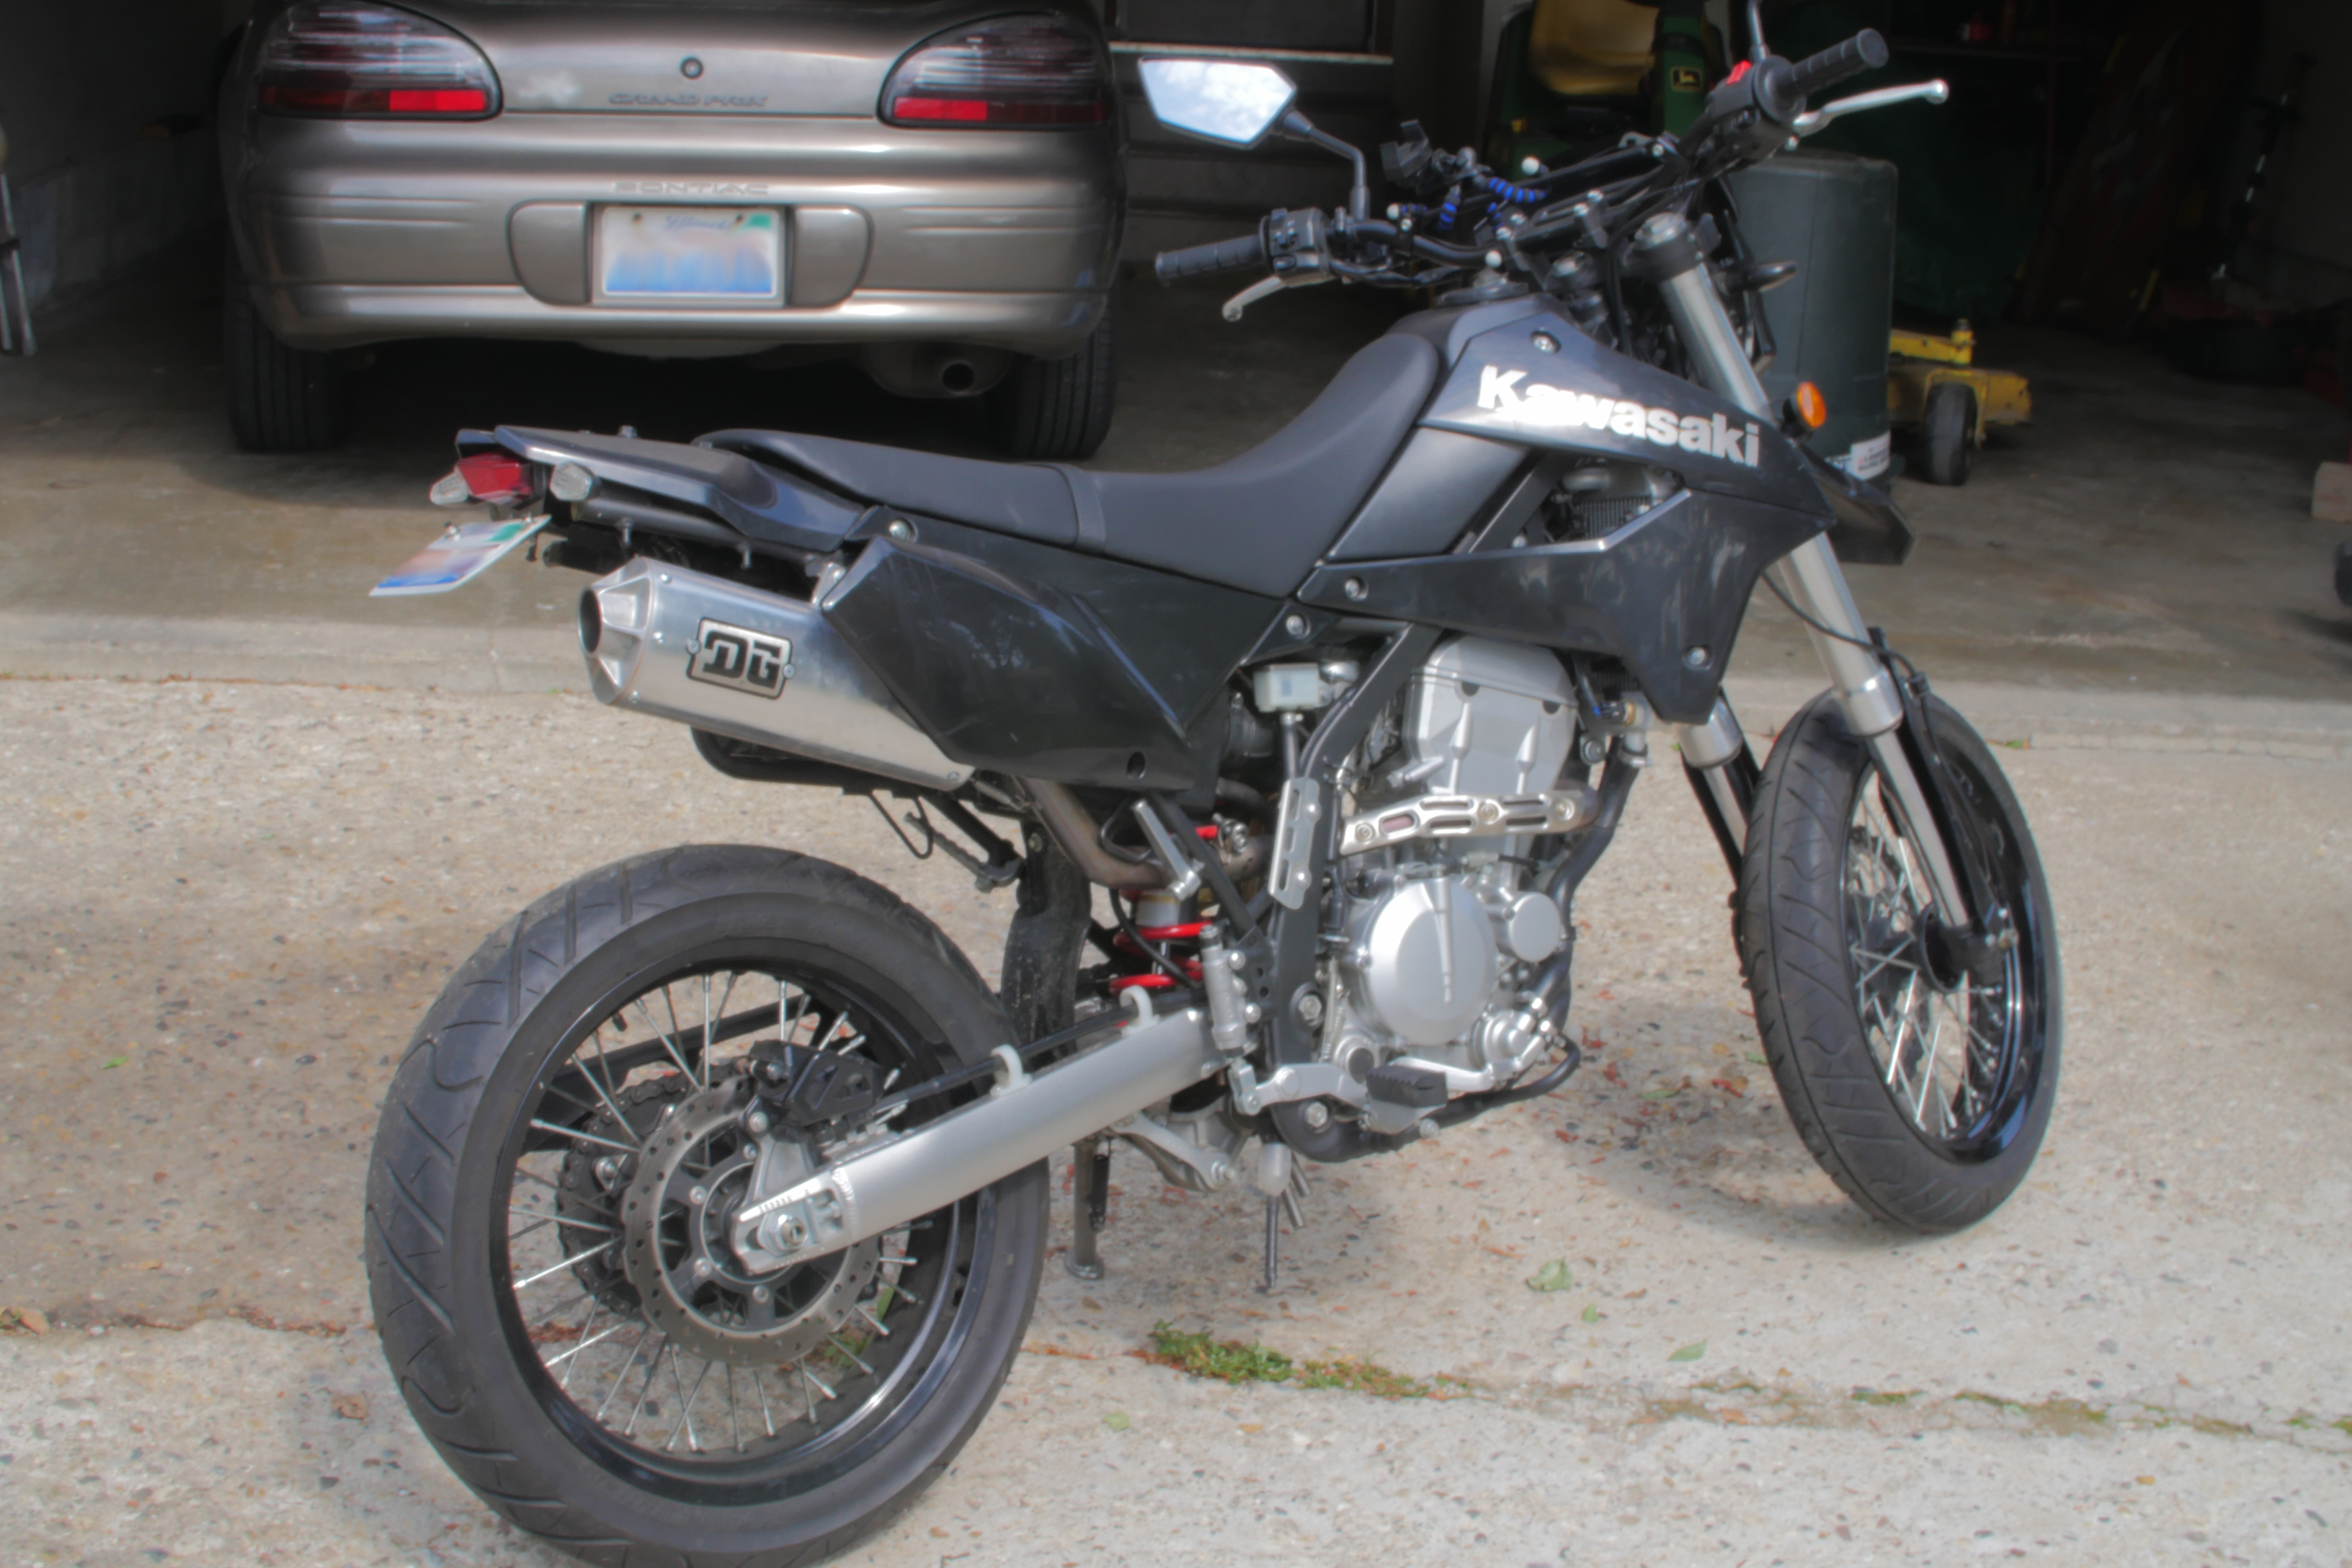
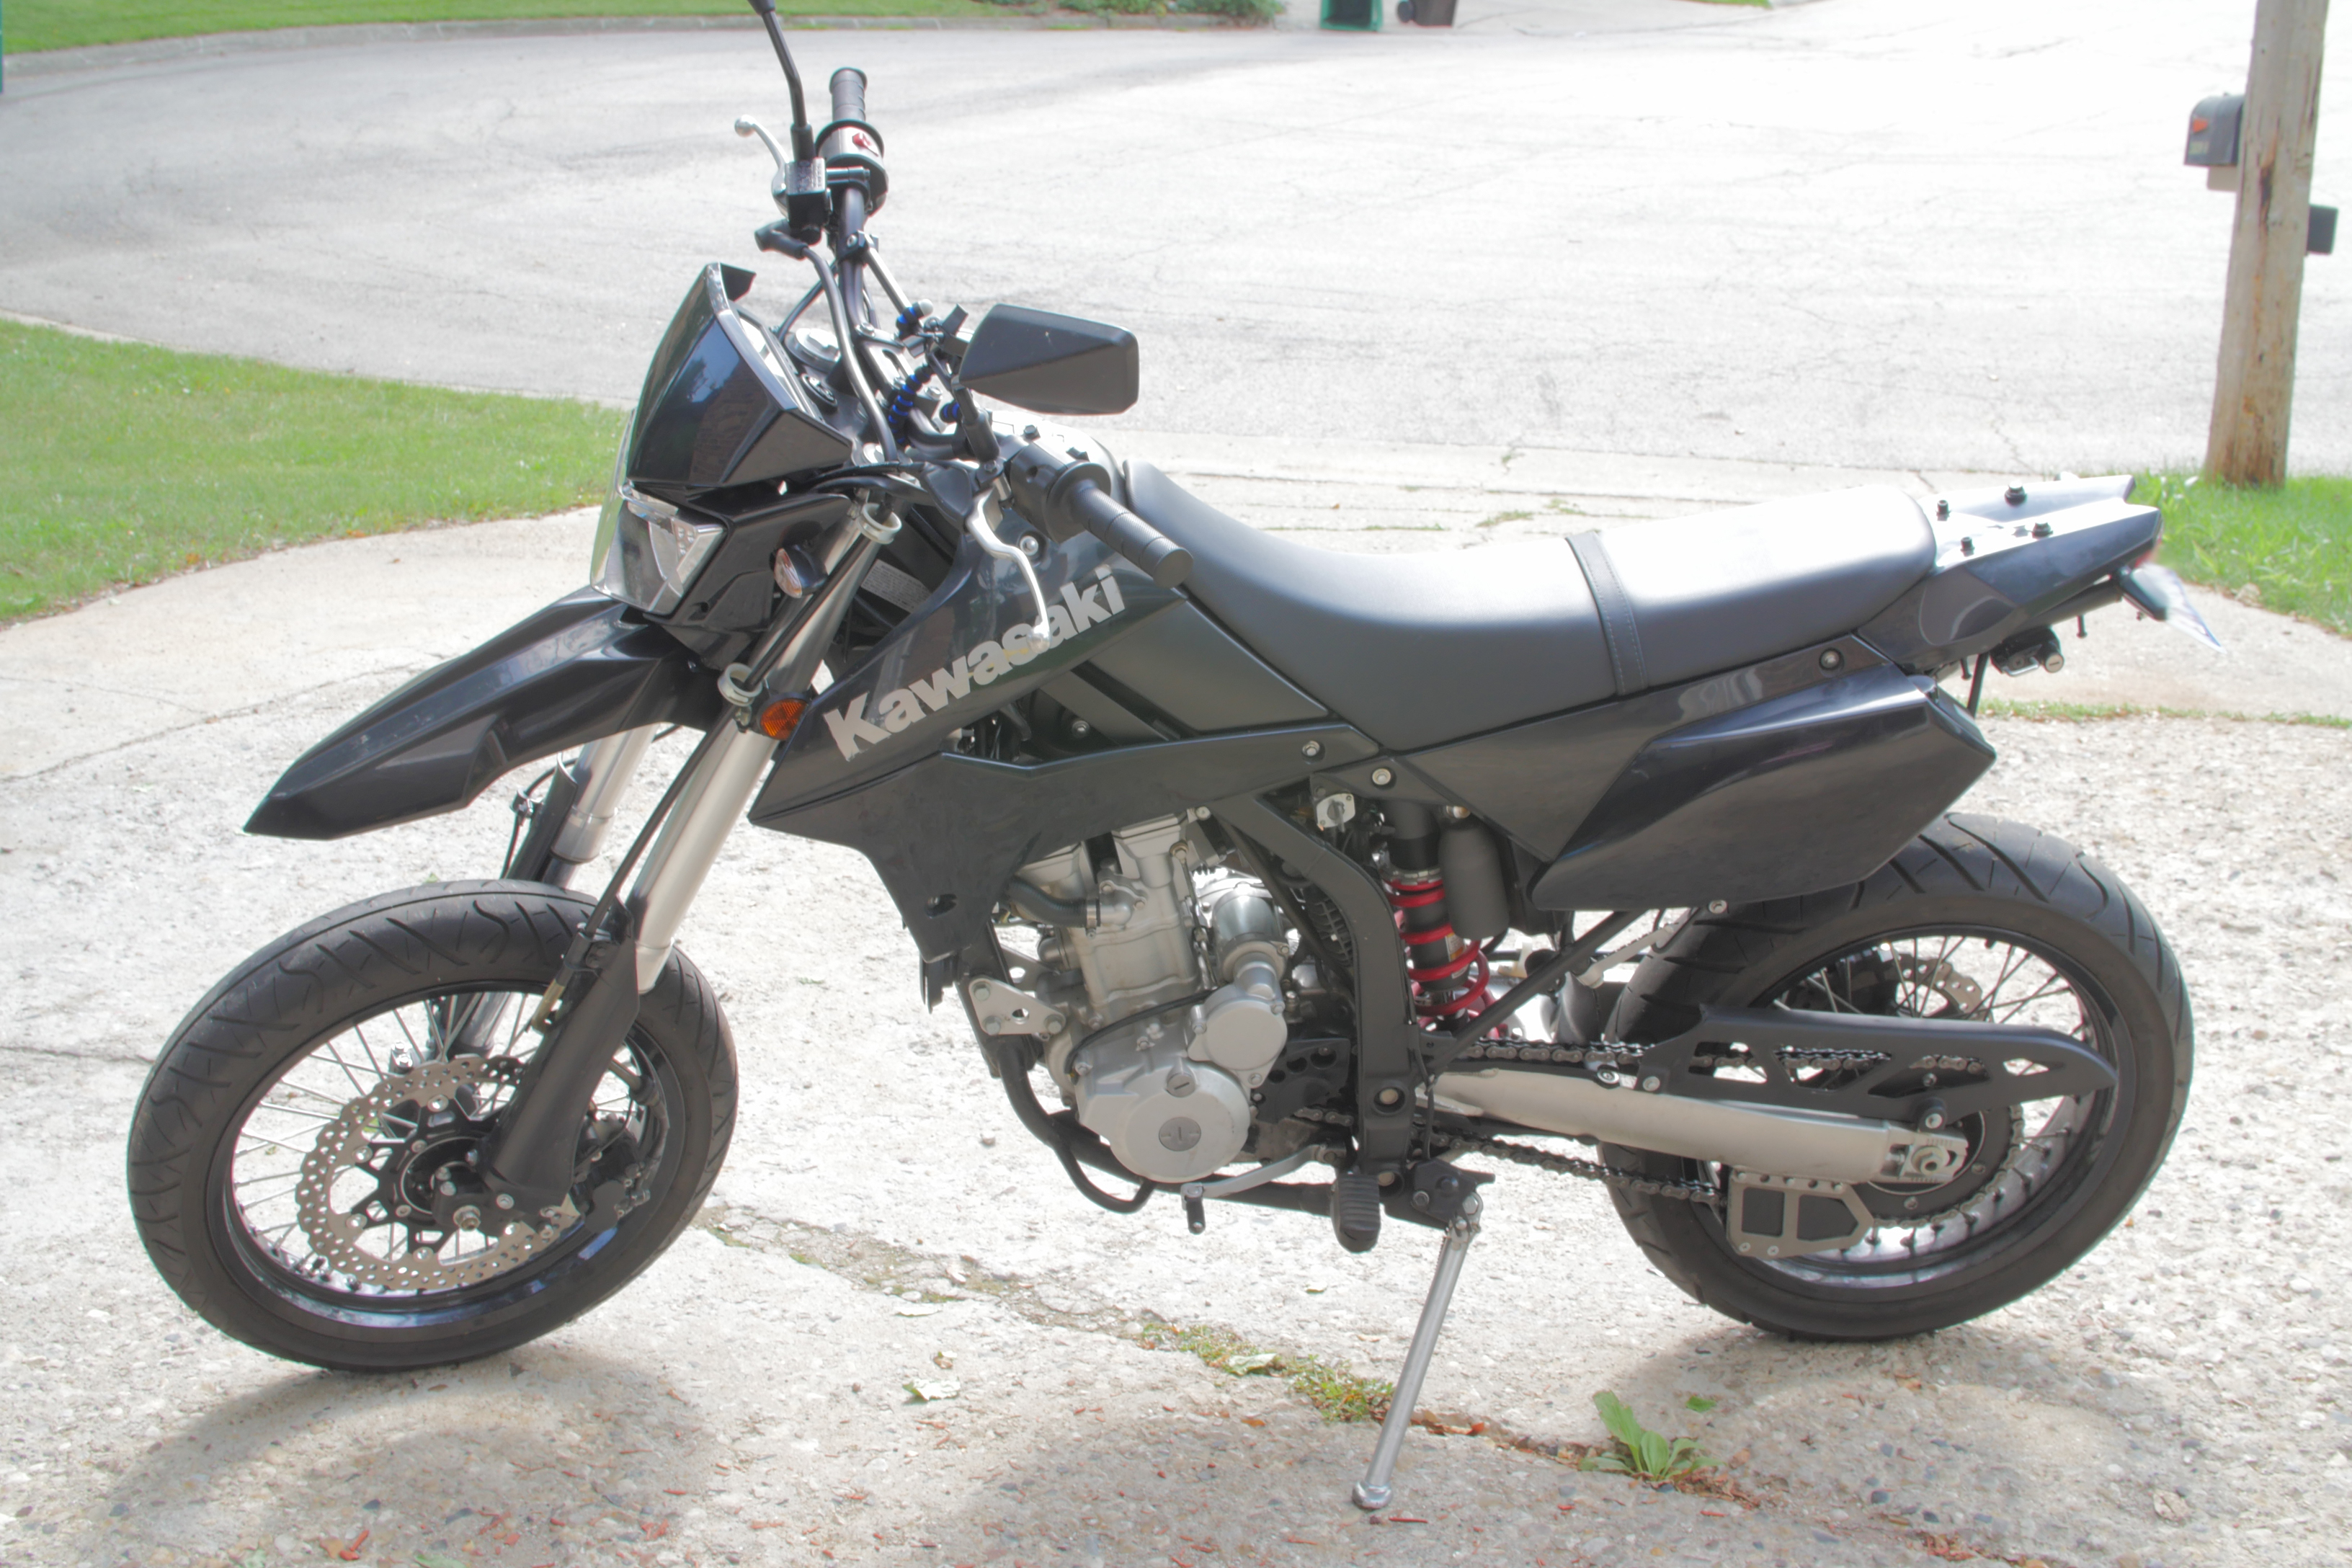
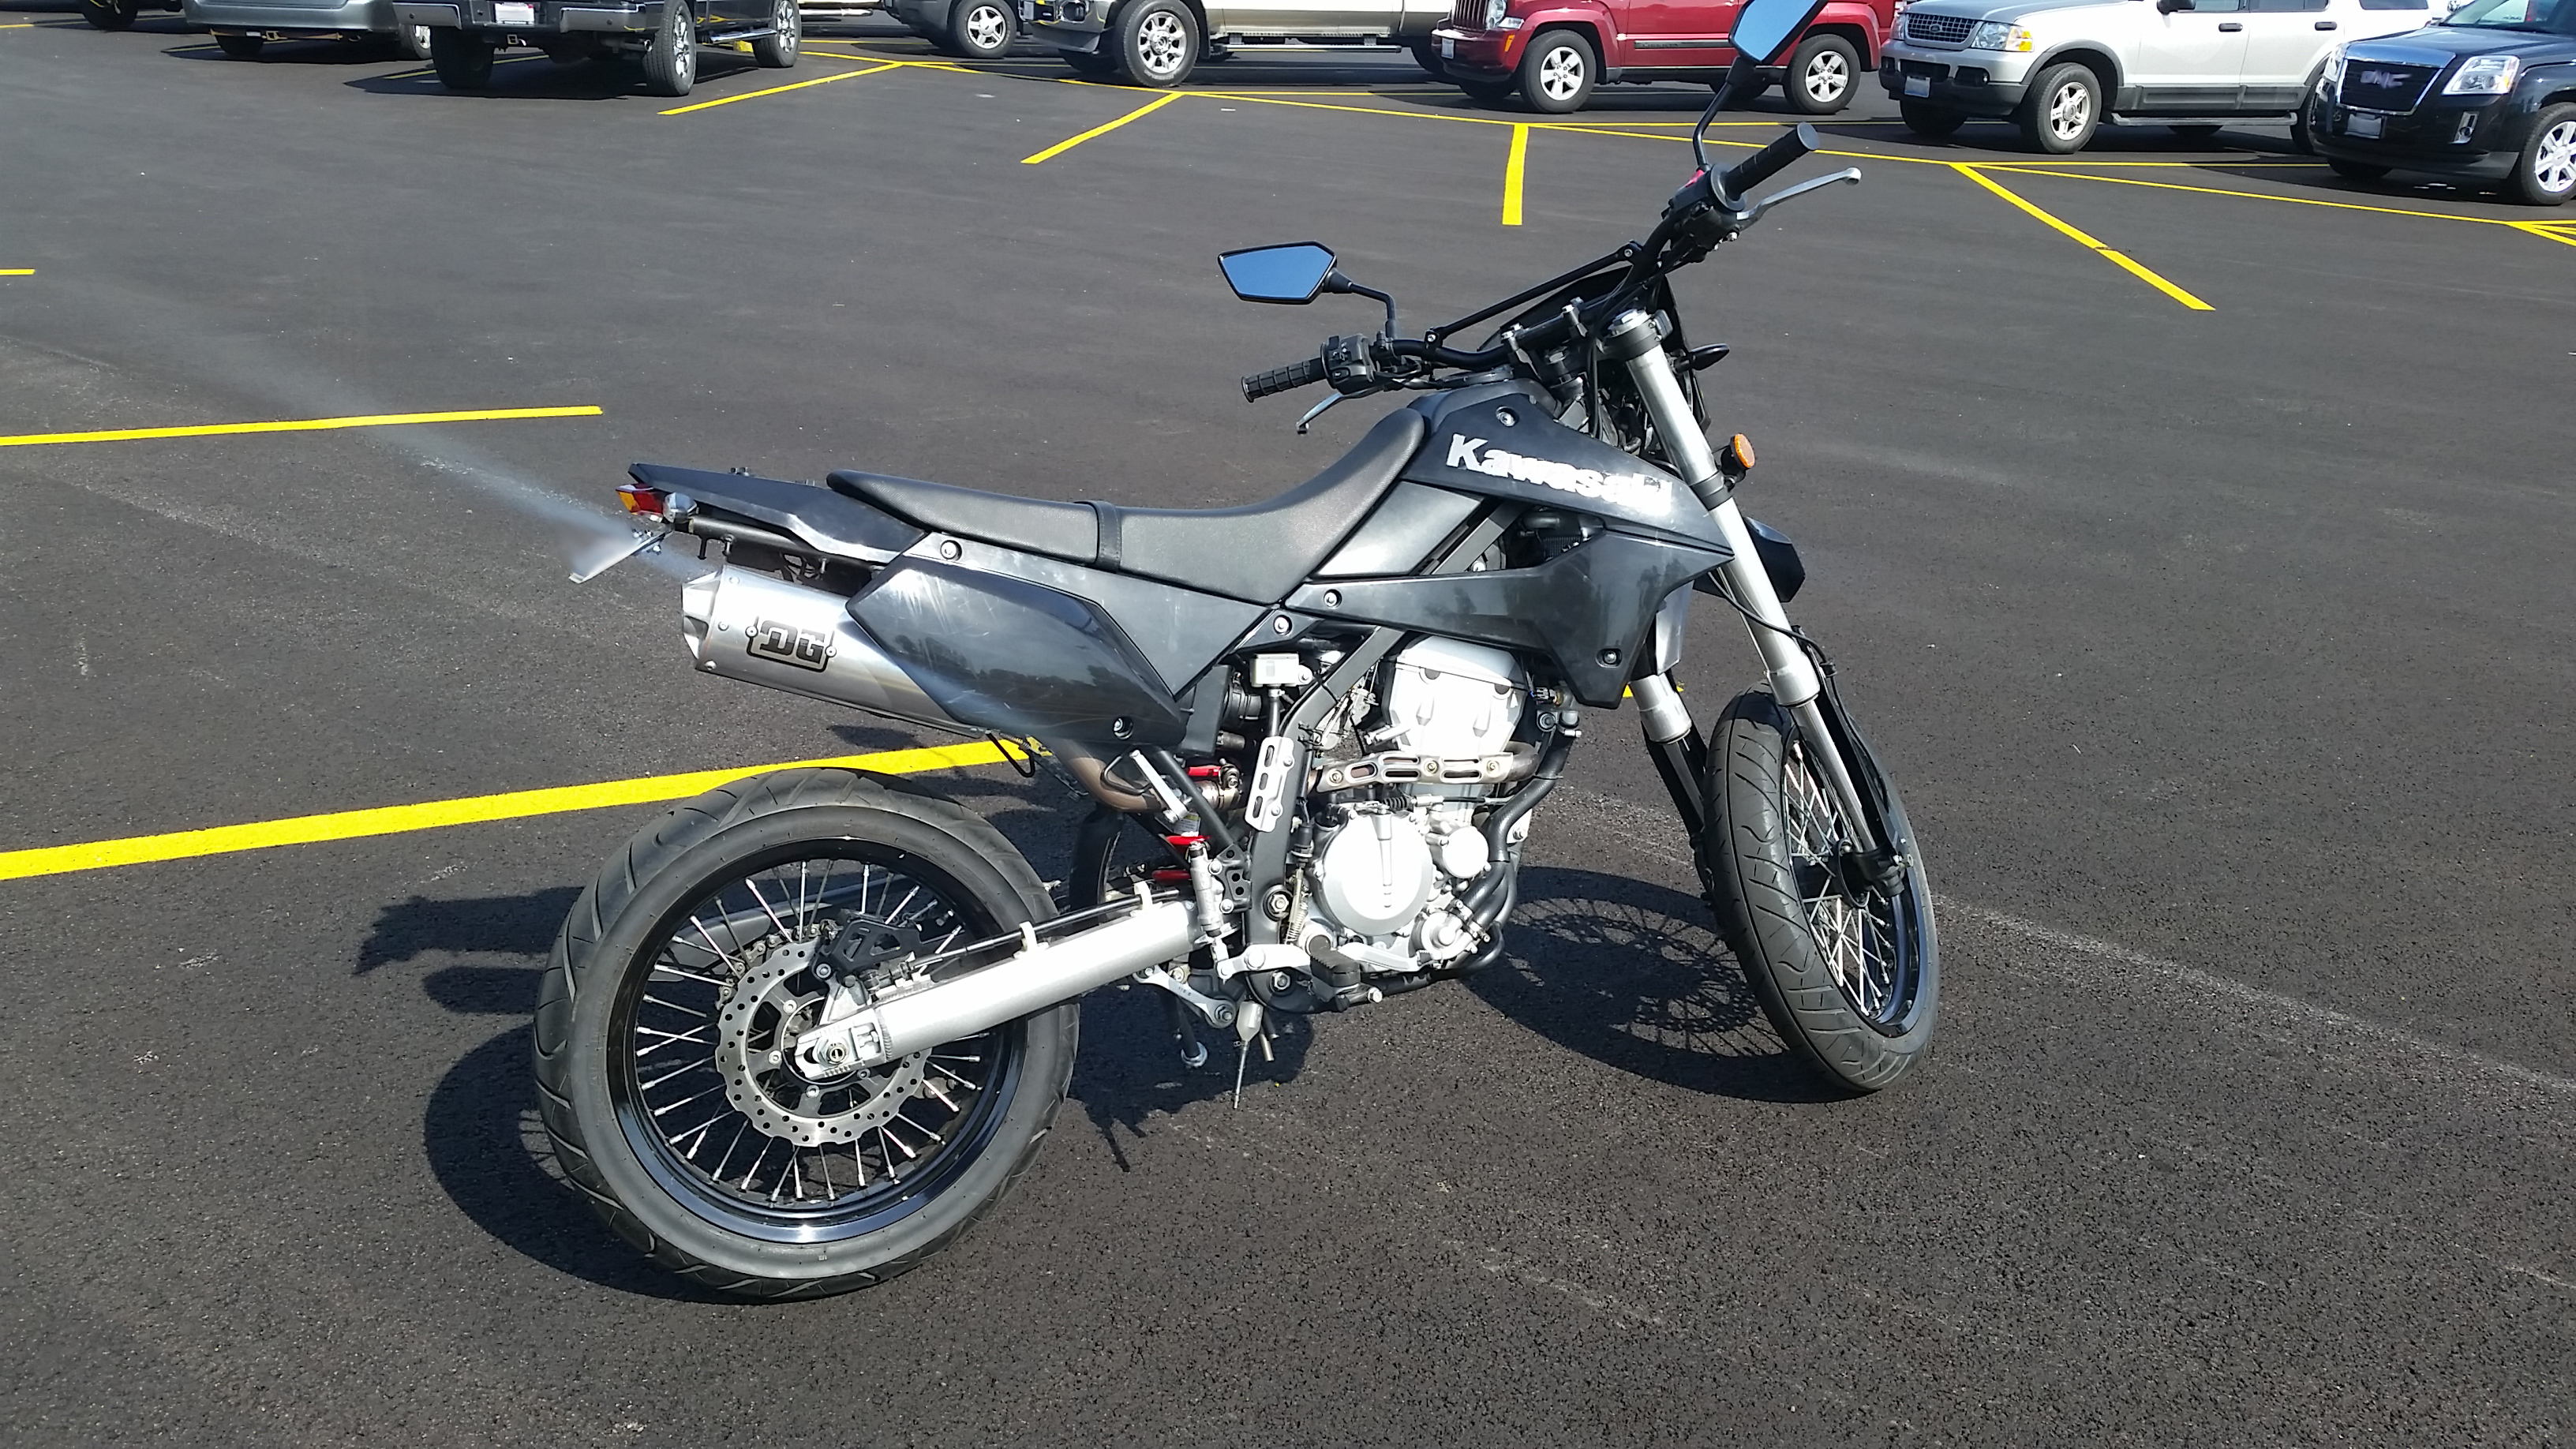
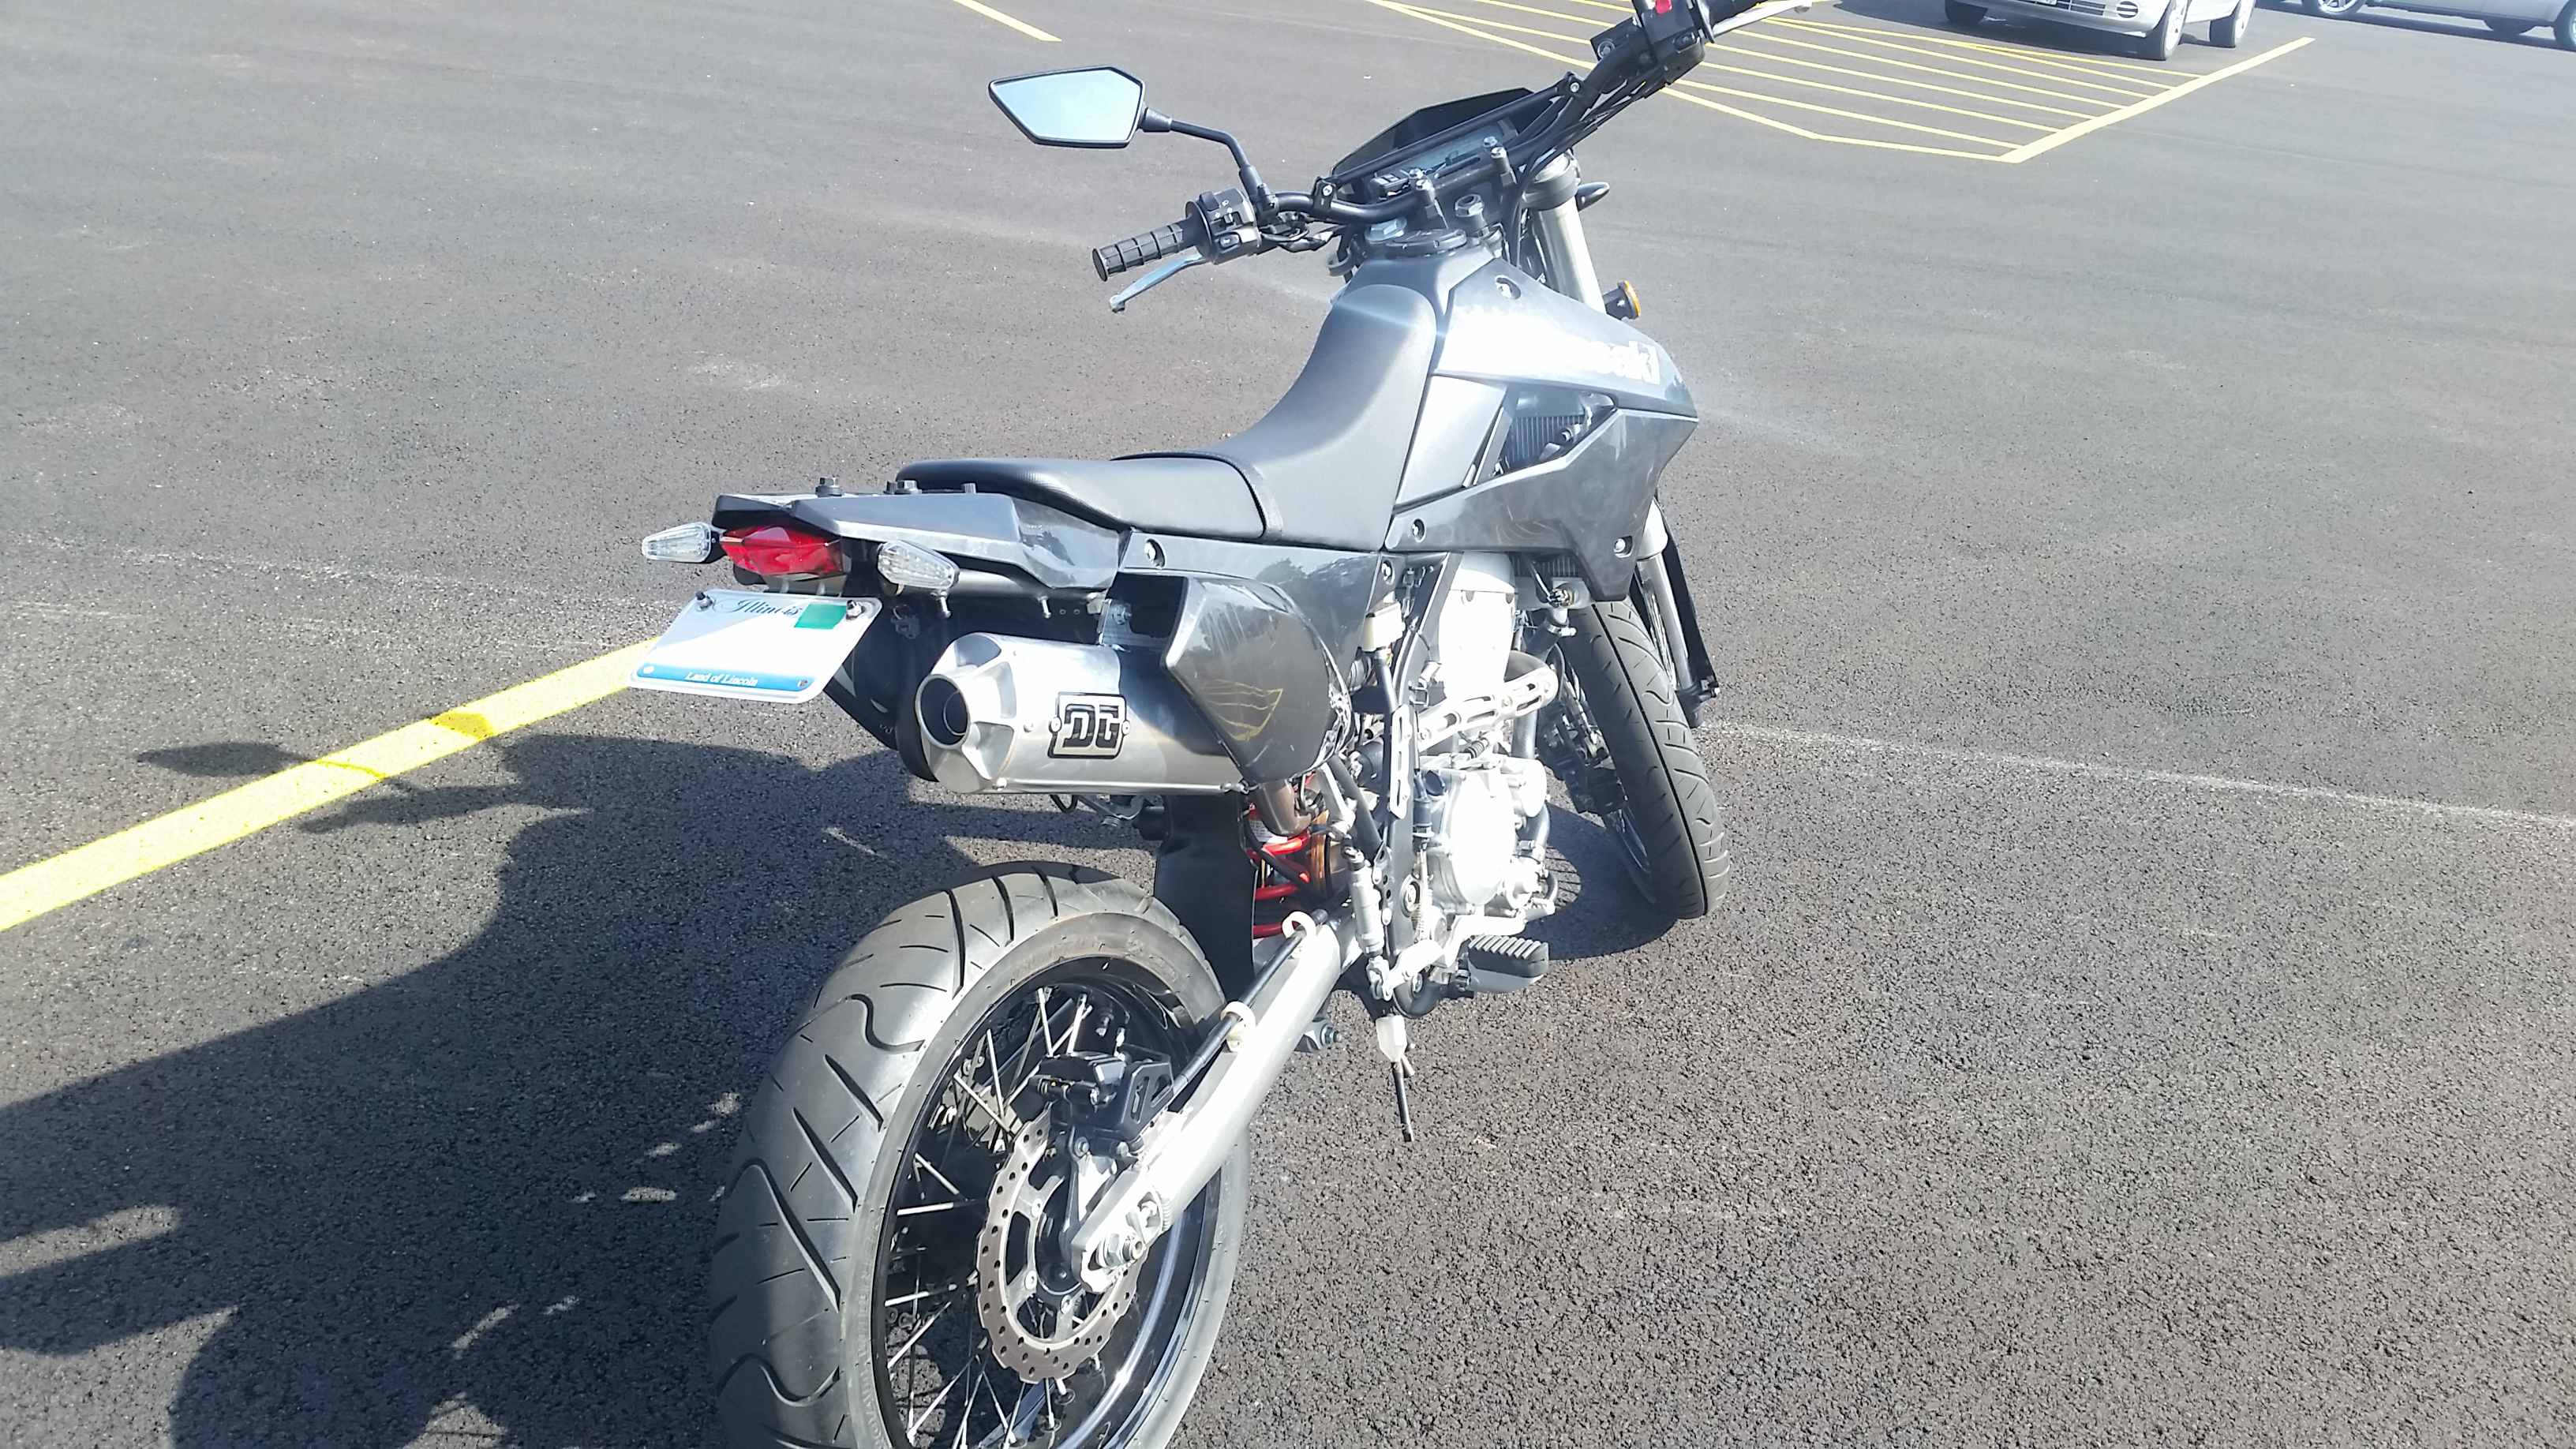
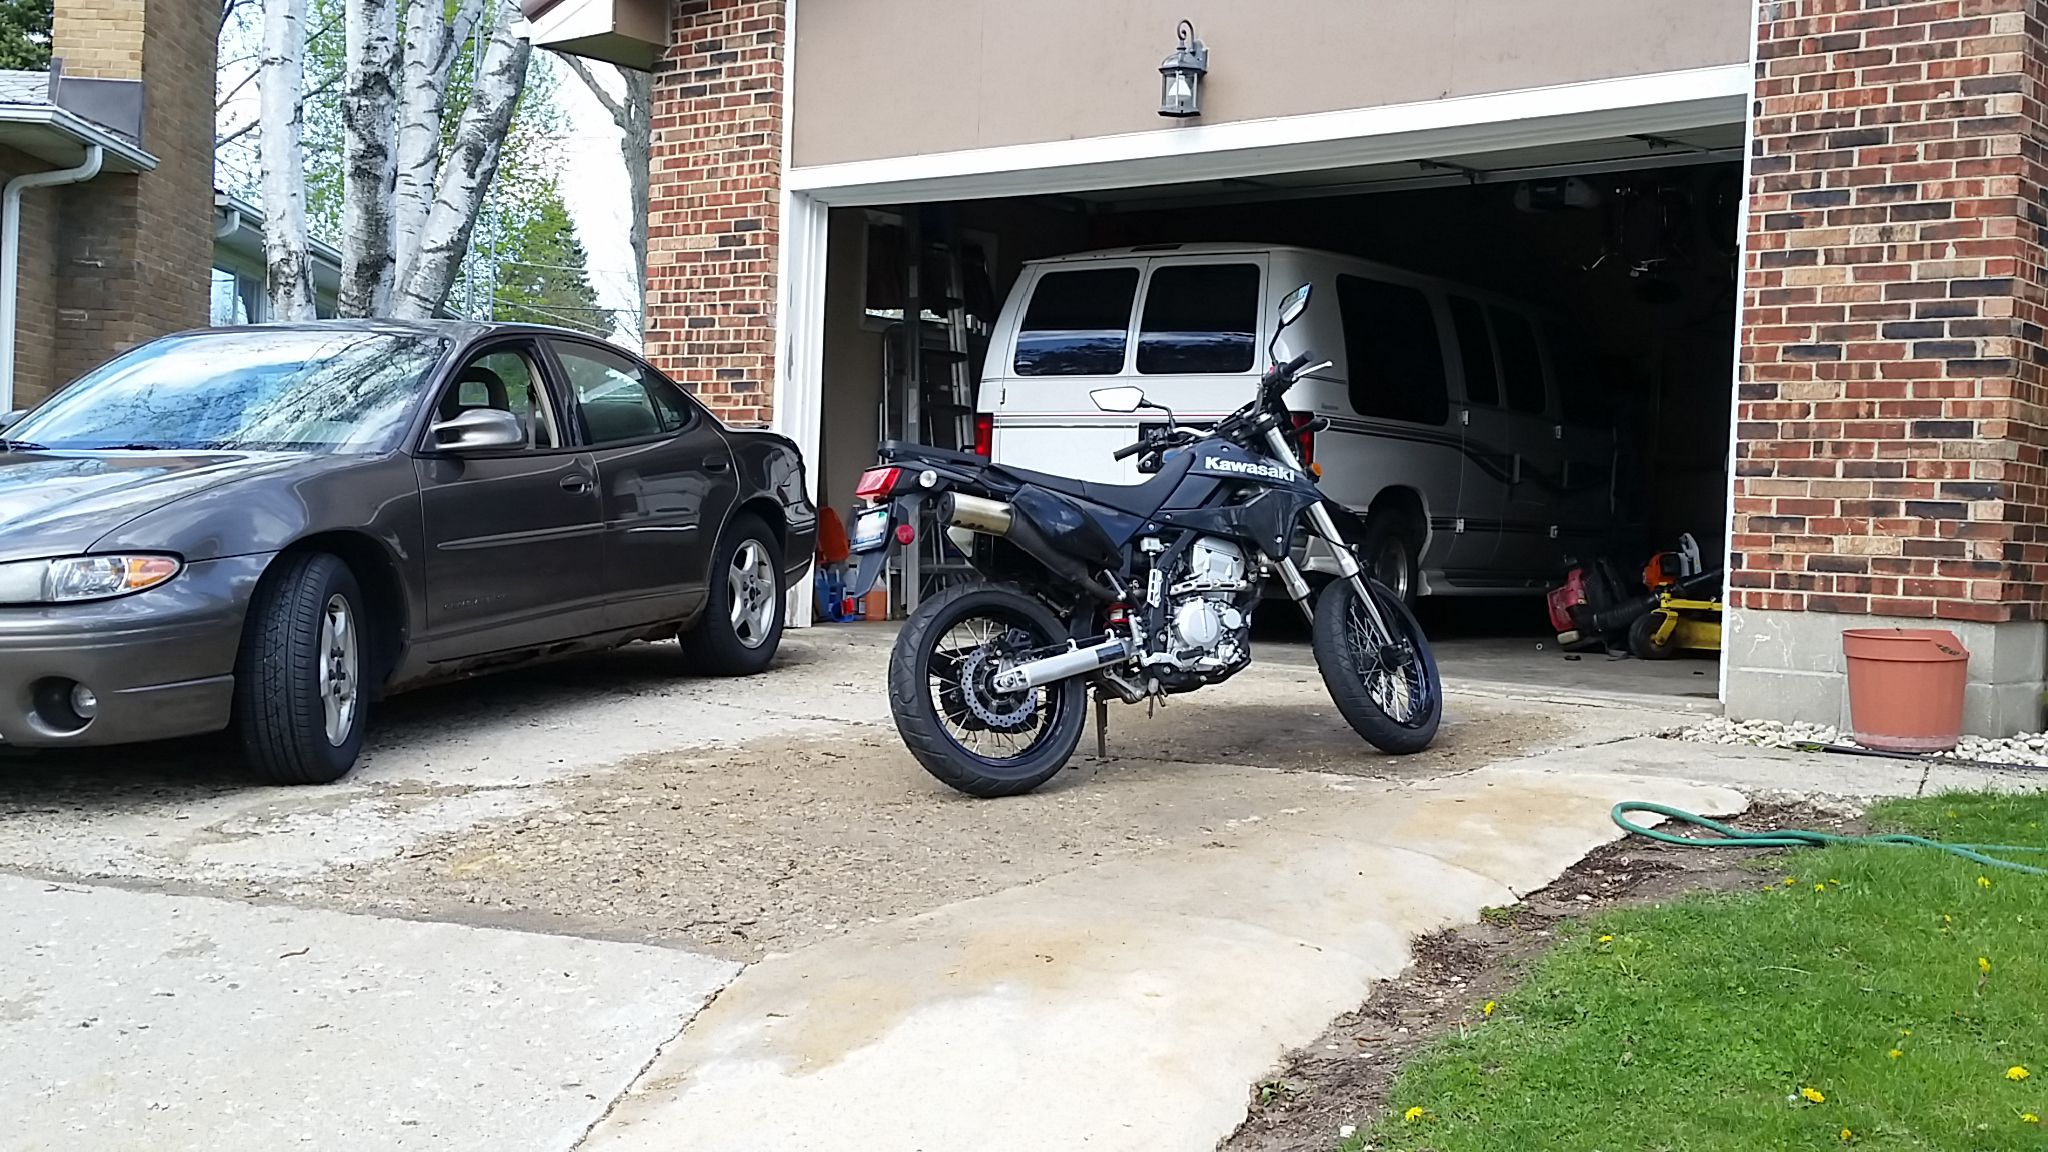
Here, have some more pictures of the KLX
Compare this:
To this:
Eww, look at that ugly lookin rear end. Sweetie, you needed this makeover.
Also, yes, I WILL remember to cover my plate next time before photo shoots. Much easier on me.
Looking forward to my future with a 351 and pumper. And knobbies to do some trail riding.
I am new to this forum. I have been lurking for a little while now, and I have a bunch of you to thank for informing me on various things about the KLX 250.
Today, I'd like to share with you a tail light job I recently did on my KLX 250sf.
Turned out pretty neat.
I'm quite proud of it. I hardly ever DIY, but provided I have a bike now, I decided to make use of my dad's abundance of tools and garage space.
Here's the process. (Beware, high-res images incoming.)
I began taking the stock taillight assembly off, naturally.
The frame under it was quite dirty. Gave it a bit of a cleaning.
Made sure to gather all my parts together, try and work so parts don't get easily lost.
Believe me, much MUCH more tools come into play later, and more parts get scattered on the floor.
My Stuff Arrived!
I ordered the DRC Edge 2 tail light in red, listed online here.
Also with this project, I ordered DRC 602 Clear LED Arrow turn signals here.
and Oxford Arrow bulb signals from Revzilla, which by the way, I ended up liking better. They're smaller and brighter.
I should note, if you're installing LED tail lights/signals for the first time, you should know that, since LED lights consume less power than stock lights, you must separately purchase what's called a flasher relay unit that's compatible with LED lights, and replaces your OEM flasher OR purchase resistors that wire to your turn signals. This is to prevent the common problem of "turn signals flashing really fast after switching to aftermarket LEDs"
I purchased a relay off ebay.
I also purchased two pairs of OEM Kawasaki turn signal connectors that wire to my aftermarket turn signals, so they can cleanly plug-in and play to the connectors on the bike. (Beware DRC's site offers these connectors to be included in your light purchases for whatever bike you own, at an extra charge, but I did not receive mine.)
Here is a quick glance at the front turn signal installation.
These signals are bright!
Here is the tail light and signals attached to the aluminum assembly. In my hand are the silly metal connectors that SHOULD HAVE been already crimped onto the turn signal wires. The oxford ones already had the connectors ready to plug-and-play. Thanks drc.
In this picture are the STOCK KLX tail light wires and its connector. I used a paper clip to unlock and slide them out.
I originally wanted to wire my DRC tail light to an OEM Kawasaki connector so I could plug and play to the bikes connector. I didn't want to cut up too many wires, and make the cleanest wiring job.
But as I said earlier, my DRC tail light somehow didn't come with the connector I asked for, so this is what I did instead:
Instead of waiting, I hit up my local hardware store, bought a generic automotive wire crimper and terminal set. Crimped these "Y" terminals to the Edge2 tail light wires and plugged those bitches right in to the bike's connector. Don't worry, I wrapped electrical tape around each wire, and again over everything.
I wrapped everything.
Moving on, here is the DRC tail light and turn signals installed on the bike.
This is how they go on stock. The black "K-Kawasaki" plastic goes on top. I do not like this plastic part at all, and wanted to eliminate it.
Here we go.
Using a hacksaw, and then a reciprocating saw, I cut off the rearmost part of the bike's subframe off.
I made sure to cut in the middle of the gap between the two welded planes, so that if I ever wish to return to the stock tail light, I can pipe-clamp this part back on the subframe again and re-assemble my old light.
Those rubber end-caps fit very snuggly on the newly shortened bars. Looks very neat.
Here is the aluminum plate with new openings to fit on the bikes subframe.
I used a power drill to drill 6 holes, 3 on each side, hugging the inner-part of the little black pillars, and then the reciprocating saw to sloppily cut out the squares.
Drilled 2 new holes to insert screws in to secure the tail light assembly to the subframe.
These two screws, and the snug-ness of the openings I cut around the black pillars are really the only things keeping the assembly secure.
I'm amazed at how lucky I got with it fitting, really. I realized later that any milimeters deeper, and the turn signals would've started conflicting with the black plastic on top,
any millimeters further out, and the back of the tail light and aluminum assembly would start to show under the black plastic.
I got REALLY lucky with where I made my cuts.
Here are some final pictures of the assembly.
You may have noticed I painted my coolant tank. I saw someone on YouTube who had done it to his KLX and so I did it myself. I like it a lot. I taped the openings and a strip on the rear, then spray painted the tank with a Rustoleum paint and primer. Very easy mod.
Here are some bonus pictures.
So in my initial installation, I put on the stock rear side-reflectors under my plate, and, wouldn't you know it, after a 15 minute ride out on a cold night on my beautiful back roads, I pull into my garage and notice my reflector behind my exhaust has melted.
Must be the elbow grease I poured into the bike burning off, or tail-light break in wearing out my relectors. We might never know, folks.
I simply removed my reflectors. No problems since.
Also, after that same ride, I noticed pair of bolt screws I put on the rear fell off.
This actually happened to the stock screws that go here as well.
No worries, I hit up my hardware store for MORE screws (I bought a lot of different screw assemblies here during this project. Thank you Ace Hardware.) I manged to buy rubber washer rings, combined with nylon washers that screwed on to the bolts. No issues with stuff falling off after that.
Oh yeah, I also changed my stock handlebars to black Renthal bars. It was quite the serious headache.
I didn't take many pictures but this one of my scratched up stock bar from trying to pry my glued left-grip off the handlebar. The new ones are much nicer, wider, lighter, and of course, stronger. I won't go into detail on installing that, but I'll highlight that with the new handlebar, I had to re-route my throttle cable from in front of my right fork to behind it in order for it to reach.
I hope you all enjoyed my little showcasing. I'm really REALLY happy with how it turned out. I can grab the tip of the tail light with my fingers and shake the whole bike. The assembly stays firm.
I'm ashamed to ever have to sell my bike now, as I put some of my own soul into it now, with this week-long project. I had to visit hardware stores a couple towns over just to buy special tools and stuff that came up being needed. This was my first time doing electrical, and metal-working, and working up serious sweat.
Here, have some more pictures of the KLX
Compare this:
To this:
Eww, look at that ugly lookin rear end. Sweetie, you needed this makeover.
Also, yes, I WILL remember to cover my plate next time before photo shoots. Much easier on me.
Looking forward to my future with a 351 and pumper. And knobbies to do some trail riding.
Last edited by qxangelxp; 08-06-2016 at 06:17 AM.


Thread
Thread Starter
Forum
Replies
Last Post
Jammin'John
2000 & 2000 Limited
2
11-14-2012 12:14 AM
Jammin'John
DIY - Do It Yourself
0
11-12-2012 11:42 PM
dubbg69
Ninja 250R
1
10-22-2006 05:23 AM