KLX250SF Upgrades - Weight Savings, Air Injection Delete, Etc.
#1
 07-05-2014, 11:29 PM

Just wanted to share some notes after doing some common upgrades to my KLX. I purchased a bone stock KLX250SF a few weeks ago and it didn't take long to start making some upgrades. As of right now, the bike is used exclusively onroad, mainly for commuting. The first change was replacing the stock 14T front sprocket with a 15T. Second was replacing the stock seat with the Seat Concepts foam and cover. Both easy and very well worth it.
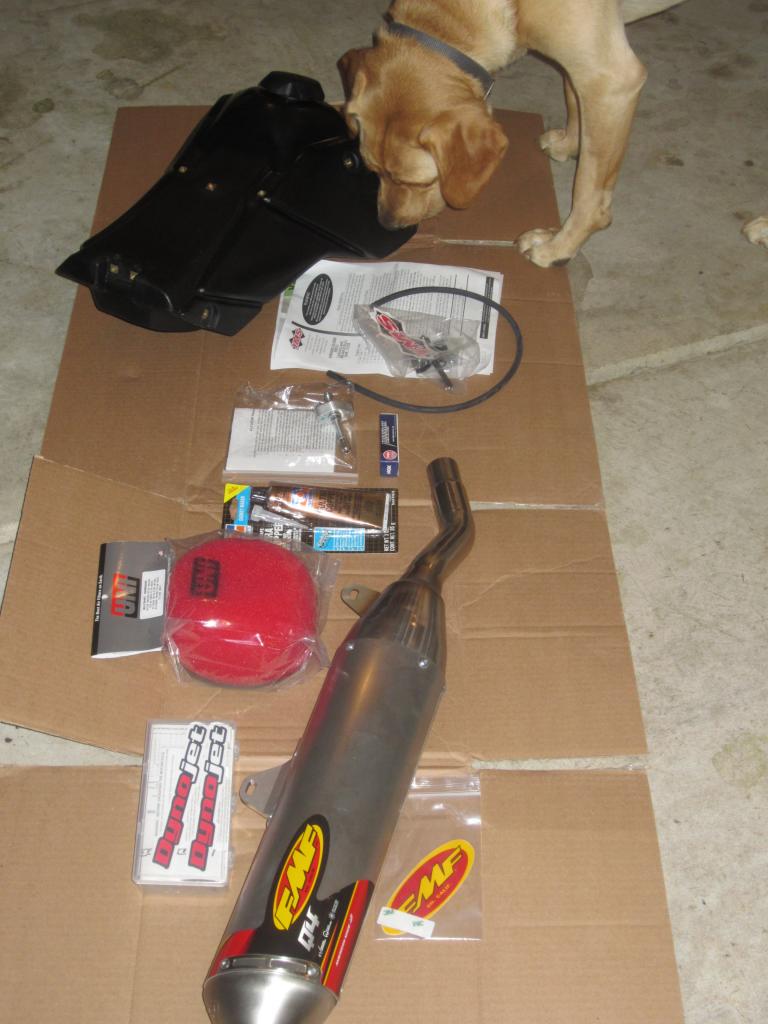
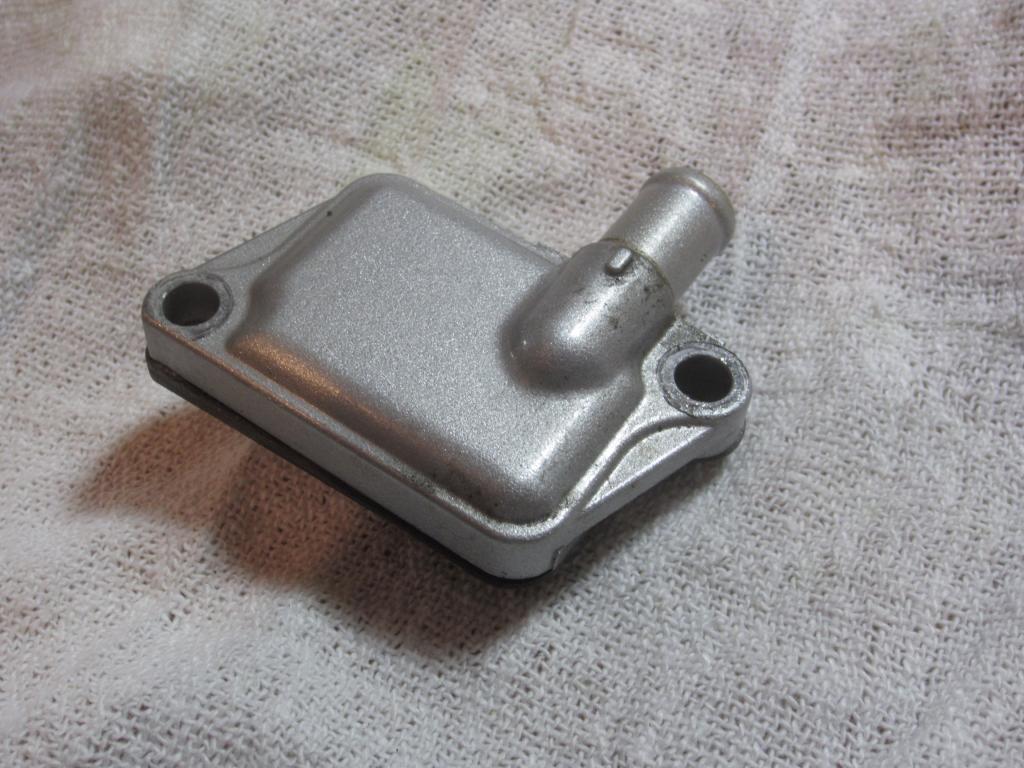
I finished the next phase of upgrades last weekend, including IMS 3 gallon tank, FMF Q4 slip-on, Dynojet jet kit, Krieger Cam Chain tensioner, and a few other small parts. There are already well written reviews and install guides for all these parts, so I'll just share a few interesting pics I took during the upgrades:
New parts undergoing inspection:
I used an old bathroom scale to get before and after weights of the bike when installing the above parts. I know it's not the most accurate method, but should at least give a ballpark estimate on weight savings.

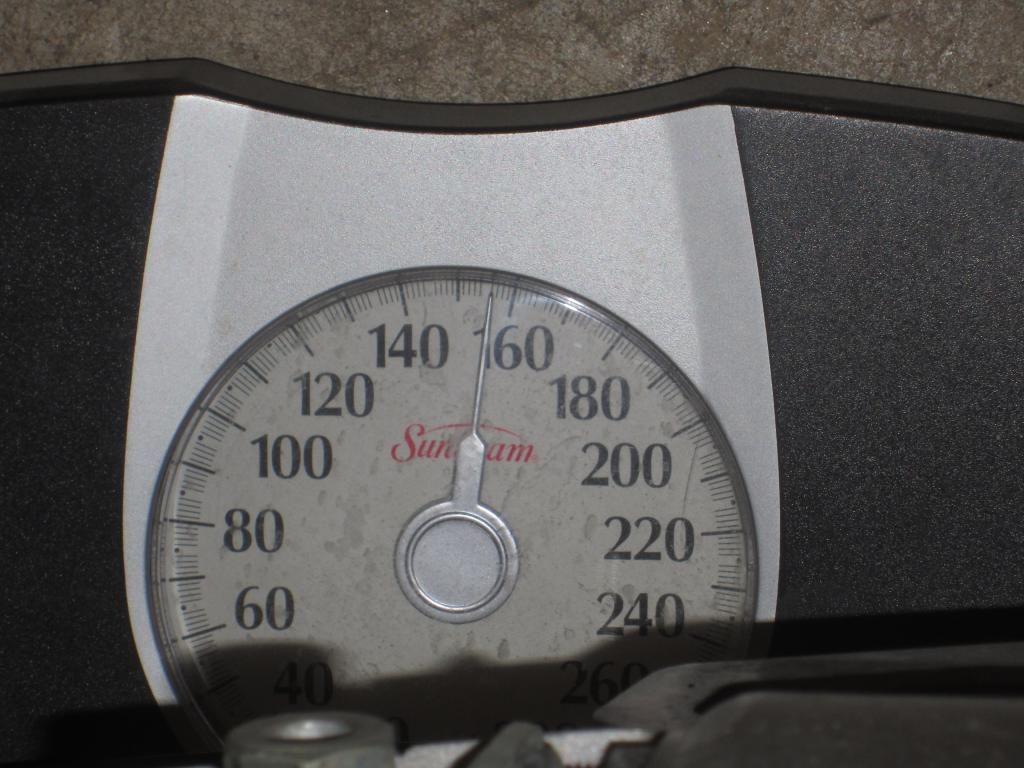
Initial weights front (138 Lbs) and rear (156 Lbs) = 294 Lbs with maybe 1/2 Gal of fuel left.
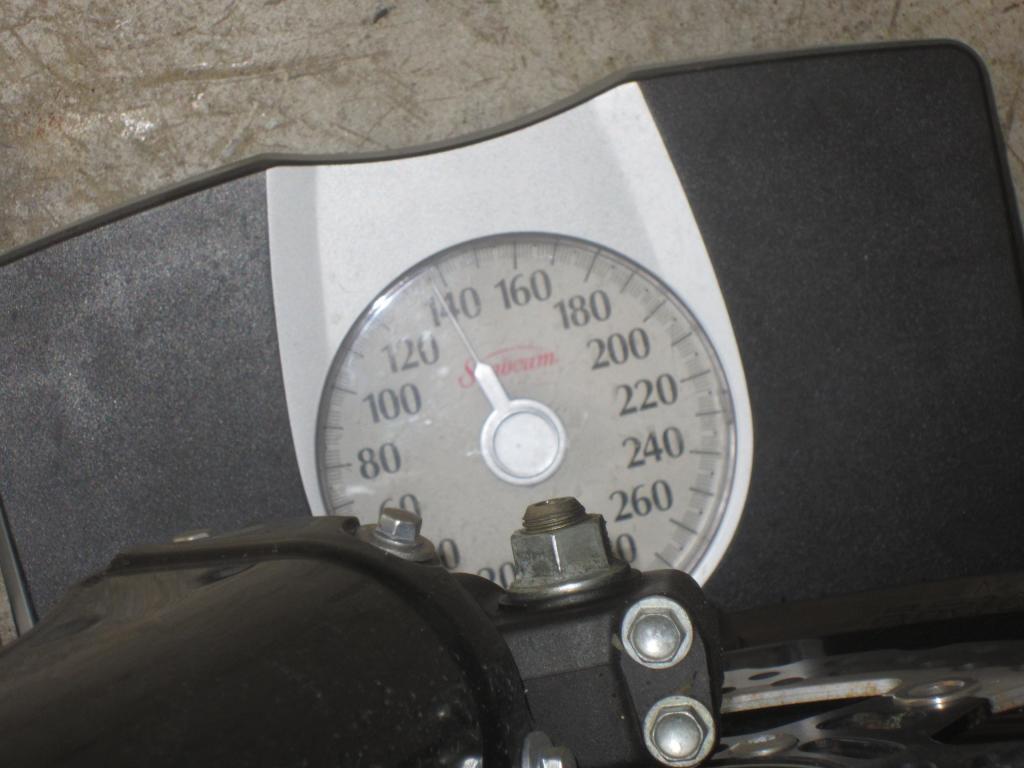
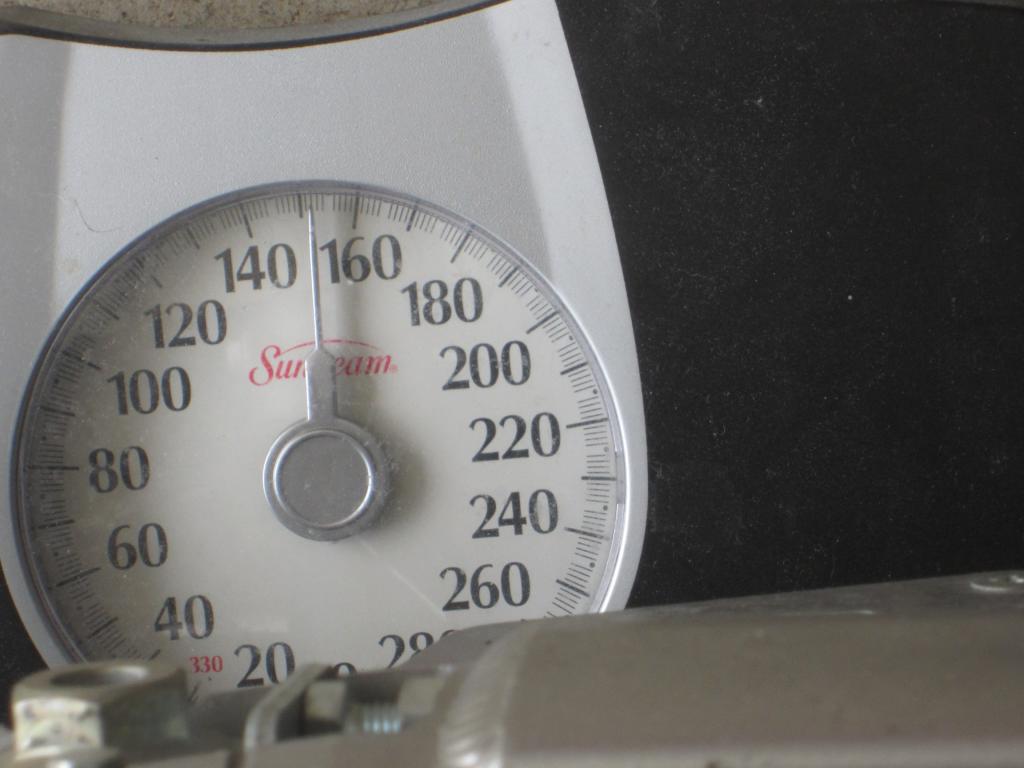
Final weights front (137 Lbs) and rear (152 Lbs) = 289 Lbs with about the same 1/2 Gal of fuel. About five pounds knocked off, most of which was the exhaust swap. The new IMS tank may have been slightly lighter than the stock metal tank, but not detectable on my crude scale. Other saving came from ditching a bunch of emissions crap and the air snorkel.
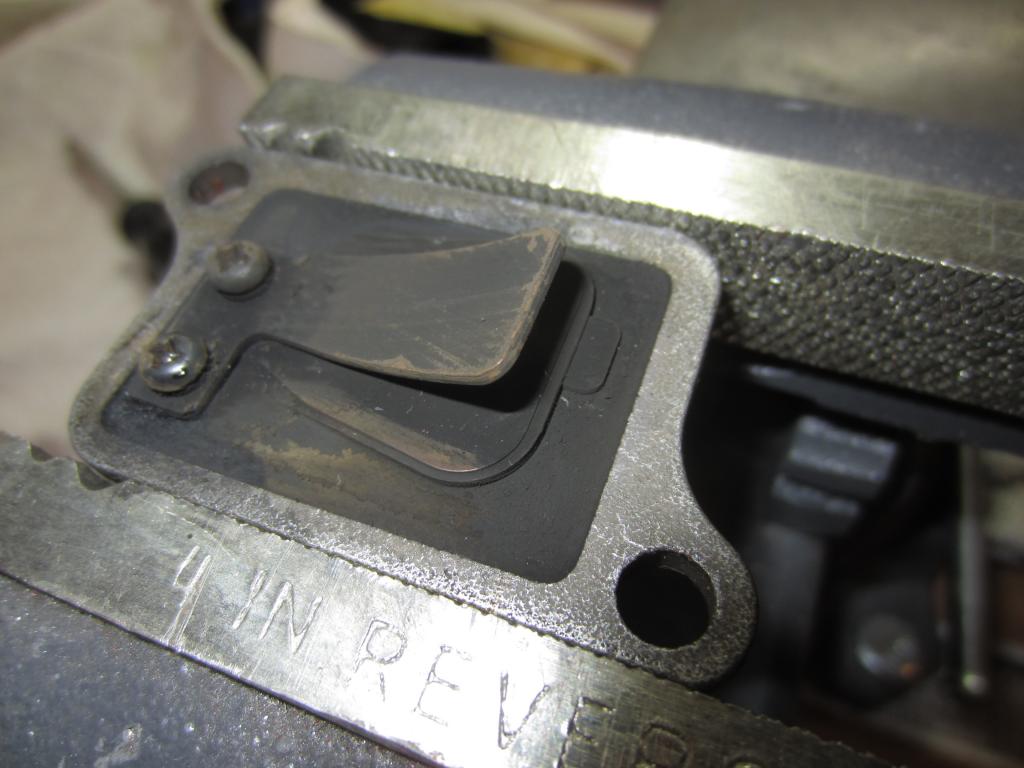
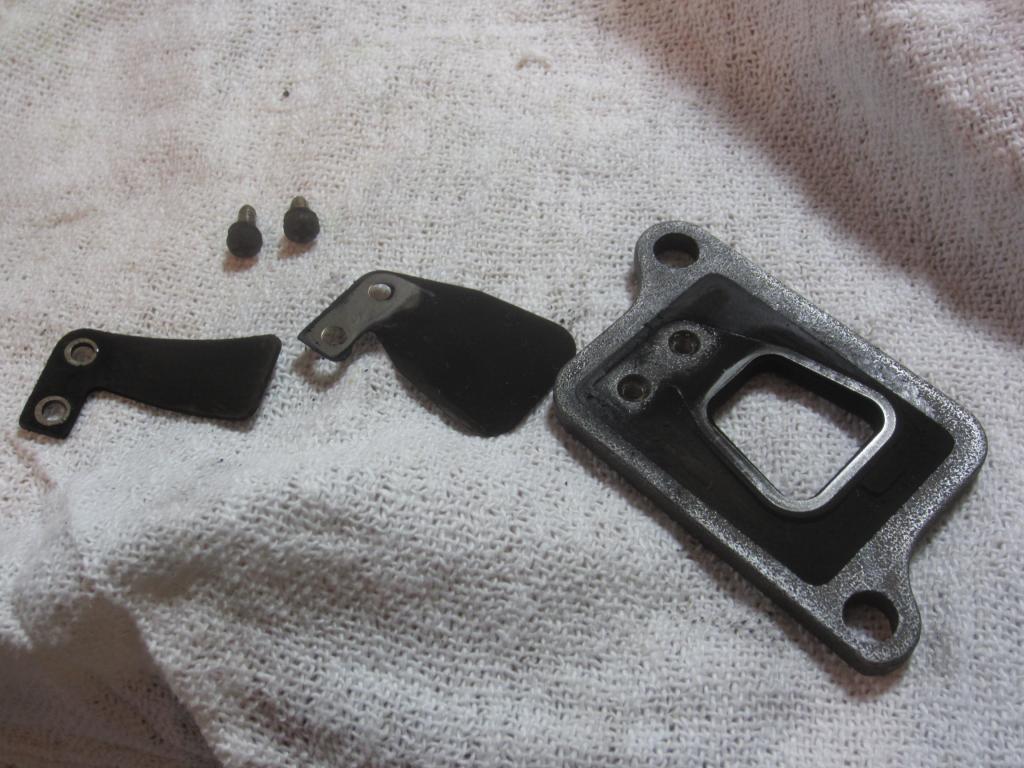
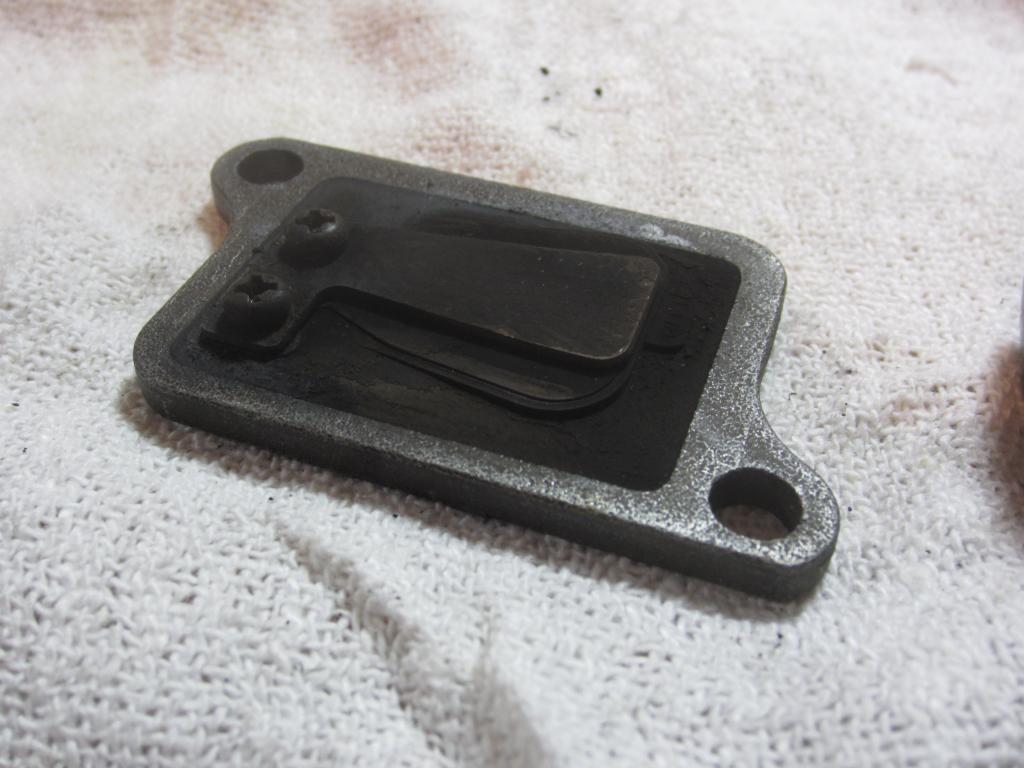
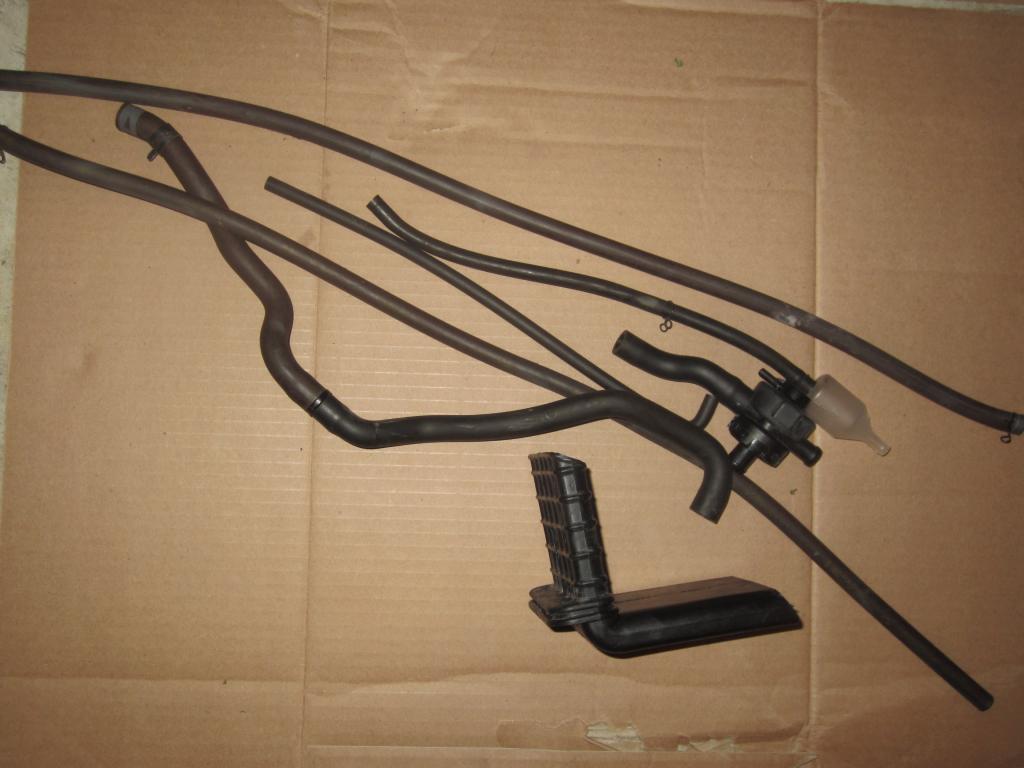
I took apart the exhaust air injection reed valve and modified it so it couldn't open any more, then capped off all associated ports. This is an easy and free mod I've done to all my Kawasaki's that used this system.
Before:
After:
Between the tank swap and air valve modification, I removed a bunch of emission tubing, it really cleans up under the tank and around the carburetor.
Other upgrades included the jet kit, NGK Iridium plug, and Krieger cam chain tensioner. My pre-mod mileage was around 63 MPG, and on the first post-mod tank it had dropped to about 53 MPG. But I'll continue to monitor and see if it changes on future tanks. At some point later this summer, the KLX will get different handlebars, grip heaters, and handguards.
So far I'm really enjoying the bike. Still trying to determine if the old saying "It's more fun to ride a slow bike fast than a fast bike slow." is true or not!
I finished the next phase of upgrades last weekend, including IMS 3 gallon tank, FMF Q4 slip-on, Dynojet jet kit, Krieger Cam Chain tensioner, and a few other small parts. There are already well written reviews and install guides for all these parts, so I'll just share a few interesting pics I took during the upgrades:
New parts undergoing inspection:

I used an old bathroom scale to get before and after weights of the bike when installing the above parts. I know it's not the most accurate method, but should at least give a ballpark estimate on weight savings.


Initial weights front (138 Lbs) and rear (156 Lbs) = 294 Lbs with maybe 1/2 Gal of fuel left.


Final weights front (137 Lbs) and rear (152 Lbs) = 289 Lbs with about the same 1/2 Gal of fuel. About five pounds knocked off, most of which was the exhaust swap. The new IMS tank may have been slightly lighter than the stock metal tank, but not detectable on my crude scale. Other saving came from ditching a bunch of emissions crap and the air snorkel.
I took apart the exhaust air injection reed valve and modified it so it couldn't open any more, then capped off all associated ports. This is an easy and free mod I've done to all my Kawasaki's that used this system.
Before:


After:

Between the tank swap and air valve modification, I removed a bunch of emission tubing, it really cleans up under the tank and around the carburetor.

Other upgrades included the jet kit, NGK Iridium plug, and Krieger cam chain tensioner. My pre-mod mileage was around 63 MPG, and on the first post-mod tank it had dropped to about 53 MPG. But I'll continue to monitor and see if it changes on future tanks. At some point later this summer, the KLX will get different handlebars, grip heaters, and handguards.
So far I'm really enjoying the bike. Still trying to determine if the old saying "It's more fun to ride a slow bike fast than a fast bike slow." is true or not!
#3
07-06-2014, 05:43 AM
Welcome snowdrifter.
Nice first posts. Good to see another rider joining in here who has obviously been around the loop a few times. DJ's jetting recommendations, IMO, seem to be on the rich side. Perhaps good for power, but not for best MPG? Keep us apprised.
Edit: and nice job modifying the air injection unit. I've never seen a clean job like that one. I just cut the air intake line off short and put a plug in it. Your method is cleaner.
Last edited by IDRIDR; 07-06-2014 at 06:11 AM.
#4
07-06-2014, 06:02 AM
If your below 1000ft and air box lid off, Dyno tests show that it'll take the #132 jet and the needle raised one notch from stage II instructions to get the AFR just below 14:1 - still lean but 1 hp more than the #128 and standard Stage II needle setting - you can feel the difference.
Last edited by Klxster; 07-06-2014 at 06:28 AM.
#5
07-06-2014, 03:43 PM

From a ZX6R (stock is on the left, modified is on the right):

If your below 1000ft and air box lid off, Dyno tests show that it'll take the #132 jet and the needle raised one notch from stage II instructions to get the AFR just below 14:1 - still lean but 1 hp more than the #128 and standard Stage II needle setting - you can feel the difference.
#6
01-21-2015, 12:35 AM
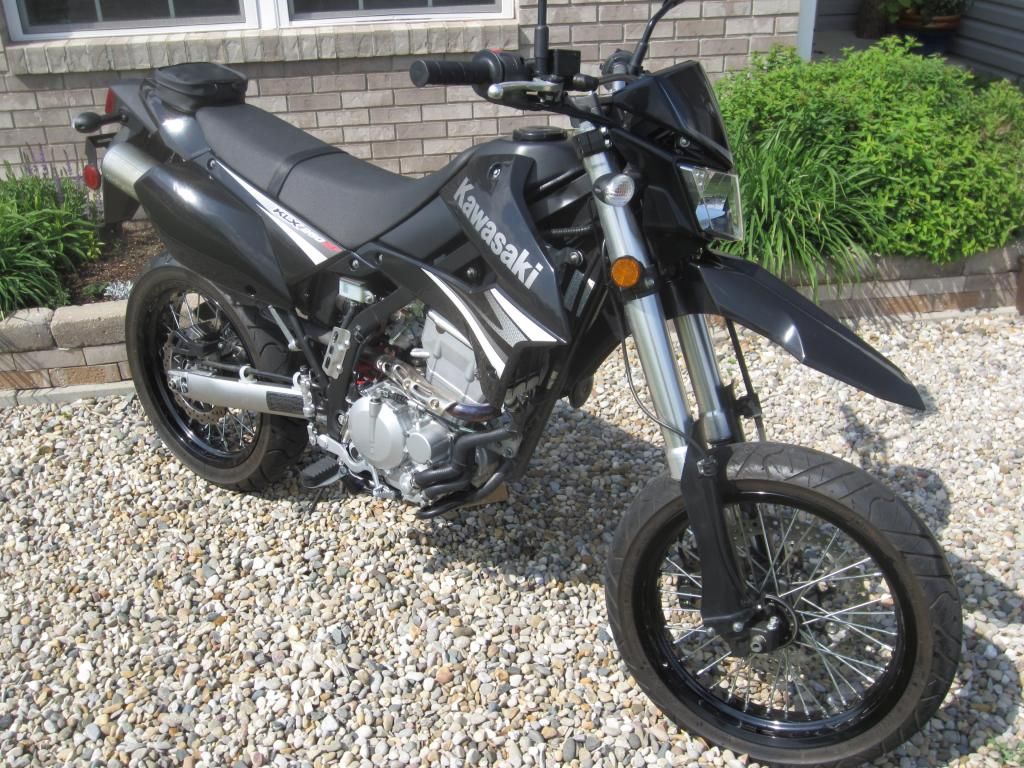
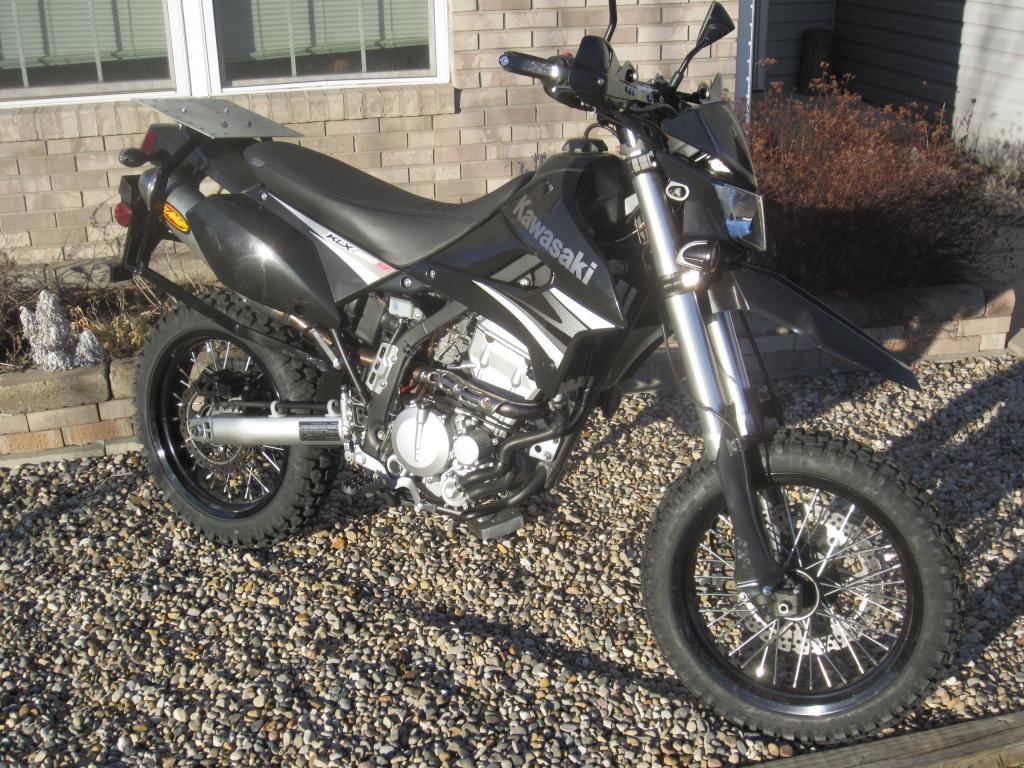
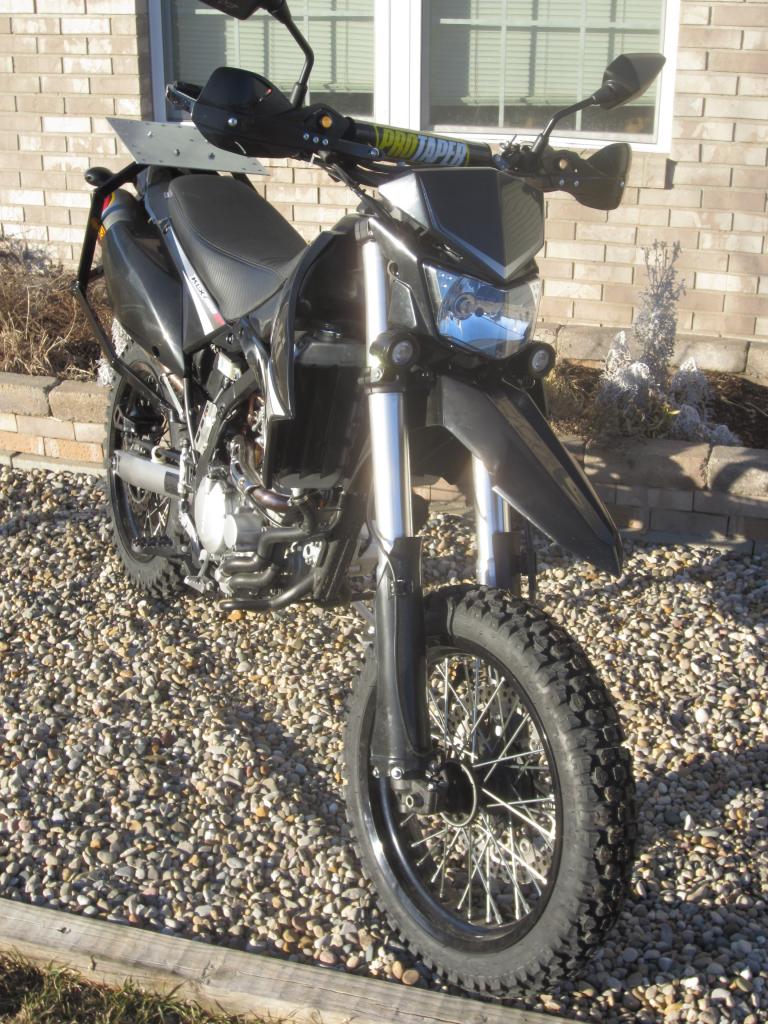
Just wanted to post an update after several months of riding (and modifications). New upgrades since last posting include raising links for the rear suspension, auxiliary LED lights (tied to the high beam), ProTaper bars, bar risers, grip heaters, handguards, smaller LED front turn signals, and Shinko 244 tires. Also fabbed up a custom rear rack for future panniers.
First a pic of the bike in stock trim:
As she sits now:
Still getting used to the new rubber and higher stance. Occasionally get to ride to work when it's warm enough. Endured temps as low as the upper 20's some mornings!
First a pic of the bike in stock trim:

As she sits now:


Still getting used to the new rubber and higher stance. Occasionally get to ride to work when it's warm enough. Endured temps as low as the upper 20's some mornings!
#7
01-21-2015, 01:42 AM

FYI, the new pipe may lead to the turn signal melting. If you are planning on keeping the stock signals, it may be worthwhile buying or making a signal relocation kit.
Google: klx250s turn signal relocation kit.
Is it a slow bike? I can't tell, I haven't ridden a wooden local trail yet where I can go wide open.
Google: klx250s turn signal relocation kit.
Is it a slow bike? I can't tell, I haven't ridden a wooden local trail yet where I can go wide open.
#8
01-21-2015, 01:58 AM
That looks bad *** with the knobbies.
Oh yeah, please round the front corners on your rear rack. That could hurt.
Oh yeah, please round the front corners on your rear rack. That could hurt.

#10
01-21-2015, 11:49 AM
2X 10W 2" Round CREE XML LED Work Light Spot Driving Lamp FogLight DRL 12V 24V | eBay
Used the included little mounting brackets and ran the bolt for the lower fork clamp through. Might have had to enlarge the hole slightly, can't remember. Actually worked out really well. Definitely not the brightest lights available, but affordable and a good supplement to the factory high beam.

Thread
Thread Starter
Forum
Replies
Last Post

