Adventures 351.0
#1
 12-02-2011, 05:36 AM

Join Date: Oct 2010
Location: SW Idaho
Posts: 4,507
It's time for 351. And other fiddling, cleaning, updates, etc. This thread will be my photo documentary.
Questions and answers.
Chime in or follow along if you wish.
I welcome advice.
Contents:
Tear Down Part I (first posts, below. Dirty bike pics, skid plate, seat, tank, ramblings)
Tear Down Part II (oil filter, carb, right side cover, oil pickup screen, clutch basket, cam cover)
Tear Down Part III (cams, head, cylinder)
Grease and Gears (rear wheel spacers, sprocket)
New Paperweight (351 jug arrives)
Wires, SS Brake Line, Float Bowl Level check
Build Part I (head gasket frustration)
Clutch (EBC Dirt racer kit and Barnett springs)
Kick-Starter (pricey insurance)
Headlight support bracket, tool thoughts, clean head, KACR
Set cam timing
Muffler Hanger Bracket
************************************************** *****************
Other 351 install threads (if you know of others, PM me and I'll put a link here)
Dan888: https://www.kawasakiforums.com/forum...s-links-32538/
armycopter: https://www.kawasakiforums.com/forum...351-mod-31703/
linkin5, Arctra, et al: https://www.kawasakiforums.com/forum...51-club-42028/
for a 300, but good instructions: http://dpippin.com/klx/index_files/Page1666.htm
MrDuhfactor series of Youtube videos on a full build of a KLX250R can be found here: https://www.youtube.com/playlist?lis..._YMlhftAoWEvsu This series is great, as he has videos going through the entire teardown and install of a 351 kit.
************************************************** *****************
Bill Blue Web Site: http://bandbcyclerestoration.com/
************************************************** *****************
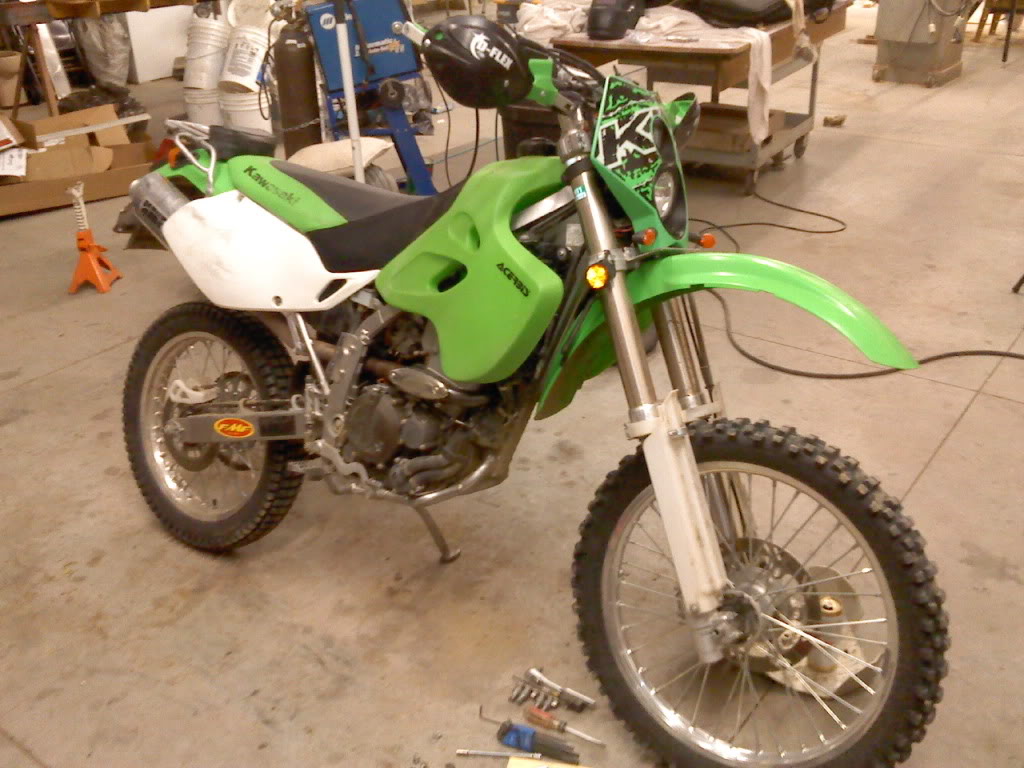
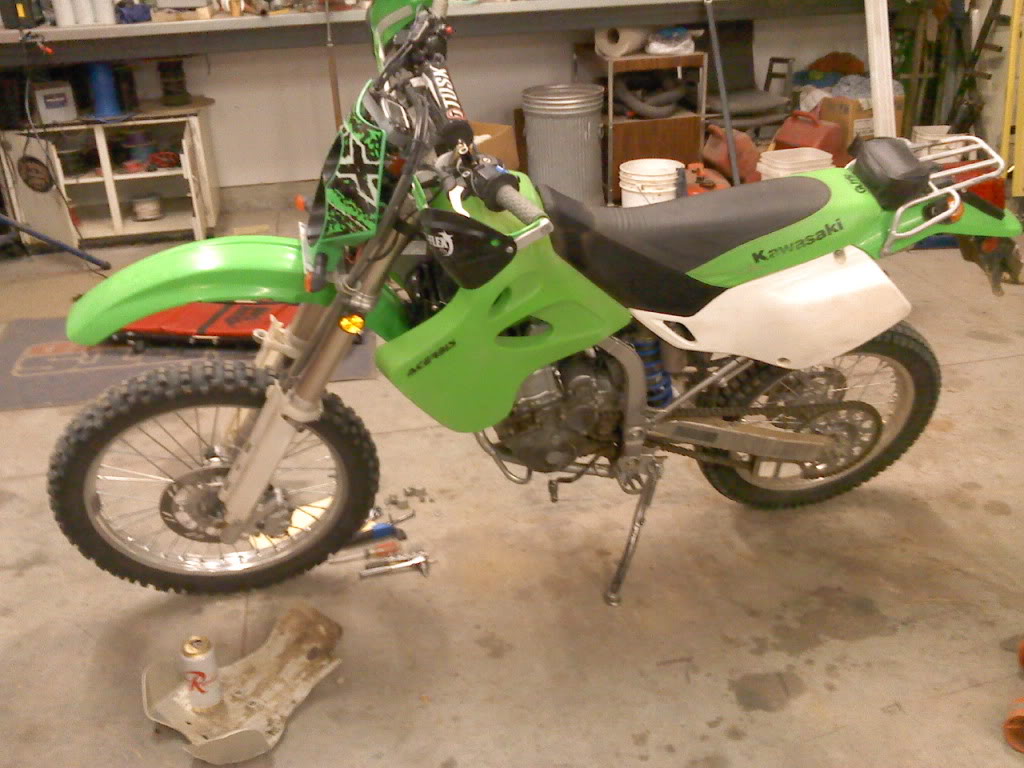
Gotta start with the first piece.
It's seen some good use over the past year
Good thing its there
13
49
13/49 is very low gearing. For me, as a noob to dirt and steep nasty rocky climbs a year ago, it was perfect. After a few months with this setup, including first trip to Moab and a bunch of gnarly stuff, graduated to the 14, then 15. Several rides ago, on a planned excursion to some difficult stuff, the 13 went back on, and good it did. And low gears are better in snow.
With the 351, the rear will go back to stock 42 or a 45, and I'll continue to use the 13/14/15 setup up front depending on the ride.
Questions and answers.
Chime in or follow along if you wish.
I welcome advice.
Contents:
Tear Down Part I (first posts, below. Dirty bike pics, skid plate, seat, tank, ramblings)
Tear Down Part II (oil filter, carb, right side cover, oil pickup screen, clutch basket, cam cover)
Tear Down Part III (cams, head, cylinder)
Grease and Gears (rear wheel spacers, sprocket)
New Paperweight (351 jug arrives)
Wires, SS Brake Line, Float Bowl Level check
Build Part I (head gasket frustration)
Clutch (EBC Dirt racer kit and Barnett springs)
Kick-Starter (pricey insurance)
Headlight support bracket, tool thoughts, clean head, KACR
Set cam timing
Muffler Hanger Bracket
************************************************** *****************
Other 351 install threads (if you know of others, PM me and I'll put a link here)
Dan888: https://www.kawasakiforums.com/forum...s-links-32538/
armycopter: https://www.kawasakiforums.com/forum...351-mod-31703/
linkin5, Arctra, et al: https://www.kawasakiforums.com/forum...51-club-42028/
for a 300, but good instructions: http://dpippin.com/klx/index_files/Page1666.htm
MrDuhfactor series of Youtube videos on a full build of a KLX250R can be found here: https://www.youtube.com/playlist?lis..._YMlhftAoWEvsu This series is great, as he has videos going through the entire teardown and install of a 351 kit.
************************************************** *****************
Bill Blue Web Site: http://bandbcyclerestoration.com/
************************************************** *****************
Gotta start with the first piece.
It's seen some good use over the past year
Good thing its there
13
49
13/49 is very low gearing. For me, as a noob to dirt and steep nasty rocky climbs a year ago, it was perfect. After a few months with this setup, including first trip to Moab and a bunch of gnarly stuff, graduated to the 14, then 15. Several rides ago, on a planned excursion to some difficult stuff, the 13 went back on, and good it did. And low gears are better in snow.
With the 351, the rear will go back to stock 42 or a 45, and I'll continue to use the 13/14/15 setup up front depending on the ride.
Last edited by IDRIDR; 02-19-2017 at 06:35 PM.
#2
12-02-2011, 05:56 AM
Join Date: Oct 2010
Location: SW Idaho
Posts: 4,507
I really, really like the height of the Guts Tall seat. I hated the stock 2x4 which sucked me into the tank. I'm 6'.
The foam on this seat is soft rated, but I want to go to medium firmness, so I'll try to sell this foam. Interested?
The kickstand spring needs replaced/retrofitted to be just a little shorter. It's too lose at this angle. I did some serious grinding so it would kick up to this angle.
Ya, it's time to clean the air filter. Deej, sorry if you're cringing
")

Tank is next
Enough for tonight.
/IDRIDR
Last edited by IDRIDR; 12-19-2012 at 11:03 PM.
#3
12-02-2011, 06:18 AM
Join Date: Apr 2011
Location: Fort Atkinson, WI
Posts: 349
I'll be following. Wish I could get out on my bike. Well, I guess I'll have to wait about 4-5 months. Winter is here!
#5
12-02-2011, 02:20 PM
Join Date: Oct 2010
Location: SW Idaho
Posts: 4,507
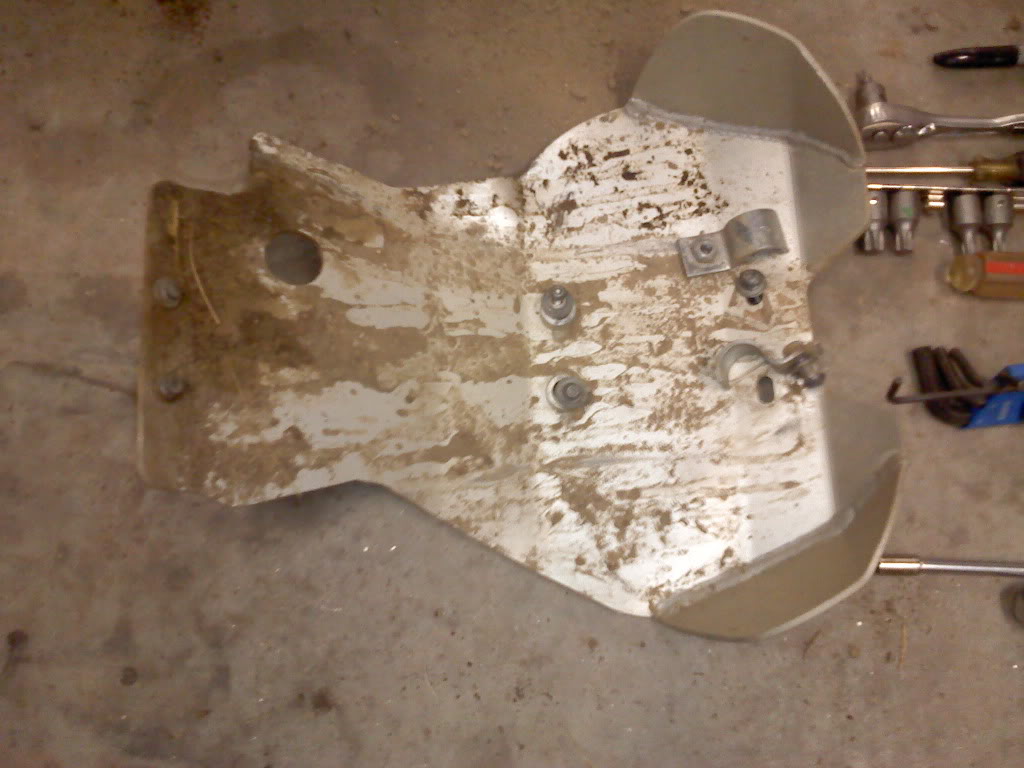
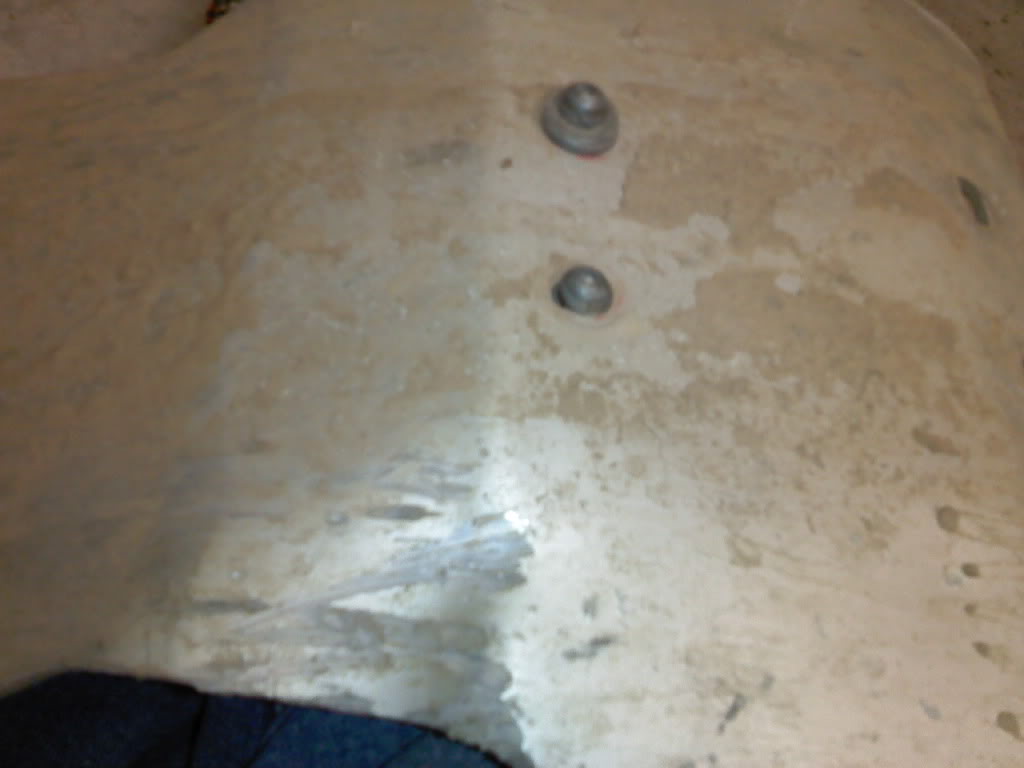
 . I only wanted to wash the bike once, so washed after skid plate removal. If you look closely, the picks above are before and after wash. Here's a cleaner one.
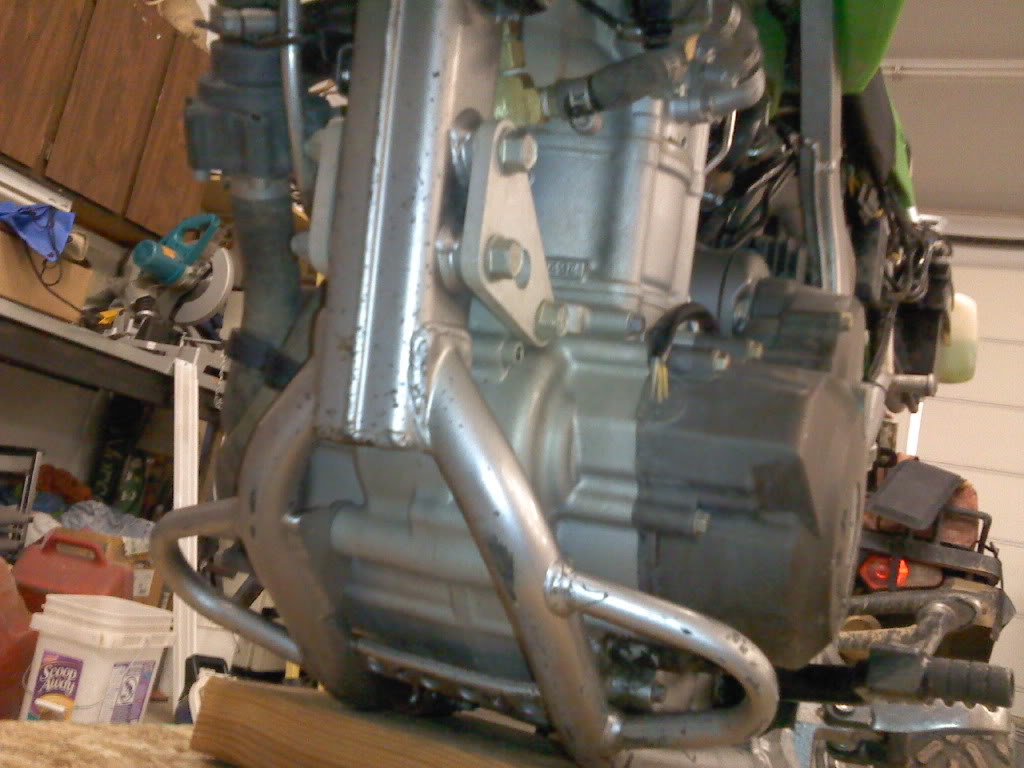
Last edited by IDRIDR; 12-02-2011 at 04:24 PM.
#6
12-02-2011, 03:22 PM

Good luck, not a hard install, follow FAQ on this site, should be smooooth 
You're going to love it.
You're going to love it.
#7
12-04-2011, 04:45 AM
Join Date: Oct 2010
Location: SW Idaho
Posts: 4,507
Continuing on
Oil filter
Easy way to remove carb linkage:
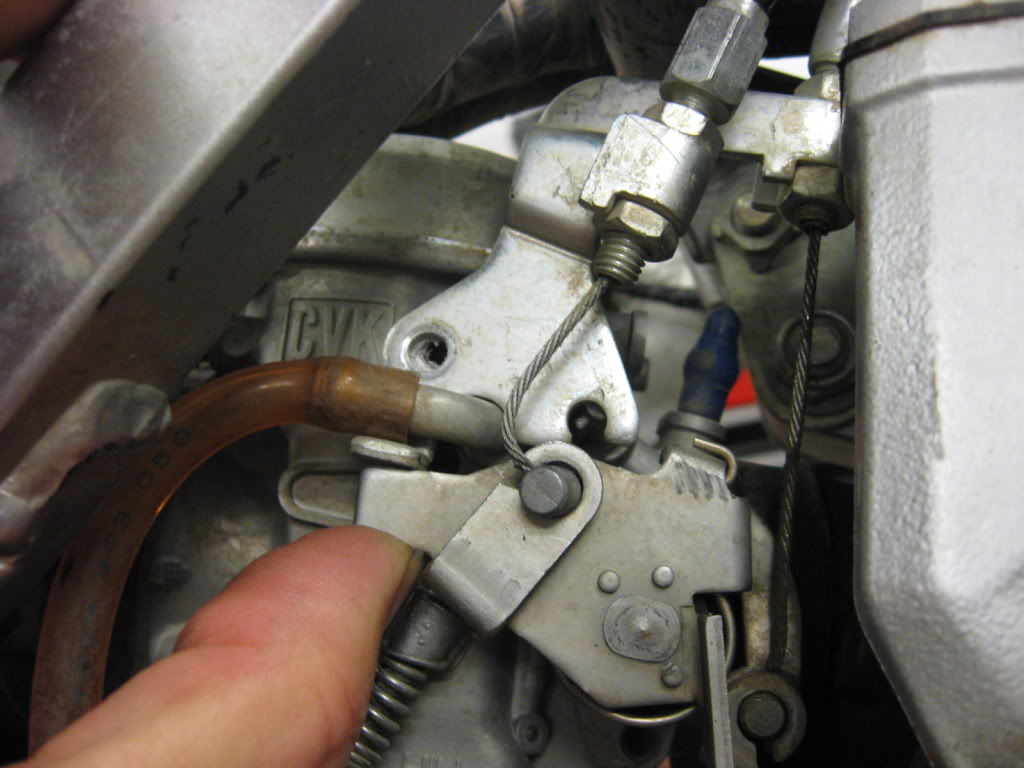
Out through the top
Long bolts on top.
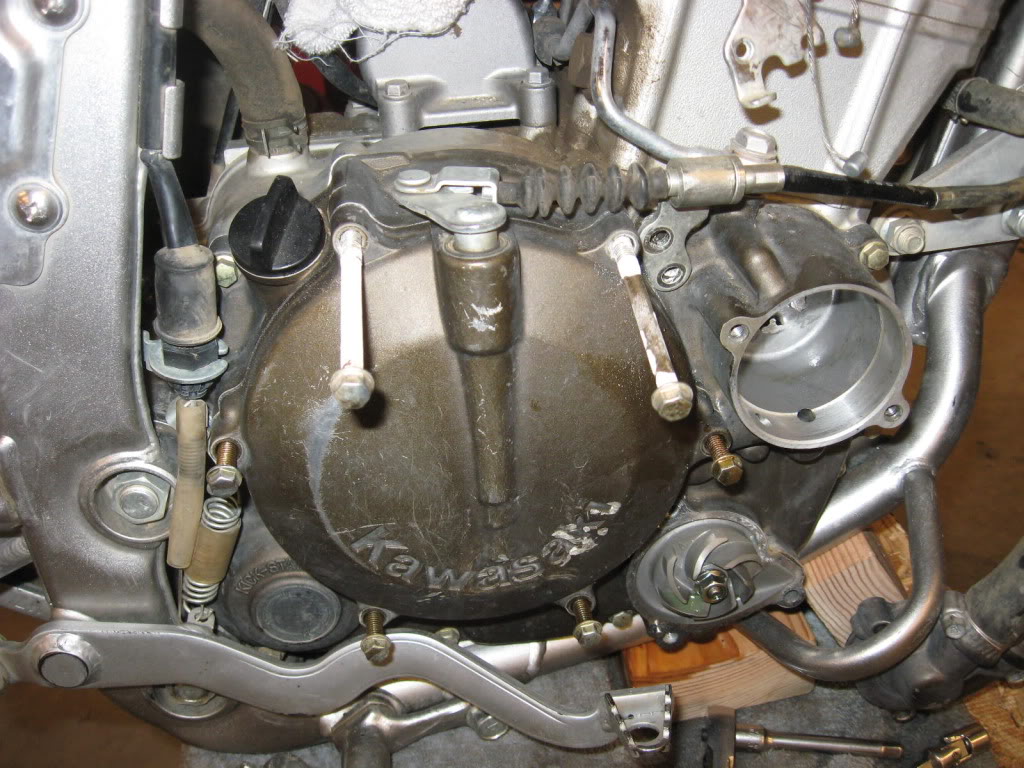
There are two alignment pins, one on rear (photo left) side also.
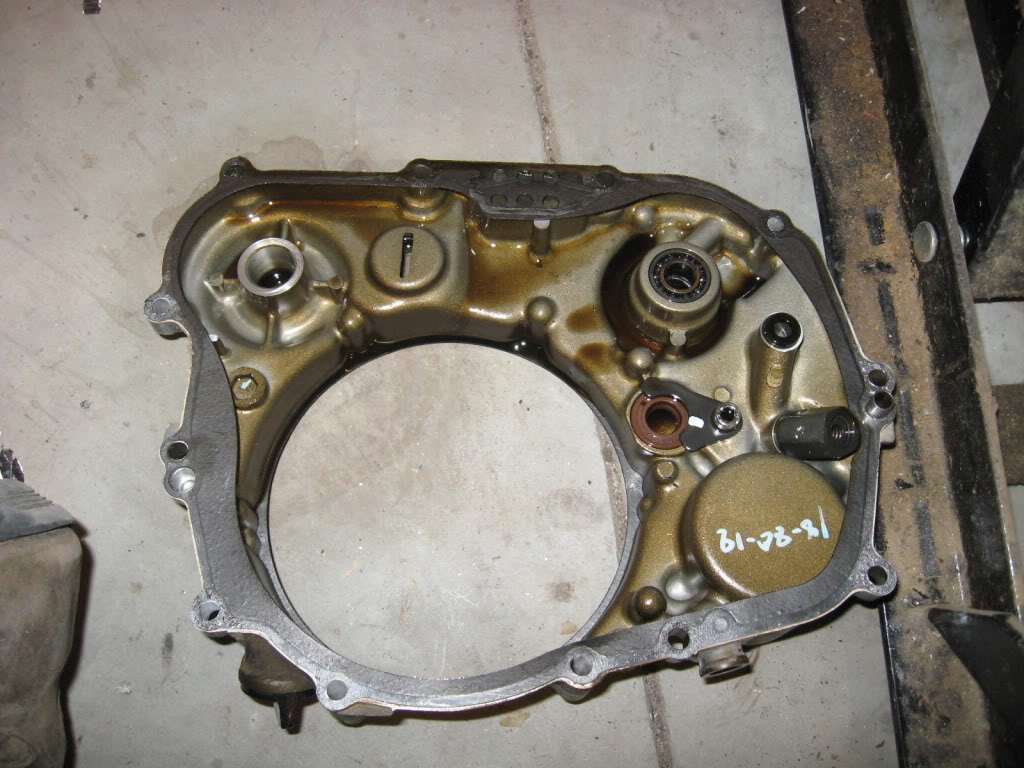
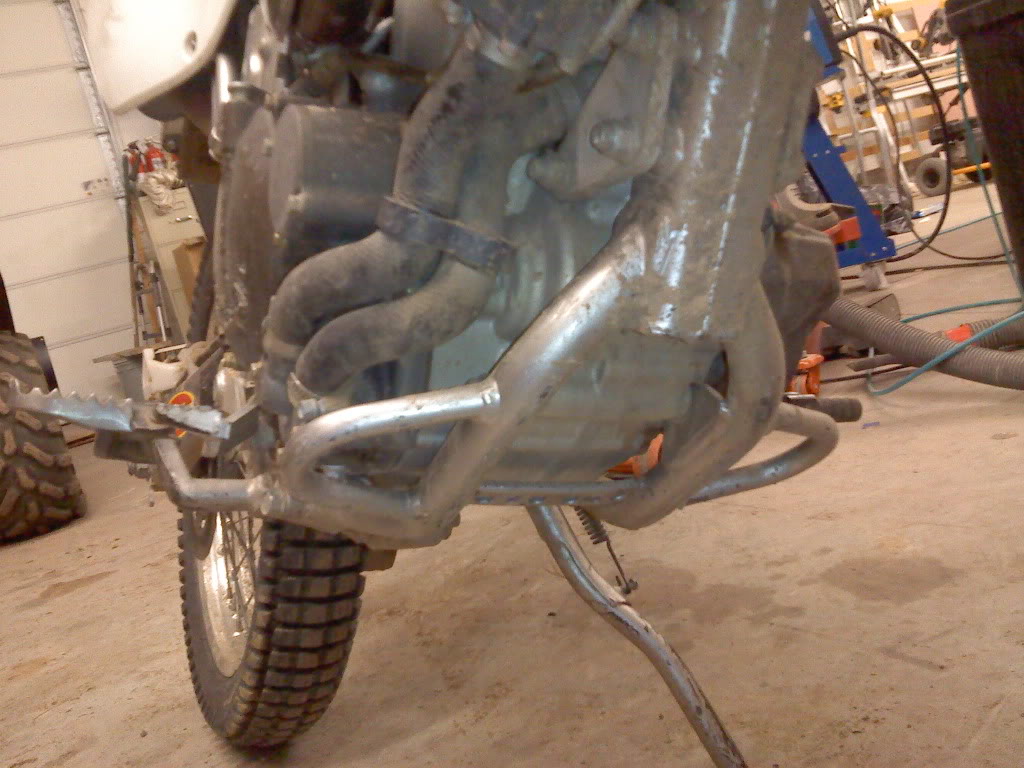
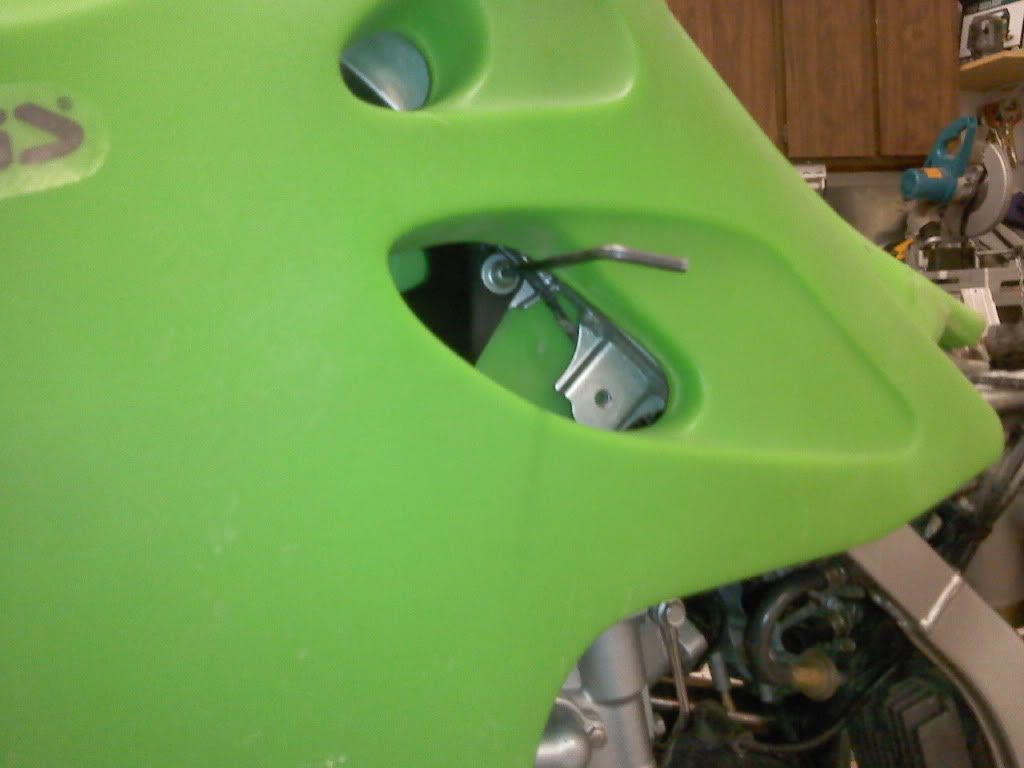
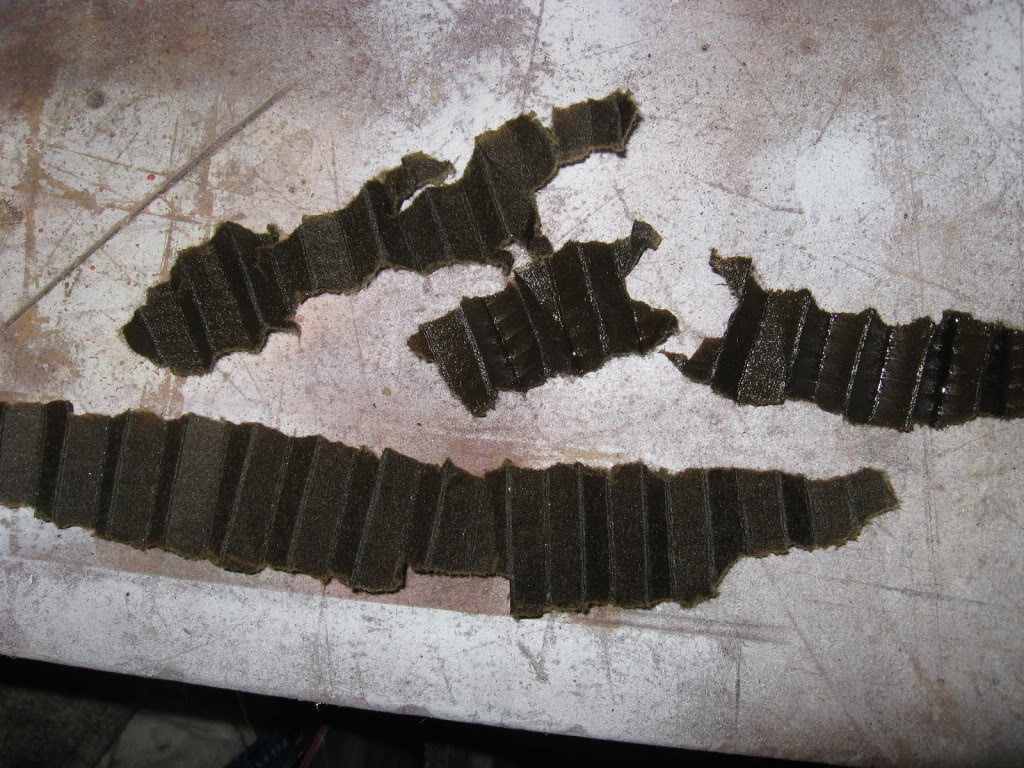
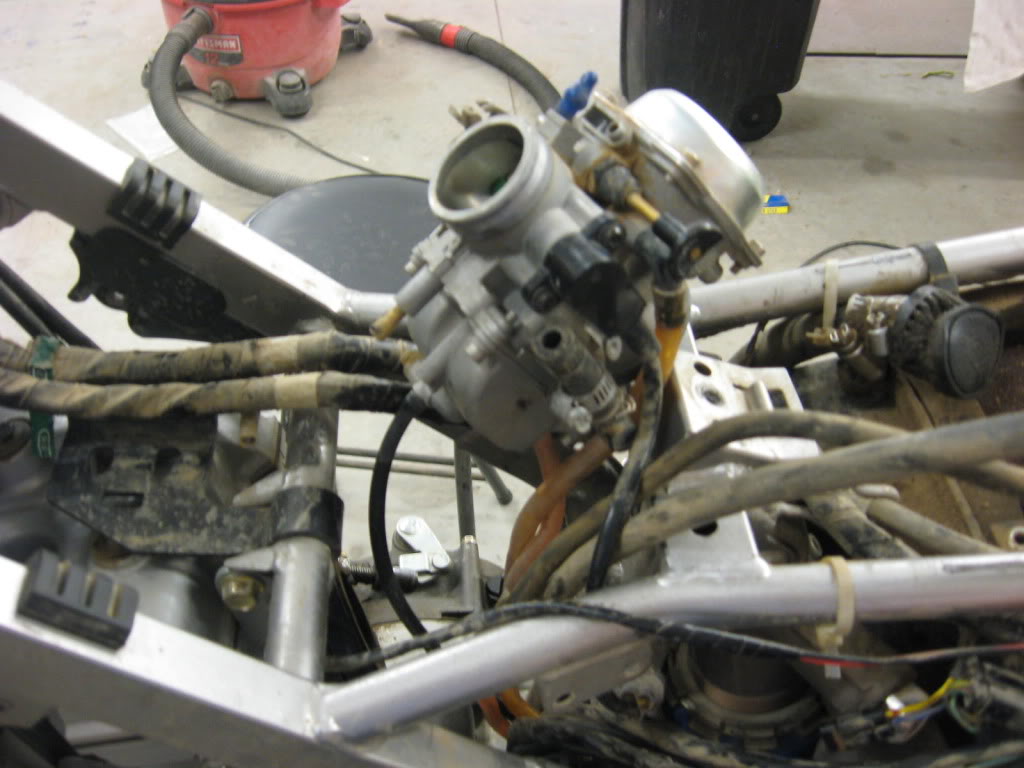
Our oil filter "pickup" screen is unlike what I've seen on other bikes. It's more like a small window screen. There were a few pieces of gasket material stuck in there. And I think I see another back down in the lower part of the case that I can't reach.
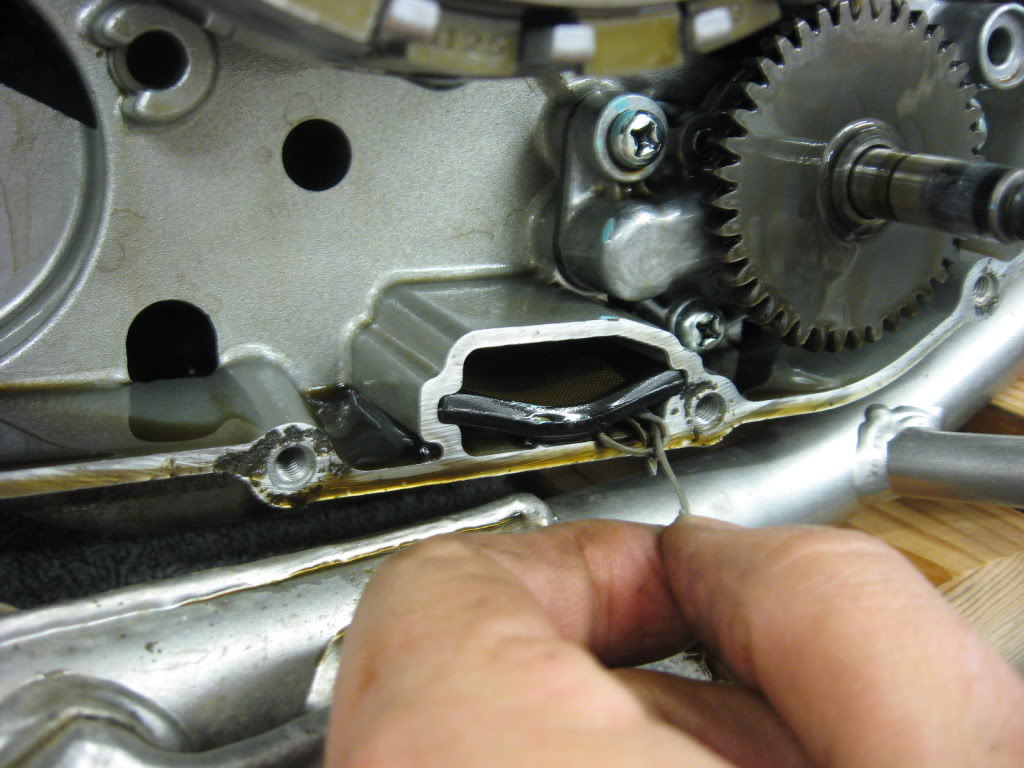
"Working" side of the screen is pretty clean.
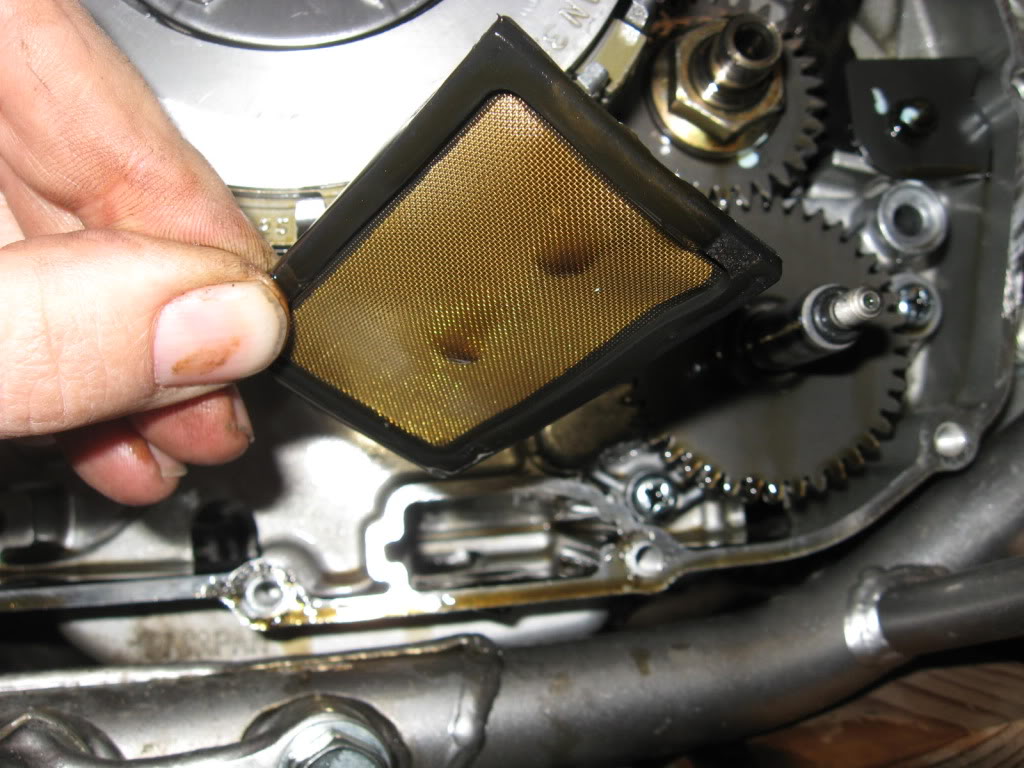

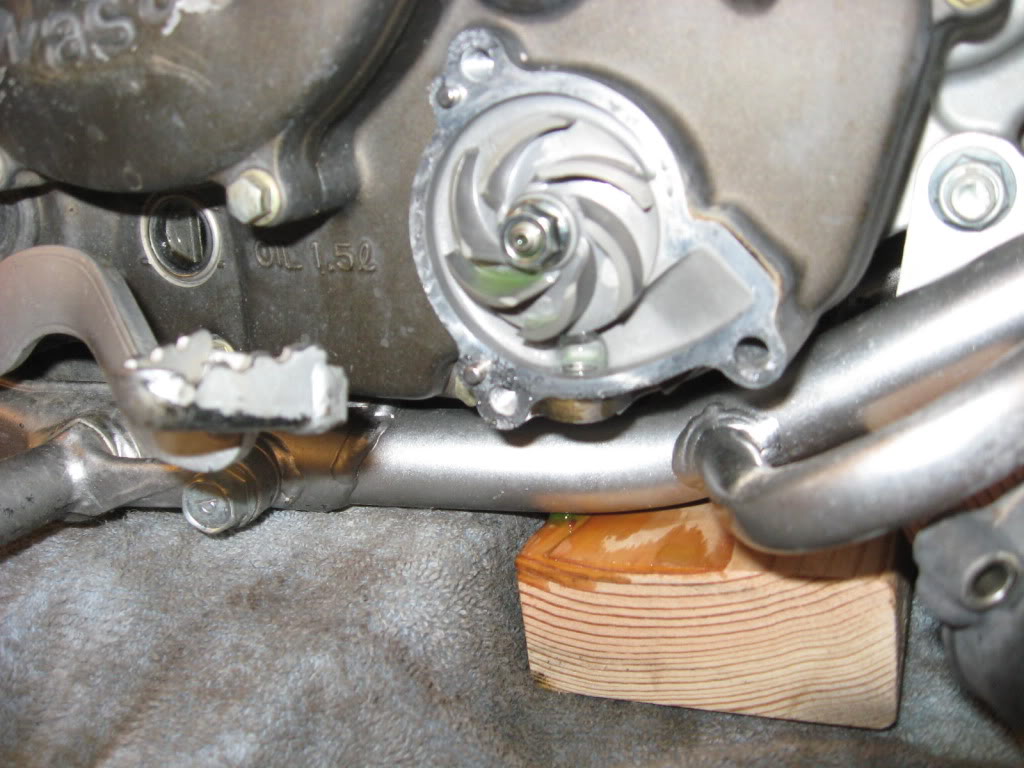
Lubrication. It's the lifeblood of a healthy running motor.
Oil filter
Easy way to remove carb linkage:
Out through the top
Long bolts on top.
There are two alignment pins, one on rear (photo left) side also.
Our oil filter "pickup" screen is unlike what I've seen on other bikes. It's more like a small window screen. There were a few pieces of gasket material stuck in there. And I think I see another back down in the lower part of the case that I can't reach.
"Working" side of the screen is pretty clean.
Lubrication. It's the lifeblood of a healthy running motor.
Last edited by IDRIDR; 08-19-2016 at 04:53 PM. Reason: grammar & clarification
#8
12-04-2011, 05:00 AM
Join Date: Oct 2010
Location: SW Idaho
Posts: 4,507
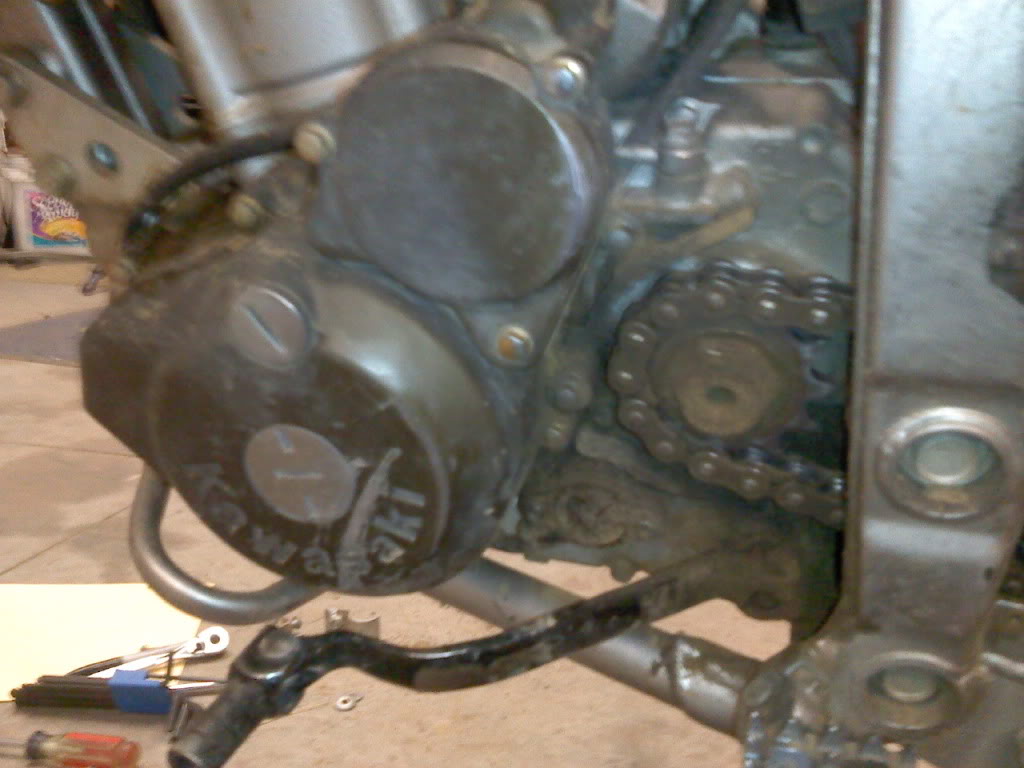
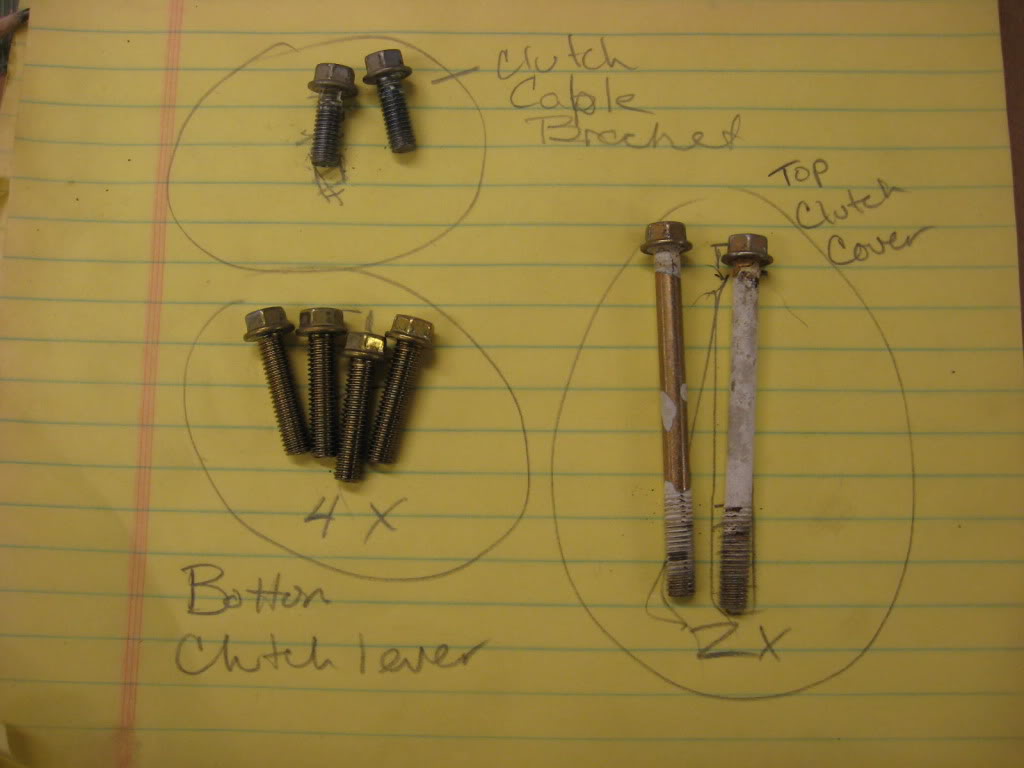
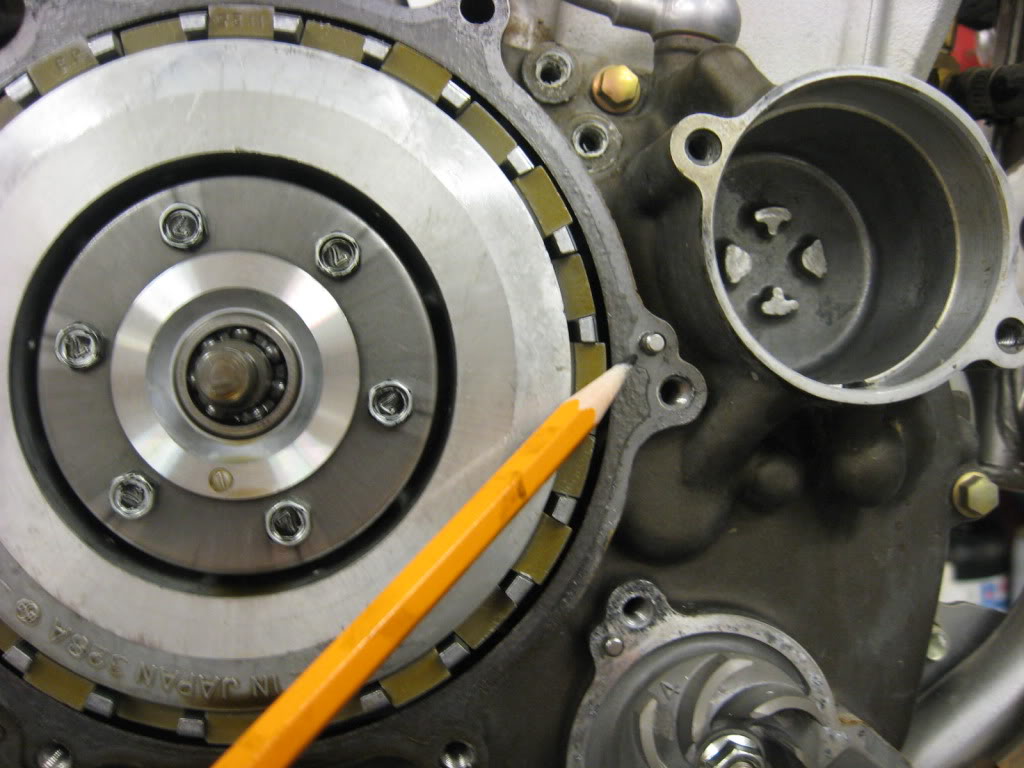
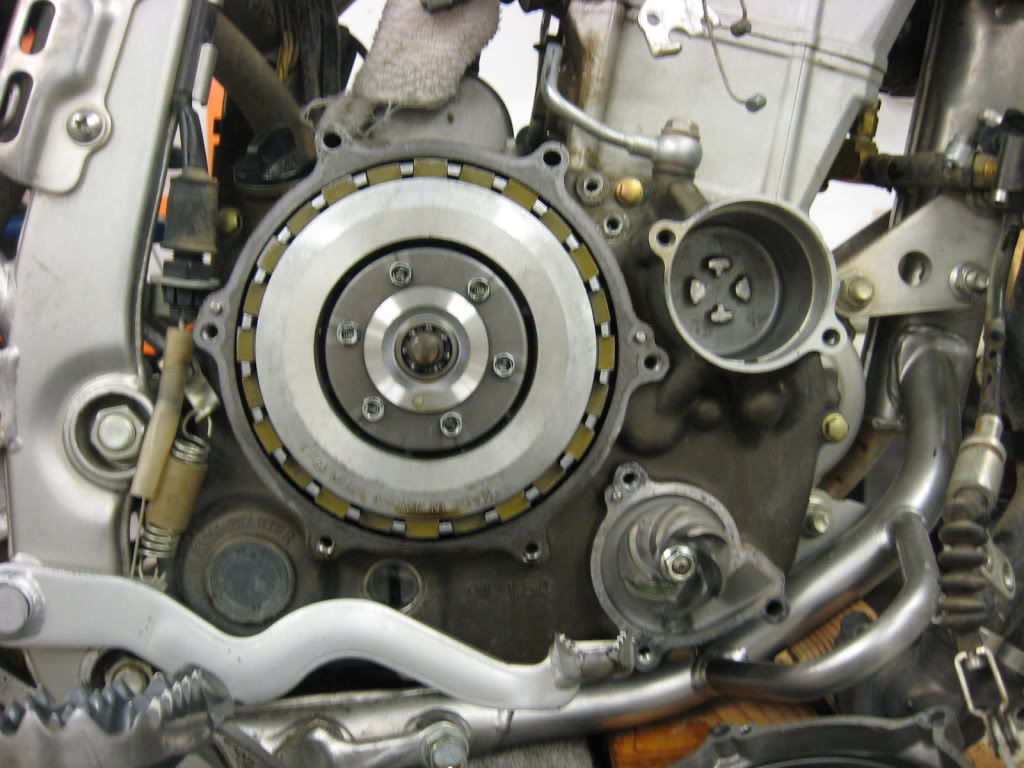
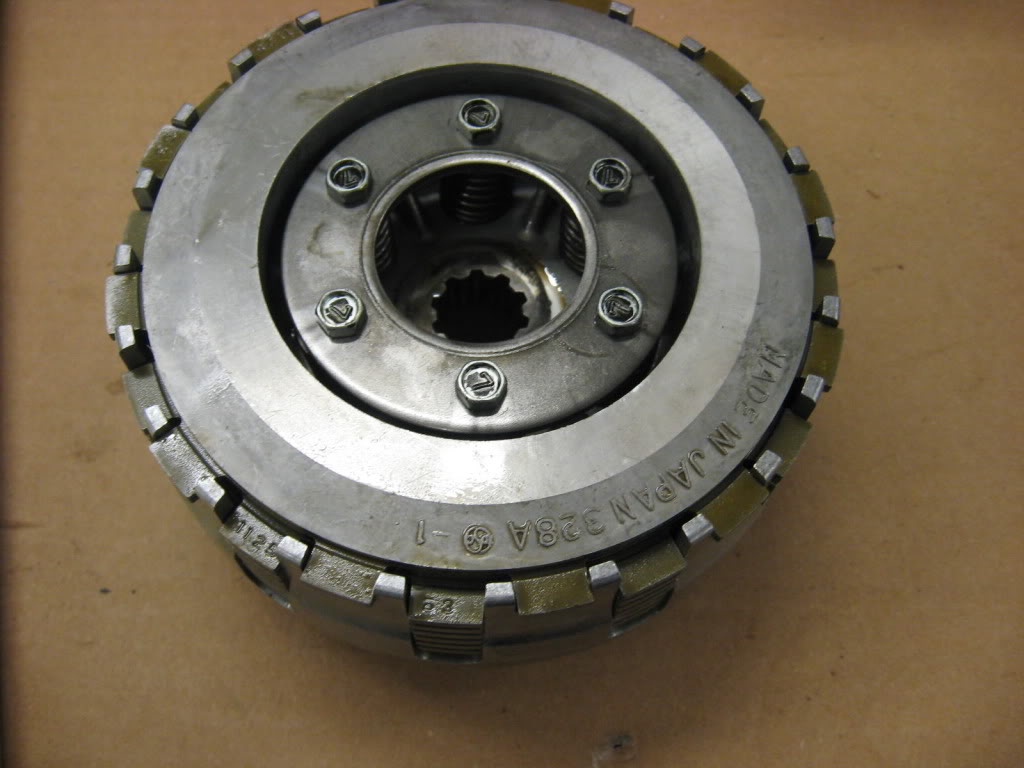
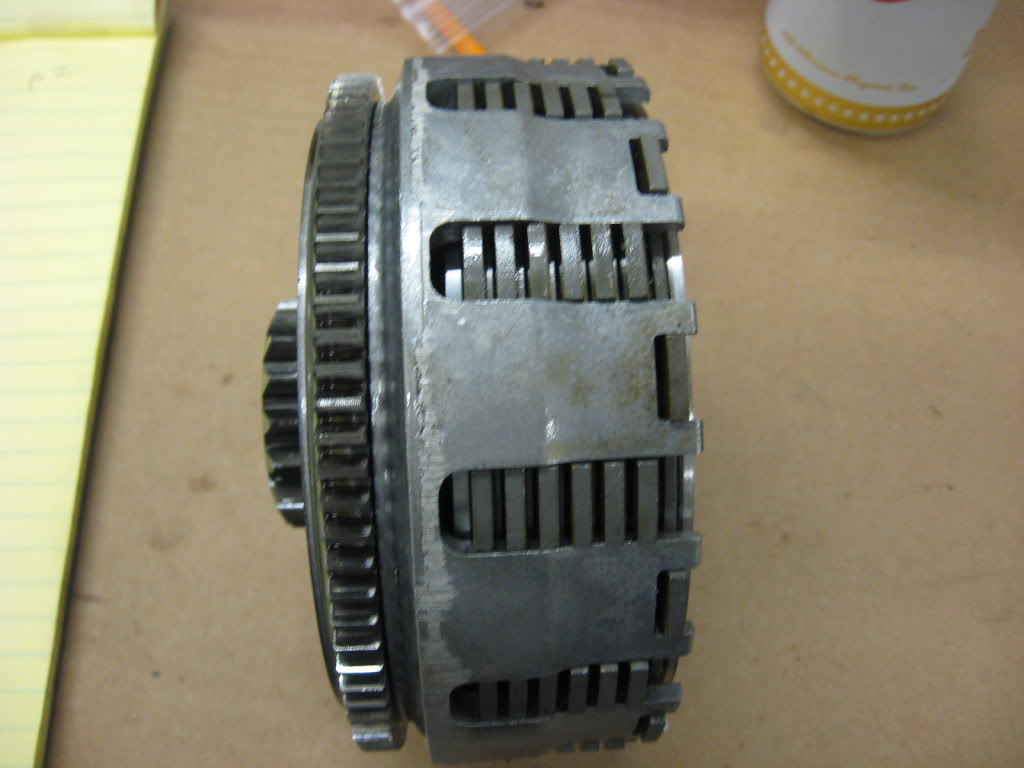
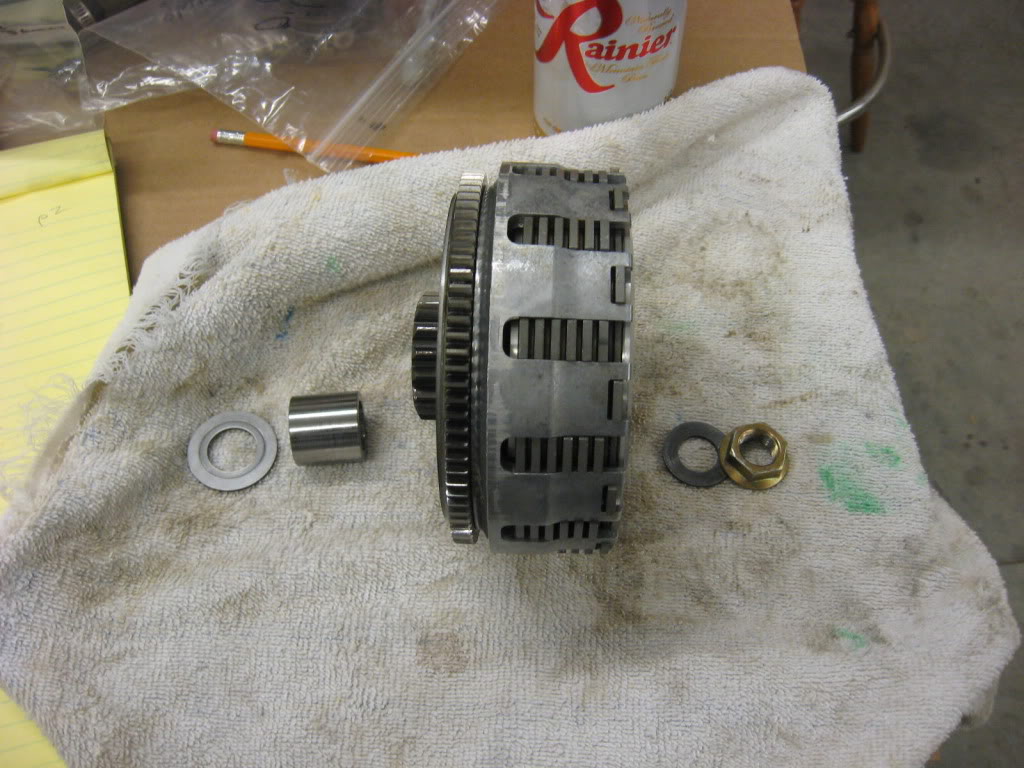
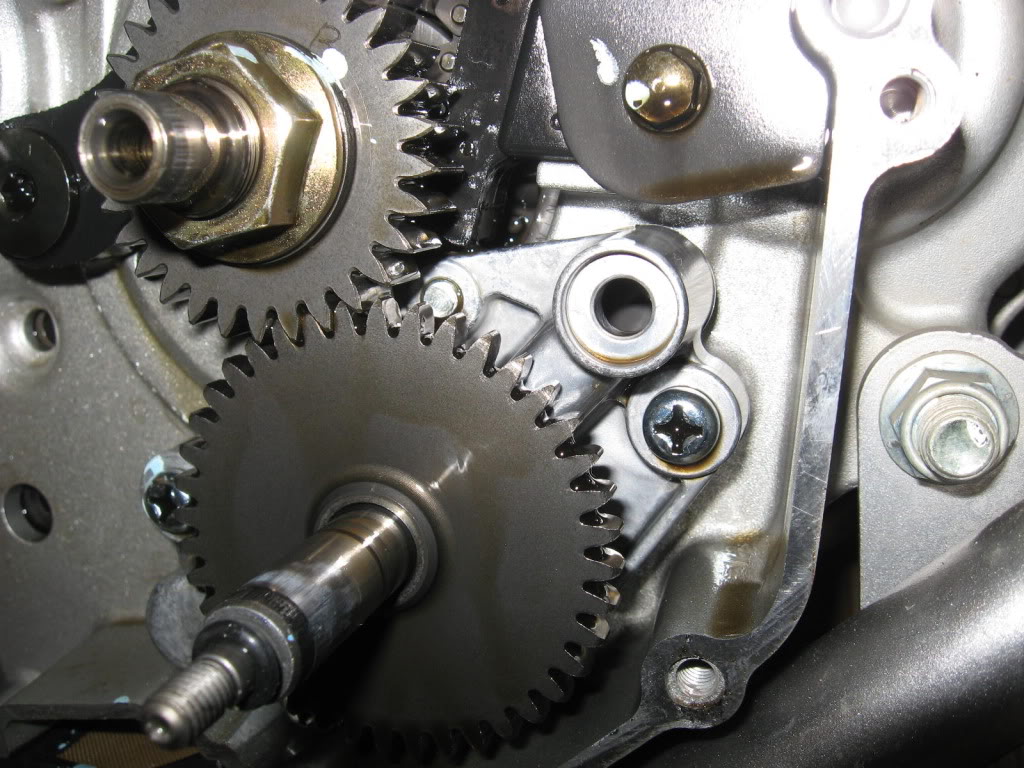
Tearing out the clutch to check plate tolerances, replace springs, and kick starter install. Used a penny in the gears to lock it up per recommendations from others. Bent the penny, but no apparent damage to the gears. In the pic below, the clutch basket is removed to show installation order of the other parts. The conical washer in on shaft 2nd from right is probably backwards. The concave side should face toward the hub (see service manual p 5-9).
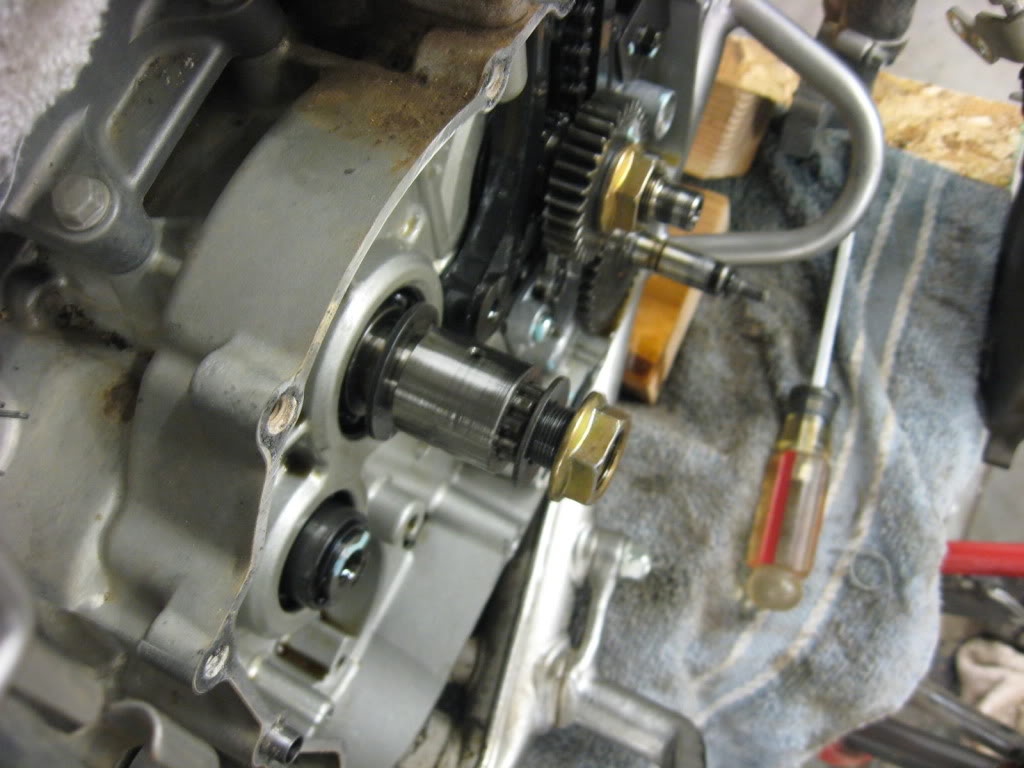

Kick starter will go into the empty hole on lower left.
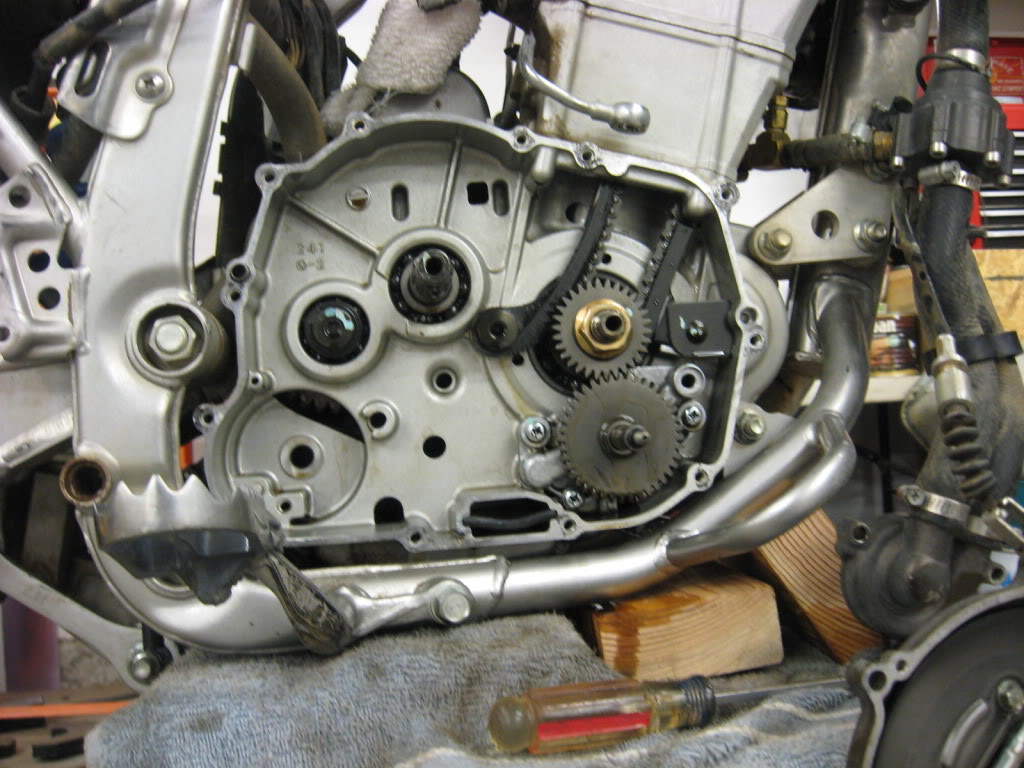
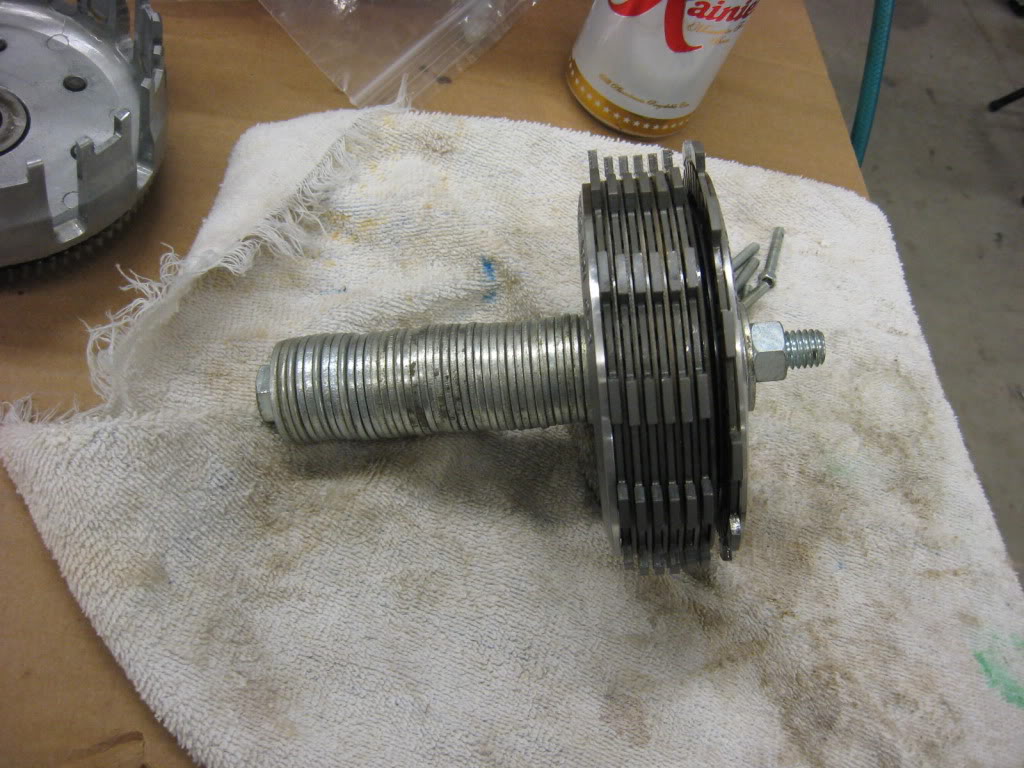
We weren't sure if the clutch plates would snap apart violently like on our snowmobiles, so a "special tool" consisting of a long bolt, a stack of washers, and a nut was used to hold compression on the springs while the six clutch spring bolts were removed. No worries from what I can tell as the clutch spring bolts have a lot of thread to work with. Special tool not necessary, but I'd use it again anyway to help maintain even pressure on everything while removing the clutch spring bolts.
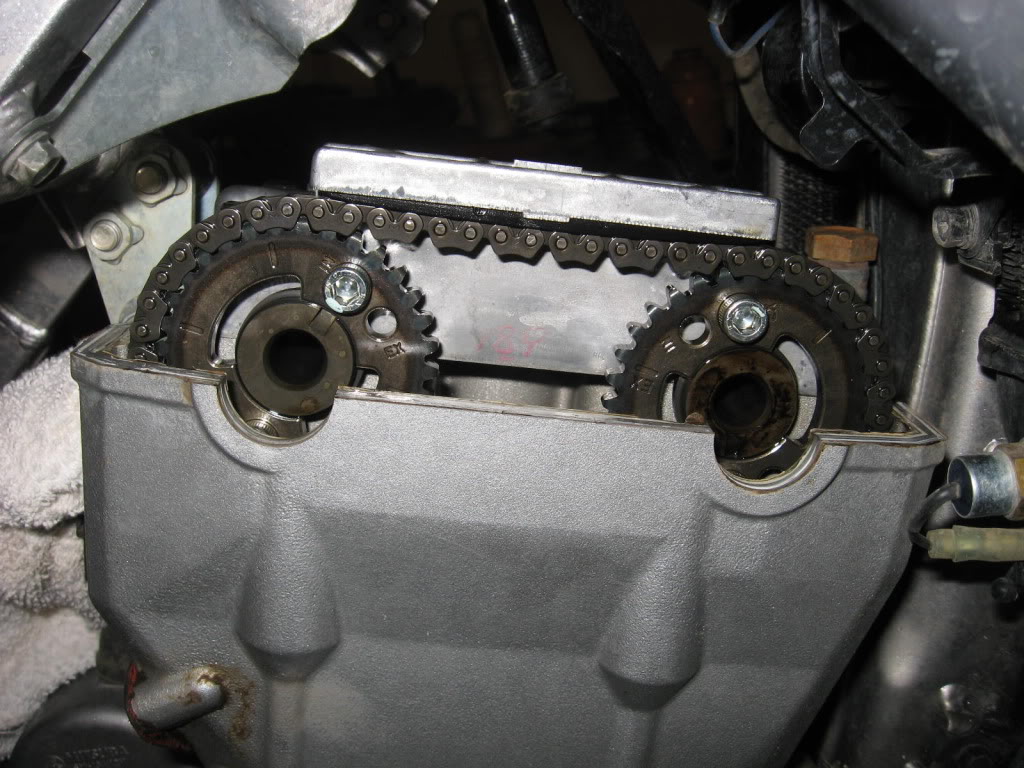
Remove Krieger manual tensioner, and the chain tension spring below.
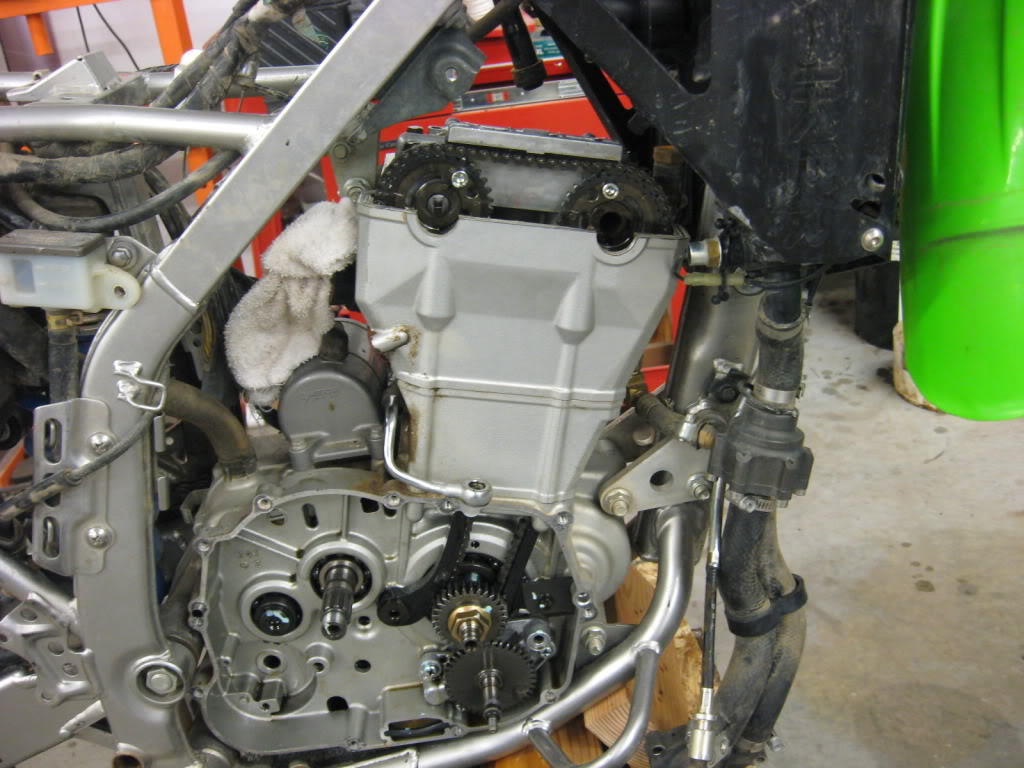
New territory. I should have checked valve clearance first before tearing everything down. Remember to check it on rebuild!
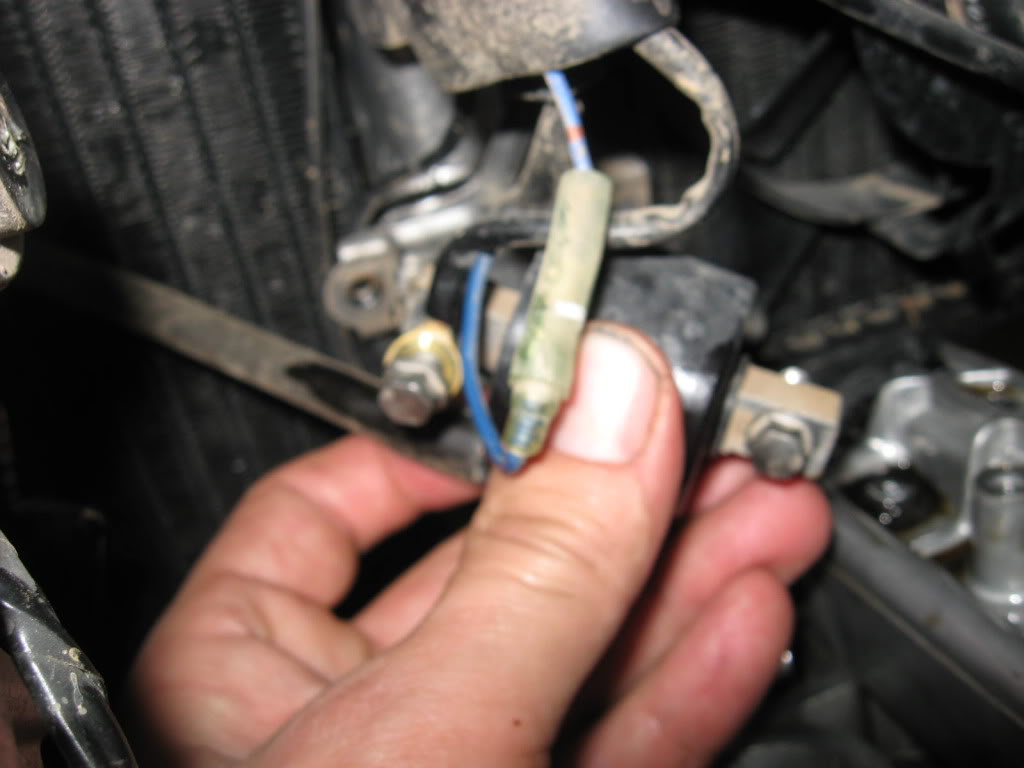
Get the coil out of the way.
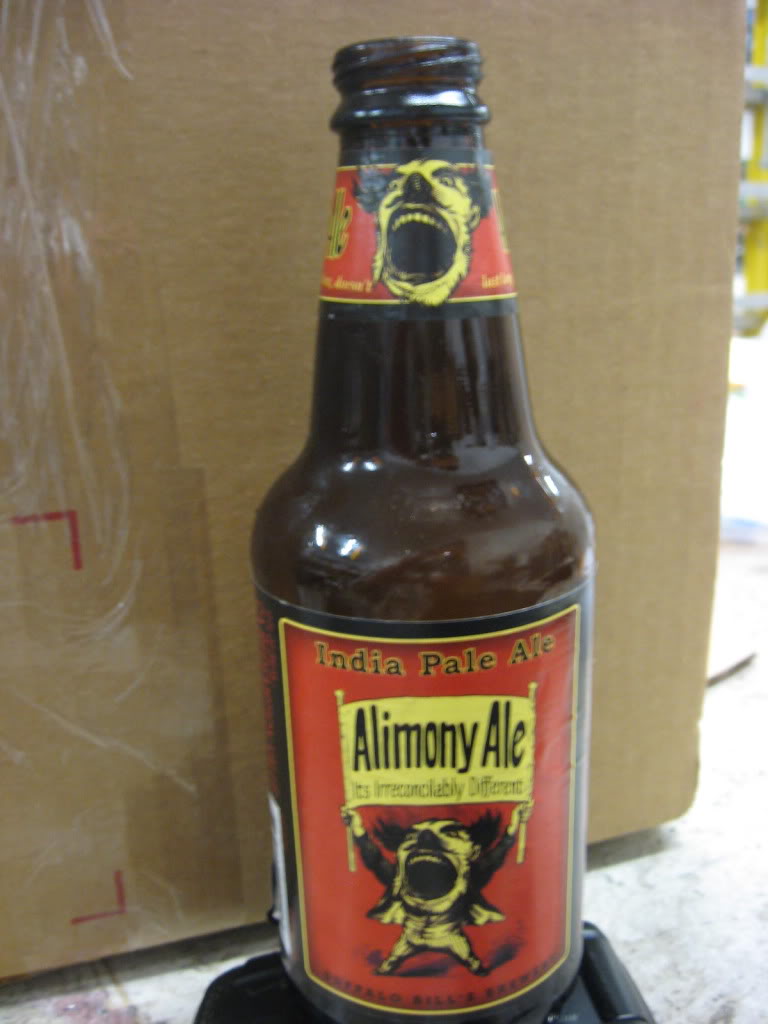
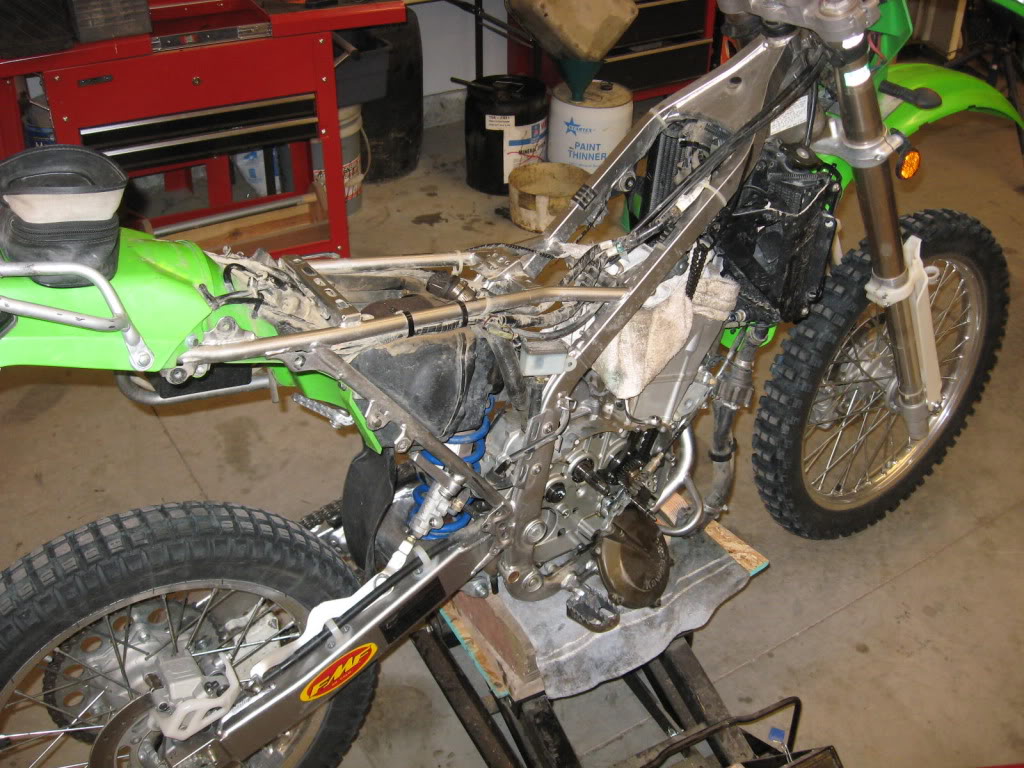
Pulled cams. Need a photo of them. That's all for tonight. The Alimony is empty.
Clutch plates were at 2.76 mm +/- 0.025mm. Not quite to service limit of 2.7 mm, but outside of spec (2.92 to 3.08 mm). Will check tomorrow with a better caliper, and check plate warp. The clutch spring free length was at around 35.5 mm, with standard 32.65mm and service limit 31mm. Interesting they were so much longer than the standard??? May just put in new plates, and definitely the stiffer Barnett springs, and be done with it.
Kick starter will go into the empty hole on lower left.
We weren't sure if the clutch plates would snap apart violently like on our snowmobiles, so a "special tool" consisting of a long bolt, a stack of washers, and a nut was used to hold compression on the springs while the six clutch spring bolts were removed. No worries from what I can tell as the clutch spring bolts have a lot of thread to work with. Special tool not necessary, but I'd use it again anyway to help maintain even pressure on everything while removing the clutch spring bolts.
Remove Krieger manual tensioner, and the chain tension spring below.
New territory. I should have checked valve clearance first before tearing everything down. Remember to check it on rebuild!
Get the coil out of the way.
Pulled cams. Need a photo of them. That's all for tonight. The Alimony is empty.
Clutch plates were at 2.76 mm +/- 0.025mm. Not quite to service limit of 2.7 mm, but outside of spec (2.92 to 3.08 mm). Will check tomorrow with a better caliper, and check plate warp. The clutch spring free length was at around 35.5 mm, with standard 32.65mm and service limit 31mm. Interesting they were so much longer than the standard??? May just put in new plates, and definitely the stiffer Barnett springs, and be done with it.
Last edited by IDRIDR; 12-04-2011 at 03:51 PM. Reason: Clarifications.

#10
12-04-2011, 06:00 AM
Join Date: Oct 2010
Location: SW Idaho
Posts: 4,507
Looks like you snuck some internet time in too. Get well soon.
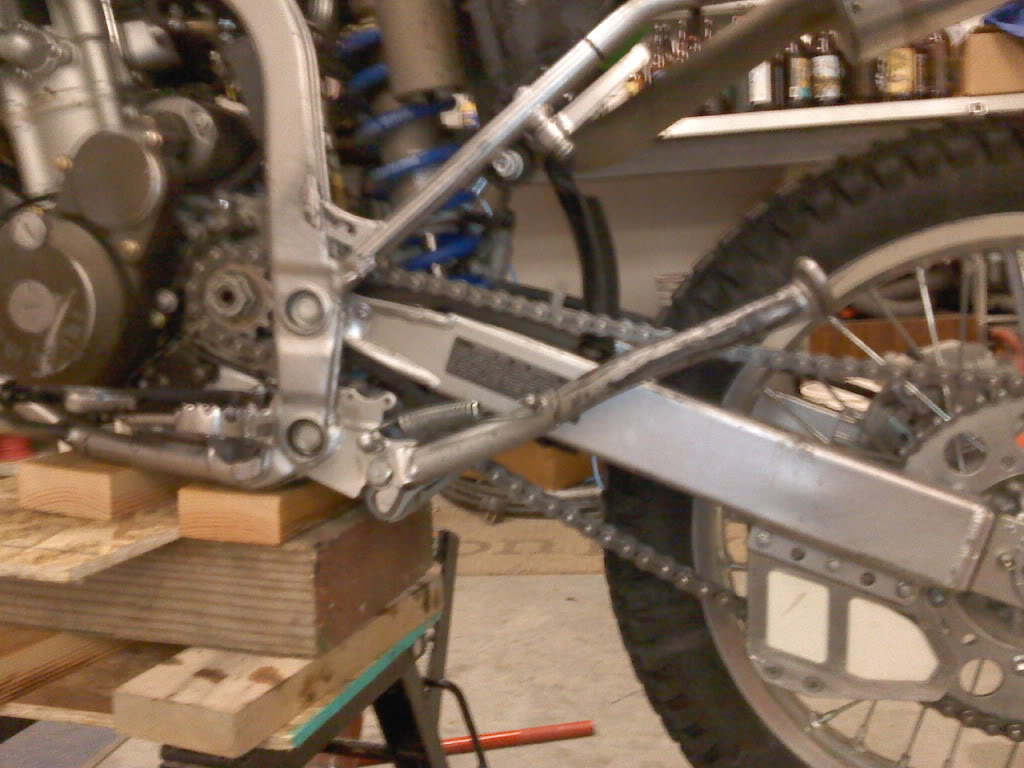
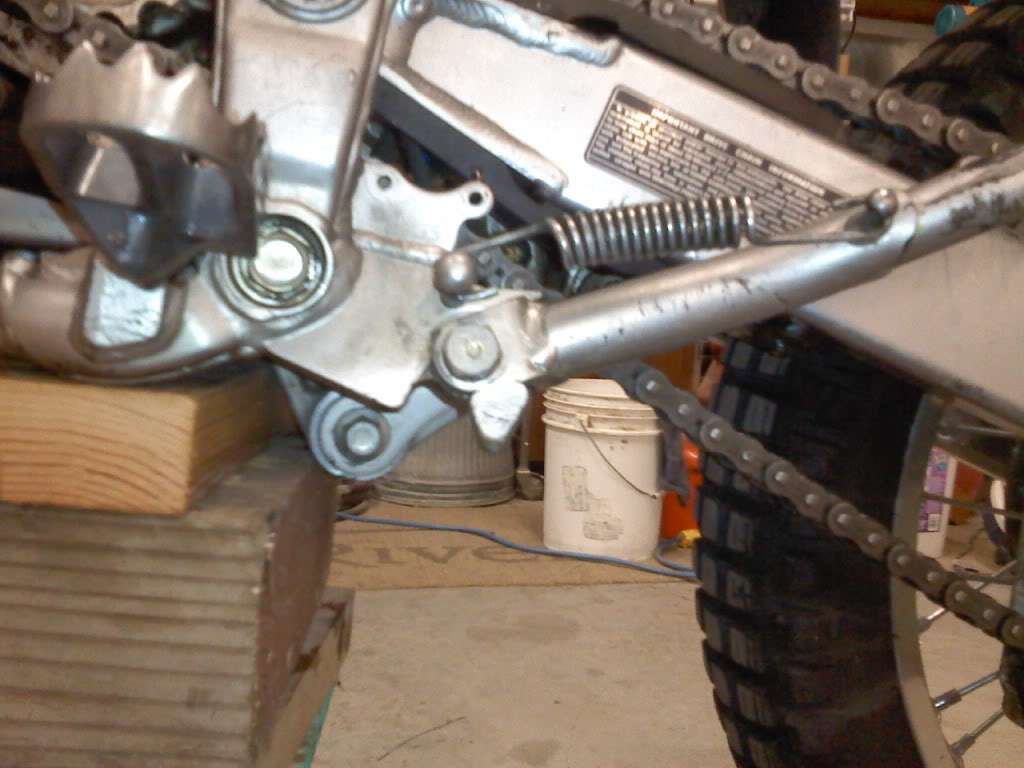
I keep looking at the rear subframe and wonder what I should do. Anything in addition to your subframe mod work thread to make sure it can handle some weight over the bumps?
I keep looking at the rear subframe and wonder what I should do. Anything in addition to your subframe mod work thread to make sure it can handle some weight over the bumps?
Last edited by IDRIDR; 12-06-2011 at 04:23 AM.